
Popular categories
Looking for a yarn?


Comments / Questions (44)
![]() Melanie Giese wrote:
Melanie Giese wrote:
Hallo Ich habe direkt eine Frage zum Anfang. Ich bin beim Patent hin und Rück, 2. Runde. Werden der aktuelle Umschlag und die abgehobene Masche zusammen gestrickt oder die ais der vorrunde? Dankeschön schon mal ;)
07.03.2021 - 19:40DROPS Design answered:
Liebe Frau Giese, wenn mann Patent in Reihen strickt, wird man jeweils den Umschlag und die abgehobene Maschen zusammen rechts stricken - siehe Video - wenn Sie später in Runden stricken, dann werden die Maschen abwechslungsweise rechts und links zusammengestrickt - siehe Video. Viel Spaß beim stricken!
08.03.2021 - 09:28
![]() Else Schmidt wrote:
Else Schmidt wrote:
I diagrammet ser det ud som om halsudskæringen går længere ned foran, men jeg kan ikke se der står noget om det i mønsteret til bærestykket.
27.04.2020 - 10:10DROPS Design answered:
Hei Elsa. Bare forhold deg til oppskriften, målskissen er kun en skisse av genseren for å vise målene. mvh DROPS design
27.04.2020 - 14:24
![]() Irenes wrote:
Irenes wrote:
Bei der Anleitung des Ärmels in Größe M komme ich bei der letzten Zunahme auf 39,5 cm. Es heisst aber bei 39 cm die Arbeit nach dem Abketten der 7 Maschen zur Seite zu legen... Ist das ein Fehler in der Anleitung oder habe ich mich verrechnet?
30.07.2019 - 14:22DROPS Design answered:
Sie haben Recht, es sieht tatsächlich im Moment so aus, dass sich 39,5 cm ergeben, wenn alle 8 Abnahmen im Abstand von 3,5 cm gemacht werden. Das Problem wird ans Design-Team weitergeleitet und geprüft. Vielen Dank für den Hinweis!
30.07.2019 - 18:28
![]() Marianne Fedders wrote:
Marianne Fedders wrote:
Der er en fejl i forklaringen til ærmet. Størrelse L. Der står tag ud hver 3. cm 8 gange. Der skal stå 9 gange. 54 m minus 36 m giver 18 m. Der er 2 m mere hver gang du tager ud altså 9 gange
25.10.2018 - 18:33
![]() Febelisen wrote:
Febelisen wrote:
Andra raden på Fram och bakstycket säger: ", sticka v 3 i PATENT ". Detta borde förtydligas till antingen "VARV 3 i PATENT" Eller "tredje varvet i Patent".
08.09.2018 - 10:50
![]() Sybille Spethmann wrote:
Sybille Spethmann wrote:
Hallo, ich bin dabei mir diesen tollen Pullover zu stricken. Ich habe das Vorderteil und das Rückenteil, jetzt nach Anleitung gestrickt. Jetzt müssten die beiden Teile ja zusammen gestrickt werden, laut der Anleitung wäre das dann der Rumpfteil ,leider bekomme ich die Teile nicht zusammen gestrickt. Da es ja im Patentmuster gestrickt wird. Ich komme nicht mit dem Absatz Rumpfteil zurecht
24.01.2018 - 14:17DROPS Design answered:
Liebe Frau Spethmann, beachten Sie, daß Rücken- sowie Vorderteil mit einer 2. R des Patentmusters beendet, dann Rumpfteil wie beschrieben stricken: die 1. Masche rechts stricken, die 2. M abheben mit Umschlag und die 3. Masche rechts stricken (= die 3 ersten Masche die früher kraus rechts gestrickt waren). Viel Spaß beim stricken!
24.01.2018 - 15:39
![]() Claudia Ries-Jung wrote:
Claudia Ries-Jung wrote:
Hallo Wie viel Wolle brauche ich bei Garngruppe C ? LG Claudia
03.01.2018 - 17:42DROPS Design answered:
Liebe Frau Ries-Jung, hier lesen Sie mehr über Garnalternativen und wie man die neue Garnmenge kalkuliert. Viel Spaß beim stricken!
04.01.2018 - 13:18
![]() Claudia Ries-Jung wrote:
Claudia Ries-Jung wrote:
Hallo Wie viel Wolle brauche ich bei Garngruppe C ? LG Claudia
01.01.2018 - 16:38
![]() LAGOUTTE CHANTAL wrote:
LAGOUTTE CHANTAL wrote:
Bonsoir, est ce que le nombre de mailles à monter sur une aiguille circulaire est le même que sur des aiguilles droites ? merci pour votre réponse. Bon tricot à toutes A bientôt Chantal
04.12.2017 - 20:48DROPS Design answered:
Bonsoir, oui le nombre de mailles a monter est le meme sur une aiguille circulaire que sur des aiguilles droites. Apres les fentes, vous devez changer pour une aiguille circulaire et travailler en rond. Bon travail!
04.12.2017 - 22:17Katia Vera wrote:
How much does the back have to measure before binding off for the sleeves? The diagram says 62cm (size S) and the instructions read 36cm. I'm confused
06.11.2017 - 18:44DROPS Design answered:
Dear Mrs Vera, the total length of back piece is 62 cm in size S, but you will bind off for armhole when body (measured from back piece) measures 36 cm (+ 22 cm armhole/raglan + 4 cm shoulder = 62 cm). Happy knitting!
07.11.2017 - 08:25
|
|||||||||||||
Dorothea#dorotheasweater |
|||||||||||||
 |
 |
||||||||||||
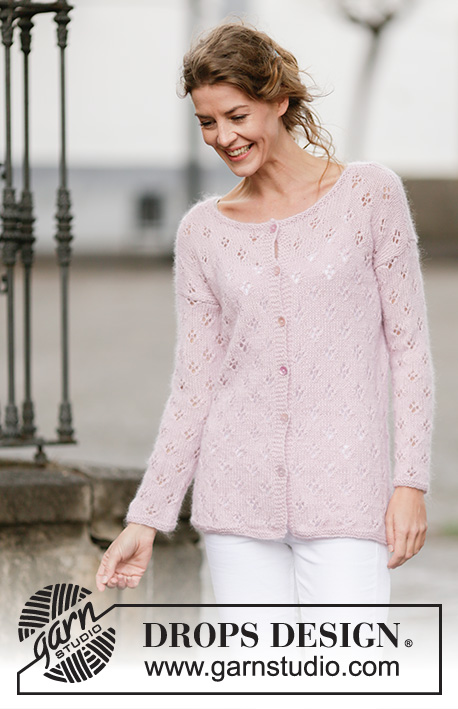
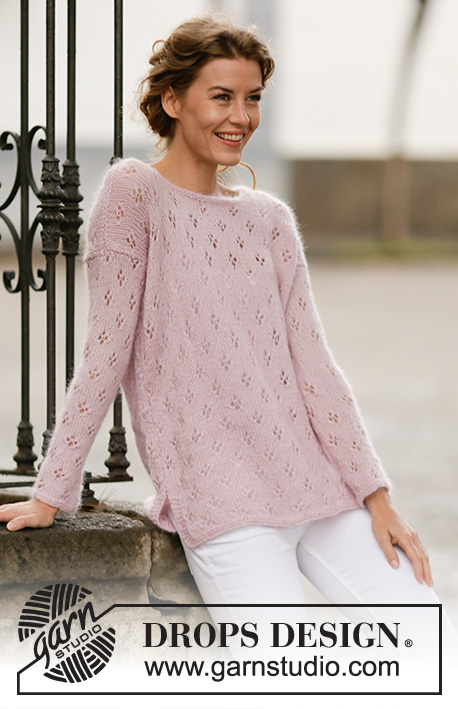
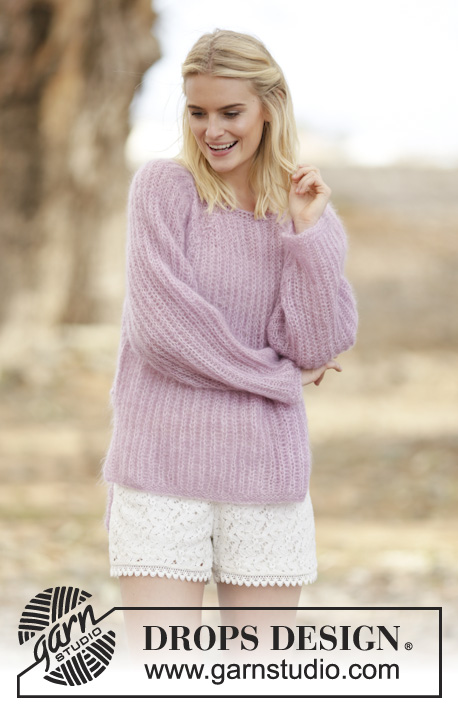
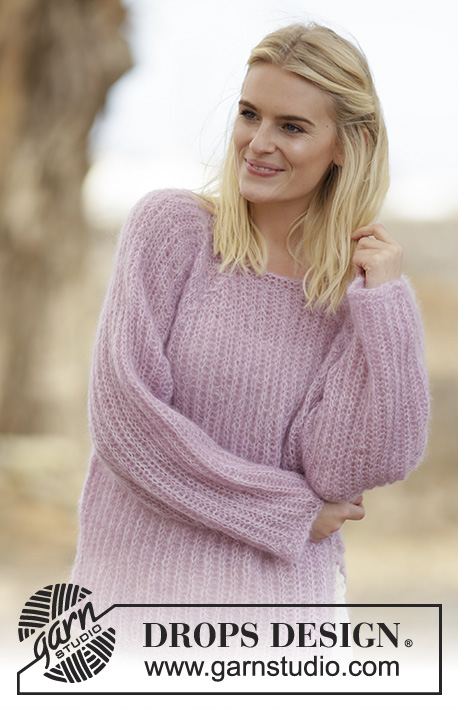
Knitted DROPS jumper with English rib, vent and raglan in 2 strands "Kid-Silk". Size S-XXXL.
DROPS 160-27 |
|||||||||||||
|
GARTER ST (back and forth): K all rows. 1 ridge = K2 rows. GARTER ST (worked in the round): * K 1 round and P 1 round *, repeat from *-*. 1 ridge = 2 rounds. ENGLISH RIB (back and forth on needle): ROW 1 (= RS): 3 sts in garter st, * K 1, 1 YO, slip 1 st as if to P *, repeat from *-* until 4 sts remain, K 1, 3 sts in garter st. ROW 2 (= WS): 3 sts in garter st, * 1 YO, slip 1 st as if to P, K tog YO and slipped st *, repeat from *-* until 4 sts remain, 1 YO, slip 1 st as if to P, 3 sts in garter st. ROW 3 (= RS): 3 sts in garter st, * K tog YO and slipped st, 1 YO, slip 1 st as if to P *, repeat from *-* until 4 sts remain, K tog YO and slipped st, 3 sts in garter st. Repeat 2nd and 3rd row upwards. ENGLISH RIB (in the round on circular needle): ROUND 1: * K 1, 1 YO, slip 1 st as if to P *, repeat from *-*. ROUND 2: * 1 YO, slip 1 st as if to P, P tog YO and slipped st *, repeat from *-*. ROUND 3: * K tog YO and slipped st, 1 YO, slip 1 st as if to P *, repeat from *-*. Repeat 2nd and 3rd round upwards. PATTERN: See diagram A.1. Repeat 2nd and 3rd round. INCREASE TIP: Inc 1 st by getting yarn between 2 sts from previous round - K this st twisted on next round, i.e. work in back loop of st instead of front to avoid holes. Work new sts into English rib. RAGLAN: Dec on each side of every A.1 (= 8 sts dec). Dec 1 st by P 2 tog. NOTE: YO in English rib are not counted as a st. On next round P 1 sts on each side of A.1. ---------------------------------------------------------- JUMPER: First work back and forth on circular needle until vent is done. Then work in the round. Back piece is long than front piece. BACK PIECE: LOOSELY cast on 66-72-78-86-95-104 sts on circular needle size 6 mm / US 10 with 1 strand light pink and 1 strand medium pink (= 2 strands). Work 2 ridges in GARTER ST - see explanation above, AT THE SAME TIME on last row from RS dec 9-11-11-13-14-15 sts evenly = 57-61-67-73-81-89 sts. Now work ENGLISH RIB back and forth - see explanation above. REMEMBER THE KNITTING GAUGE When piece measures 25 cm / 9¾", adjust so that last row is 2nd row in English rib, put piece aside. FRONT PIECE: Cast on and work as back piece. When piece measures 15 cm / 6", adjust so that last row is 2nd row in English rib, work body in the round on circular needle. BODY: Now work front and back piece tog as follows: Beg with front piece, K 1, 1 YO, slip 1 st as if to P, K 1, work 3rd round in ENGLISH RIB in the round on circular needle - see explanation above, until 4 sts remain on front piece, K YO and slipped st tog, K 1, 1 YO, slip 1 st as if to P, K 2 tog (= right side), 1 YO, slip 1 st as if to P, K 1, continue with English rib over back piece until 4 sts remain, K YO and slipped st tog, K 1, 1 YO, slip 1 st as if to P, K 2 tog (= left side) = 112-120-132-144-160-176 sts. Continue with English rib from 2nd round. When piece measures 36-37-38-39-40-41 cm / 14¼"-14½"-15"-14¼"-15¾"-16⅛" (measured from back piece), bind off 7 sts in each side for armholes = 49-53-59-65-73-81 sts for both front and piece. Work 25-27-30-33-37-44 sts in English rib. Now round beg here (= mid back). Put piece aside and knit the sleeves. SLEEVE: Work sleeve in the round on circular needle/double pointed needles. Cast on 38-40-41-41-44-44 sts on double pointed needles size 6 mm / US 10 with a strand light pink and 1 strand medium pink (= 2 strands). Work 2 ridges in GARTER ST in the round – see explanation above, AT THE SAME TIME on last round with K dec 6-6-5-5-6-6 sts evenly = 32-34-36-36-38-38 sts. Now work English rib over all sts. NOTE: Insert a marker in first st at beg of round = mid under sleeve. When piece measures 15-15-15-15-10-10 cm / 6"-6"-6"-6"-4"-4", inc 1 st on each side of st with marker - read INCREASE TIP. Repeat inc every 4-3-3-2-2-1½ cm / 1½"-1⅛"-1⅛"-⅞"-⅞"-½" 6-7-8-11-13-17 more times = 46-50-54-60-66-74 sts. When piece measures 39-39-39-39-38-38 cm / 15¼"-15¼"-15¼"-15¼"-15"-15" (shorter measurements in the larger sizes because of wider neck and shoulders), bind off the 7 sts mid under sleeve = 39-43-47-53-59-67 sts. Put piece aside and make another sleeve the same way. YOKE: Slip sleeves on to same circular needle as body where armholes were bound off = 176-192-212-236-264-296 sts. Now continue with English rib as before on arms, back and front piece from mid back, work PATTERN - see explanation above, between pieces as follows: Work 20-22-25-28-32-36 sts, A.1 (= 7 sts) 33-37-41-47-53-61 sts (= sleeve), A.1, 41-45-51-57-65-73 sts (= front piece), A.1, 33-37-41-47-53-61 sts (= sleeve), A.1, work the remaining 21-23-26-29-34-37 sts. On next round start dec for RAGLAN – see explanation above! Dec every round 0-0-0-0-3-9 times, every other round 6-10-14-21-22-20 times and every 3rd round 9-7-5-1-0-0 times = 56-56-60-60-64-64 sts. K 1 round, AT THE SAME TIME inc 11-11-12-12-12-12 sts evenly = 67-67-72-72-76-76 sts. Work 2 ridges and loosely bind off. ASSEMBLY: Sew the openings under the sleeves. |
|||||||||||||
Diagram explanations |
|||||||||||||
|
|||||||||||||
 |
|||||||||||||
Have you finished this pattern?Tag your pictures with #dropspattern #dorotheasweater or submit them to the #dropsfan gallery. Do you need help with this pattern?You'll find 18 tutorial videos, a Comments/Questions area and more by visiting the pattern on garnstudio.com. © 1982-2026 DROPS Design A/S. We reserve all rights. This document, including all its sub-sections, has copyrights. Read more about what you can do with our patterns at the bottom of each pattern on our site. |
|||||||||||||


With over 40 years in knitting and crochet design, DROPS Design offers one of the most extensive collections of free patterns on the internet - translated to 17 languages. As of today we count 324 catalogs and 12278 patterns - 12268 of which are translated into English (US/in).
We work hard to bring you the best knitting and crochet have to offer, inspiration and advice as well as great quality yarns at incredible prices! Would you like to use our patterns for other than personal use? You can read what you are allowed to do in the Copyright text at the bottom of all our patterns. Happy crafting!
Post a comment to pattern DROPS 160-27
We would love to hear what you have to say about this pattern!
If you want to leave a question, please make sure you select the correct category in the form below, to speed up the answering process. Required fields are marked *.