
Popular categories
Looking for a yarn?


Comments / Questions (53)
![]() Berit Norum wrote:
Berit Norum wrote:
Min erfaring er at plagg som er strikket i patent mister fasongen, dvs. vokser, etter kort tid på grunn av tyngden og den elastiske strukturen. Er det noen måte å unngå det på?
14.02.2014 - 20:46DROPS Design answered:
Det beror mycket på vilket garn man använder. En del garner är mer elastiska än andra, en del garner har mer tyngd som kan göra att det töjer sig av tyngden. Detta är dock inte fallet med Karisma,som fungerar mycket bra i plagg som detta.
15.02.2014 - 01:44
![]() Berit Norum wrote:
Berit Norum wrote:
Min erfaring er at plagg strikket i patent mister fasongen, dvs vokser, etter kort tid. Er det noen måte å unngå dette på?
14.02.2014 - 20:24
![]() Regina wrote:
Regina wrote:
Wat wordt met de volgende beschrijving bedoeld? haal volgende omsl over de st (zodat hij achter deze st komt te liggen), haal dan deze st af alsof u hem recht gaat breien, Ik kan me er geen voorstelling bij maken. kan iemand mij dit uitleggen?
04.09.2013 - 00:11DROPS Design answered:
Hoi Regina. Ik zie niet precies waar in dit patroon dit staat? Zou je dit aan mij willen doorgeven, dan kan ik sneller meekijken en reageren. Alvast bedankt ;-)
04.09.2013 - 10:34
|
|
DROPS Extra 0-898 |
|
 |
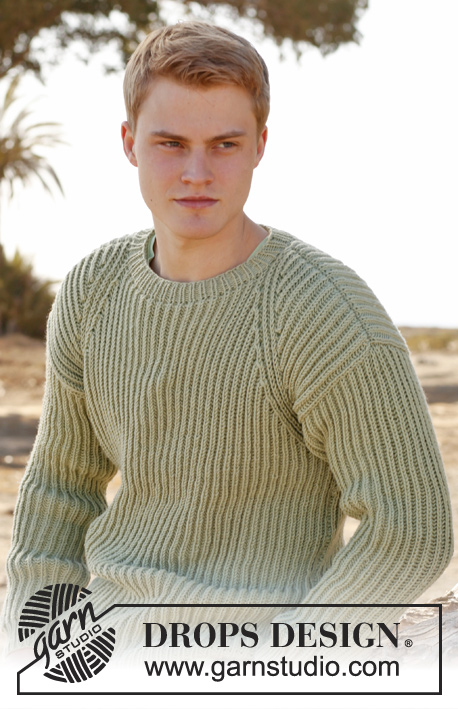 |
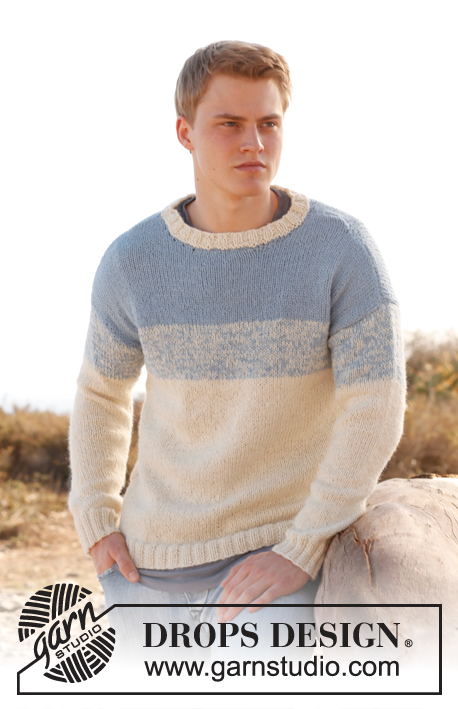
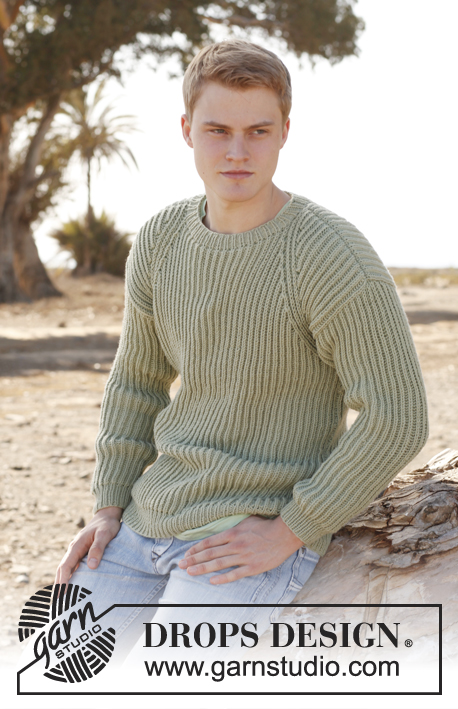
Men's knitted sweater with English rib, in DROPS Karisma. Size: S - XXXL.
DROPS Extra 0-898 |
|
|
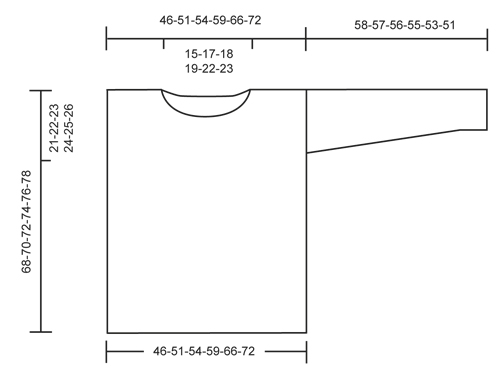
MEASURING TIP: Because of the weight of the yarn all measurements must be done when the piece is held up. GARTER ST (back and forth on needle): K all rows. 1 ridge = 2 rows K. ENGLISH RIB (back and forth on needle): Row 1 (from WS): 1 st in garter st, * 1 YO, slip 1 st as if to P, K 1 *, repeat from *-* until 2 sts remain, 1 YO, slip 1 st as if to P, 1 st in garter st. Row 2 (= from RS): 1 st in garter st, * K tog YO and slipped st, 1 YO, slip 1 st as if to P *, repeat from *-* until 2 sts remain, K tog YO and slipped st, 1 st in garter st. Row 3 (= from WS): 1 st in garter st, * 1 YO, slip 1 st as if to P, K tog YO and slipped st *, repeat from *-* until 2 sts remain, finish with 1 YO, slip 1 st as if to P, 1 st in garter st. Repeat 2nd and 3rd row upwards. ENGLISH RIB ST: When counting the sts, the YOs are not counted as sts. INCREASE TIP (applies to sleeve): Inc 1 st inside 1 edge st in each side of piece. Inc 1 st by making 1 YO, on next row work YO twisted i.e. work in back loop of st instead front. NOTE: Work the inc sts in English rib. BIND-OFF TIP: When binding off, work YO and slipped st K tog (= K 1). ---------------------------------------------------------- BACK PIECE: Worked back and forth on circular needle to make room for all the sts. Cast on 82-90-96-106-118-128 sts on circular needle size 4.5 mm / US 7 with Karisma. Work as follows – from RS: 1 edge st, * K 1, P 1 *, repeat from *-* and finish with 1 edge st. Work edge st in GARTER ST until finished measurements - see explanation above. Work rib like this for 6 cm / 2⅜" – READ MEASURING TIP. Inc 1 st at the end of last row in rib (last row = from RS) = 83-91-97-107-119-129 sts. Continue to work in ENGLISH RIB with 1 edge st in each side - see explanation above. When piece measures 47-47-47-46-45-43 cm / 18½"-18½"-18½"-18"-17¾"-17", work a false raglan – 4 sts in English rib in each side should be displaced towards the neck. In the right side (from RS) inc 2 sts before 4 sts in English rib and dec 2 sts after 4 sts in English rib. In the left side dec 2 sts before 4 sts in English rib and inc 2 sts after 4 sts in English rib. No of sts should always be the same. Work the 2 inc sts in English rib. Work as follows from RS: 1 edge st in garter st, 2 YOs, insert 1 marker in piece, work 4 sts in English rib as before (YOs are not counted as sts - READ ENGLISH RIB ST), insert 1 marker in piece, pass next YO over st (so that it is behind this st), slip this st to the right needle as if to K, K the next 2 sts tog, psso, continue in English rib until 7 sts in English rib + 1 edge st remain, K the next 3 sts tog, insert 1 marker in piece, work 4 sts in English rib as before, insert 1 marker in piece, 2 YOs, finish with 1 edge st in garter st. On next row work the new YOs as follows: At beg of row (seen from WS): 1 edge st, P in back loop of first YO, 1 YO, K in back loop of second YO, continue in English rib as before. At end of row (seen from WS): K 1 in back loop of first YO, P 1 in back loop of second YO, 1 YO, 1 edge st in garter st. Work 4 rows in English rib over all sts. On next row work in English rib AT THE SAME TIME inc before first marker, dec after second marker, dec before third marker and inc after fourth marker as explained above. Inc and dec on every 6th row 11-12-13-15-17-19 times in total. Work in English rib for 2 cm / ¾" after last dec/inc. Now cast/bind off the middle 27-31-33-35-39-41 sts - READ CAST-OFF TIP = 28-30-32-36-40-44 sts remain on each shoulder. Finish each shoulder separately. Work in English rib for 2 cm / ¾", cast/bind off. The whole piece measures approx. 68-70-72-74-76-78 cm / 26¾"-27½"-28⅜"-29⅛"-30"-30¾". Insert 1 marker in each side of back piece, 21-22-23-24-25-26 cm / 8¼"-8¾"-9"-9½"-9¾"-10¼" down from shoulder. Markers show where sleeve is sewn in. FRONT PIECE: Cast on and work as on back piece until piece measures 58-60-62-64-66-68 cm / 22¾"-23⅝"-24⅜"-25¼"-26"-26¾". Continue inc and dec on every 6th row AT THE SAME TIME cast/bind off for neck as follows: Slip the middle 17-21-23-25-29-31 sts on a stitch holder for neck and finish each shoulder separately. Continue pattern and displacement as before AT THE SAME TIME cast/bind off for neck on every row from mid front as follows: 2 sts 2 times and 1 st 1 time = 28-30-32-36-40-44 sts remain on shoulder. Bind off when piece measures 68-70-72-74-76-78 cm / 26¾"-27½"-28⅜"-29⅛"-30"-30¾". Insert 1 marker in each side of piece, 21-22-23-24-25-26 cm / 8¼"-8¾"-9"-9½"-9¾"-10¼" down from shoulder. Markers show where sleeve is sewn in. SLEEVE: Worked back and forth on circular needle. Loosely cast on 44-46-48-50-52-54 sts with Karisma on circular needle size 4.5 mm / US 7. Work as follows – from RS: 1 edge st, * K 1, P 1 *, repeat from *-* and finish with 1 edge st. Work edge sts in garter st until finished measurements. Work rib for 6 cm / 2⅜" – READ MEASURING TIP. Inc 1 st at the end of last row in rib (last row = from RS) = 45-47-49-51-53-55 sts. Then work in English rib with 1 edge st in garter st in each side. When piece measures 8 cm / 3", inc 1 st in each side - READ INCREASE TIP above! Repeat inc every 3-2½-2½-2½-2-2 cm / 1⅛"-⅞"⅞"-⅞"-¾"-¾" 15-16-16-17-18-18 more times (16-17-17-18-19-19 inc in total) = 77-81-83-87-91-93 sts. When piece measures 58-57-56-55-53-51 cm / 22¾"-22½"-22"-21½"-21"-20" (NOTE! Shorter measurements in the larger sizes because of wider shoulders), bind off. ASSEMBLY: Sew underarm seams inside 1 edge st. Sew in sleeves, down to markers on body. Sew side seams inside one edge st. NECK EDGE: Pick up approx. 84-88-92-96-100-104 sts (no includes sts on stitch holder) around the neck on a short circular needle size 4.5 mm / US 7. Work rib = K 1/P 1 for 3 cm / 1", then bind off with K over K and P over P. |
|
 |
|
Have you finished this pattern?Tag your pictures with #dropspattern or submit them to the #dropsfan gallery. Do you need help with this pattern?You'll find 17 tutorial videos, a Comments/Questions area and more by visiting the pattern on garnstudio.com. © 1982-2026 DROPS Design A/S. We reserve all rights. This document, including all its sub-sections, has copyrights. Read more about what you can do with our patterns at the bottom of each pattern on our site. |
|


With over 40 years in knitting and crochet design, DROPS Design offers one of the most extensive collections of free patterns on the internet - translated to 17 languages. As of today we count 324 catalogs and 12290 patterns - 12280 of which are translated into English (US/in).
We work hard to bring you the best knitting and crochet have to offer, inspiration and advice as well as great quality yarns at incredible prices! Would you like to use our patterns for other than personal use? You can read what you are allowed to do in the Copyright text at the bottom of all our patterns. Happy crafting!
Post a comment to pattern DROPS Extra 0-898
We would love to hear what you have to say about this pattern!
If you want to leave a question, please make sure you select the correct category in the form below, to speed up the answering process. Required fields are marked *.