
Popular categories
Looking for a yarn?


Comments / Questions (59)
![]() Monika wrote:
Monika wrote:
Beim Rückenteil nach 47 cm beginnt der falsche Raglan. Sie beschreiben Reihe 1+2 Danach 4 Reihen im Patentmuster darüberstricken = 6. Reihe Es geht aber in der Beschreibung mit Reihe 5 + 6 weiter? Müsste es nicht anstatt Reihe 5+6 Reihe 7+8? Geht es dann mit Reihe 1+2 wieder weiter. Es heißt weiter 13 x in jeder 6. ten Reihe auf- und abnehmen. Werden dann über Reihe 1+2 nur 2 Reihen im Patentmuster darübergestrickt? Ich bitte hier um Unterstützung. Danke.
08.03.2025 - 17:33DROPS Design answered:
Liebe Monika, in diesem Video zeigen wir, wie man diesen falschen Raglan strickt, sicher kann das Ihnen helfen. Viel Spaß beim Stricken!
10.03.2025 - 08:13
![]() Monika Ocker wrote:
Monika Ocker wrote:
Möchte beim ROPS Extra 0-898 Patentgestrickter DROPS Herrenpullover in „Karisma“. Größe S - XXXL. die Wolle tauschen in DROPS Merino Extra Fine. Kann ich die gleiche Nadelgröße verwenden, die in der Anleitung angegeben ist.
17.02.2025 - 18:04DROPS Design answered:
Liebe Frau Ocker, Merino Extra Fine und Karisma gehören beide zur gleichen Garngruppe, so brauchen Sie nur dieselben Nadelgröße - passen Sie die Größe damit Ihre Maschenprobe stimmt. Viel Spaß beim Stricken!
18.02.2025 - 09:09
![]() Satu Hietamies wrote:
Satu Hietamies wrote:
Hei, pitääkö todella paikkansa että takakappaleen ja etukappaleen pituus ennen raglankavennusten aloittamista ovat täysin eri pituisia?
31.01.2025 - 09:19DROPS Design answered:
Hei, raglankavennukset alkavat samalla korkeudella kuin takana.
04.02.2025 - 19:20
![]() Joanna wrote:
Joanna wrote:
Proszę o pomoc, nie rozumiem tego fragmentu przy dekolcie przodu. Może jest jakiś filmik? Albo objaśnienie rząd po rzędzie po kolei.: W TYM SAMYM CZASIE zamknąć o. na dekolt następująco: zdjąć 17-21-23-25-29-31 o. środk. na drut pomocniczy na dekolt i zakańczać każde ramię osobno. Dalej przer. przesuwając ścieg angielski, W TYM SAMYM CZASIE zamykać o. na dekolt w każdym rz. od dekoltu: 2 razy 2 o. i 1 raz 1 o. = zostaje 28-30-32-36-40-44 o. na ramię.
04.11.2024 - 15:18DROPS Design answered:
Witaj Joanno, jak jesteś na prawej stronie przodu, najpierw przerabiasz lewe ramię (widok jak sweter jest noszony), na końcu rzędu zamykasz 2 oczka, teraz masz dekolt (zdejmujesz te oczka na nitkę lub drut pomocniczy, bez przerabiania), obracasz robótkę. Teraz lewa strona -zamykasz 2 oczka na początku rzędu i przerabiasz do końca rzędu. Teraz jesteś na prawej stronie robótki - przerabiasz lewe ramię i na końcu rzędu zamykasz 1 oczko. Na drugie ramię musisz dołączyć nową nitkę, zaczynasz na prawej stronie robótki i zamykasz oczka tak samo, tylko jak było na końcu rzędu to będzie na początku. Pozdrawiamy!
05.11.2024 - 08:28
![]() TORSTEN wrote:
TORSTEN wrote:
Bei den Hilfe Videos wird gezeigt wie beim zweifarbigen Patentmuster eine fallen gelassene Masche wieder aufgenommen wird geht das auch genauso für das einfarbige Patentmuster?
14.08.2024 - 07:29DROPS Design answered:
Lieber Torsten, das denke ich schon, es kann eben mit einfarbig Patentmuster einfacher sein. Viel Spaß beim Stricken!
14.08.2024 - 07:58
![]() Ursula Planker wrote:
Ursula Planker wrote:
Ich brauche für 10 cm in der Höhe bei meiner Maschenprobe nur 20 Reihen statt 35. Stimmt Ihre Anleitung? Das kann doch nicht sein. Ich verwende sowohl DROPS Karisma als auch die Stricknadel NR 4,5. In der Breite brauche ich 16 statt 18 M, das ist ja okay. Aber 20 statt 35 Reihen?
14.06.2024 - 11:33DROPS Design answered:
Liebe Frau Planker, stricken Sie das Patentmuster genauso wie beschrieben? Am besten beachten Sie, daß auch die Maschenprobe in der Breite stimmt, sonnst wird der Pullover nicht die richtigen Maßen stimmen; für die Höhe können Sie auch dann enfach die Abnahmen für den falschen Raglan nach Ihrer eigenen Maschenprobe anpassen. Viel Spaß beim Stricken!
14.06.2024 - 16:22
![]() Knittina wrote:
Knittina wrote:
Sorry, ich muss nochmal nachhaken. Mache ich das nur in den ersten drei Hin-Reihen (links) bzw. Rück-Reihen (rechts)? Oder fange ich dann in der vierten Hin- bzw. Rück-Reihe wieder mit dem Abketten von 2 Maschen an? Und wenn ich das immer weiter fortsetze habe ich doch am Ende der Schulter nur noch etwa 10 M übrig. Wenn ich das aber nicht fortsetze, wird der Halsausschnitt doch eckig, oder?
30.05.2024 - 09:32DROPS Design answered:
Liebe Kristina, bei der rechten Schulter (Vorderteil) ketten Sie für den Hals so ab: 2 Maschen am Anfang der 1. + der 3. Hinreihe und 1 Masche am Anfang der 5. Hinreihe = 5 Maschen wurden für den Hals abgekettet; bei der linken Schulter (Vorderteil) ketten Sie genauso ab, aber dann am Anfang der 1. + 3. + 5. Rückreihe, und genauso 5 Maschen für den Hals werden insgesamt abgekettet (+ die mittleren Maschen natürlich). Viel Spaß beim Stricken!
30.05.2024 - 12:41
![]() Knittina wrote:
Knittina wrote:
Hi, Ich habe ein Problem mit dem Halsausschnitt beim Vorderteil. Wie genau sollen diese 2x2 M und 1x1 M abgenommen werden? In jeder Reihe (Hin- wie Rück-) an der Seite des Halsausschnitts, in jeder Reihe wenn ich die Zu- bzw. Abnahmen für den Raglan mache, oder verteilt über die komplette Schulter in drei frei gewählten Reihen? Vielen Dank im Voraus 🤗
29.05.2024 - 17:55DROPS Design answered:
Liebe Knittina, für den Halsausschnitt wird es am Anfang jeder Reihe ab Halsausschnitt so abgekettet: am Anfang jeder Hin-Reihe beim linken Schulter/ am Anfang jeder Rückreihe beim rechten Schulter. Viel Spaß beim Stricken!
30.05.2024 - 07:37
![]() Elisa wrote:
Elisa wrote:
Buonasera. Non sono contenta di come è venuto il giro maniche, che mi risulta un po' "tirato", inoltre risultano troppo lunghe. Dovendo quindi disfarle, mi chiedo se una soluzione potrebbe essere tirare su i punti dal giro maniche e lavorare così le maniche dall'alto verso il polso. Cosa ne pensate? Grazie!
04.01.2024 - 22:50DROPS Design answered:
Buonasera Elisa, per un aiuto così personalizzato può rivolgersi al suo rivenditore DROPS di fiducia. Buon lavoro!
10.01.2024 - 16:38
![]() Gisèle Allemand wrote:
Gisèle Allemand wrote:
Bonjour, les côtes anglaise de ce modèle ressembles beaucoup au point de brioche qui est plus rapide à tricoter car sans les jetés mais avec une maille double endroit et un maille endroit, quand pensez vous ? cela changerait il les mesures du modèle ?
28.08.2023 - 12:49DROPS Design answered:
Bonjour Mme Allemand, le point dit "brioche" en anglais correspond en général aux côtes anglaises avec jeté expliquées dans ce modèle. Si vous préférez tricoter les côtes anglaises différemment, pensez à bien tricoter un échantillon au préalable pour vérifier vos mesures (et les quantités peuvent en être affectées). Retrouvez ici une petite récap des différentes variations des côtes anglaises. Bon tricot!
28.08.2023 - 16:33
|
|
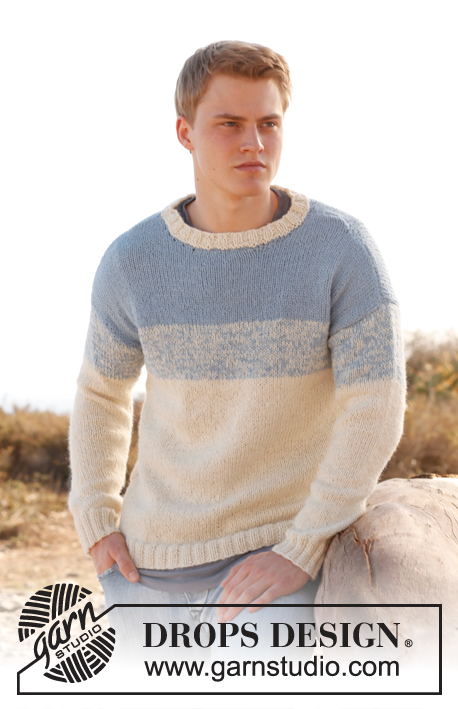
DROPS Extra 0-898 |
|
 |
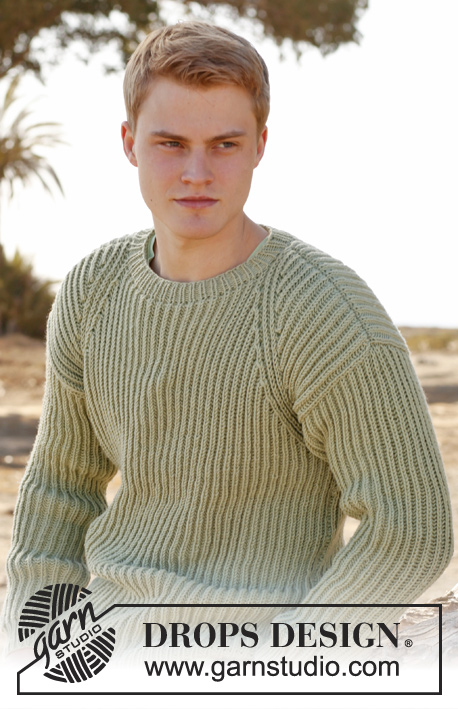 |
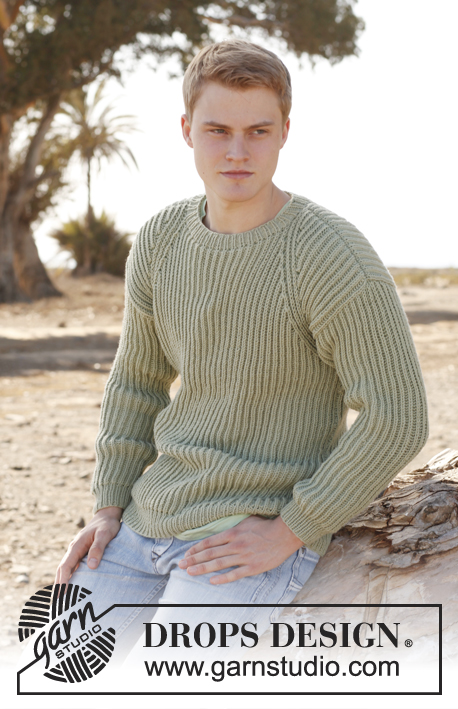
Men's knitted jumper with English rib, in DROPS Karisma. Size: S - XXXL.
DROPS Extra 0-898 |
|
|
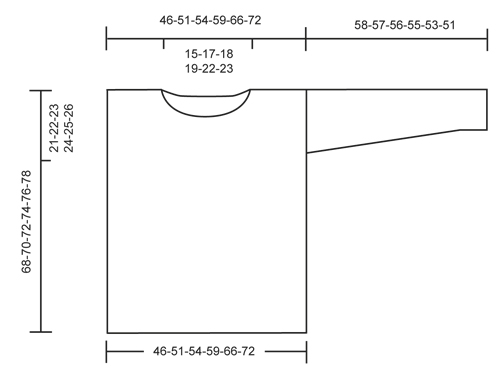
MEASURING TIP: Because of the weight of the yarn all measurements must be done when the piece is held up. GARTER ST (back and forth on needle): K all rows. 1 ridge = 2 rows K. ENGLISH RIB (back and forth on needle): Row 1 (from WS): 1 st in garter st, * 1 YO, slip 1 st as if to P, K 1 *, repeat from *-* until 2 sts remain, 1 YO, slip 1 st as if to P, 1 st in garter st. Row 2 (= from RS): 1 st in garter st, * K tog YO and slipped st, 1 YO, slip 1 st as if to P *, repeat from *-* until 2 sts remain, K tog YO and slipped st, 1 st in garter st. Row 3 (= from WS): 1 st in garter st, * 1 YO, slip 1 st as if to P, K tog YO and slipped st *, repeat from *-* until 2 sts remain, finish with 1 YO, slip 1 st as if to P, 1 st in garter st. Repeat 2nd and 3rd row upwards. ENGLISH RIB ST: When counting the sts, the YOs are not counted as sts. INCREASE TIP (applies to sleeve): Inc 1 st inside 1 edge st in each side of piece. Inc 1 st by making 1 YO, on next row work YO twisted i.e. work in back loop of st instead front. NOTE: Work the inc sts in English rib. CAST-OFF TIP: When casting off, work YO and slipped st K tog (= K 1). ---------------------------------------------------------- BACK PIECE: Worked back and forth on circular needle to make room for all the sts. Cast on 82-90-96-106-118-128 sts on circular needle size 4.5 mm with Karisma. Work as follows – from RS: 1 edge st, * K 1, P 1 *, repeat from *-* and finish with 1 edge st. Work edge st in GARTER ST until finished measurements - see explanation above. Work rib like this for 6 cm – READ MEASURING TIP. Inc 1 st at the end of last row in rib (last row = from RS) = 83-91-97-107-119-129 sts. Continue to work in ENGLISH RIB with 1 edge st in each side - see explanation above. When piece measures 47-47-47-46-45-43 cm, work a false raglan – 4 sts in English rib in each side should be displaced towards the neck. In the right side (from RS) inc 2 sts before 4 sts in English rib and dec 2 sts after 4 sts in English rib. In the left side dec 2 sts before 4 sts in English rib and inc 2 sts after 4 sts in English rib. No of sts should always be the same. Work the 2 inc sts in English rib. Work as follows from RS: 1 edge st in garter st, 2 YOs, insert 1 marker in piece, work 4 sts in English rib as before (YOs are not counted as sts - READ ENGLISH RIB ST), insert 1 marker in piece, pass next YO over st (so that it is behind this st), slip this st to the right needle as if to K, K the next 2 sts tog, psso, continue in English rib until 7 sts in English rib + 1 edge st remain, K the next 3 sts tog, insert 1 marker in piece, work 4 sts in English rib as before, insert 1 marker in piece, 2 YOs, finish with 1 edge st in garter st. On next row work the new YOs as follows: At beg of row (seen from WS): 1 edge st, P in back loop of first YO, 1 YO, K in back loop of second YO, continue in English rib as before. At end of row (seen from WS): K 1 in back loop of first YO, P 1 in back loop of second YO, 1 YO, 1 edge st in garter st. Work 4 rows in English rib over all sts. On next row work in English rib AT THE SAME TIME inc before first marker, dec after second marker, dec before third marker and inc after fourth marker as explained above. Inc and dec on every 6th row 11-12-13-15-17-19 times in total. Work in English rib for 2 cm after last dec/inc. Now cast off the middle 27-31-33-35-39-41 sts - READ CAST-OFF TIP = 28-30-32-36-40-44 sts remain on each shoulder. Finish each shoulder separately. Work in English rib for 2 cm, cast off. The whole piece measures approx. 68-70-72-74-76-78 cm. Insert 1 marker in each side of back piece, 21-22-23-24-25-26 cm down from shoulder. Markers show where sleeve is sewn in. FRONT PIECE: Cast on and work as on back piece until piece measures 58-60-62-64-66-68 cm. Continue inc and dec on every 6th row AT THE SAME TIME cast off for neck as follows: Slip the middle 17-21-23-25-29-31 sts on a stitch holder for neck and finish each shoulder separately. Continue pattern and displacement as before AT THE SAME TIME cast off for neck on every row from mid front as follows: 2 sts 2 times and 1 st 1 time = 28-30-32-36-40-44 sts remain on shoulder. Cast off when piece measures 68-70-72-74-76-78 cm. Insert 1 marker in each side of piece, 21-22-23-24-25-26 cm down from shoulder. Markers show where sleeve is sewn in. SLEEVE: Worked back and forth on circular needle. Loosely cast on 44-46-48-50-52-54 sts with Karisma on circular needle size 4.5 mm. Work as follows – from RS: 1 edge st, * K 1, P 1 *, repeat from *-* and finish with 1 edge st. Work edge sts in garter st until finished measurements. Work rib for 6 cm – READ MEASURING TIP. Inc 1 st at the end of last row in rib (last row = from RS) = 45-47-49-51-53-55 sts. Then work in English rib with 1 edge st in garter st in each side. When piece measures 8 cm, inc 1 st in each side - READ INCREASE TIP above! Repeat inc every 3-2½-2½-2½-2-2 cm 15-16-16-17-18-18 more times (16-17-17-18-19-19 inc in total) = 77-81-83-87-91-93 sts. When piece measures 58-57-56-55-53-51 cm (NOTE! Shorter measurements in the larger sizes because of wider shoulders), cast off. ASSEMBLY: Sew underarm seams inside 1 edge st. Sew in sleeves, down to markers on body. Sew side seams inside one edge st. NECK EDGE: Pick up approx. 84-88-92-96-100-104 sts (incl sts on stitch holder) around the neck on a short circular needle size 4.5 mm. Work rib = K 1/P 1 for 3 cm, then cast off with K over K and P over P. |
|
|
|
Have you finished this pattern?Tag your pictures with #dropspattern or submit them to the #dropsfan gallery. Do you need help with this pattern?You'll find 18 tutorial videos, a Comments/Questions area and more by visiting the pattern on garnstudio.com. © 1982-2025 DROPS Design A/S. We reserve all rights. This document, including all its sub-sections, has copyrights. Read more about what you can do with our patterns at the bottom of each pattern on our site. |
|


With over 40 years in knitting and crochet design, DROPS Design offers one of the most extensive collections of free patterns on the internet - translated to 17 languages. As of today we count 314 catalogues and 11821 patterns translated into English (UK/cm).
We work hard to bring you the best knitting and crochet have to offer, inspiration and advice as well as great quality yarns at incredible prices! Would you like to use our patterns for other than personal use? You can read what you are allowed to do in the Copyright text at the bottom of all our patterns. Happy crafting!
Post a comment to pattern DROPS Extra 0-898
We would love to hear what you have to say about this pattern!
If you want to leave a question, please make sure you select the correct category in the form below, to speed up the answering process. Required fields are marked *.