
Popular categories
Looking for a yarn?


Comments / Questions (272)
![]() Viviann wrote:
Viviann wrote:
Do not understand where to put the marker? “When piece measures 27-29-33 (37-40) cm, insert a marker = mid on top of shoulder. ” Insert a marker, but where? At the beginning of the row? After a certain amount of stitches?
28.04.2019 - 20:42DROPS Design answered:
Dear Viviann, you insert the marker on this row, between stitches, so that it can help you to measure the length from marker. Happy knitting!
29.04.2019 - 11:26
![]() Zee wrote:
Zee wrote:
When working the left front, the short rows...With W.S. Facing I knitted 26 stitches garter stitch,turned and returned then with W.S. Facing I knitted 26 stitches, garter stitch THEN continued with purl until the last 13 which I knit in garter stitch , and turn then back.....garter x 13, purl in middle then 26 garter......please tell me where I went wrong. I've noticed that the outer side in stocking stitch is becoming longer than in inner band of garter stitch, is this correct. Thank you .
21.03.2019 - 06:56DROPS Design answered:
Dear Zee, the short rows over the 26 front band stitches should be repeated every 4 cm to compensate the difference of height when working garter stitch and stocking stitch. After you have worked the 2 rows over the 26 sts only, continue for 4 cm as before then repeat the short rows. Happy knitting!
21.03.2019 - 09:49
![]() Christine wrote:
Christine wrote:
Liebes Garnstudio-Team, ich habe diese Anleitung für meine kleine Tochter verwendet und habe mich in dieses Jäckchen verliebt. Jetzt ist sie größer geworden (trägt ungefährt 116). Können Sie mir ein Tipp geben, wie ich die Anleitung auf die entsprechende Größe umrechnen kann. Viele Grüße Christine
12.03.2019 - 10:41DROPS Design answered:
Liebe Christine, leider könnnen wir nicht jede Anleitung nach jeder Anfrage anpassen, gerne bekommen Sie weitere Hilfe von Ihrem DROPS Laden. Viel Spaß beim stricken!
12.03.2019 - 12:28
![]() Annette Wiegers wrote:
Annette Wiegers wrote:
Herhaal dit meerderen in de volgende nld langs de hals aan de goede kant = 64-69-77 (91-103) st op de nld. Brei 1 nld aan de verkeerde kant. Moet je die ( voor mij) 69 in een keer 69 meerderen? Ik snap dit gedeelte niet.
01.03.2019 - 15:10DROPS Design answered:
Dag Annette,
Je herhaalt dit meerderen van 2 steken nogmaals (dus 2 keer 2 steken en dan heb je 69 steken op de naald.
05.03.2019 - 21:00
![]() Annette Wiegers wrote:
Annette Wiegers wrote:
Waar zit midden bovenkant schouder? Daar moet een markeerder geplaatst worden.
01.03.2019 - 13:34DROPS Design answered:
Dag Annette,
Dit staat ergens halverwege aangegeven: ... Plaats bij een hoogte van 27-29-33 (37-40) cm een markeerder = midden bovenkant van de schouder. Zet nu de 24-24-26 (28-28) voorbies st middenvoor op een hulpdraad. Zet dan 2 nieuwe st op aan... in de paragraaf boven het rechter voorpand.
05.03.2019 - 21:12
![]() Bianca wrote:
Bianca wrote:
Forstår jeg de forkortede pinde ret her (str.1/3mrd)? Strik 24m retstrik, vend, tag en maske løst af, strik pinden ud i retstrik. = 2p Strik 12m retstrik, vend, tag en maske løst af, strik pinden ud i retstrik. = 2p Dette forgår kun på ret-striks-stykket og ikke på ærmet vel? På forhånd tak hjælpen
07.02.2019 - 11:59DROPS Design answered:
Hei Bianca. Ja, det stemmer. Du strikker forkortede pinner kun over stolpemaskene i rettstrikk altså de maskene mot åpningen midt foran. God fornøyelse
11.02.2019 - 11:23
![]() Rita Terstegen wrote:
Rita Terstegen wrote:
Ik begrijp niet wat er word bedoeld bij de voorpanden: de steken van de voorbies moet je op een hulpdraad zetten, duidelijk, vervolgens moet je 2 steken opzetten aan de halskant, en dit moet je dan een aantal keren herhalen. .?????? Ik heb geen idee hoe dit er uit gaat zien, wat is de bedoeling van deze steken????
21.01.2019 - 21:33DROPS Design answered:
Dag Rita,
Je zet inderdaad steken op aan de halskant, dus aan dezelfde kant als waar je steken op een hulpdraad hebt gezet. Deze opgezette steken worden de halslijn van het achterpand. (Je hebt namelijk geen schoudernaden, maar je breit het achterpand vanaf de schouder weer naar beneden.)
23.01.2019 - 09:51
![]() Pascale wrote:
Pascale wrote:
Bonjour, Je n'ai pas compris pourquoi vous indiquez de faire des rangs raccourcis sur 12m alors qu'il y a 24 m de bordure. J'ai fait mes rangs raccourcis sur toutes mes mailles de bordure au point mousse, en ajoutant 1 rang raccourci tous les 6 rangs mousse, ceci pour compenser la différence du hauteur entre le point mousse et le jersey. Pouvez-vous me confirmer si mon raisonnement est correct ? Cordialement.
12.06.2018 - 00:27DROPS Design answered:
Bonjour Pascale! L'explication est correcte. La bordure dans ce modele est assez large, c'est pourquoi il suffit de faire des rangs raccourcis seulement sur 12m pour que la bordure ait la bonne forme. Bon tricot!
12.06.2018 - 07:00
![]() Sara wrote:
Sara wrote:
Hej! Jag håller nu på att sticka luvan (stickar minsta storleken). Var ska den vara 21 cm när jag avmaskar: i mitten (där den är kortast) eller i kanten (där den är längst)?
02.05.2018 - 22:17DROPS Design answered:
Hej Sara, du mäter där den är kortast. Lyka till :)
04.05.2018 - 11:56Aloittelija wrote:
Hei. Mitä käytännössä tarkoittaa ohjeen seuraava kohta: ”luo jokaisen nurjan puolen krs:n loppuun (eli sivuun) silmukoita hihaa varten seuraavasti: 2-2-3 (3-3) x 6 s, 1-1-1 (2-3) x 8 s ja 1 x 21-22-22 (25-26) s = 84-89-99 (115-127) s olkaa/hihaa varten.” Eli mitä tarkoittaa luo 3x6s, 3x8s ja 1X26s, kuinka paljon ja usein silmukoita luodaan? Saisiko tästä rautalankamallin? Kiitos!
08.04.2018 - 13:51DROPS Design answered:
Hei, esimerkiksi luo 3 x 6 s tarkoittaa, että sivuun luodaan joka 2. kerros 6 silmukkaa yhteensä 3 kertaa.
28.05.2018 - 18:00
|
|
Buttercup#buttercupset |
|
 |
 |
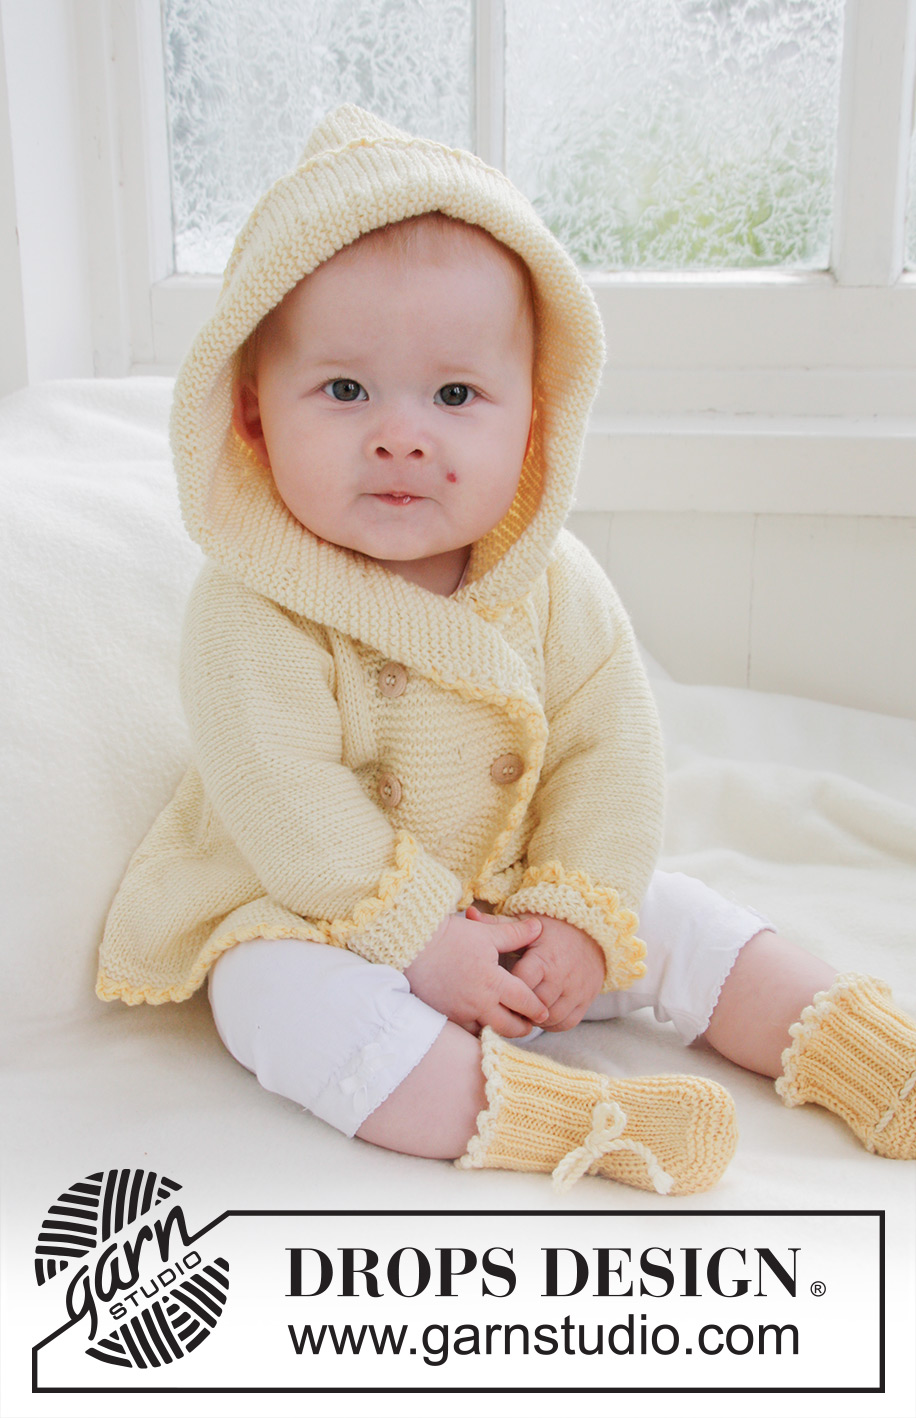
Knitted jacket with hood and booties for baby and children in DROPS BabyMerino
DROPS Baby 21-1 |
|
|
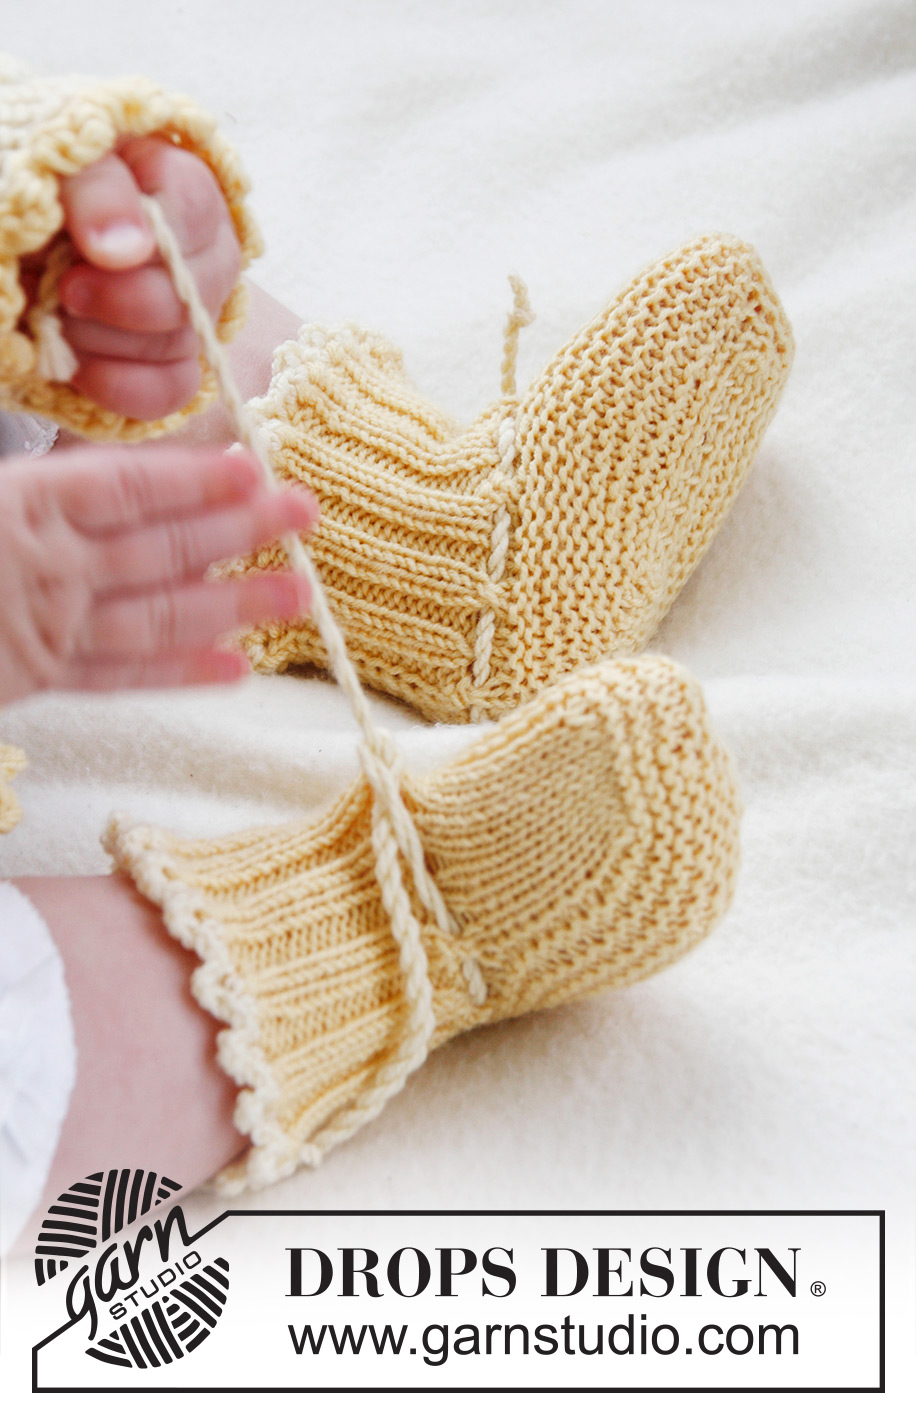
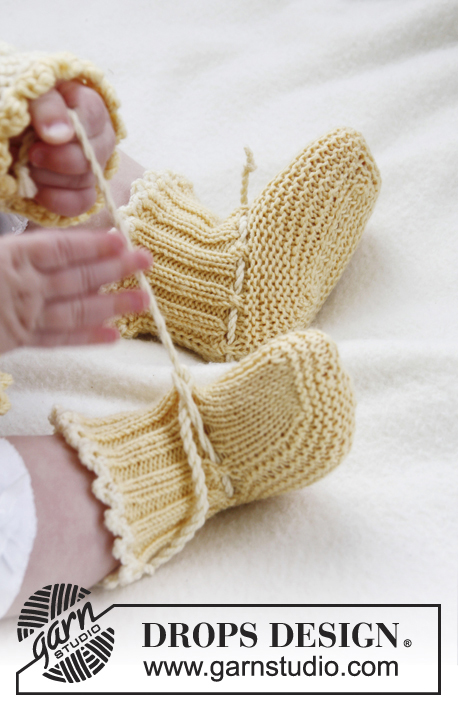
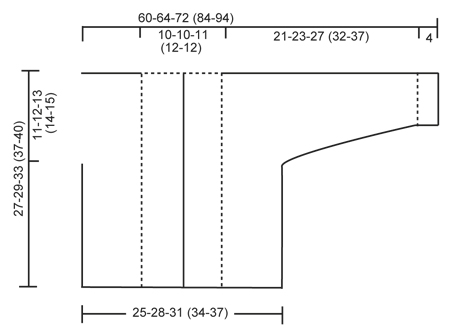
GARTER ST (back and forth on needle): K all rows. SHORT ROWS: * Work 2 rows in garter st over the 24-24-26 (28-28) band sts, work 2 rows in garter st only over the outermost 12-12-13 (14-14) sts. NOTE: When turning mid piece, slip first st. Tighten yarn and continue as before. This is done to avoid holes in the transitions *. BUTTON HOLES: The jacket is double-breasted. Bind off for 4 button holes on right band. 1 BUTTON HOLE = K tog fourth and fifth st from edge and make 1 YO. On same row also K tog fourth and fifth LAST st on band, make 1 YO. Bind off for 2 button holes when piece measures: SIZE 1/3 MONTHS: 14 and 19 cm / 5½" and 7½" SIZE 6/9 MONTHS: 16 and 21 cm / 6 1/4"- and 8 1/4" SIZE 12/18 MONTHS: 18 and 24 cm / 7" and 9½" SIZE 2 YEARS: 20 and 27 cm / 8" and 10½" SIZE 3/4 YEARS: 22 and 30 cm / 8 3/4" and 11 3/4" ---------------------------------------------------------- JACKET: Worked back and forth on circular needle. Beg on front piece, cast on sts for sleeve and work up to the shoulder. Knit the other front piece, place both front pieces tog and work down the back piece. LEFT FRONT PIECE: Read all of the following section before continuing! Cast on 43-47-51 (56-59) sts (includes 1 edge st in the side and 24-24-26 (28-28) band sts towards mid front) on needle size 2.5 mm / US 1or2 with Baby Merino. Work 6 rows in GARTER ST - see explanation above. Switch to circular needle size 3 mm / US 2or3 and work in stockinette st but continue to work the 24-24-26 (28-28) band sts towards mid front in Garter st. When piece measures 4 cm / 1½'', work SHORT ROWS - see explanation above (1st row = from WS). Repeat from *-* 1 time every 4 cm / 1½'' until piece measures 19-21-24 (27-30) cm / 7½"-8 1/4"-9½" (10 5/8"-11 3/4"), then repeat from *-* 1 time every 2 cm / 3/4'' until finished measurements. AT THE SAME TIME when piece measures 16-17-20 (23-25) cm / 6¼''-6¾''-8'' (9''-9¾''), cast on new sts at the end of every row from WS (towards the side of sleeve): 6 sts 2-2-3 (3-3) times, 8 sts 1-1-1 (2-3) times and 21-22-22 (25-26) sts 1 time = 84-89-99 (115-127) sts for shoulder/sleeve. Work inc sts in stockinette st. When all sts have been cast on, continue in stockinette st and Garter st as before while AT THE SAME TIME also working the outermost 10 sts on sleeve in garter st. When piece measures 27-29-33 (37-40) cm / 10 5/8''-11 3/8''-13'' (14½''-15¾''), insert a marker = mid on top of shoulder. Now slip the 24-24-26 (28-28) band sts towards mid front on a stitch holder. Then cast on 2 new sts at the end of row from RS (towards neck), repeat inc on next row towards neck = 64-69-77 (91-103) sts on needle. Work 1 row from WS. Put all sts on a stitch holder. RIGHT FRONT PIECE: Cast on and work as left front piece but reversed. In addition bind off for BUTTON HOLES on band - see explanation above. NOTE! Slip sts on a stitch holder after the last row with inc (i.e. last row = from WS). BACK PIECE: Work left front piece on to circular needle, cast on 16-16-18 (20-20) new sts (= back of neck) and work right front piece on to circular needle = 144-154-172 (202-226) sts. NOW MEASURE PIECE FROM MARKERS ON SHOULDERS. Continue in stockinette st and Garter st at the end on each sleeve back and forth on needle. When piece measures 8½-9½-10 (10-11) cm / 3 1/4"-3 3/4"-4" (4"-4 3/8"), beg to bind off sleeve sts. Bind off at beg of every row in each side as follows: 21-22-22 (25-26) sts 1 time, 8 sts 1-1-1 (2-3) times and 6 sts 2-2-3 (3-3) times = 62-70-76 (84-90) sts on needle. Continue in stockinette st with 1 edge st in garter st each side. When piece measures approx. 26-28-32 (36-39) cm / 10 1/4"-11"-12½" (14 1/4"-15 1/4") – fold the piece double at the markers on shoulders and make sure that the back piece is as long as front piece down to rows in garter st, switch to needle size 2.5 mm / US 1or2 and work 6 rows in garter st, then bind off. ASSEMBLY: Sew the sleeve and side seams inside 1 edge st. Sew on buttons. HOOD: Knit up approx. 102-106-112 (118-122) sts (including sts from stitch holders at the front – NOTE: If more/fewer sts have been knitted up, dec/inc evenly on 1st row. Continue in garter st over all sts while AT THE SAME TIME working short rows in each side every 2 cm / 3/4'' – SEE EXPLANATION ABOVE. Bind off when hood measures approx. 21-23-25 (27-28) cm / 8 1/4"-9"-9 3/4" (10 5/8"-11"). Sew hood neatly tog at the top - sew in outer loop of edge st to avoid a chunky seam. CROCHET BORDER: Crochet a border around the entire jacket. Beg at the bottom on right front piece and crochet with 2 strands yellow Baby Merino and hook size 3 mm / C as follows: Work 1 sc, * ch 3, 1 dc in 1st ch, skip approx. ½ cm / 1/4'', 1 sc in next st *, repeat from *-*. Crochet the same way around the openings on sleeves. ----------------------------------------------------------- BOOTEE: The bootee is worked back and forth from mid back. Cast on 48-52-56 (56) sts on needle size 2.5 mm / US 1or2 with 2 strands yellow Baby Merino. Remove 1 strand and work rib (= K 2/P 2) for 5-6-6 (7) cm / 2"-2 3/8"-2 3/8" (2 3/4") – adjust so that next row is worked from WS. P 1 row from WS while at the same time dec 14-14-18 (14) sts evenly = 34-38-38 (42) sts. On next row work eyelet row as follows from RS: K 1, *K 2 tog, 1 YO *, repeat from *-* and finish with K 1. P 1 row from WS. Now slip the outermost 12-13-13 (15) sts in each side on a stitch holder. Work 4-4½-5½ (6½) cm / 1½"-1 3/4"-2 1/4" (2½") in stockinette st over the middle 10-12-12 (12) sts. Slip sts from stitch holders back on needle and knit up 10-11-13 (16) sts on each side of mid piece = 54-60-64 (74) sts on needle. K every row over all sts for 3-4-5 (5) cm / 1 1/8"-1½"-2" (2") while at the same time after 1½-2-2½ (3) cm / ½"-3/4"-7/8" (1 1/8"), start dec on every other row as follows until completed: Dec 1 st at the beg and the end of row and K 2 tog on each side of the 2 mid sts. bind off and sew tog mid under foot and continue up mid back in outer loop of edge sts to avoid a chunky seam. Knit another bootee the same way. TIES: Cut 3 strands light yellow of approx. 1 meter / 1.1 yds each, twine them tightly tog, fold them double and they will twine again, tie a knot in each end. Thread tie up and down through the eyelet row on bootee. CROCHET BORDER: Crochet a border at the top of bootee on hook size 2 mm/US B with light yellow as follows: 1 sc in first st, * ch 3, 1 dc in 1st ch, skip approx. ½ cm / 1/4'', 1 sc in next st *, repeat from *-* and finish with 1 sl st in sc from beg of round. |
|
 |
|
Have you finished this pattern?Tag your pictures with #dropspattern #buttercupset or submit them to the #dropsfan gallery. Do you need help with this pattern?You'll find 21 tutorial videos, a Comments/Questions area and more by visiting the pattern on garnstudio.com. © 1982-2026 DROPS Design A/S. We reserve all rights. This document, including all its sub-sections, has copyrights. Read more about what you can do with our patterns at the bottom of each pattern on our site. |
|


With over 40 years in knitting and crochet design, DROPS Design offers one of the most extensive collections of free patterns on the internet - translated to 17 languages. As of today we count 324 catalogs and 12290 patterns - 12280 of which are translated into English (US/in).
We work hard to bring you the best knitting and crochet have to offer, inspiration and advice as well as great quality yarns at incredible prices! Would you like to use our patterns for other than personal use? You can read what you are allowed to do in the Copyright text at the bottom of all our patterns. Happy crafting!
Post a comment to pattern DROPS Baby 21-1
We would love to hear what you have to say about this pattern!
If you want to leave a question, please make sure you select the correct category in the form below, to speed up the answering process. Required fields are marked *.