
Popular categories
Looking for a yarn?


Comments / Questions (163)
![]() Maria Angeles wrote:
Maria Angeles wrote:
Me gustaría mucho saber hasta pronto pero no me lo saben explicar en ninguna tienda que voy a comprar
03.03.2024 - 14:40DROPS Design answered:
Hola Maria Angeles, si vas a una tienda DROPS (https://www.garnstudio.com/findastore.php?id=23&cid=23) y enseñas la lista de materiales indicadas en la parte superior podrán ayudarte o posiblemente encargarte lanas. El texto del patrón está disponible aquí online.
03.03.2024 - 23:34
![]() Maria Angeles wrote:
Maria Angeles wrote:
Me gustaría hacer este patrón he ido para comprar la lana pero no me lo saben decir no sé si es que no están preparadas pues no quieren
03.03.2024 - 14:39DROPS Design answered:
Hola Maria Angeles, puedes ver la respuesta debajo.
03.03.2024 - 23:33
![]() Maria Angeles wrote:
Maria Angeles wrote:
Quisiera hacer este poncho pero nadie cuando voy a comprar la lana me dice como se empieza no creo que es que no están preparadas
03.03.2024 - 14:31
![]() Maria Angeles wrote:
Maria Angeles wrote:
Quisiera hacer este poncho pero nadie cuando voy a comprar la lana me dice como se empieza no creo que es que no están preparadas
03.03.2024 - 14:29
![]() Maria Angeles wrote:
Maria Angeles wrote:
Me gustaría muchísimo hacer este poncho pero es que voy a comprar si ustedes me pueden como se mandar un vídeo la verdad la lana cuando tiene que ser me lo explican más tuvo que ver el hecho de que pues una plataforma sí sí me gustaría pero yo lo que quiero hacer es el poncho la lana y no me lo explican como como es y no sé qué hacer
03.03.2024 - 14:28DROPS Design answered:
Hola Maria Angeles, todos los videos relevantes para poder hacer la labor están indicados en la sección videos, en la parte superior del patrón. La cantidad de hilo está especificada en los materiales; la primera alternativa está ya descatalogada, tienes que usar la de Brushed Alpaca Silk o Melody. La cantidad de hilo depende de la talla; puedes ver las tallas en la sección superior de los materiales y las medidas del poncho para las diferentes tallas en el esquema de medidas/Diagrama. Si vas a una tienda DROPS (https://www.garnstudio.com/findastore.php?id=23&cid=23) y enseñas la lista de materiales indicadas en la parte superior podrán ayudarte o posiblemente encargarte lanas.
03.03.2024 - 23:32
![]() Verena wrote:
Verena wrote:
Hallo. Ich habe ein kleines Problem mit der Formulierung der Beschreibung : Beginne ich direkt NACH den Krausrippen mit den Zunahmen ? Und beginne ich in der Hinreihe schon direkt mit der Zunahme am Anfang der Reihe oder erst am Ende. Irgendwie fehlt mir da ein bisschen der Durchblick... Danke für eure Mühe
24.01.2023 - 21:21DROPS Design answered:
Liebe Verena, die 2 ersten neuen Maschen werden am Anfang der 2 nächsten Reihe nach den Krausrippen angeschlagen, und gleichzeitig, nach 3 cm (von der Anschlagskante) beginnen die Zunahmen beidseitig der Markierung - wenn alle neuen Maschen für die Ärmel angeschlagen sind dann legen Sie die Arbeit still und stricken das Vorderteil genauso wie das Rückenteil, dann stricken Sie weiter in Runden und stricken Die Zunahmen wie zuvor weiter. Viel Spaß beim stricken!
25.01.2023 - 11:48
![]() Mia wrote:
Mia wrote:
Sorry, nochmal nachfragen: also ich nehme 11 x 2 Maschen auf jeder Seite auf und nach 3cm innerhalb der beiden einzelnen Strickstücke fange ich dann mit den 58 Abnahmen an? Wenn ich bei 12cm gesamt (nach x Abnahmen) bin füge ich die zusammen und mache alle 2 Runden die abnahmen einfach weiter? Grüße
01.07.2022 - 21:38DROPS Design answered:
Liebe Mia, beim Rückenteil nehmen Sie 1 Masche beidseitig der Markierungn bis die Arbeit 12 (3. Größe) cm misst, dann stricken Sie das Vorderteil genauso auch bis 12 cm, dann stricken Sie beide Teile in der Runde weiter und nehmen Sie wie zuvor zu, bis insgesamt 58 Mal zugenommen wurde. Viel Spaß beim stricken!
04.07.2022 - 07:50
![]() Mia wrote:
Mia wrote:
Hallo, jetzt muss ich doch fragen, weil irgendwie bekomme ich das nicht zusammen. Wann muss ich die Abnahmen 58 Mal wiederholen? 1.Wenn die beiden Teile fertig sind? oder 2. Wenn die Teile zusammengeschlossen auf der Nadel in Runden gearbeitet wird? Danke für die Hilfe
28.06.2022 - 22:03DROPS Design answered:
Liebe Mia, die Abnahmen beginnen Sie wenn Sie jedes Teil separat stricken (bis die Arbeit 12 cm misst), und dann werden Sie weiter gestrickt, wann die beiden Teilen zusammen gestrickt werden. Viel Spaß beim stricken!
29.06.2022 - 09:17
![]() CarrieB wrote:
CarrieB wrote:
This question is in reference to Decreasing Tip 2: The pattern states to start these decreases when piece measures 4 3/4 “ ( for my size) Is this measurement taken at the widest part of piece or the narrowest part ( where the front and back were joined) ? Thank you.
15.03.2022 - 16:53DROPS Design answered:
Dear CarrieB, measure now from where you joined both parts (front and back pieces) and now start to decrease on the sides. Happy knitting!
16.03.2022 - 08:34
![]() CarrieB wrote:
CarrieB wrote:
After joining the front and back panels and proceeding to knit in the round do you then do the decreases EVERY OTHER round?
14.03.2022 - 16:45DROPS Design answered:
Dear CarrieB, correct when working in the round, decrease now on mid front and on mid back on every other round. Happy knitting!
14.03.2022 - 16:57
|
|
Hometown |
|
 |
 |
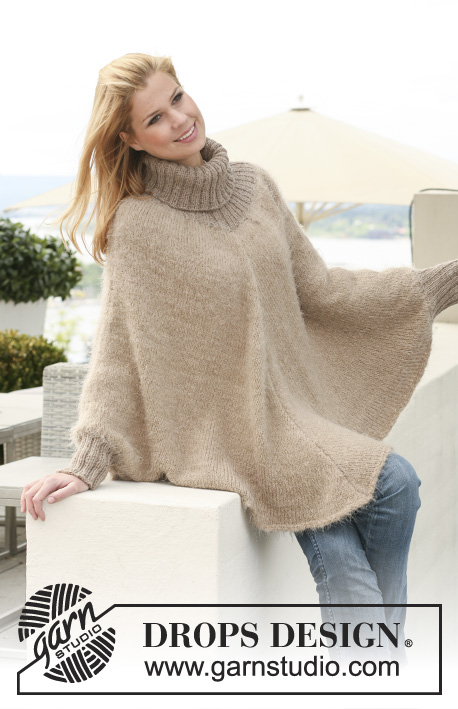
Knitted DROPS poncho in 1 thread ”Symphony”, 1 thread "Melody" or 1 thread "Brushed Alpaca Silk" + 1 thread "Alpaca" with rib in ”Alpaca”. Size S to XXXL.
DROPS 123-28 |
|
|
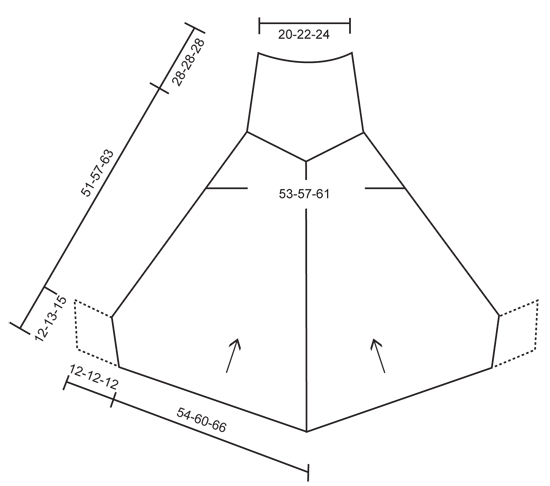
GARTER ST (back and forth on needle): K all rows. DECREASING TIP 1 (applies to mid front and mid back): Dec from RS each side of 2 sts. Dec as follows 3 sts BEFORE marker: K2 tog, K1. Dec as follows AFTER marker: K1, slip 1 st as if to K, K1, psso. DECREASING TIP 2 (applies to the side): Dec by K2 tog before marker and K2 tog into back of loop after marker. -------------------------------------------------------- PONCHO: Worked in 2 parts, then parts are put tog and piece completed in the round on all sts. Arrows in diagram show the knitting direction. BACK PIECE: Worked back and forth on circular needle from the bottom edge up. Cast on 162-180-198 sts on circular needle size 6 mm / US 10 with with 1 thread Symphony, 1 tread Melody or 1 thread Brushed Alpaca Silk + 1 thread Alpaca. Work 4 rows GARTER ST - see above! Insert a marker in the middle of piece, i.e. after 81-90-99 sts. READ ALL OF THE FOLLOWING SECTION BEFORE CONTINUING: REMEMBER THE GAUGE! Continue in stockinette st, AT THE SAME TIME cast on 2 new sts at the end of the next 2 rows for sleeve edges. Repeat the inc at the end of every row a total of 9-10-11 times each side (= 18-20-22 inc sts for sleeve edge each side). AT THE SAME TIME when piece measures 3 cm / 1⅛" dec 1 st each side of marker – See DECREASING TIP 1! Repeat the dec on every row from RS a total of 46-52-58 times, and when all inc for sleeve edges are complete (piece measures approx 10-11-12 cm / 4"-4⅜"-4¾") finish with 1 row from WS. Put piece aside. FRONT PIECE: Like back piece. PONCHO: Slip all sts on the same circular needle and continue in the round. Insert 1 marker at beg of round and 1 after half the sts (to mark the sides). Continue to dec mid front and mid back as before. AT THE SAME TIME when piece measures 12-12-13 cm / 4¾"-4¾"-5⅛" dec 1 st each side of marker each side – See DECREASING TIP 2! Repeat the dec at the sides on every 6th round (every 3 cm / 1⅛") a total of 13-15-17 times (= until finished measurements). After all dec are complete there are 160-172-184 sts left on needle. Continue until piece measures 51-57-63 cm / 20"-22½"-24¾". NECK: Change to circular needle size 4 mm / US 6 and 2 strands Alpaca. K 1 round, AT THE SAME TIME K2 tog across the round = 80-86-92 sts. P 1 round and K 1 round, AT THE SAME TIME inc 20-22-24 sts evenly = 100-108-116 sts. Now continue in rib, K2/P2, on all sts. When rib measures 28 cm / 11" bind off LOOSELY with K over K and P over P. SLEEVE EDGES: Worked in the round. Sew the garter st at the bottom of back and front piece tog with a couple of sts each side (sleeve edge now has a circumference of approx 24-26-30 cm / 9½"-10¼"-11¾"). Pick up 44-48-52 sts round sleeve edge on double pointed needles size 4 mm / US 6 with 2 strands Alpaca. P 1 round and continue in rib, K2/P2, on all sts. When rib measures 12 cm / 4¾" bind off with K over K and P over P. |
|
 |
|
Have you finished this pattern?Tag your pictures with #dropspattern or submit them to the #dropsfan gallery. Do you need help with this pattern?You'll find 17 tutorial videos, a Comments/Questions area and more by visiting the pattern on garnstudio.com. © 1982-2026 DROPS Design A/S. We reserve all rights. This document, including all its sub-sections, has copyrights. Read more about what you can do with our patterns at the bottom of each pattern on our site. |
|


With over 40 years in knitting and crochet design, DROPS Design offers one of the most extensive collections of free patterns on the internet - translated to 17 languages. As of today we count 325 catalogs and 12298 patterns - 12288 of which are translated into English (US/in).
We work hard to bring you the best knitting and crochet have to offer, inspiration and advice as well as great quality yarns at incredible prices! Would you like to use our patterns for other than personal use? You can read what you are allowed to do in the Copyright text at the bottom of all our patterns. Happy crafting!
Post a comment to pattern DROPS 123-28
We would love to hear what you have to say about this pattern!
If you want to leave a question, please make sure you select the correct category in the form below, to speed up the answering process. Required fields are marked *.