
Popular categories
Looking for a yarn?


Comments / Questions (29)
![]() Yolanda wrote:
Yolanda wrote:
Me podéis explicar como es acabar el resorte con resorte? . Estoy haciendo el resorte ya pero no sé cómo es ese acabado. Gracias!
14.04.2026 - 22:20DROPS Design answered:
Hola Yolanda, puedes ver este vídeo sobre cómo rematar con el elástico.
27.04.2026 - 00:58
![]() Yolanda wrote:
Yolanda wrote:
Casi acabando pone: montar seis puntos(= lado bajo manga). \\r\\nNo lo entiendo. Me lo podéis explicar? Hay algún video de ese punto ? Gracias de antemano.
22.03.2026 - 22:41DROPS Design answered:
Hola Yolanda, tienes que montar puntos en el lado de la labor. Estos puntos se usan para formar la sisa y unir los delanteros y la espalda. Puedes ver cómo montar estos puntos aquí.
30.03.2026 - 00:20
![]() Yolanda wrote:
Yolanda wrote:
No entiendo cómo hacer cuando dice FRENTE IZQUIERDO. A partir de aquí estoy perdida. Cómo levantar puntos y desde dónde. No sé dónde empieza el escote de la espalda. Ayuda,por favor.
04.03.2026 - 23:15DROPS Design answered:
Hola Yolanda, coges los 8 puntos del borde (de I-cord, los 8 puntos), después levantas 1 punto en cada fila trabajada a lo largo del hombro izquierdo en la espalda, lo que serán entre 24 y 30 puntos según la talla. En total deberías tener entre 32 y 38 puntos. De estos, al principio de la siguiente fila comienzas con 2 reveses de I-cord y luego continúas de revés hasta que queden los 8 puntos del borde, que se trabajan según el borde con I-cord.
08.03.2026 - 23:50
![]() Céline wrote:
Céline wrote:
Bonjour, j’ai terminé le côté gauche de la veste. J’ai un souci pour faire le côté droit, j’ai fait la bordure comme expliqué, mais si je relève les mailles sur l’endroit à partir de l emmanchure, j’ai les 8 mailles côté emmanchure et non côté devant. Merci de votre réponse
27.01.2026 - 14:08
![]() Céline wrote:
Céline wrote:
Bonjour, j’ai terminé le côté gauche de la veste. J’ai un souci pour faire le côté droit, j’ai fait la bordure comme expliqué, mais si je relève les mailles sur l’endroit à partir de l emmanchure, j’ai les 8 mailles côté emmanchure et non côté devant. Merci de votre réponse
27.01.2026 - 13:59DROPS Design answered:
Bonjour Céline, il manquait une info qui vient d'être ajoutée: lorsque vous avez fini la bordure devant, coupez le fil et mettez ces mailles en attente; relevez maintenant les mailles le long de la bordure du devant droit et tricotez les 8 mailles à la fin de ce rang. Bon tricot!
28.01.2026 - 09:18
![]() Kirsten wrote:
Kirsten wrote:
Jeg kan ikke se på opskriften hvornår jer bruger pIND NR 3 en halv
26.01.2026 - 13:36
![]() Anne Loua Esbjørn wrote:
Anne Loua Esbjørn wrote:
Jeg er igang med at strikke woodworker vest og har flg spørgsmål Jeg har strikke bagstykke og arbejdet måler 12cm Næste pkt i opskriften er udtagning til ærmegab 1. Pind strik de første 4 masker som før Hvad betyder det? Skal jeg strikke de 2 første i icord kant? Og hvad så med de 2 næste? Og så herefter lave udtagning 1? Håber på hurtigt svar så jeg kan komme videre. Hilsen Anne
20.01.2026 - 20:04DROPS Design answered:
Hei Anne Loua. Ja, du strikker de 2 første som i-cord og de 2 andre som du har strikket tidligere (glattstrikk). Så økes det, husk les ØKETIPS. mvh DROPS Design
30.01.2026 - 08:45
![]() Veerle wrote:
Veerle wrote:
Ben zover dat ik de boord ga breien onderaan het vest. Meerder aan de goede kant en begin met de boordsteek staat er, klopt dat ? Of eerst eerst de naald met de meerderingen en de volgende met de boordsteek beginnen ? Ik hoor het graag.
13.01.2026 - 11:01DROPS Design answered:
Dag Veerle,
Het is inderdaad handiger om dit vlak voor de boordsteek te doen.
14.01.2026 - 19:22
![]() Bernadette Kop wrote:
Bernadette Kop wrote:
Is dit patroon vertaald? Een zin als: …neem 1 steek op in elke gebreide naald over de linkerschouder achter, in de binnenkant van de buitenste steek (punnikrand?) vind ik moeilijk te begrijpen. Temeer steken gebreid moeten worden tot 2 of 8 steken over zijn. Lengteafmetingen worden gemeten vanaf deze ‘opneemnaald’. Staan de ‘opneemsteken op een naald of neem je al breiend (vanaf het armgat of hals de steken langs de punnikrand op?
09.01.2026 - 18:14DROPS Design answered:
Dag Bernadette,
De opneemnaald is het punt, de rij of de naald waar je steken op hebt genomen. Je neemt de steken op naast de buitenste steek, zodat de buitenste steek wegvalt (= neem steken op aan de binnenkant van de buitenste s steek). Dit is niet in de punnikrand, want over de schouder zit geen punnikrand. Nadat je steken op hebt genomen brei je op een gegeven moment tot er 2 steken over zijn en deze steken brei je in punnikrand (dit is aan de kant van het armsgat).
10.01.2026 - 17:01
![]() Ange Wieberdink wrote:
Ange Wieberdink wrote:
Beste mensen, Ik ben het Woodworker Vest aan het breien en kan geen aanwijzingen vinden voor de knoopsgaten. Waar komen die en hoe moet ik die maken? vriendelijke groet Ange
09.01.2026 - 16:28DROPS Design answered:
Dag Ange,
Bovenaan bij de instructies staat dat het eerste knoopsgat op de eerste naald aan de goede kant wordt gebreid nadat de V-hals klaar is. Er staat bij de bies inderdaad geen herinnering dat je knoopsgaten moet maken.
10.01.2026 - 17:05
|
|
Woodworker Vest#woodworkervest |
|
 |
 |
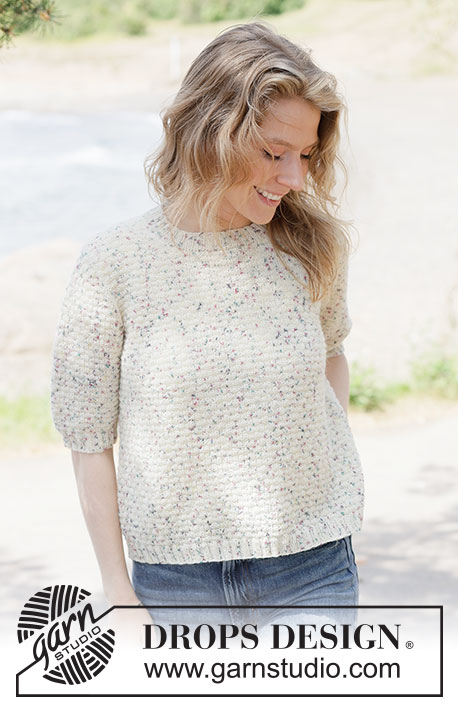
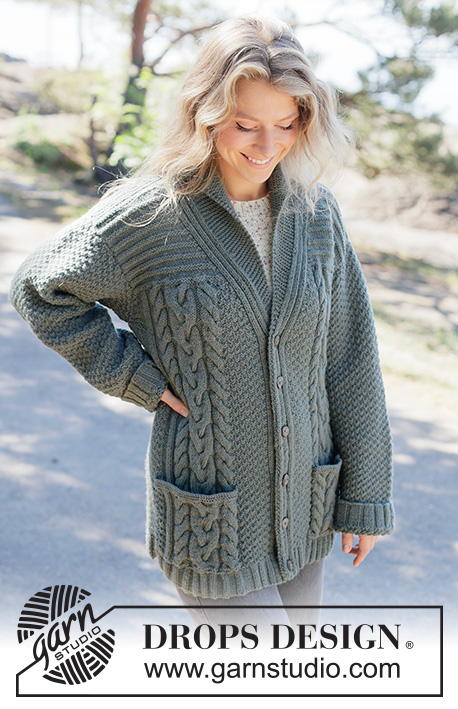
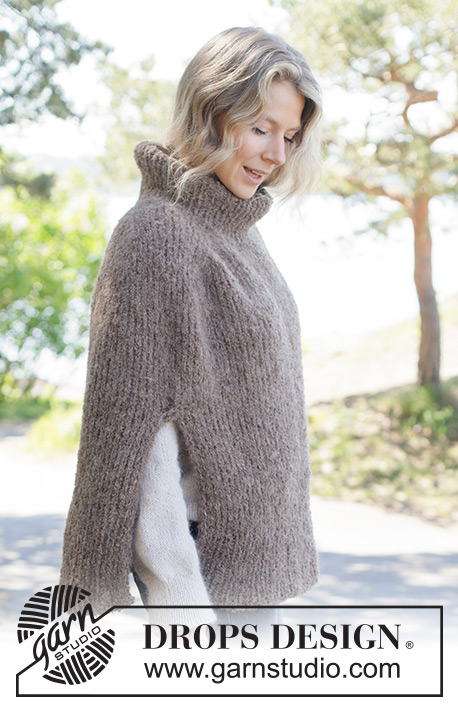
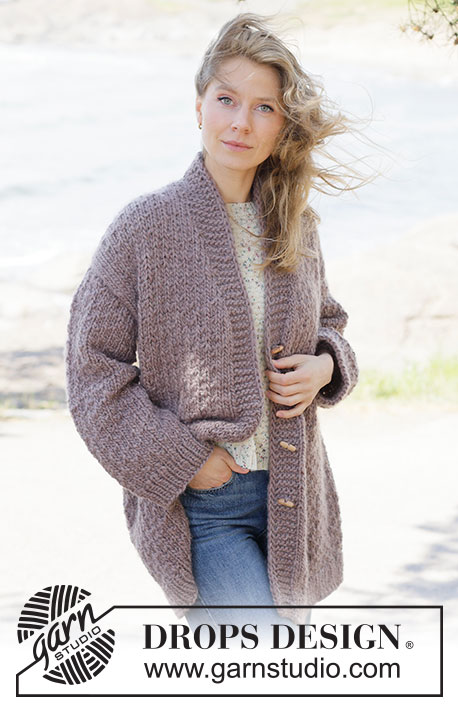
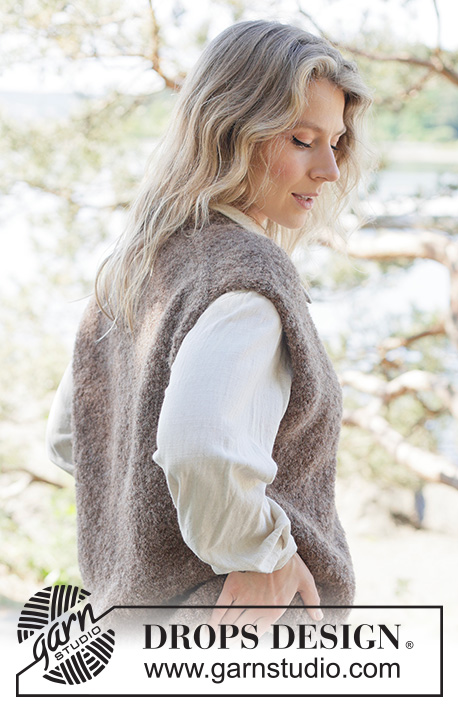
Knitted vest in DROPS Alpaca Bouclé and DROPS Alpaca. The piece is worked top down with European/diagonal shoulders, V-neck and I-cord. Sizes XS - XXXL.
DROPS 262-34 |
|
|
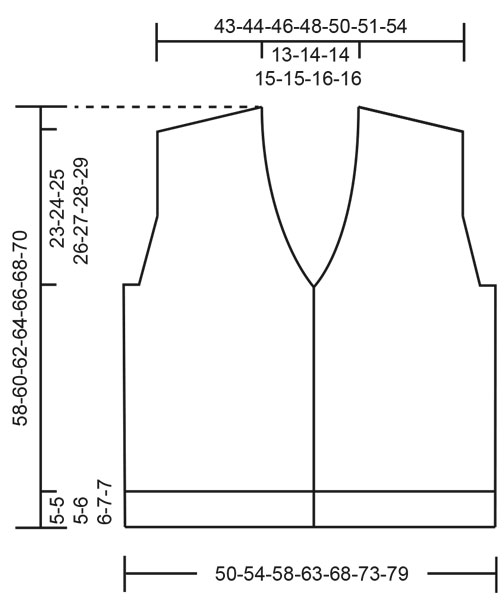
------------------------------------------------------- EXPLANATIONS FOR THE PATTERN: ------------------------------------------------------- INCREASE TIP-1: INCREASE 1 STITCH TOWARDS THE LEFT - from RIGHT SIDE: Use left needle to pick up yarn between 2 stitches from row below, pick up yarn from the front and knit in the stitch loop that is on the back of the needle. INCREASE 1 STITCH TOWARDS THE RIGHT - from RIGHT SIDE: Use left needle to pick up yarn between 2 stitches from row below, pick up yarn from the back and knit in the stitch loop that is on the front side of the needle. INCREASE TIP-2: INCREASE 1 STITCH TOWARDS THE RIGHT - from WRONG SIDE: Use left needle to pick up yarn between 2 stitches from row below, pick up yarn from the back and purl in the stitch loop that is on the front side of the needle. INCREASE 1 STITCH TOWARDS THE LEFT - from WRONG SIDE: Use left needle to pick up yarn between 2 stitches from row below, pick up yarn from the front and purl in the stitch loop that is on the back side of the needle. 2 EDGE STITCHES I-CORD: RIGHT SIDE: Slip 1 stitch purl-wise with the strand in front of the piece, knit 1. WRONG SIDE: Slip 1 stitch purl-wise with the strand in front of the piece, knit 1. GARTER STITCH (worked back and forth): Knit all rows, from both the right and wrong side. 1 ridge in height = knit 2 rows. LEFT BAND WITH I-CORD: RIGHT SIDE: Slip 1 stitch purl-wise with yarn in front, knit 1, work 6 garter stitches. WRONG SIDE: Work 6 garter stitches, slip 1 stitch purl-wise with yarn in front, knit 1. RIGHT BAND WITH I-CORD: RIGHT SIDE: Work 6 garter stitches, slip 1 stitch purl-wise with yarn in front, knit 1. WRONG SIDE: Slip 1 stitch purl-wise with yarn in front, knit 1, work 6 garter stitches. BUTTONHOLES: Work the buttonholes on the right band (when the garment is worn) from the right side, when there are 6 stitches left on the row as follows: ROW 1 (right side): Make 1 yarn over, knit 2 together, knit 2, slip 1 purl-wise with strand in front, knit 1. ROW 2 (wrong side): Work the band as before, knit the yarn over to leave a hole. The first buttonhole is worked on the first row from the right side after the V-neck is finished. Then work the other 3 buttonholes with 9-9-9½-9½-9½-9½-10 cm = 3½"-3½"-3⅝"-3⅝"-3⅝"-3⅝"-4" between each one. Adjust so the bottom buttonhole is worked in the transition between the stockinette stitch and rib. ------------------------------------------------------- START THE PIECE HERE: ------------------------------------------------------- VEST – SHORT OVERVIEW OF THE PIECE: Start by casting on stitches for the back of the neck. The back piece is then worked back and forth, top down, increasing on each side to the correct stitch count for the shoulders and giving slightly diagonal shoulders. Continue working down to the armholes. Now the back piece waits while the front pieces are worked. The band is worked first (they are sewn together mid-back of neck to finish). Stitches are knitted up along one back shoulder and the front piece is worked top down as far as the armhole, at the same time as increasing for the V-neck. This is repeated on the other shoulder. At the armholes, the back piece and 2 front pieces are joined and the body is continued back and forth. The 2 bands are sewn together mid-back and then sewn to the neckline. BACK PIECE: Cast on 22-24-24-26-26-28-28 stitches with circular needle size 5 MM = US 8, 1 strand DROPS Alpaca Bouclé and 1 strand DROPS Alpaca (= 2 strands). ROW 1 (wrong side): Purl. ROW 2 (right side): Read INCREASE TIP-1. Knit 3, increase 1 stitch towards the left, knit until there are 3 stitches left on the row, increase 1 stitch towards the right, knit 3. ROW 3 (wrong side): Read INCREASE TIP -2. Purl 3, increase 1 stitch towards the right, purl until there are 3 stitches left on the row, increase 1 stitch towards the left, purl 3. Work ROWS 2 and 3 a total of 12-12-13-13-14-14-15 times (24-24-26-26-28-28-30 rows worked) = 70-72-76-78-82-84-88 stitches. Insert 1 marker outermost on one side; the piece is now measured from here! Continue with stockinette stitch and 2 EDGE STITCHES I-CORD on each side – read description above. Remember to maintain the knitting gauge. Work until the piece measures 14-14-13-12-11-10-8 cm = 5½"-5½"-5⅛"-4¾"-4⅜"-4"-3⅛", measured from the marker and along the armhole. Now increase for the armholes. INCREASE FOR ARMHOLES: ROW 1 (right side): Remember INCREASE TIP -1. Work the first 4 stitches as before, increase 1 stitch towards the left, knit until there are 4 stitches left, increase 1 stitch towards the right, work the last 4 stitches as before. ROW 2 (wrong side): Work 2 edge stitches I-cord, purl until there are 2 stitches left, work 2 edge stitches I-cord. Work ROWS 1 and 2 a total of 3-4-5-7-8-10-12 times (6-8-10-14-16-20-24 rows worked) = 76-80-86-92-98-104-112 stitches. The piece measures approx. 17-18-18-19-19-20-20 cm = 6¾"-7"-7"-7½"-7½"-8"-8", measured from the marker along the armhole. Finish after a row from the right side. Cut the strand and place the stitches on a stitch holder. Work the left band and front piece as follows: LEFT BAND: Cast on 8 stitches with circular needle size 5 MM = US 8 and 1 strand of each quality (= 2 strands). Work LEFT BAND WITH I-CORD – read explanation above, until the band measures 6-6½-6½-7-7-7½-7½ cm = 2⅜"-2½"-2½"-2¾"-2¾"-2⅞"-2⅞", finish after a row from the right side. Now work the left front piece as follows: LEFT FRONT PIECE: Find the left back shoulder as follows: Lay the back piece flat, right side up, with the stitch holder towards you; left side of piece = left shoulder. Knit up stitches along the left back shoulder, working from the right side from the neck towards the shoulder as follows: Work the 8 band-stitches as before from the right side, knit up 1 stitch in each worked row along the left back shoulder, inside the outermost stitch (24-24-26-26-28-28-30 stitches) = 32-32-34-34-36-36-38 stitches. All length-measurements on the front piece are taken from this knitted-up row. ROW 1 (wrong side): Work 2 edge stitches I-cord, purl until there are 8 stitches left, work 8 band-stitches as before. ROW 2 (right side): Work 8 band-stitches as before, knit until there are 2 stitches left, 2 edge stitches I-cord. Repeat ROWS 1 and 2 until the piece measures 12-11-13-12-14-13-15 cm = 4¾"-4⅜"-5⅛"-4¾"-5½"-5⅛"-6" from the knitted-up row. OVERVIEW OF THE NEXT SECTION: You now increase for the V-neck, then subsequently increase for the armhole. The increases for the armhole are started before the increases for the V-neck are finished –read the next 2 sections before continuing. INCREASE FOR V-NECK: ROW 1 (right side): Work the 8 band stitches as before, increase 1 stitch towards the left - remember INCREASE TIP-1, knit until there are 2 stitches left, work 2 edge stitches I-cord. ROW 2 (wrong side): Work 2 edge stitches I -cord, purl until there are 8 stitches left, work the 8 band-stitches as before. Increase like this every 3 cm = 1⅛" a total of 3-3-3-3-3-3-3 times, then every 2 cm = ¾" 5-6-6-7-7-8-8 times. You have worked a total of 8-9-9-10-10-11-11 increases in height for the V-neck. Approx. 3-3-4-4-5-5-5 cm = 1⅛"-1⅛"-1½"-1½"-2"-2"-2" of the neck-height will be positioned on the back piece when the garment is worn. INCREASE FOR ARMHOLE: AT THE SAME TIME, when the piece measures 26-26-27-26-27-26-26 cm = 10¼"-10¼"-10⅝"-10¼"-10⅝"-10¼"-10¼", increase for the armhole as follows: ROW 1 (right side): Work the 8 band stitches as before, knit until there are 4 stitches left, increase 1 stitch towards the right - remember INCREASE TIP -1, work the last 4 stitches as before (= 2 stockinette stitches and 2 edge stitches I-cord). ROW 2 (wrong side): Work 2 edge stitches I, purl until there are 8 stitches left, work the 8 band stitches as before. Work ROWS 1 and 2 a total of 3-4-5-7-8-10-12 times (6-8-10-14-16-20-24 rows worked). When all the increases for the V-neck and armhole are finished, there are 43-45-48-51-54-57-61 stitches and the piece measures approx. 29-30-32-33-35-36-38 cm = 11⅜"-11¾"-12½"-13"-13¾"-14¼"-15" from the knitted up row – finish after a row from the right side. Cut the strand and place the stitches on a stitch holder. Work the right band and front piece as follows. RIGHT BAND: Cast on 8 stitches with circular needle size 5 MM = US 8 and 1 strand of each quality (= 2 strands). Work RIGHT BAND WITH I-CORD – read explanation above, until the band measures 6-6½-6½-7-7-7½-7½ cm = 2⅜"-2½"-2½"-2¾"-2¾"-2⅞"-2⅞", finish after a row from the wrong side. Cut the yarn and put stitches on another needle, the right band will be worked after the new stitches for right front piece have been picked up. RIGHT FRONT PIECE: Knit up stitches along the right back shoulder, from the right side and working from the armhole towards the neck as follows: Knit up 1 stitch in each worked row inside the outermost stitch (24-24-26-26-28-28-30 stitches from the back piece), work the 8 band-stitches as before from the right side = 32-32-34-34-36-36-38 stitches. All length-measurements on the front piece are taken from this knitted-up row. ROW 1 (wrong side): Work 8 band-stitches as before, purl until there are 2 stitches left, work 2 edge stitches I-cord. ROW 2 (right side): Work 2 edge stitches I-cord, knit until there are 8 stitches left, work 8 band-stitches as before. Repeat ROWS 1 and 2 until the piece measures 12-11-13-12-14-13-15 cm = 4¾"-4⅜"-5⅛"-4¾"-5½"-5⅛"-6". OVERVIEW OF THE NEXT SECTION: You now increase for the V-neck, then subsequently increase for the armhole. The increases for the armhole are started before the increases for the V-neck are finished –read the next 2 sections before continuing. INCREASE FOR V-NECK: ROW 1 (right side): Work 2 edge stitches I-cord, knit until there are 8 stitches left, increase 1 stitch towards the right - remember INCREASE TIP-1, work the 8 band stitches as before. ROW 2 (wrong side): Work the 8 band-stitches as before, purl until there are 2 stitches left, work 2 edge stitches I-cord. Increase like this every 3 cm = 1⅛" a total of 3-3-3-3-3-3-3 times, then every 2 cm = ¾" 5-6-6-7-7-8-8 times. You have worked a total of 8-9-9-10-10-11-11 increases in height for the V-neck. Approx. 3-3-4-4-5-5-5 cm = 1⅛"-1⅛"-1½"-1½"-2"-2"-2" of the neck-height will be positioned on the back piece when the garment is worn. INCREASE FOR ARMHOLE: When the piece measures 26-26-27-26-27-26-26 cm = 10¼"-10¼"-10⅝"-10¼"-10⅝"-10¼"-10¼" from the knitted-up row, increase for the armhole as follows: ROW 1 (right side): Work 2 edge stitches I-cord, knit 2, increase 1 stitch towards the left - remember INCREASE TIP -1, knit until there are 8 stitches left, work the 8 band-stitches as before. ROW 2 (wrong side): Work 8 band-stitches as before, purl until there are 2 stitches left, work 2 edge stitches I-cord. Work ROWS 1 and 2 a total of 3-4-5-7-8-10-12 times (6-8-10-14-16-20-24 rows worked). When all the increases for the V-neck and armhole are finished, there are 43-45-48-51-54-57-61 stitches. Continue working until the piece measures approx. 29-30-32-33-35-36-38 cm = 11⅜"-11¾"-12½"-13"-13¾"-14¼"-15" from the knitted up row – finish after a row from the right side. Do not cut the strand. The pieces are now joined for the body and all further measurements are taken from here! BODY: Work the first row from the wrong side, starting with the right front piece as follows: Work the 8 band stitches as before, purl the remaining 35-37-40-43-46-49-53 stitches, cast on 4-6-6-8-10-12-14 stitches (= side under the sleeve), purl the 76-80-86-92-98-104-112 stitches on the back piece, cast on 4-6-6-8-10-12-14 stitches (= side under the sleeve), purl the first 35-37-40-43-46-49-53 stitches on the left front piece and work the 8 band stitches as before = 170-182-194-210-226-242-262 stitches. Work back and forth with stockinette stitch and the bands as before and until the body measures 27-28-29-29-30-30-30 cm = 10⅝"-11"-11⅜"-11⅜"-11¾"-11¾"-11¾" from the join. On the next row from the right side begin the rib, AT THE SAME TIME increase 31-35-37-41-59-47-49 stitches evenly on this row (do not increase across the bands) = 201-217-231-251-269-289-311 stitches, working as follows: Change to circular needle size 3.5 MM = US 4, work the band as before, work rib (knit 1 twisted, purl 1 – remember the increases) until there are 9 stitches left, knit 1 twisted, work the band as before. When the rib measures 5-5-5-6-6-7-7 cm = 2"-2"-2"-2⅜"-2⅜"-2¾"-2¾", bind off with rib. The vest measures approx. 58-60-62-64-66-68-70 cm = 22¾"-23⅝"-24⅜"-25¼"-26"-26¾"-27½", measured innermost by the neck. ASSEMBLY: Sew the buttons onto the left band. Sew the bands from each front piece together mid-back, then sew the bands to the neckline. |
|
 |
|
Have you finished this pattern?Tag your pictures with #dropspattern #woodworkervest or submit them to the #dropsfan gallery. Do you need help with this pattern?You'll find 28 tutorial videos, a Comments/Questions area and more by visiting the pattern on garnstudio.com. © 1982-2026 DROPS Design A/S. We reserve all rights. This document, including all its sub-sections, has copyrights. Read more about what you can do with our patterns at the bottom of each pattern on our site. |
|


With over 40 years in knitting and crochet design, DROPS Design offers one of the most extensive collections of free patterns on the internet - translated to 17 languages. As of today we count 325 catalogs and 12298 patterns - 12288 of which are translated into English (US/in).
We work hard to bring you the best knitting and crochet have to offer, inspiration and advice as well as great quality yarns at incredible prices! Would you like to use our patterns for other than personal use? You can read what you are allowed to do in the Copyright text at the bottom of all our patterns. Happy crafting!
Post a comment to pattern DROPS 262-34
We would love to hear what you have to say about this pattern!
If you want to leave a question, please make sure you select the correct category in the form below, to speed up the answering process. Required fields are marked *.