
Popular categories
Looking for a yarn?


Comments / Questions (209)
![]() Marianne wrote:
Marianne wrote:
J'ai le même problème que Linnea : après le col, le premier rang d'empiècement, tel que je le comprends, m'amène à 142 mailles et non 160. Où je me suis-je trompée ? (j'ai recalculé 3 fois à partir des instructions, je tombe toujours sur 142)
17.09.2025 - 22:36DROPS Design answered:
Bonjour Marianne, avez-vous bien noté qu'au tout premier rang des diagrammes, vous "perdez" 1 maille par torsade ajourée? Chaque A.3 doit toujours être compté pour 9 mailles, même si vous n'en avez plus que 8. Bon tricot!
18.09.2025 - 18:18
![]() Molly wrote:
Molly wrote:
Hej. Efter man stickat klart ökningarna på ärmarna och har stickat 2 rapporter av ökningar på fram och bakstycket så står det att man ska fortsätta utan ökningar tills arbetet mäter 25-30-35 cm (beroende på storlek) från ”markören mitt i bak”. Vilken markör? Har jag missat att placera en markör någonstans? Menar ni att man ska mäta från där oket börjar? Tack på förhand för svar!
15.09.2025 - 16:07DROPS Design answered:
Hej Molly. Det ser ut som det blivit en miss i översättningen, det ska stå från markören mitt fram (den du satte efter halskanten). Detta kommer rättas i texten. Mvh DROPS Design
16.09.2025 - 08:25
![]() Celina wrote:
Celina wrote:
Ich verstehe nicht wie die 13 neu aufgenommenen Maschen unter den Ärmeln in dem Muster von A3 aufgehen. Aus der Vorrunde habe noch die Reste der Raglanlinie und ende mit einer rechten Masche vor den neu aufgenommenen Maschen, soll ich die letzten beiden Maschen anpassen, sodass sie ins Muster passen oder einfach weiter stricken?
11.09.2025 - 19:12DROPS Design answered:
Liebe Celina, die Gesamtmaschenzahl ist nach dem Anschlagen der neuen Maschen so, dass A.3 in der ganzen Runde aufgeht. Stricken Sie also mustergemäß weiter, achten Sie aber darauf, dass Sie sowohl am Vorderteil als auch am Rückenteil das bestehende Muster korrekt fortsetzen.
17.09.2025 - 09:53
![]() Linnea wrote:
Linnea wrote:
Hei. jeg er ferdig med halskanten og første omg på bærestykke. jeg strikker en small og skal ende med 160 masker. dette får jeg ikke til å gå opp, og ender alltid med 142, hva gjør jeg feil? kan jeg ha misforstått A3 diagrammet, for ved A3 så feller jeg?
09.09.2025 - 11:15DROPS Design answered:
Hei. Du legger opp 108 m og etter halskanten skal du ha 144 m. Deretter strikkes det slik: Plukk opp 1 m fra omg under og strikk den vridd vrang + 1 rett, plukk opp 1 m fra omg under og strikk den vridd vrang = 3 m = 1.raglanlinje. Så strikkes: A.2 + A.3 over 27 m + A.4 = 31 m + 2 kast. Plukk opp m ved 2. raglanlinje som ved 1. raglanlinje = 3 m. Så strikkes: A.2 + A.3 over 35 m + A.4 = 39 m + 2 kast. Plukk opp m ved 3. raglanlinje som ved 1. raglanlinje = 3 m. Så strikkes: A.2 + A.3 over 27 m + A.4 = 31 m + 2 kast. Plukk opp m ved 4. raglanlinje som ved 1. raglanlinje = 3m. Tilslutt strikkes: A.2 + A.3 over 35 m + A.4 = 39 m + 2 kast = 152 m og 8 kast = 160 m. mvh DROPS
22.09.2025 - 13:00
![]() Christine wrote:
Christine wrote:
When it says in the diagram slip 1 knit , do we slip it knit wise with the front Leg ( from left to right) or do we just slip it knitwise with the back Leg or do we slip it purlwise?
07.09.2025 - 04:24DROPS Design answered:
Hi Christine, You slip the stitch knit-wise through the front loop. Regards, Drops team.
08.09.2025 - 06:55
![]() Sarah wrote:
Sarah wrote:
Soll man, bevor man die Passe anfängt, eine Runde stricken um die Umschläge der Vorrunde verschränkt zu stricken? Wie soll man sonst eine Masche auffassen, wenn danach ein Umschlag kommt?
26.08.2025 - 17:13DROPS Design answered:
Liebe Sarah, die Maschen für die Raglanlinien werden bei der 1. Runde der Passe aufgefassen, gleichzeitig nehmen Sie für Raglan zu und gleichzeitig stricken Side das Muster wie beschrieben; die neuen Maschen der Raglanlinien können Sie wie in diesem Video auffassen. Viel Spaß beim Stricken!
27.08.2025 - 07:35
![]() Sarah wrote:
Sarah wrote:
Ich bin jetzt bei der Passe angekommen und ich weiß nicht wie ich die erste Runde stricken soll? Das kommt mit den Umschlägen der Vorrunde nicht ganz hin wenn ich die erst in dieser Runde verschränkt stricken soll. Oder geht die Runde jetzt erst ab der 52. Masche los wo der 2. Markierer gesetzt wurde? Irgendwie passt das mit A2 und A3 dann nicht.
23.08.2025 - 21:29DROPS Design answered:
Liebe Sarah, die 1. Runde wird über die 52 Maschen gestrickt, gleichzeitig nehmen Sie 2 Maschen bei jeder Raglanline zu (vor + nach der rechten Masche) und jeweils 8 Maschen für den Raglan (die sind in A.2 und A.4 gezeichnet), aber in jedem A.3 werden Sie auch 1 Masche jeweils abnehmen (es sind nur noch 7 Maschen in jedem A.3 aber A.3 muss immer mit 8 Maschen gezählt werden). Viel Spaß beim Stricken!
25.08.2025 - 10:04
![]() Mona Frydenlund wrote:
Mona Frydenlund wrote:
Denne oppskriften var vanskelig å lese, har lest meg opp på et par av spørsmålene, men denne fant jeg ikke. Det står: " , strikk de 3 første maskene i A3, " Hva betyr det, skal det strikkes 3 rettmasker, eller som angitt i A3? Dette står etter hver A3 på både armene og for- og bakstykke. Håper dette var forståelig. Gleder meg til jeg får til denne 🙂
22.08.2025 - 20:18DROPS Design answered:
Hei Mona, Diagrammene leses fra høyre til venstre og fra bunnen oppover (fra retten). Grunnen til at man strikke de første 3 maskene i A.3 er for å få mønsteret symmetrisk. Så, f. eks., i omgang-1 i A.3 og etter du er ferdig med å strikke A.3 over 24 masker, strikker du "ta 1 maske løs av pinnen, 2 masker rett, løft den løse masken over maskene som ble strikket" som er de første 3 maskene, før du går videre med A.4. Håper dette hjelper. Hilsen Drops team.
25.08.2025 - 07:02
![]() Leonie wrote:
Leonie wrote:
Is het bij dit patroon noodzakelijk om DROPS KID-SILK te gebruiken of kan het ook alleen met DROPS ALPACA? Ik kan het in het patroon niet zo snel terugvinden waar dit verwerkt wordt.
30.07.2025 - 14:29DROPS Design answered:
Dag Leonie,
De hele trui wordt met 2 draden gebreid; 1 draad Kid-Silk en 1 draad Alpaca.
30.07.2025 - 19:50
![]() Zoi wrote:
Zoi wrote:
Hej\\r\\nJag får inte ihop det med Oket. Jag har stickat om tre ggr. Det blir inte 160 maskor stickar storlek L. Jag saknar 16 när jag följer mönstret. \\r\\n1. Var i diagrammet ser man raglanökningarna? \\r\\n2. Är omslaget som visas i A2 och A 4 utöver omslagen i raglan?\\r\\n3. Ska jag sticka raglan där det står (=raglanlinje)
28.07.2025 - 13:46
|
|||||||||||||||||||
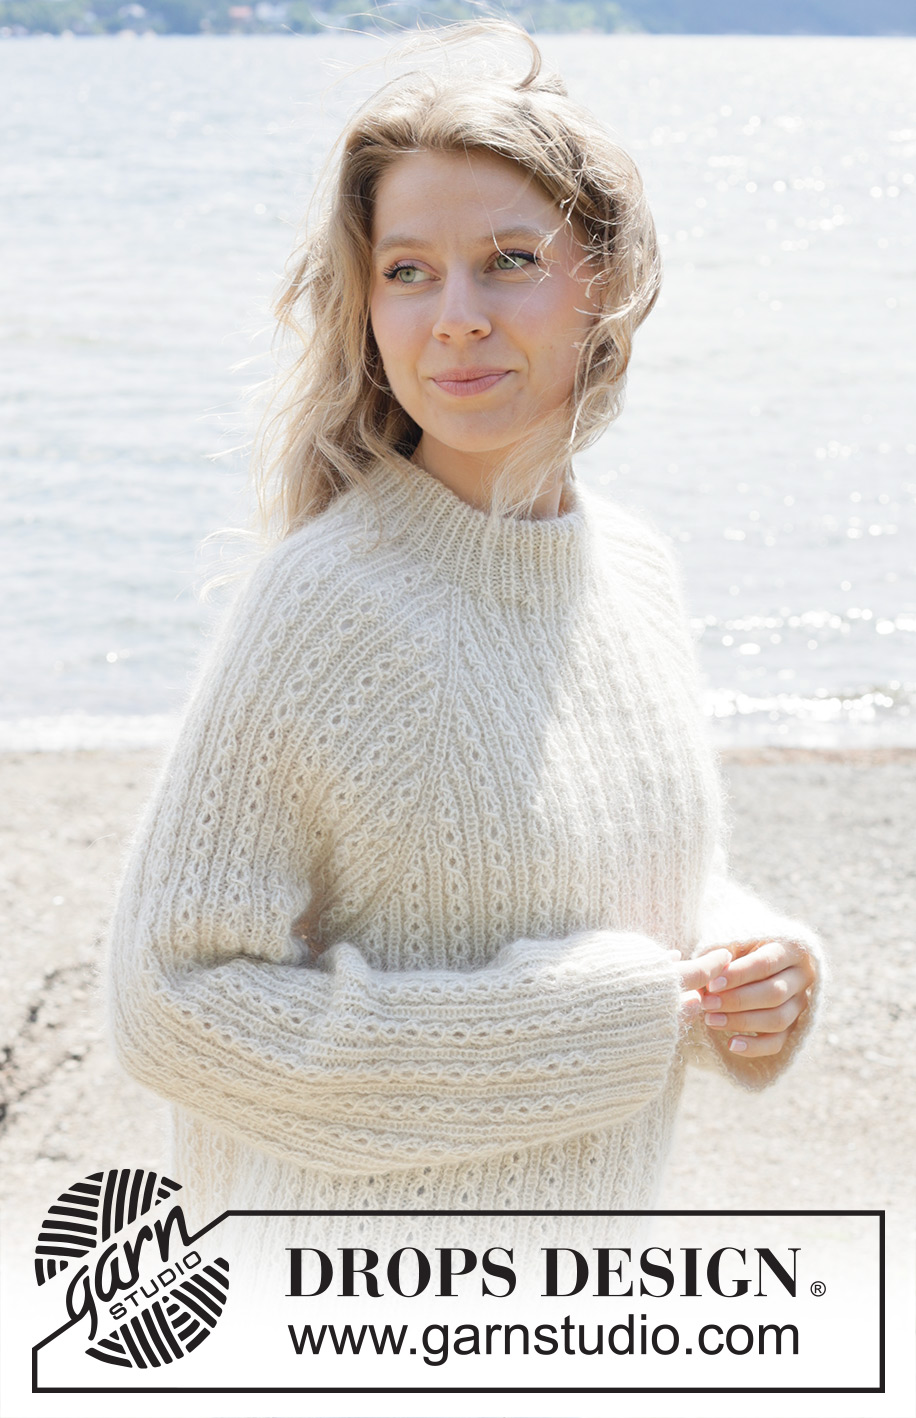
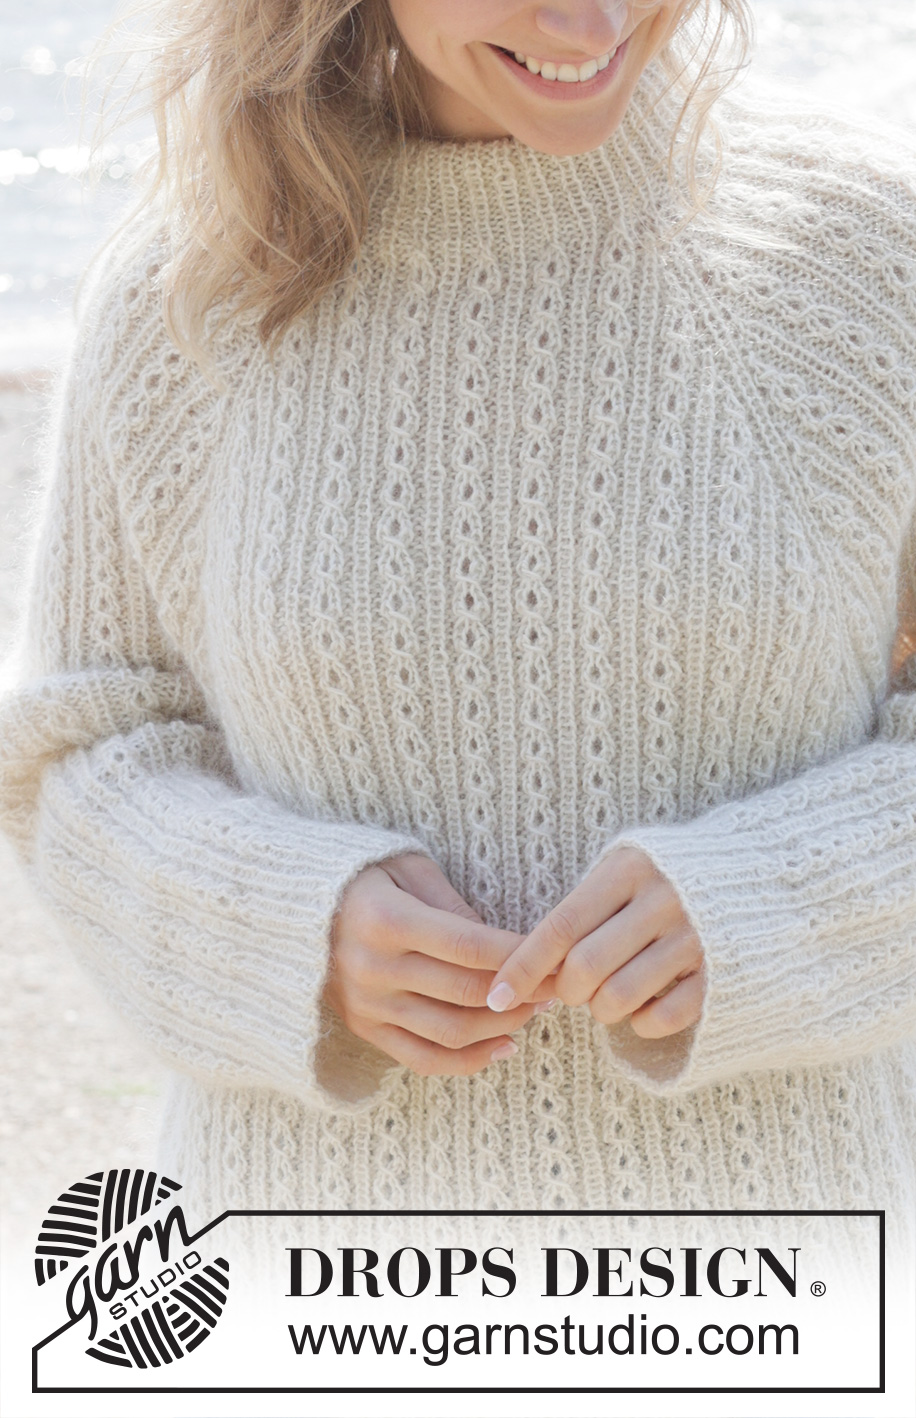
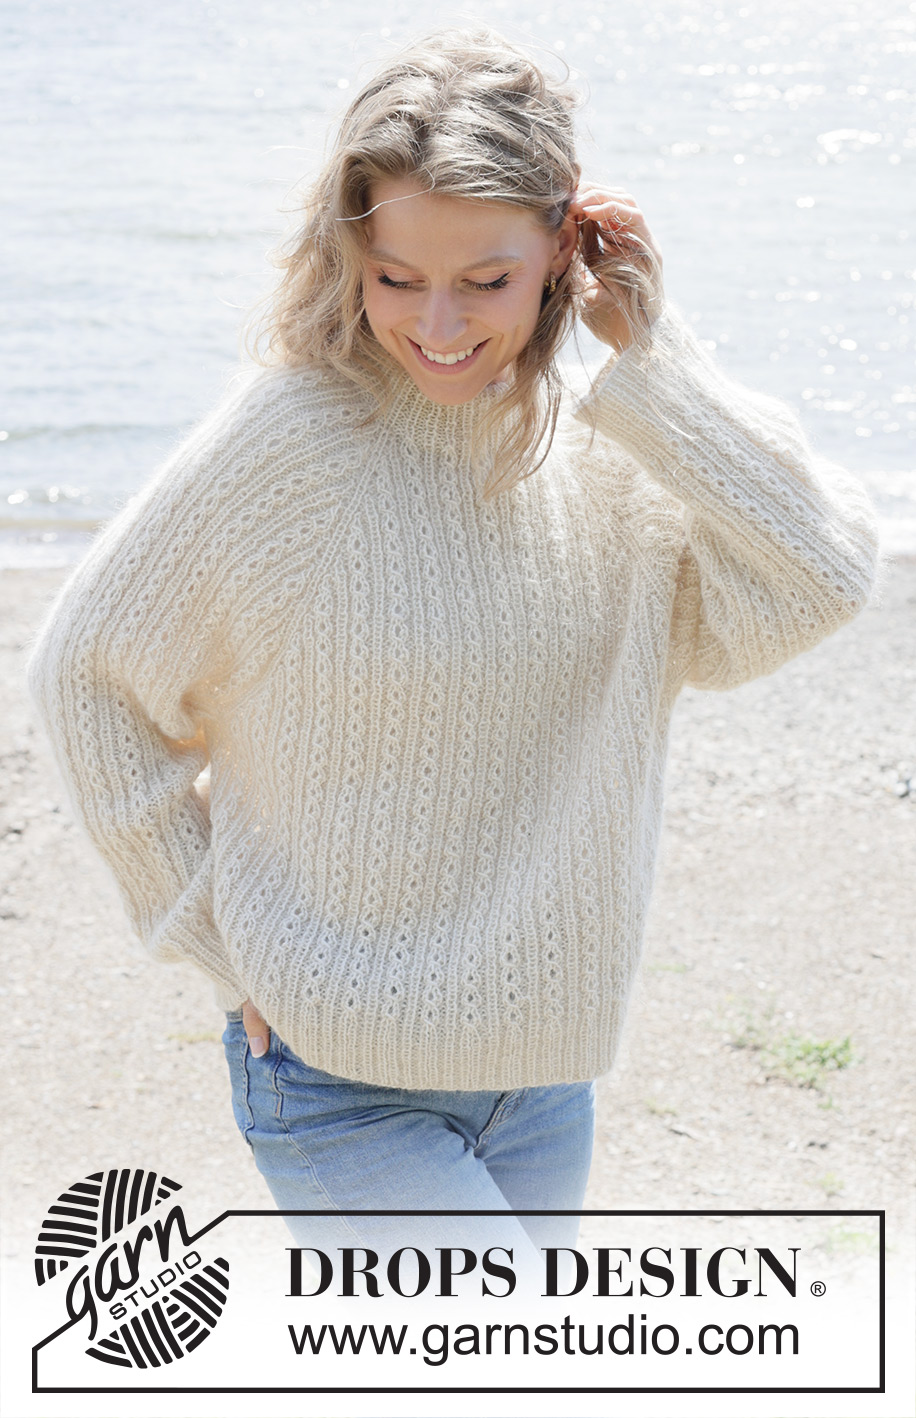
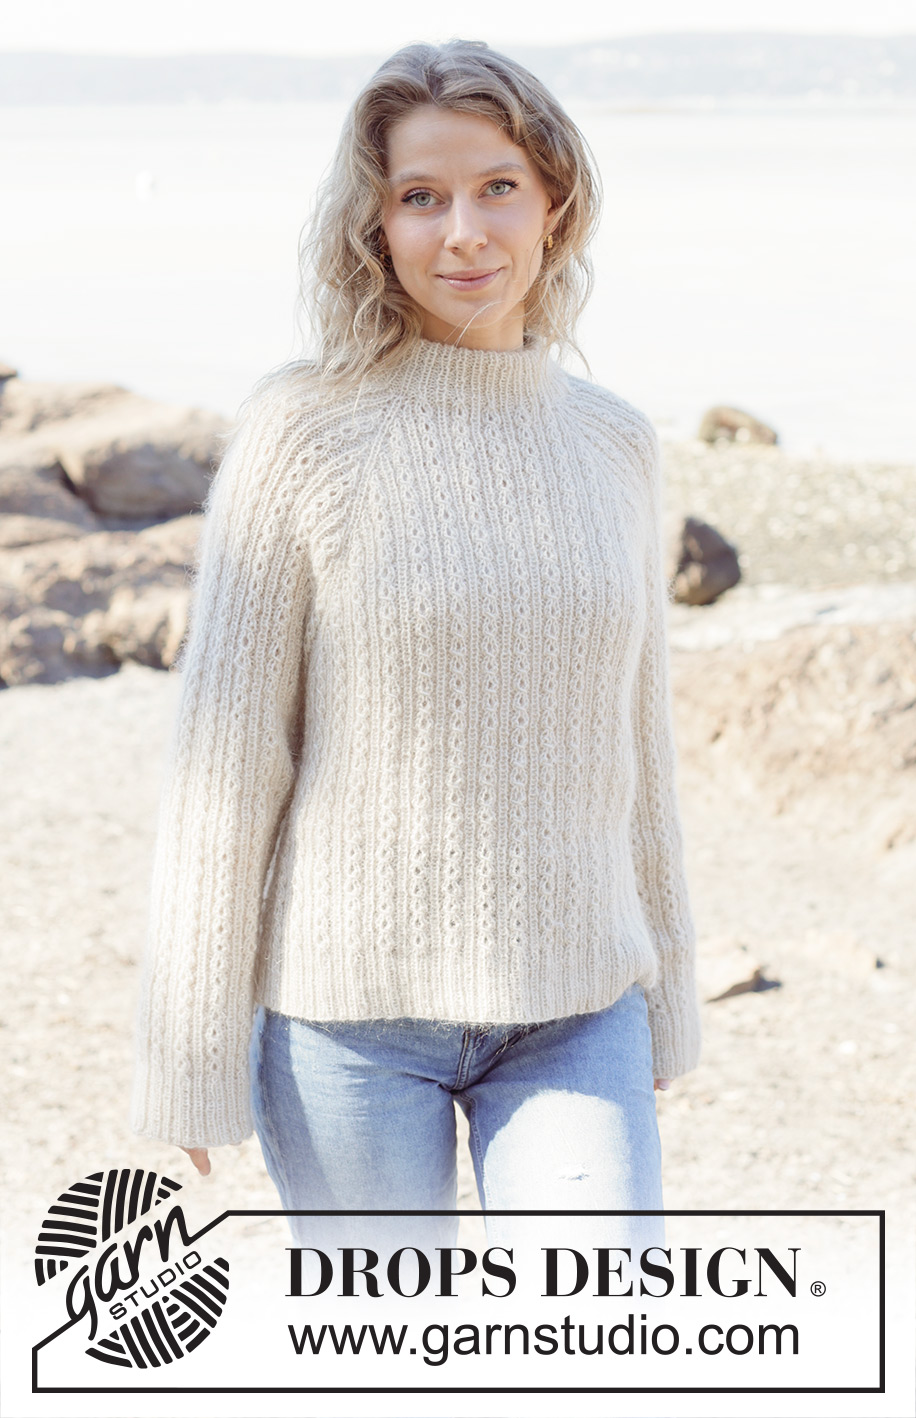
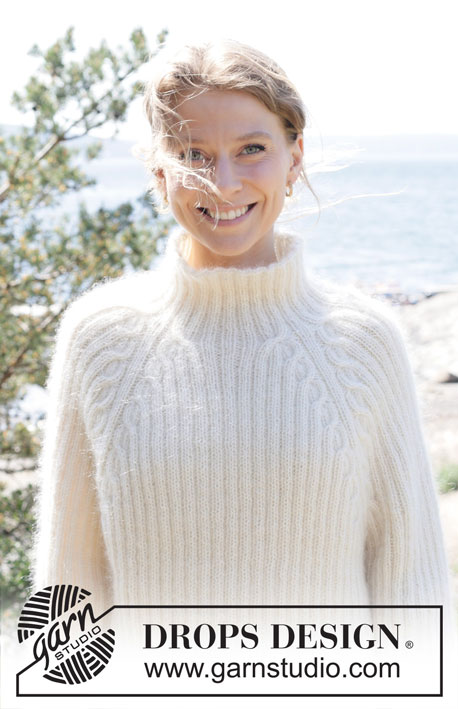
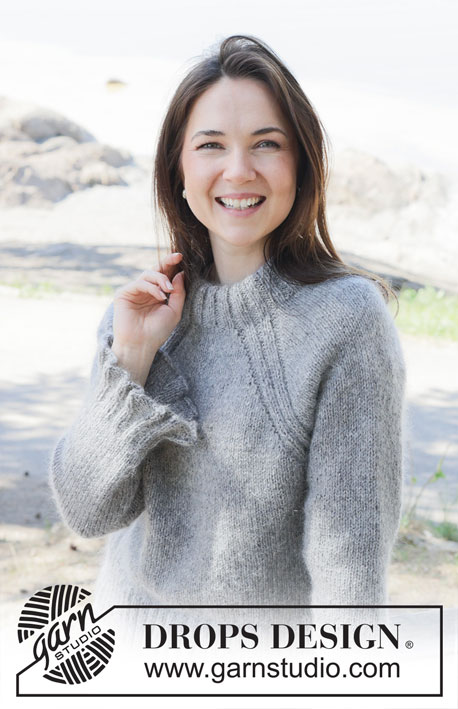
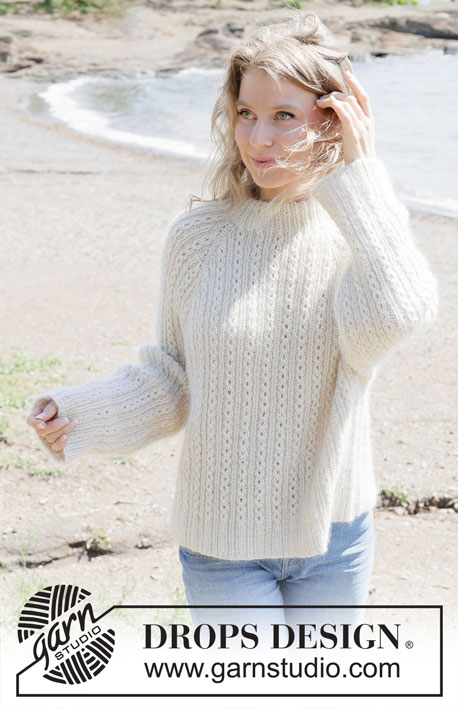
Winter Pearl Sweater#winterpearlsweater |
|||||||||||||||||||
 |
 |
||||||||||||||||||
Knitted sweater in DROPS Alpaca and DROPS Kid-Silk. The piece is worked top down with double neck, raglan and cables. Sizes S - XXXL.
DROPS 255-1 |
|||||||||||||||||||
|
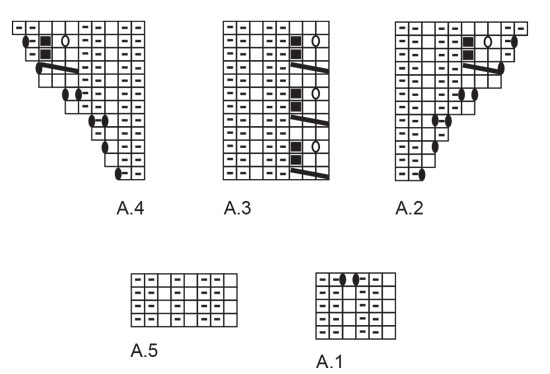
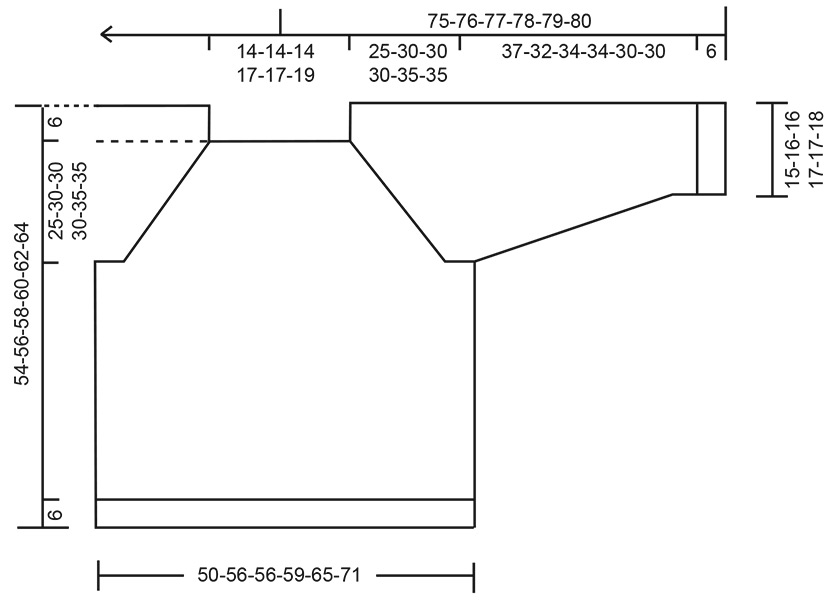
------------------------------------------------------- EXPLANATIONS FOR THE PATTERN: ------------------------------------------------------- PATTERN: See diagrams A.1 to A.5. A.3 is always counted as 8 stitches. RAGLAN: Increase for raglan before/after 1 purled + 1 knitted + 1 purled stitch (= raglan-line). The increased stitches are worked into the pattern. The increases are marked in the diagrams. DECREASE TIP (for sleeves): Decrease by purling 2 together on each side of 1 knitted stitch (= 2 decreased stitches). The stitches which do not fit into a complete cable are knitted. ----------------------------------------------------- START THE PIECE HERE: ------------------------------------------------------- SWEATER – SHORT OVERVIEW OF THE PIECE: The pattern uses both long and short needles; start with the length which fits the number of stitches and change when necessary. The neck and yoke are worked in the round with circular needle, top down and from the right back shoulder. When the yoke is finished, it is divided for the body and sleeves and the body continued in the round, while the sleeves wait. The sleeves are worked top down, in the round. The neck is folded double and fastened to the inside. DOUBLE NECK: Cast on 108-108-108-120-120-132 stitches with circular needle size 3 MM = US 2.5 and 1 strand of each quality (= 2 strands). Work rib according to A.1 in the round. Repeat the first 4 rounds of A.1 until the rib measures 9-9-9-11-11-11 cm = 3½"-3½"-3½"-4⅜"-4⅜"-4⅜"; the neck is later folded double. Change to circular needle size 4.5 MM = US 7 and work the last round in A.1 (yarn overs knitted twisted on the next round) = 144-144-144-160-160-176 stitches. Insert 1 marker after the first 52-52-52-57-57-61 stitches (approx. mid-front); the piece is measured from here. YOKE: Continue in the round as follows: Pick up 1 stitch from the previous round (all picked-up stitches are purled twisted), knit 1 ( = raglan-line), pick up 1 stitch from the previous round, work A.2, A.3 across the next 24 stitches, work the first 3 stitches in A.3, A.4 (= sleeve), pick up 1 stitch from the previous round, knit 1 (= raglan-line), pick up 1 stitch from the previous round, work A.2, A.3 across the next 32-32-32-40-40-48 stitches, work the first 3 stitches in A.3, A.4 (= front piece), pick up 1 stitch from the previous round, knit 1 (= raglan-line), pick up 1 stitch from the previous round, work A.2, A.3 across the next 24 stitches, work the first 3 stitches in A.3, work A.4 (= sleeve) pick up 1 stitch from the previous round, knit 1 (= raglan-line), pick up 1 stitch from the previous round, work A.2, A.3 across the next 32-32-32-40-40-48 stitches, work the first 3 stitches in A.3, A.4 (= back piece). NOTE! Make sure the pattern matches the rib. The increases for raglan are marked in the diagrams, you have picked up 8 extra stitches = 160-160-160-176-176-192 stitches. RAGLAN: Increase as shown in the diagrams, increasing on each side of 1 purled + 1 knitted + 1 purled stitch in each raglan-line. Each time A.2 and A.4 are finished in height, there is room for 2 more repeats of A.3 in width. Continue with pattern and increases until A.2, A.3 and A.4 have been worked a total of 3-4-4-4-5-5 times in height. There are 344-408-408-424-488-504 stitches. Now increase only on the front and back pieces; the increases on the sleeves are finished. Work 2 more repeats in height with increases as shown in A.2 and A.4 on the front and back pieces, continuing the pattern on the sleeves without further increases. There are 408-472-472-488-552-568 stitches. Continue working without further increases until the yoke measures 25-30-30-30-35-35 cm = 9¾"-11¾"-11¾"-11¾"-13¾"-13¾" from the marker mid-front. DIVIDE FOR BODY AND SLEEVES: Work the next round as follows: Work the first 2 stitches (belong to back piece), place the next 81-97-97-97-113-113 stitches on a thread for the sleeve, cast on 13-13-13-13-13-21 stitches (in side under sleeve), work 123-139-139-147-163-171 stitches (front piece), place the next 81-97-97-97-113-113 stitches on a thread for the sleeve, cast on 13-13-13-13-13-21 stitches (in side under sleeve), work the remaining 121-137-137-145-161-169 stitches (back piece). BODY: = 272-304-304-320-352-384 stitches. Continue the pattern in the round until the piece measures 42-44-46-48-50-52 cm = 16½"-17¼"-18"-19"-19¾"-20½" from the marker mid-front. Change to circular needle size 3 MM = US 2.5 and work rib according to A.5 for 6 cm = 2⅜", make sure you have knit 1, purl 1, knit 1 across the cables and knit over knit and purl over purl otherwise. Bind off. The sweater measures approx. 48-50-52-54-56-58 cm = 19"-19¾"-20½"-21¼"-22"-22¾" from the marker and 54-56-58-60-62-64 cm = 21¼"-22"-22¾"-23⅝"-24⅜"-25¼" from the shoulder. SLEEVES: Place the 81-97-97-97-113-113 sleeve-stitches from the thread on one side of the piece on circular needle size 4.5 MM = US 7 and knit up 1 stitch in each of the 13-13-13-13-13-21 stitches cast on under the sleeve + 1 extra stitch on each side = 96-112-112-112-128-136 stitches. Insert a marker-thread mid-under sleeve. Continue the pattern from the yoke, in the round. When the sleeve measures 4 cm = 1½", decrease 2 stitches under the sleeve – read DECREASE TIP. Decrease like this every 4-2-2-2½-1-1 cm = 1½"-¾"-¾"-1"-⅜"-⅜" a total of 8-14-13-11-18-20 times = 80-84-86-90-92-96 stitches. Continue working until the sleeve measures 37-32-34-34-30-30 cm = 14½"-12½"-13⅜"-13⅜"-11¾"-11¾". Change to double pointed needles size 3 MM = US 2.5. Work rib as shown in A.5 for 6 cm = 2⅜", make sure you have knit 1, purl 1, knit 1 across the cables and knit over knit and purl over purl otherwise. Bind off. The sleeve measures approx. 43-38-40-40-36-36 cm = 17"-15"-15¾"-15¾"-14¼"-14¼" from the division. ASSEMBLY: Fold the neck double to the inside and sew down. Make sure the seam is elastic to avoid the neck being tight. |
|||||||||||||||||||
Diagram explanations |
|||||||||||||||||||
|
|||||||||||||||||||
 |
|||||||||||||||||||
 |
|||||||||||||||||||
Have you finished this pattern?Tag your pictures with #dropspattern #winterpearlsweater or submit them to the #dropsfan gallery. Do you need help with this pattern?You'll find 23 tutorial videos, a Comments/Questions area and more by visiting the pattern on garnstudio.com. © 1982-2026 DROPS Design A/S. We reserve all rights. This document, including all its sub-sections, has copyrights. Read more about what you can do with our patterns at the bottom of each pattern on our site. |
|||||||||||||||||||


With over 40 years in knitting and crochet design, DROPS Design offers one of the most extensive collections of free patterns on the internet - translated to 17 languages. As of today we count 324 catalogs and 12291 patterns - 12281 of which are translated into English (US/in).
We work hard to bring you the best knitting and crochet have to offer, inspiration and advice as well as great quality yarns at incredible prices! Would you like to use our patterns for other than personal use? You can read what you are allowed to do in the Copyright text at the bottom of all our patterns. Happy crafting!
Post a comment to pattern DROPS 255-1
We would love to hear what you have to say about this pattern!
If you want to leave a question, please make sure you select the correct category in the form below, to speed up the answering process. Required fields are marked *.