
Popular categories
Looking for a yarn?


Comments / Questions (13)
![]() Natja wrote:
Natja wrote:
Sehr schönes Strickmuster! Danke! Leider spannt die Knopfleiste ein bisschen. Ich hoffe das gibt sich noch ein bisschen beim blocken.
10.01.2026 - 17:31
![]() Birgitta wrote:
Birgitta wrote:
Stickas hela mönstret A1 innan delningen för ärm, fram- och bakstycke? Jag är inte färdig med mönstret vid angiven längd, trots att jag gått ner ett halvnummer på stickor och stickfastheten stämmer i bredd. Hur är det tänkt?
06.11.2025 - 07:56DROPS Design answered:
Hej Birgitta, hvis du ikke er færdig med mønsteret, så fortsætter du efter at du har delt arbejdet :)
19.11.2025 - 11:39
![]() Hellen wrote:
Hellen wrote:
Bel motivo e facile da realizzare. Per me era il primo cardigan mai fatto. L'ho realizzato con la lana LIMA ed è venuto molto bene
20.10.2025 - 13:13
![]() Gabriela wrote:
Gabriela wrote:
Guten Tag Habe Schwierigkeiten mit dem Musterdiagramm. Zeigt das Diagramm alle Hin und Rückreihe? Wird es von rechts nach links und von links nach rechts gelesen? Wird in der Rückreihe zugenommen? Herzlichen Dank
05.12.2024 - 15:55DROPS Design answered:
Liebe Gabriela, Diagramme lesen Sie von unten nach oben, rechts nach links bei den Hinreihen und links nach rechts bei den Rückreihen. Zunahmen werden wie im Diagram bearbeitet, die können bei einer Hin oder bei einer Rückreihe entstehen. Viel Spaß beim Stricken!
06.12.2024 - 07:50
![]() Criissagillie wrote:
Criissagillie wrote:
I would like to make the jacket.. lengthen it and add a hood. Is there an easy way to add the hood.
18.08.2024 - 17:49DROPS Design answered:
Dear Criissagillie, we don't make custom patterns. To add a hood, remember that you start this pattern from the neck, so you would need a shorter rib neck edge for a hooded jacket and that the hood is added at the end, by picking up the neck edge stitches. You could use the following pattern as a guide: https://www.garnstudio.com/pattern.php?id=687&cid=19. You can also check the following video: https://www.garnstudio.com/video.php?id=171&lang=en. Happy knitting!
18.08.2024 - 23:18
![]() Tuula Haglund wrote:
Tuula Haglund wrote:
Kuinka neulotaan kuvio nurjalla puolella?
03.06.2024 - 12:05DROPS Design answered:
Piirrokset näyttävät mallineuleen kaikkia kerroksia, eli myös työn nurjalla puolella neulotaan kirjoneuletta piirroksen mukaisesti.
04.06.2024 - 17:37
![]() Gabriele Preuss-Jung wrote:
Gabriele Preuss-Jung wrote:
Ich stricke das Modell 245-3. Wenn man die Passe beginnt, soll man Maschen zunehmen und 7 Ma. Blende und dann sufnehmen und stricken bis noch 8 Maschen übrig sind. Das verstehe ich nicht. Ich muss doch durchsprechen bis zur rechten Blende. Bitte um Hilfe.
16.04.2024 - 16:21DROPS Design answered:
Liebe Frau Preuss-Jung, wenn diese 8 Maschen übrig sind, stricken Sie die 1. Masche A.1 so daß das Muster symmetrisch wird und enden Sie mit den 7 Blenden-Maschen. Bei den Rückreihen stricken Sie die 7 Blenden-Maschen, die letzte Masche A.1 (lesen Sie das Diagram links nach rechts), dann wiederholen Sie A.1 und enden Sie mit den 7 Blenden-Maschen. Viel Spaß beim Stricken!
17.04.2024 - 07:40
![]() Maggi wrote:
Maggi wrote:
Nachdem man die Halsblende mit Nadel Nr. 3 gestrickt hat soll man: \"Bei einer Länge des Rippenmusters von 12 cm 1 Hin-Reihe rechts stricken und dabei 16-16-18-18-20-20 Maschen gleichmäßig verteilt abnehmen (dabei nicht bei den Blenden-Maschen abnehmen)\". Also erstmal in 1 Reihe Maschen ABNEHMEN und anschließend bei der Passe (Nadel 4) wieder Maschen zunehmen? Ist das so korrekt?
07.01.2024 - 19:44DROPS Design answered:
Liebe Maggi, nach dem Bündchen muss man abnehmen, da man mehr Maschen für Bündchen mit den kleineren Nadeln als für glattrechts mit den grösseren Nadeln braucht. Viel Spaß beim stricken!
08.01.2024 - 10:34
![]() Jaana wrote:
Jaana wrote:
Enligt diagram S-M-L så görs de 2 första ökningarna vid pil 1 och 2 från rätsidan. Vid pil 3 blir från avigsidan. Då blir också första mönsterraden från avigan. Är det riktigt eller har ni missat en rad i början?
04.11.2023 - 09:38DROPS Design answered:
Hei Jaana. Økepinnen er lagt til pinnen etter "mønster", ettersom det blir penest. Du kan fint øke både fra retten og vrangen, bare husk å strikk kastet vridd, slik at det ikke blir hull. mvh DROPS Design
06.11.2023 - 14:17
![]() Fabienne wrote:
Fabienne wrote:
Superbe modèle. Je le tricote avec le fil Lima qui est ma laine préférée. Je ne connaissais pas cette façon de tricoter des mailles de bordure qui donnent un très joli fini. Désormais je travaillerai toutes mes bordures de cette manière. Bravo, félicitations et merci pour ce modèle très apprécié !
08.10.2023 - 07:43
|
||||||||||||||||
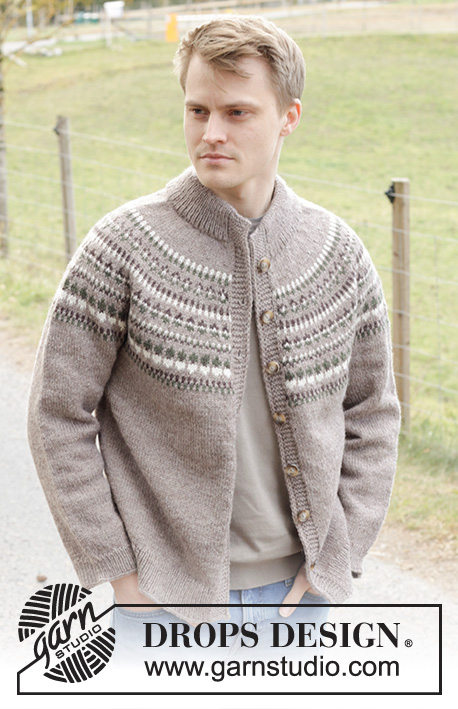
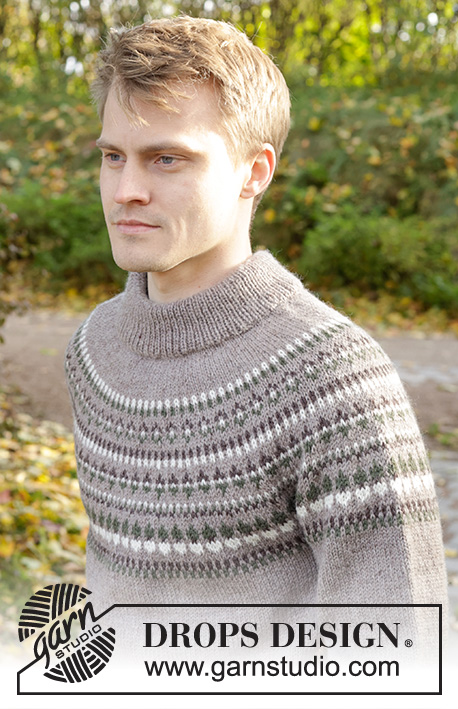
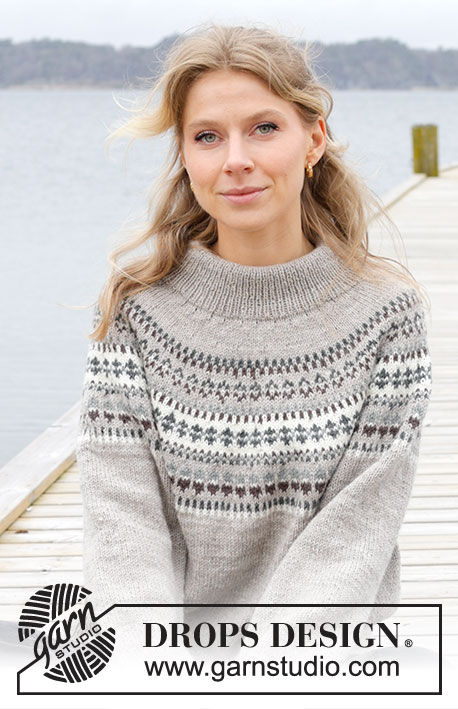
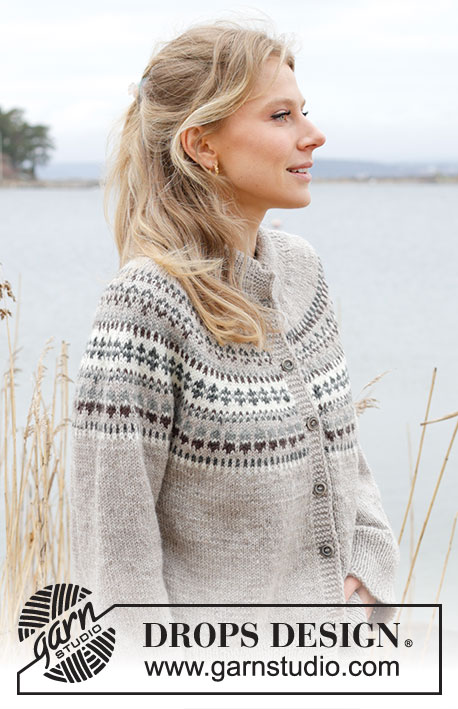
Boreal Circle Cardigan#borealcirclecardigan |
||||||||||||||||
 |
 |
|||||||||||||||
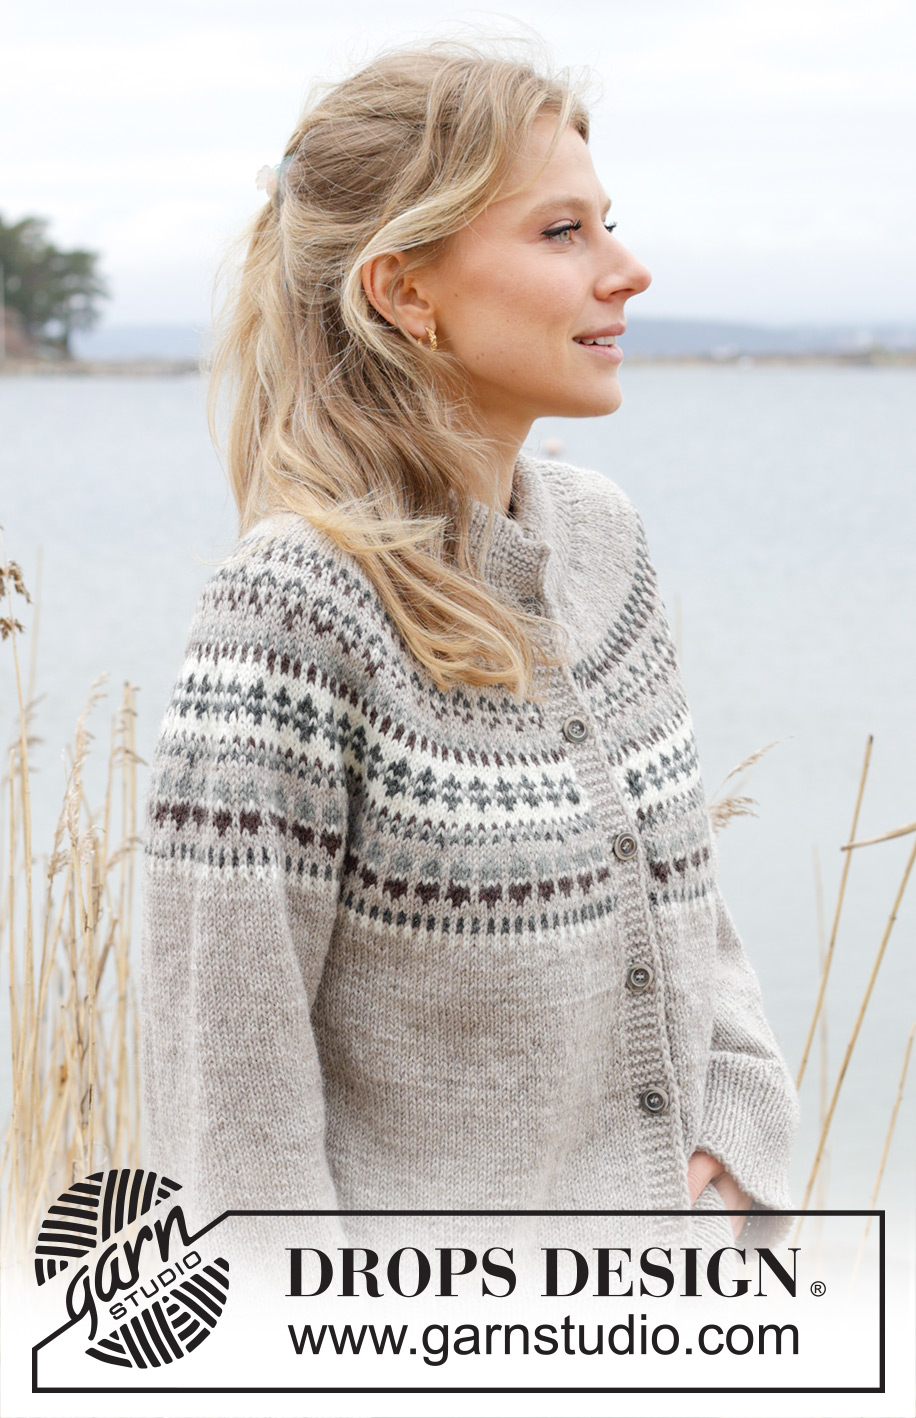
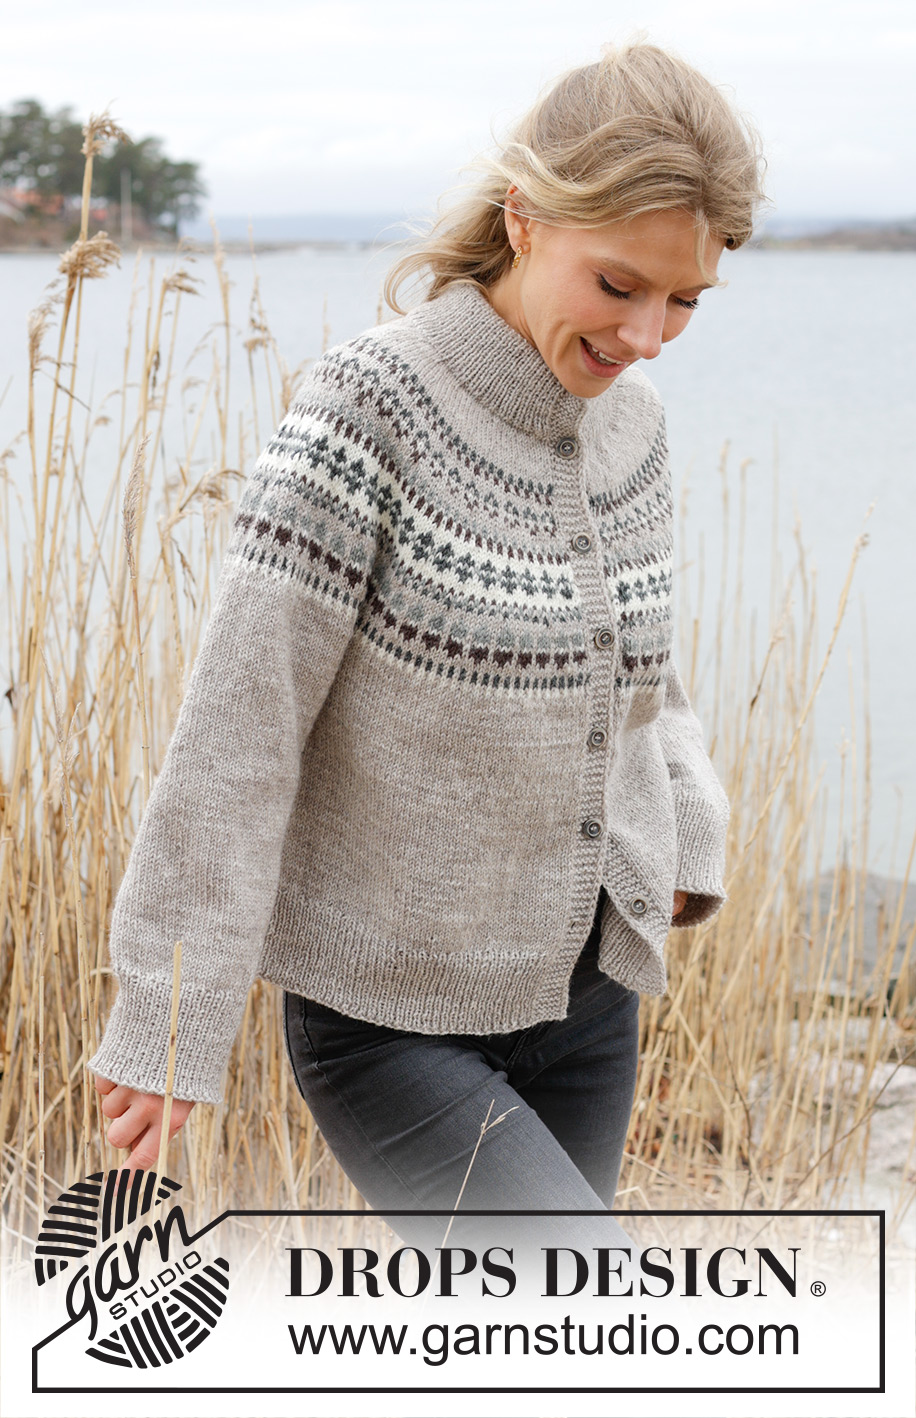
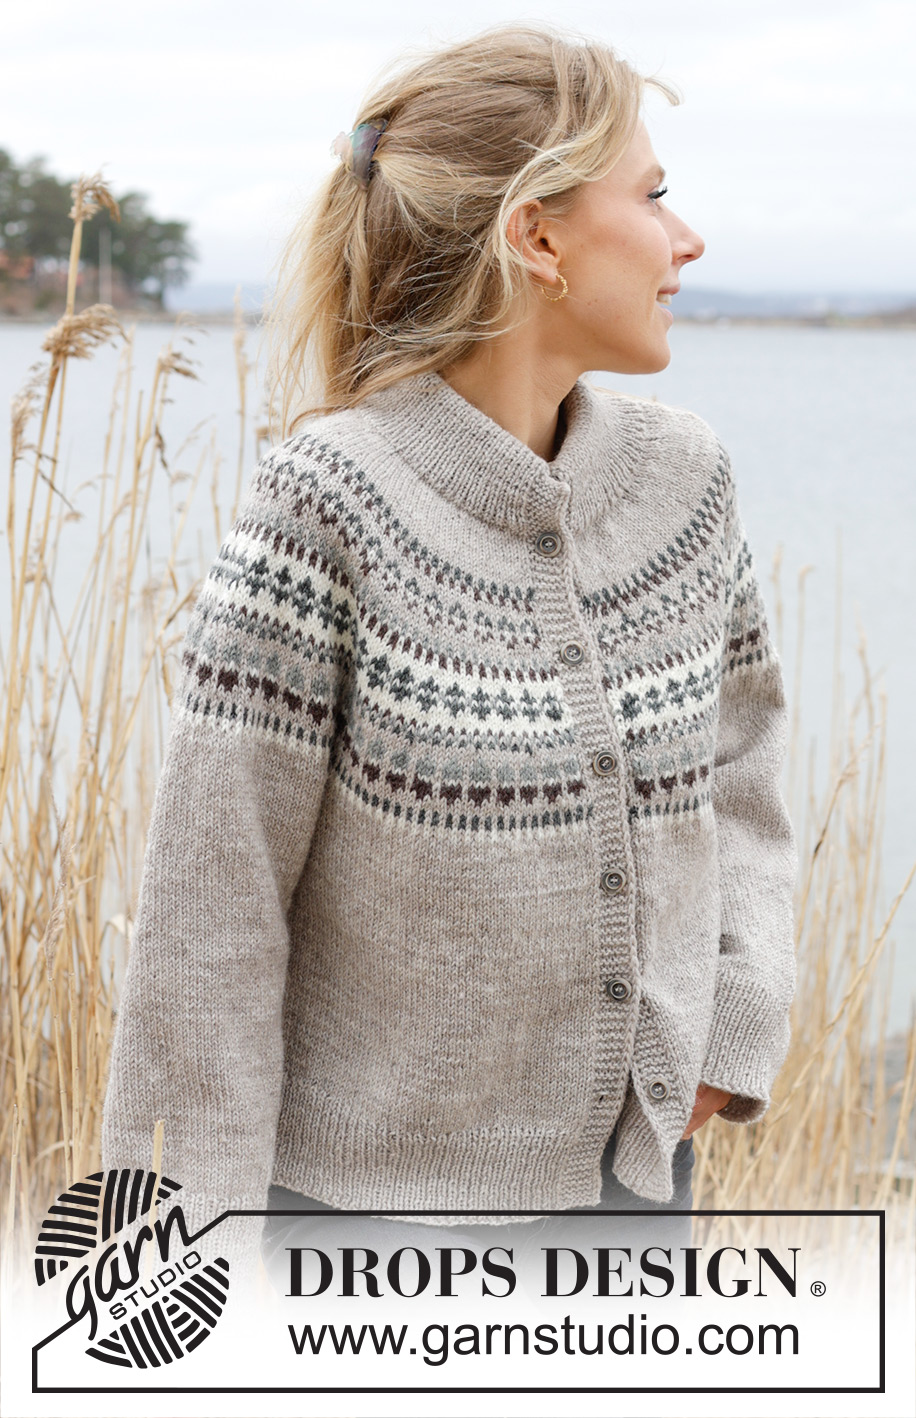
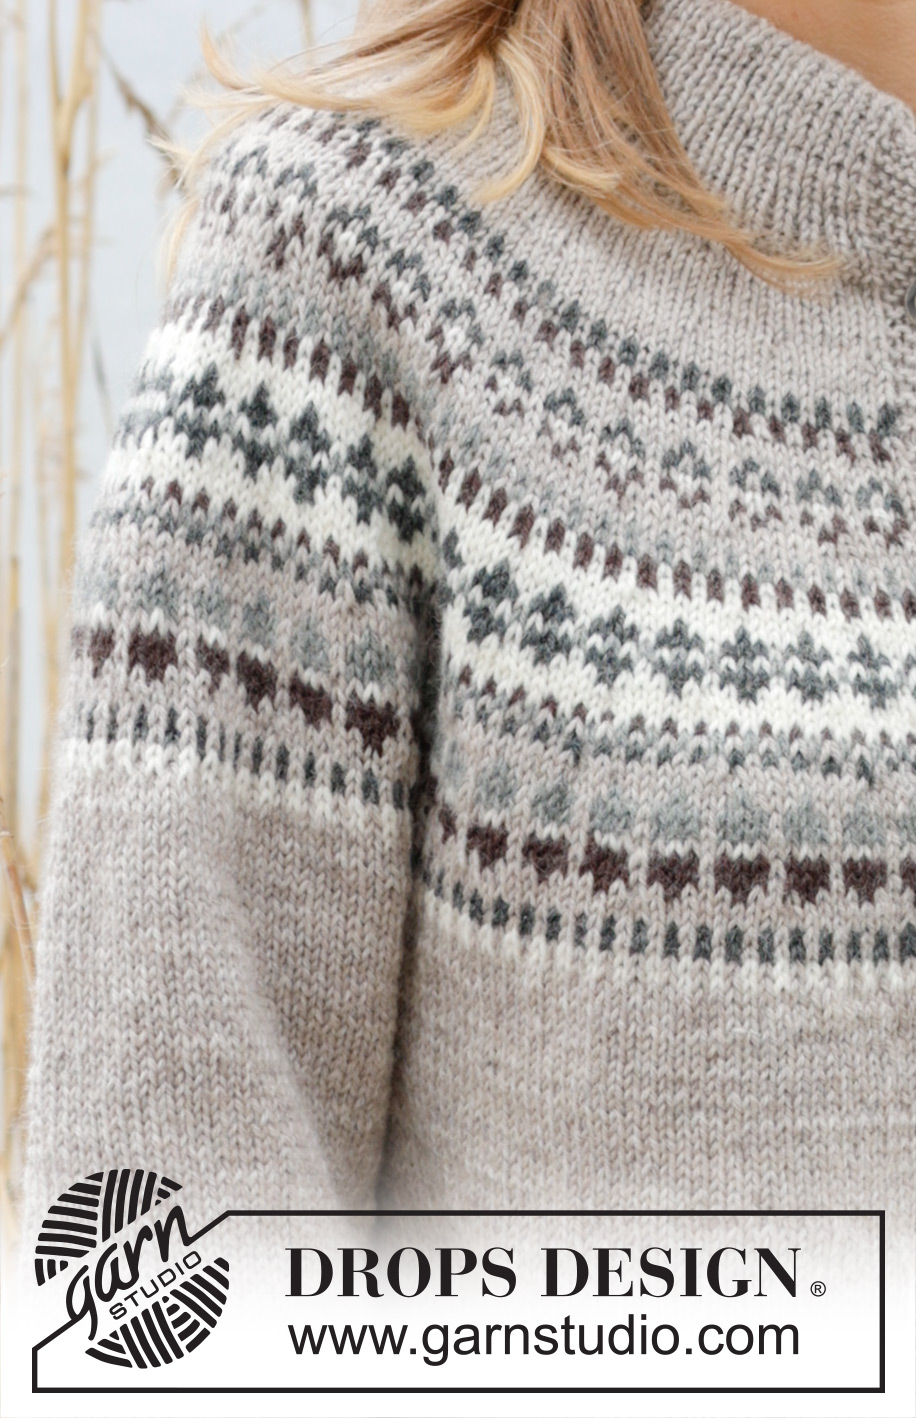
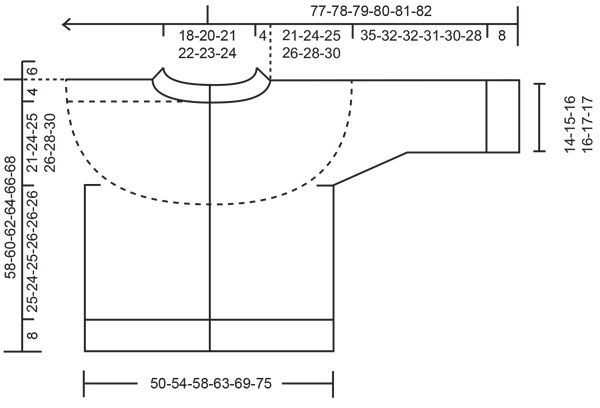
Knitted jacket in DROPS Karisma. The piece is worked top down with round yoke and Nordic pattern. Sizes S - XXXL.
DROPS 245-3 |
||||||||||||||||
|
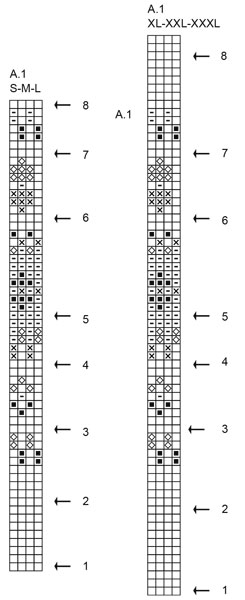
------------------------------------------------------- EXPLANATIONS FOR THE PATTERN: ------------------------------------------------------- GARTER STITCH (worked back and forth): Knit all rows. 1 ridge = knit 2 rows. PATTERN: See diagram A.1. Choose diagram for your size. The pattern is worked in stockinette stitch. INCREASE/DECREASE TIP (evenly spaced): To work out how to increase/decrease evenly, count the total number of stitches on needle (e.g., 139 stitches), minus the bands (e.g., 14 stitches) and divide the remaining stitches by the number of increases/decreases to be made (e.g., 16) = 7.8. In this example, increase by making 1 yarn over after alternately each 7th and 8th stitch (approx.). Do not increase over the bands. On the next row work the yarn overs twisted to avoid holes. When decreasing, knit together approx. each 7th and 8th stitch. EDGE STITCHES: At the beginning of each row work 2 edge stitches as follows: Slip 1 stitch purl-wise with the strand in front of the piece, knit 1. At the end of each row work 2 edge stitches as follows: Work until there are 2 stitches left on the row, slip 1 stitch purl-wise with the strand in front of the piece, knit 1. Repeat at the beginning and end of each row. BUTTONHOLES: Work buttonholes on the right band (when the garment is worn). Work from the right side when there are 4 stitches left on the row as follows: Make 1 yarn over, knit 2 together and knit 2. On the next row (wrong side), knit the yarn over to leave a hole. The first buttonhole is worked when the neck is finished. The other 5-5-5-6-6-6 buttonholes are then worked with approx. 9-9½-10-8½-9-9 cm = 3½"-3⅝"-4"-3¼"-3½"-3½" between each one. The bottom buttonhole is worked in the transition between the stockinette stitch and rib. DECREASE TIP (for sleeves): Decrease 1 stitch on each side of the marker-thread as follows: Work until there are 3 stitches left before the marker-thread, knit 2 together, knit 2 (marker-thread sits between these 2 stitches), slip 1 stitch knit-wise, knit 1 and pass the slipped stitch over the knitted stitch. ------------------------------------------------------- START THE PIECE HERE: ------------------------------------------------------- JACKET – SHORT OVERVIEW OF THE PIECE. The neck and yoke are worked back and forth with circular needle, from mid front and top down. The yoke is divided for body and sleeves and the body continued back and forth with circular needle. The sleeves are worked in the round with short circular needle/ double pointed needles. NECK: Cast on 127-135-141-145-151-155 stitches, with DROPS Karisma color light oak, using short circular needles size 3 MM = US 2.5. Purl 1 row from the wrong side. Then work as follows from the right side: 1 GARTER STITCH – read description above, * knit 1, purl 1 *, work from *-* until there are 2 stitches left, knit 1 and 1 garter stitch. Continue this rib for 6 cm = 2⅜". Cast on 6 stitches at the end of the next 2 rows = 139-147-153-157-163-167 stitches. Continue the rib with EDGE STITCHES – read description above - over the 2 outermost stitches on each side and garter stitch over the 5 stitches inside these, i.e., there are 7 band stitches, with 2 of these being edge stitches. The bands are always worked with color light oak (if light oak is not used in the pattern, twist the strands between the bands and pattern together to avoid a hole; to avoid letting the yarn follow the work over all stitches, you can use a separate small skein for the front band stitches). When the rib measures 12 cm = 4¾", knit 1 row from the right side and decrease 16-16-18-18-20-20 stitches evenly spaced (do not decrease over the bands) - read INCREASE/DECREASE TIP, on this row also begin to work the BUTTONHOLES – read description above = 123-131-135-139-143-147 stitches. Purl 1 row from the wrong side with the bands worked as before. YOKE: Change to circular needle size 4 MM = US 6. Work as follows from the right side: 7 band stitches as before, A.1 until there are 8 stitches left, work the first stitch in A.1 (so the pattern is symmetrical) and 7 band stitches as before. REMEMBER THE KNITTING GAUGE! On each row in the diagram marked with an arrow, increase as follows: ARROW 1: Increase 24-28-28-32-36-40 stitches evenly spaced = 147-159-163-171-179-187 stitches. ARROW 2: Increase 24-28-32-36-36-40 stitches evenly spaced = 171-187-195-207-215-227 stitches. ARROW 3: Increase 24-28-32-36-36-40 stitches evenly spaced = 195-215-227-243-251-267 stitches. ARROW 4: Increase 24-28-32-36-36-40 stitches evenly spaced = 219-243-259-279-287-307 stitches. ARROW 5: Increase 28-28-32-36-40-40 stitches evenly spaced = 247-271-291-315-327-347 stitches. ARROW 6: Increase 28-28-32-36-40-40 stitches evenly spaced = 275-299-323-351-367-387 stitches. ARROW 7: Increase 28-32-32-36-40-44 stitches evenly spaced = 303-331-355-387-407-431 stitches. ARROW 8: Increase 31-31-31-35-39-43 stitches evenly spaced = 334-362-386-422-446-474 stitches. Continue with color light oak and stockinette stitch, with 7 band stitches on each side. When the yoke measures 21-24-25-26-28-30 cm = 8"-9½"-9¾"-10¼"-11"-11¾" after the neck, divide for the body and sleeves as explained below. DIVIDE PIECE FOR BODY AND SLEEVES AS FOLLOWS: Work 56-61-64-69-74-80 stitches as before (front piece), place the next 62-66-72-80-82-84 stitches on a thread for the sleeve, cast on 6-6-8-8-10-12 stitches (in side under sleeve), work 98-108-114-124-134-146 stockinette stitches (back piece), place the next 62-66-72-80-82-84 stitches on a thread for the sleeve, cast on 6-6-8-8-10-12 stitches (in side under sleeve), work the last 56-61-64-69-74-80 stitches as before (front piece). The body and sleeves are finished separately. THE PIECE IS NOW MEASURED FROM HERE! BODY: = 222-242-258-278-302-330 stitches. Continue stockinette stitch with color light oak and 7 band stitches on each side for a further 25-24-25-26-26-26 cm = 10¼"-9½"-9¾"-10¼"-10¼"-10¼". Knit 1 row from the right side and increase 71-73-79-87-97-101 stitches evenly spaced (do not increase over the bands) = 293-315-337-365-399-431 stitches. Change to circular needle size 3 MM = US 2.5. Work as follows from the wrong side: 7 band stitches as before, * purl 1, knit 1 *, work from *-* until there are 8 stitches left, purl 1 and 7 band stitches as before. Continue this rib for 8 cm = 3⅛". Bind off a little loosely with knit from the right side. The jacket measures approx. 58-60-62-64-66-68 cm = 22¾"-23⅝"-24⅜"-25¼"-26"-26¾" from the shoulder. SLEEVES: Place the 62-66-72-80-82-84 stitches from the thread on the one side of the piece on short circular needle/double pointed needles size 4 MM = US 6 and knit up 1 stitch in each of the 6-6-8-8-10-12 stitches cast on under the sleeve = 68-72-80-88-92-96 stitches. Insert a marker-thread in the middle of the new stitches under the sleeve. Start at the marker-thread and work stockinette stitch in the round with color light oak. When the sleeve measures 3 cm = 1⅛", decrease 2 stitches mid-under sleeve – read DECREASE TIP. Decrease like this every 9-8-4-2½-2-2 cm = 3½"-3⅛"-1½"-1"-¾"-¾" a total of 4-4-7-10-11-12 times = 60-64-66-68-70-72 stitches. Continue working until the sleeve measures 35-32-32-31-30-28 cm = 13¾"-12½"-12½"-12¼"-11¾"-11" from the division (or to desired length. There is approx. 8 cm = 3⅛" left). Knit 1 round and increase 20-20-20-22-22-22 stitches evenly spaced = 80-84-86-90-92-94 stitches. Change to double pointed needles size 3 MM = US 2.5 and work rib (knit 1, purl 1) for 8 cm = 3⅛". Loosely bind off with knit. The sleeve measures approx. 43-40-40-39-38-36 cm = 17 "-15¾"-15¾"-15¼"-15"-14¼". Work the other sleeve in the same way. ASSEMBLY: Fold the neck double to the inside and sew down. To avoid the neck being tight and rolling outwards, it is important that the seam is elastic. Sew together the openings on the bands with small stitches. Sew the buttons onto the left band. |
||||||||||||||||
Diagram explanations |
||||||||||||||||
|
||||||||||||||||
 |
||||||||||||||||
 |
||||||||||||||||
Have you finished this pattern?Tag your pictures with #dropspattern #borealcirclecardigan or submit them to the #dropsfan gallery. Do you need help with this pattern?You'll find 32 tutorial videos, a Comments/Questions area and more by visiting the pattern on garnstudio.com. © 1982-2026 DROPS Design A/S. We reserve all rights. This document, including all its sub-sections, has copyrights. Read more about what you can do with our patterns at the bottom of each pattern on our site. |
||||||||||||||||


With over 40 years in knitting and crochet design, DROPS Design offers one of the most extensive collections of free patterns on the internet - translated to 17 languages. As of today we count 325 catalogs and 12298 patterns - 12288 of which are translated into English (US/in).
We work hard to bring you the best knitting and crochet have to offer, inspiration and advice as well as great quality yarns at incredible prices! Would you like to use our patterns for other than personal use? You can read what you are allowed to do in the Copyright text at the bottom of all our patterns. Happy crafting!
Post a comment to pattern DROPS 245-3
We would love to hear what you have to say about this pattern!
If you want to leave a question, please make sure you select the correct category in the form below, to speed up the answering process. Required fields are marked *.