
Popular categories
Looking for a yarn?


Comments / Questions (35)
![]() Clara Sofie wrote:
Clara Sofie wrote:
Hej. Findes der et billede af ryggen?
15.04.2024 - 22:02DROPS Design answered:
Hej Clara, det har vi desværre ikke, men det strikkes som forstykket, så det skal se ud som det du ser :)
16.04.2024 - 07:25
![]() Fayet Edith wrote:
Fayet Edith wrote:
Bonsoir, Je ne vois pas comment faire à partir de : 2cotes mousse ..... reste 62 mailles Comment décaler le dessin et où faire les 3 diminutions ? Merci cordialement Edith
09.04.2024 - 21:23DROPS Design answered:
Bonjour Mme Fayet, vous aviez 68 mailles sur l'aiguille et vous avez tricoté les 5 mailles de chaque côté au point mousse pendant 4 rangs (= 2 côtes mousse), vous allez maintenant rabattre (et non diminuer) les mailles des emmanchures autrement dit: rabattez 3 mailles au début du rang suivant sur l'endroit et tricotez les mailles restantes comme avant (il reste 65 mailles), tournez. Rabattez les 3 premières mailles au début du rang suivant sur l'envers et terminez le rang comme avant = il reste 62 mailles sur l'aiguille. Diminuez maintenant pour les emmanchures après A.2 et avant A.3. Bon tricot!
10.04.2024 - 07:47
![]() Fayet Edith wrote:
Fayet Edith wrote:
Bonjour, Je ne comprends pas comment continuer après les 2 cotes mousse puisque A1 est sur 8 mailles. 2cotes mousse et 5 font 7 et ou placez vous les 3 diminutions par rapport au motif ? Merci Cordialement
08.04.2024 - 22:00DROPS Design answered:
Bonjour Mme Fayet, pouvez-vous nous indiquer à quel niveau vous en êtes exactement? Je ne suis pas bien sûre de le situer, merci pour votre compréhension. Bon tricot!
09.04.2024 - 08:51
![]() Benedetta wrote:
Benedetta wrote:
Ciao! Non mi è chiaro il passaggio tra davanti/dietro e bordo/spalline. Quando dice "tenere le maglie sui ferri e lavorare le spalline e un bordo ad I-cord lungo il collo" significa che faccio bordo e spalline separati dal resto? O solo le spalline e poi le cucio al davanti e al dietro? Grazie mille in anticipo
08.03.2024 - 08:42DROPS Design answered:
Buonasera Benedetta, deve lavorare un bordo ad I-cord di 7 cm e poi procedere come indicato. Buon lavoro!
17.03.2024 - 19:32
![]() Jayne Baak wrote:
Jayne Baak wrote:
Would it be possible to make this on a circular needle to avoid seeing up the sides?? Thank you Jayne 🙂
04.03.2024 - 22:14DROPS Design answered:
Dear Mrs Baak, probably, you then just have to adjust the number of stitches and how to read diagrams as they would be worked from RS on every row. Happy knitting!
05.03.2024 - 09:19
![]() Esther wrote:
Esther wrote:
Ik denk dat de beschrijving onder "schouderbandjes en punnikrand" niet helemaal klopt?! Er staat "* Brei de eerste 2 steken van het bandje gedraaid recht samen met de laatste steek en de eerste steek op het voorpand". Volgens mij moet dat zijn: Brei de eerste 2 steken van het bandje, brei daarna de laatste steek op de rechter naald met de eerste steek op het voorpand gedraaid recht". Vr.gr., Esther
19.06.2023 - 15:15
![]() Mia wrote:
Mia wrote:
Hello, thank you for this beautiful pattern. I have knitted the front and back piece and the icord edging. I do not understand how to do the straps. Do I start with the double pointed needle with separate yarn? Do I join the 4 stitches to the neck edge and do an icord strap? I am totally lost. Please help. Thank you, Mia
16.06.2023 - 07:27DROPS Design answered:
Dear MIa, you first work an I-cord for 7 cm then work the I-cord together with the stitches from front piece casting off these stitches as shown in this video (in the video the I-cord is worked over 3 sts, just work as explained in the pattern with the 4 sts, the video shows the technique). .Happy knitting!
16.06.2023 - 07:51
![]() Lisa wrote:
Lisa wrote:
Hi, I was wondering for the back piece after the 2 ridges you cast off 3 stitches (size M) do we continue like before following what’s left of the A1 pattern?
08.06.2023 - 16:48DROPS Design answered:
Dear Lisa, the first row of the 2 ridges should be worked from WS (pattern fixed), then you cast off 3 sts on each side working remaining stitches as before. Happy knitting!
16.06.2023 - 15:05
![]() Märta wrote:
Märta wrote:
Hur ser toppen ut bakifrån?
08.06.2023 - 09:52
![]() Jannie wrote:
Jannie wrote:
Er ribben ikke ret over ret og vrang over vrang?
18.05.2023 - 12:09DROPS Design answered:
Hej Jannie, ja det stemmer :)
19.05.2023 - 10:59
|
|||||||
Miss Gardener#missgardener |
|||||||
 |
 |
||||||
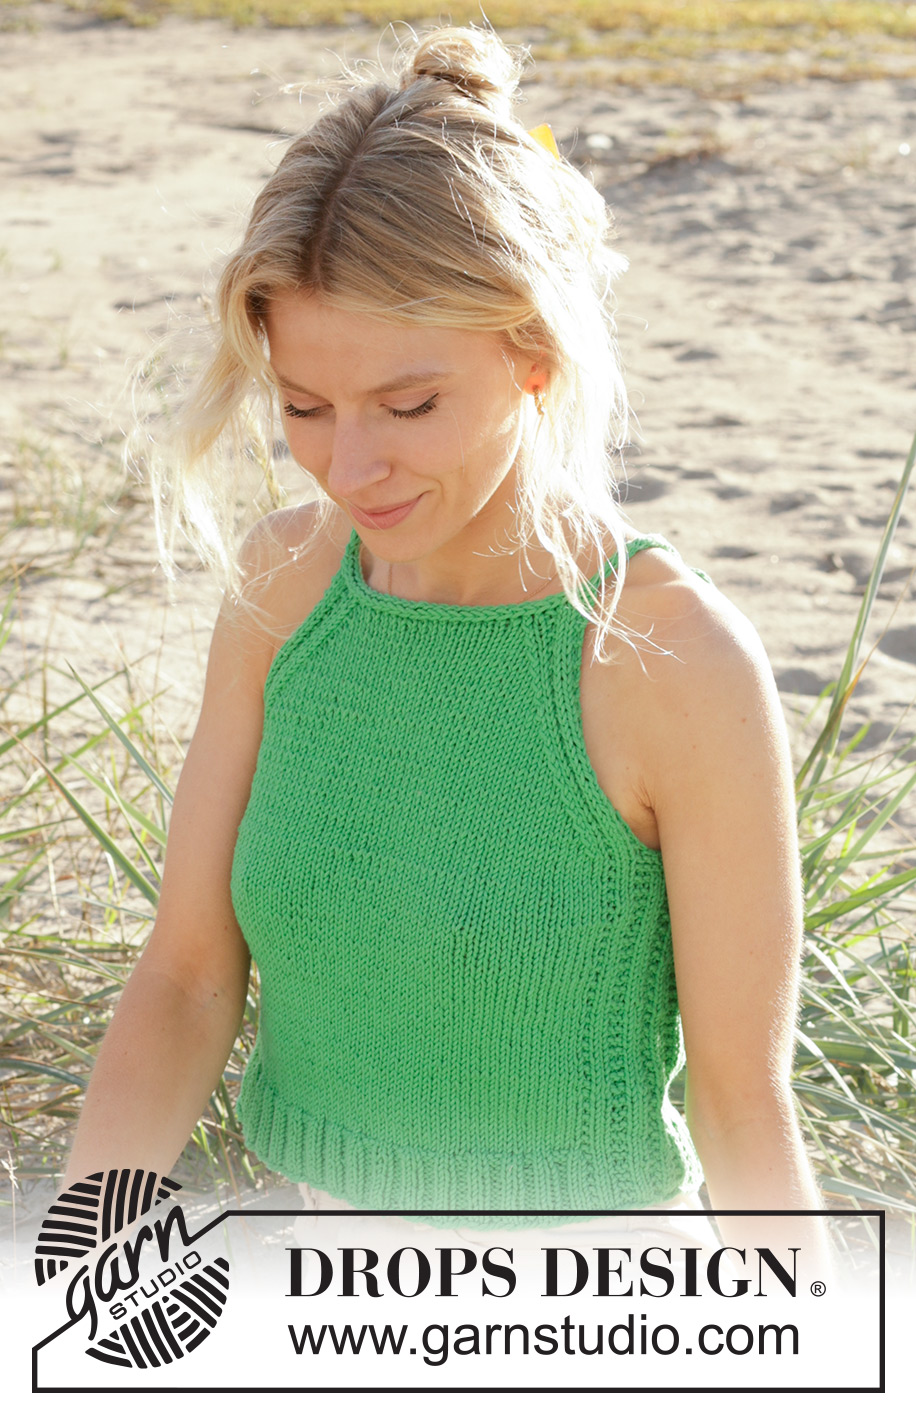
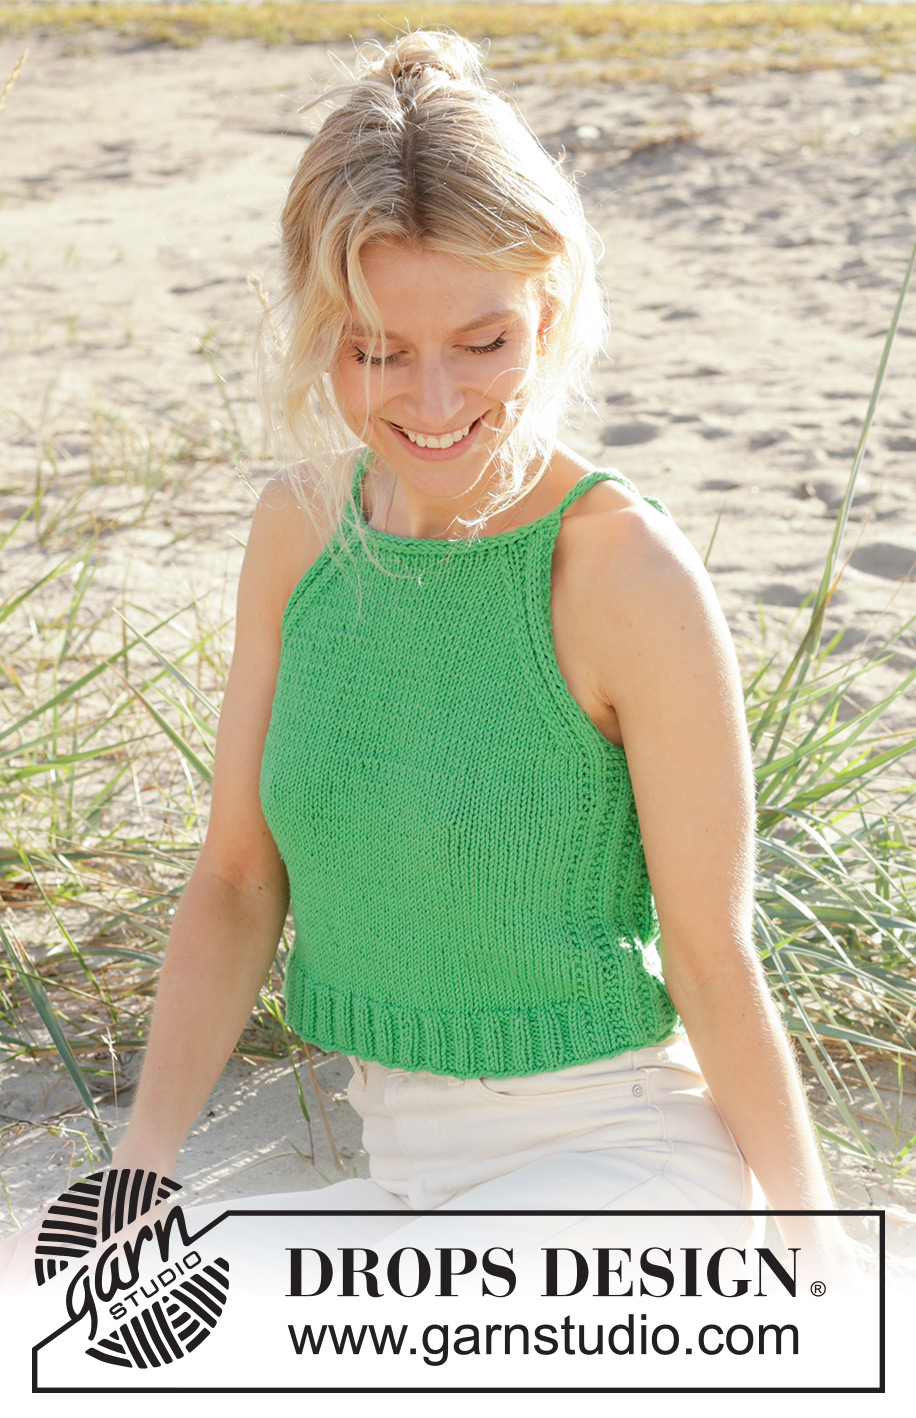
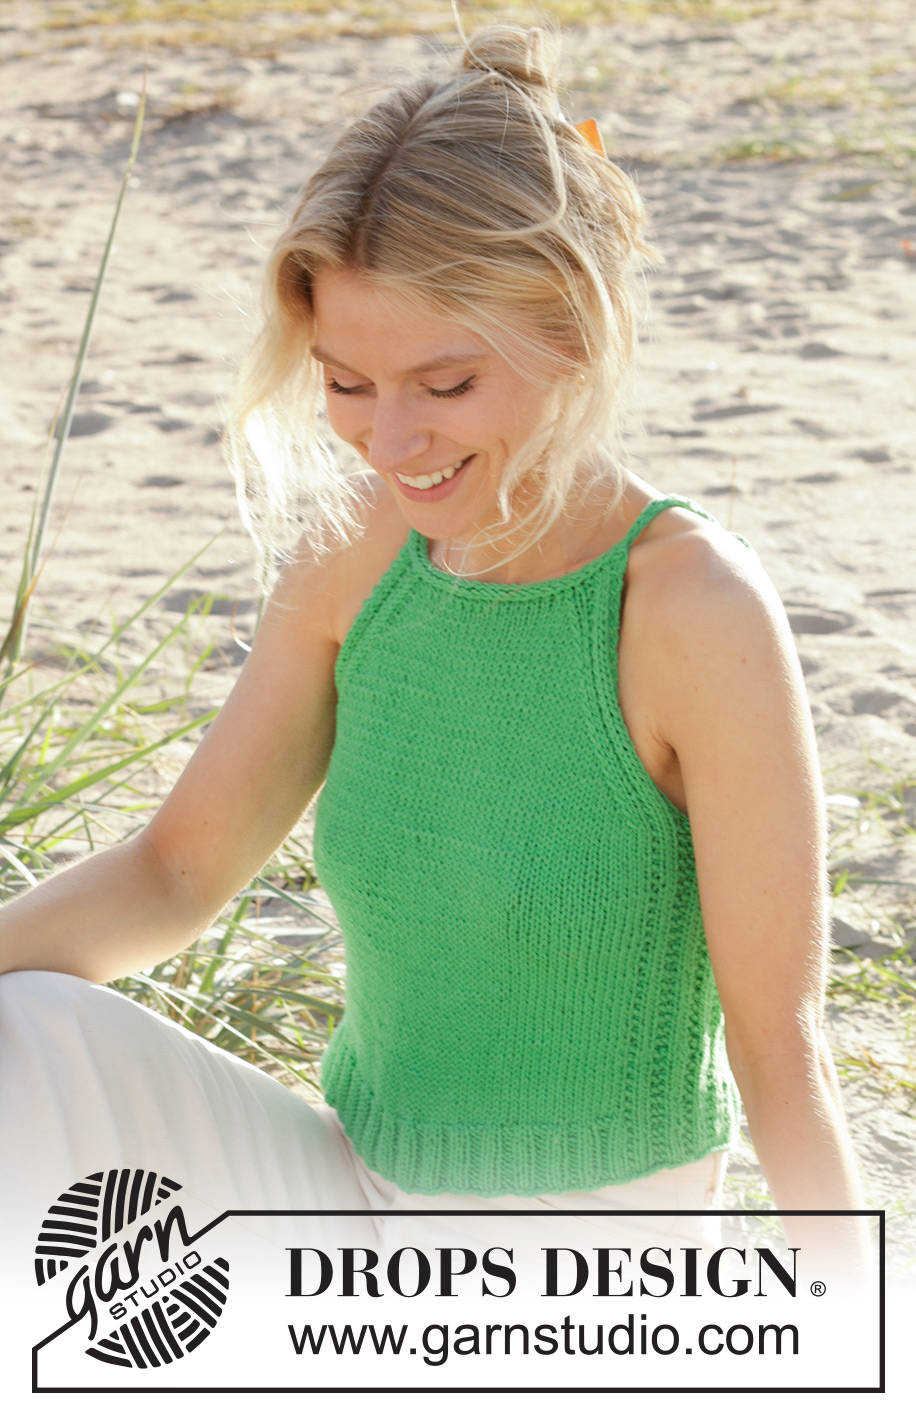
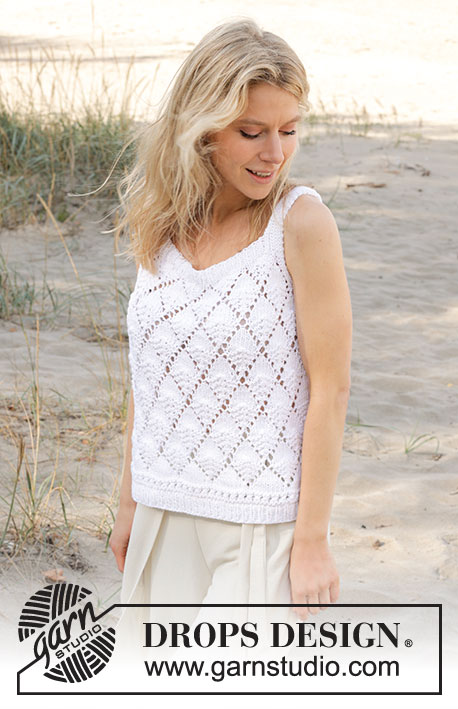
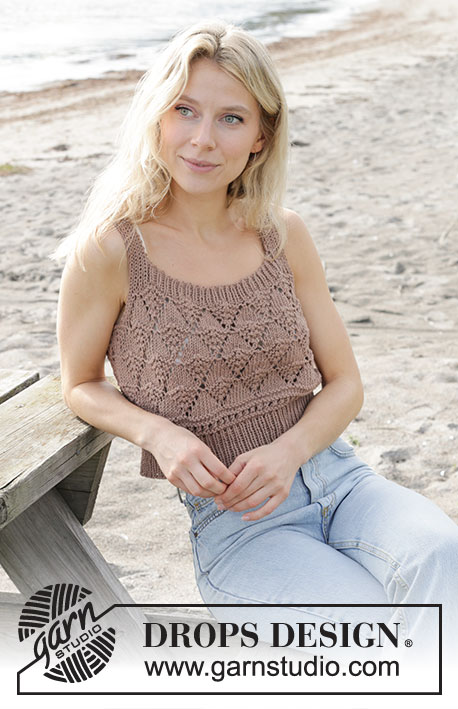
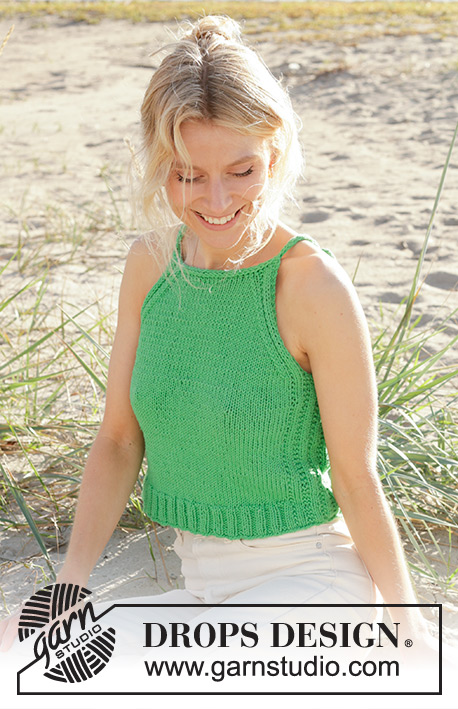
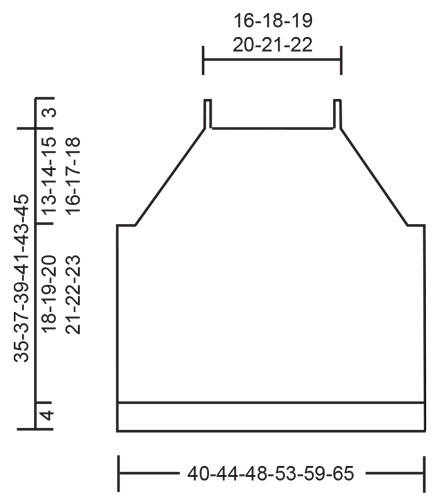
Knitted top/crop-top in DROPS Paris. The piece is worked bottom up in stockinette stitch, with I-cord edges. Sizes S - XXXL.
DROPS 241-8 |
|||||||
|
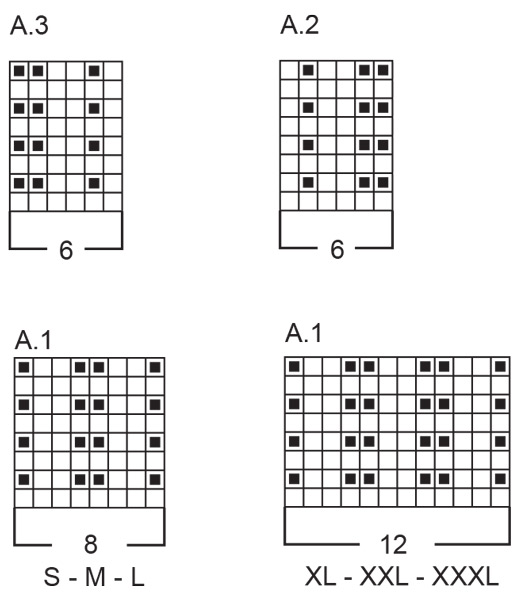
------------------------------------------------------- EXPLANATIONS FOR THE PATTERN: ------------------------------------------------------- RIDGE/GARTER STITCH (worked back and forth): Knit all rows. 1 ridge = knit 2 rows. PATTERN: See diagrams A.1 to A.3. Choose diagram for your size (applies to A.1). DECREASE TIP: All decreases are worked from the right side! Decrease inside 6 stitches: DECREASE 1 STITCH AT BEGINNING OF THE ROW: Work A.2, slip the next stitch as if to knit, knit 1 and pass the slipped stitch over the knitted stitch (1 stitch decreased). DECREASE 2 STITCHES AT BEGINNING OF THE ROW: Work A.2, slip the next stitch as if to knit, knit 2 together and pass the slipped stitch over the knitted together stitches (2 stitches decreased). DECREASE 1 STITCH AT END OF THE ROW: Work until there are 8 stitches left on the row, knit 2 together, work A.3 (1 stitch decreased). DECREASE 2 STITCHES AT END OF THE ROW: Work until there are 9 stitches left on the row, knit 3 together, work A.3 (2 stitches decreased). ------------------------------------------------------- START THE PIECE HERE: ------------------------------------------------------- TOP – SHORT OVERVIEW OF THE PIECE: The front and back pieces are worked separately, back and forth and bottom up. The piece is sewn together. The I-cord edge and tube-knitted shoulder straps are worked to finish. BACK PIECE: Cast on 78-86-94-106-118-130 stitches with needles size 3.5 MM = US 4 and DROPS Paris. Purl 1 row from the wrong side. Work the next row as follows, from the right side: A.1, * knit 2, purl 2 *, work from *-* until there are 10-10-10-14-14-14 stitches left, knit 2 and work A.1. Continue this rib for 4 cm = 1½". Work the next row as follows, from the right side: Continue A.1 over the first 8-8-8-12-12-12 stitches, knit 62-70-78-82-94-106 and decrease 10-12-12-16-18-20 stitches evenly over these stitches, work A.1 as before over the last 8-8-8-12-12-12 stitches = 68-74-82-90-100-110 stitches. Change to needles size 5 MM = US 8. Continue with stockinette stitch and A.1 on each side as before. REMEMBER THE KNITTING GAUGE! When the piece measures 21-22-23-24-25-26 cm = 8¼"-8¾"-9"-9½"-9¾"-10¼", and next row should be worked from the wrong side, work 2 RIDGES – read description above, over the outermost 5-5-5-9-9-9 stitches on each side (the other stitches are worked as before). After the 2 ridges, bind off 3-3-3-7-7-7 stitches at the beginning of the next 2 rows for the armholes = 62-68-76-76-86-96 stitches. Work the next row as follows from the wrong side: 2 stitches in garter stitch, purl 2, 1 stitch in garter stitch, purl until there are 5 stitches left, 1 stitch in garter stitch, purl 2 and 2 stitches in garter stitch. Work the next row as follows, from the right side: A.2, decrease 1 stitch at the beginning of the row – read DECREASE TIP, knit until there are 8 stitches left, decrease 1 stitch at the end of the row – read DECREASE TIP, work A.3. Continue this pattern back and forth, decreasing in the same way for the armholes every 2nd row (each row from the right side) a total of 11-11-12-15-13-11 times. Then decrease 2 stitches on each side every 2nd row 3-4-5-3-6-9 times – read DECREASE TIP = 28-30-32-34-36-38 stitches. The piece measures approx. 35-37-39-41-43-45 cm = 13¾"-14½"-15¼"-16⅛"-17"-17¾" from the cast-on edge. Leave the stitches on the needle and work an I-cord edge along the neck. I-CORD EDGE: Cast on 3 stitches with 1 double pointed needle size 3.5 MM = US 4 and DROPS Paris. Purl these 3 stitches from the wrong side. Turn, * knit the first 2 stitches, then knit twisted together the last stitch and the first stitch on the back piece (from the right side), move the worked stitches back onto the left needle *, work from *-* until all the stitches from the back piece are bind off and you have 3 stitches left on the right needle. Bind off with purl from the wrong side. FRONT PIECE: Cast on and work in the same way as the back piece. Keep the stitches on the needle and work the straps and an I-cord edge along the neck. SHOULDER STRAPS AND I-CORD EDGE: Cast on 4 stitches with 1 double pointed needle size 3.5 MM = US 4 and DROPS Paris. Work tube-knitting as follows: * Push the stitches back to the beginning of the needle, tighten the strand and knit the 4 stitches again from the right side *, work from *-* until the strap measures 7 cm = 2¾" (the strap should reach over the shoulder to the back piece; try the top on and work to desired length). Knit together the last 2 stitches = 3 stitches. Push the stitches back to the beginning of the needle, tighten but do not cut the strand. Work an i I-cord edge along the neck as follows: * Knit the first 2 stitches from the strap, knit twisted together the last stitch and the first stitch on the front piece, move the worked stitches back onto the left needle *, work from *-* until all the stitches from the front piece are bind off and you have 3 stitches left on the right needle, cast on 1 stitch at the end of the row = 4 stitches. Work tube-knitting over these stitches until the second strap matches the first in length. Cut the strand and pull it through the stitches, tighten and fasten well. ASSEMBLY: Sew the side seams in the outermost loop of the outermost stitch so the seam is flat. Sew the straps to the back piece, outermost on each side. |
|||||||
Diagram explanations |
|||||||
|
|||||||
 |
|||||||
 |
|||||||
Have you finished this pattern?Tag your pictures with #dropspattern #missgardener or submit them to the #dropsfan gallery. Do you need help with this pattern?You'll find 19 tutorial videos, a Comments/Questions area and more by visiting the pattern on garnstudio.com. © 1982-2026 DROPS Design A/S. We reserve all rights. This document, including all its sub-sections, has copyrights. Read more about what you can do with our patterns at the bottom of each pattern on our site. |
|||||||


With over 40 years in knitting and crochet design, DROPS Design offers one of the most extensive collections of free patterns on the internet - translated to 17 languages. As of today we count 325 catalogs and 12298 patterns - 12288 of which are translated into English (US/in).
We work hard to bring you the best knitting and crochet have to offer, inspiration and advice as well as great quality yarns at incredible prices! Would you like to use our patterns for other than personal use? You can read what you are allowed to do in the Copyright text at the bottom of all our patterns. Happy crafting!
Post a comment to pattern DROPS 241-8
We would love to hear what you have to say about this pattern!
If you want to leave a question, please make sure you select the correct category in the form below, to speed up the answering process. Required fields are marked *.