
Popular categories
Looking for a yarn?


Comments / Questions (9)
![]() Jeanette wrote:
Jeanette wrote:
Hi. I love this cardigan. However, I am completely confused when calculating the increases and on what row to increase. Can you please advise me on what row to increase and by how many I really want to complete it. I am knitting the second size starting with 104 stitches. Thank you.
10.08.2025 - 21:34DROPS Design answered:
Dear Jeanette, you first work rib K2, P2 with 5 front band sts on each side. After 4 cm you will increase the rib into K2, P3 with still 5 front band sts in each side increasing 1 stitch at the beg of every P2 section, so that you will get 127 sts in total and work rib K2, P3 with 5 front band sts. Then you increase again in the P section but this time at the end of every P section from P3 to P4, so that you get 150 sts and rib K2, P4 with 5 front band sts on each side. Happy knitting!
11.08.2025 - 08:26
![]() Rita wrote:
Rita wrote:
Non riesco a capire le misure che compaiono sul modello in fondo alle spiegazioni. A cosa sono riferiti ? Grazie
13.12.2023 - 09:40DROPS Design answered:
Buongiorno Rita, le misure dello schema in fondo alla pagina si riferiscono alle misure finali del modello dopo il bloccaggio. Buon lavoro!
19.12.2023 - 08:52
![]() Ilonka wrote:
Ilonka wrote:
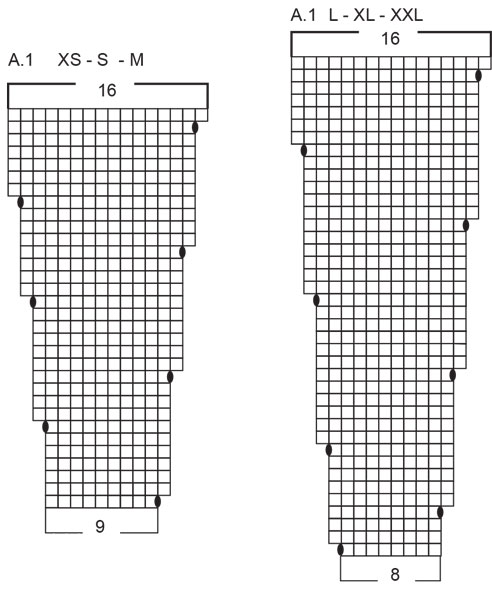
Mijn vraag betreft het A1 diagram. In het patroon staat dat alle meerderingen aan de goede kant gemaakt worden. Maar de 2e keer meerderen is volgens mij in een averechte toer, klopt dat? En klopt het dat je ook een meerdering maakt aan het eind, dus na de laatste steek die voor de voorbies zit? Alvast bedankt.
31.10.2023 - 16:50DROPS Design answered:
Dag Ilonka,
De minderingen hoeven niet perse aan de goede kant gemaakt te worden. Maar bij het telpatroon staat het inderdaad niet goed aangegeven. Als je een meerdering op de verkeerde kant maakt, kun je deze aan de goede kant gedraaid recht breien (i.p.v. gedraaid averecht).
01.11.2023 - 19:30
![]() Line Villeneuve wrote:
Line Villeneuve wrote:
Pour lire le diagramme des augmentations, à la fin d'un rang pair, on met une augmentation à la fin du rang. Que dois-je comprendre quand je fais des augmentations tout le rang? Dois-je les faire sur l'envers, soit le rang suivant?
29.03.2023 - 00:11DROPS Design answered:
Bonjour Mme Villeneuve, pour augmenter, faites le jeté comme indiqué dans le diagramme: soit au début soit à la fin de chaque A.1. Les augmentations se font toujours sur l'endroit (sur l'envers, tricotez les jetés torse à l'envers pour éviter un trou). Bon tricot!
29.03.2023 - 10:13
![]() Line Villeneuve wrote:
Line Villeneuve wrote:
Modèle 228-28. Je fais l'empiècement et je ne comprends pas le diagramme A-1 parce que je suis à 163 mailles et quand j'aurai fini l'empiècement, j aurai 282 mailles. (17 motifs de 9 mailles) Comment arriver à ce nombre? Sur le diagramme, je dois faire 7 séquences de 9 mailles. (7x9=63) 63 mailles + 163 = 226 et je dois arriver à 282?? Merci de votre collaboration!!
28.03.2023 - 20:51DROPS Design answered:
Bonjour Mme Villeneuve, en taille M vous commencez par 163 m et tricotez: 5 m point mousse, 17x les 9 m de A.1 (=153m) et 5 m point mousse. Vous augmentez en faisant 1 jeté comme le montre le diagramme = vous avez 16 m dans chaque A.1 quand le diagramme est terminé, soit: 5 m + 17x16 = 272 + 5 m = 282 mailles. Bon tricot!
29.03.2023 - 09:58
![]() Line Villeneuve wrote:
Line Villeneuve wrote:
Je tricote le modèle drops 228-28. Après avoir monté les mailles on me dit de tricoter un rang envers sur l'envers qu'est-ce que ça veut dire? Après avoir monté les mailles, je suis sur l'endroit et non envers...
22.03.2023 - 18:11DROPS Design answered:
Bonjour Mme Villeneuve, pour ce modèle, on veut que le 1er rang après le montage soit sur l'envers de l'ouvrage pour que avoir le côté avec les petits fils (méthode continental) soit l'endroit, on doit donc tricoter d'abord 1 rang sur l'envers, et le rang suivant se fera alors sur l'endroit. Bon tricot!
23.03.2023 - 09:43
![]() Danielle Guill wrote:
Danielle Guill wrote:
In the Neck Edge instructions it says "Work until rib measures 4 cm = 1 1/2". Decrease for BUTTONHOLES on right band - read explanation above." In those instructions it says "Decrease first buttonhole when piece measures approx. 1 cm = 3/8". Can I get clarification on which measurement will be the correct placement (1 1/2" or 3/8") of the first buttonhole? I want to be sure that the rest of my buttonholes align correctly.
24.09.2022 - 21:28DROPS Design answered:
Dear Danielle, work the first buttonhole when the garment measures 4 cm. Happy knitting!
25.09.2022 - 20:19
![]() Ruth Couldridge wrote:
Ruth Couldridge wrote:
Do I use the diagram from the top down or bottom up
31.07.2022 - 15:11DROPS Design answered:
Dear Ruth, we read the diagrams from bottom up and right to left. You can find a lesson on how to read a knitting diagram here. Happy Knitting!
31.07.2022 - 15:53
![]() Regine Karg wrote:
Regine Karg wrote:
Guten Abend, ich verstehe in der Anleitung nicht welche Wolle ich nehmen kann. Was heißt hier wieder das A+A? Nehme ich hier zwei Farben, die ich dann zusammenstricke? Dunkel plush und hell perlgrau? Also für Größe M 350g je Farbe? Nehme ich dagegen die Garngruppe C benötige ich nur insgesamt 350g? Vielen Dank Regine Karg
21.03.2022 - 19:23DROPS Design answered:
Liebe Frau Karg, dieses Modell wird mit 2 Fäden der Garngruppe A (= Alpaca) gestrickt, dh doppelfädig. Hier brauchen Sie in M je 350 g = 7 Knäuel Alpaca in jede der beiden Farben (insgesamt 700 g Alpaca). Dann stricken Sie mit 2 Fäden. Am besten benutzen Sie den Garnumrechner, so können Sie je nach dem gewüsnschten Garn der Garngruppe C kalkulieren lassen, wieviel Sie dann brauchen. Viel Spaß beim stricken!
22.03.2022 - 10:11
|
|||||||
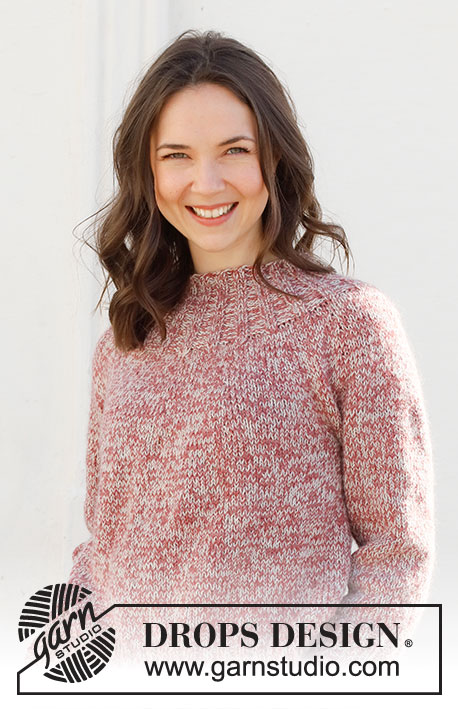
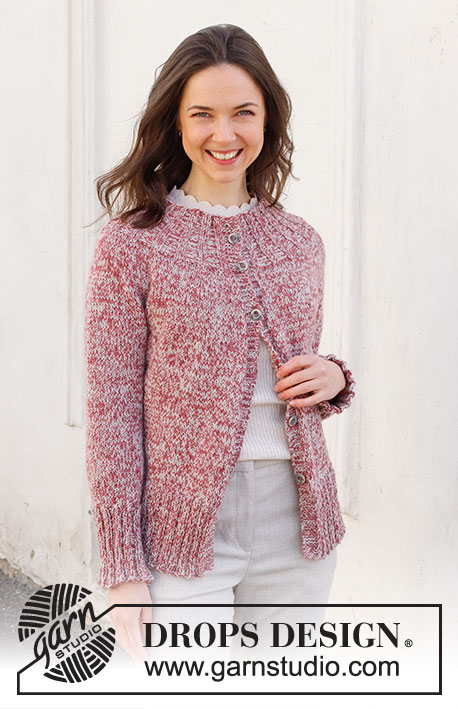
Frosted Cranberries#frostedcranberriesjacket |
|||||||
 |
 |
||||||
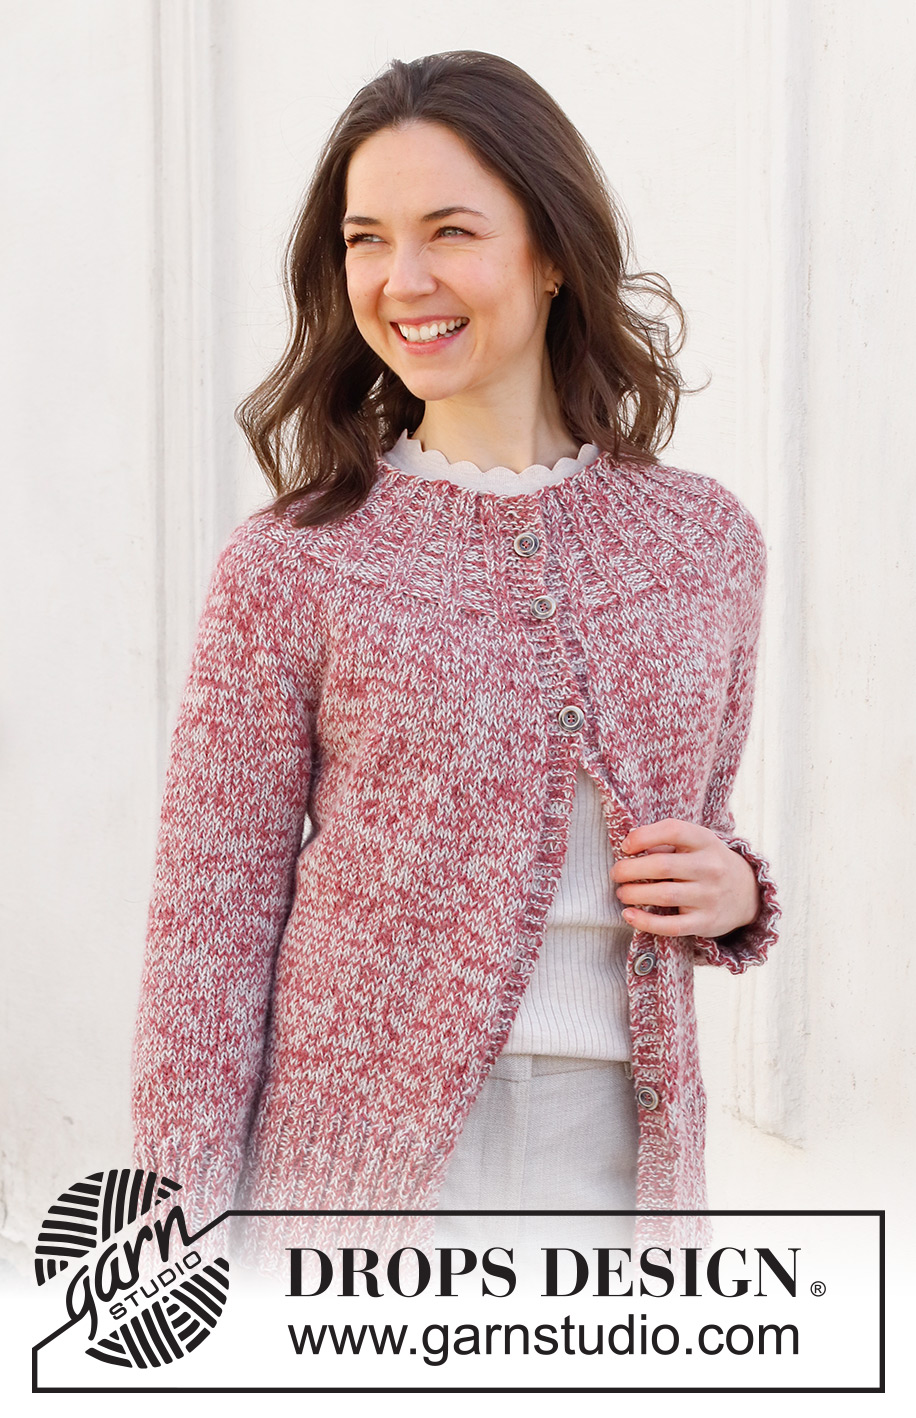
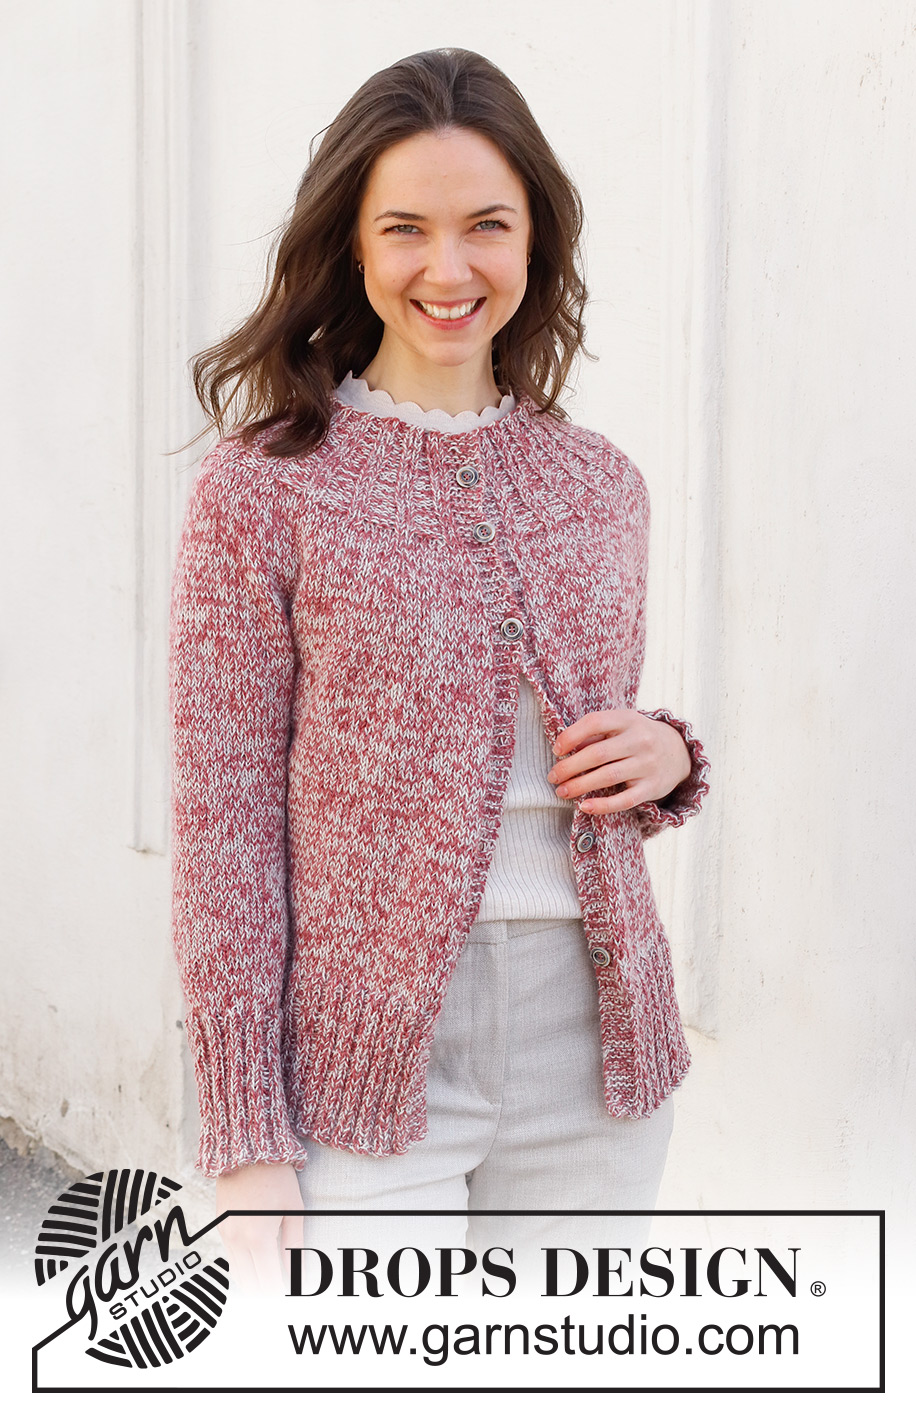
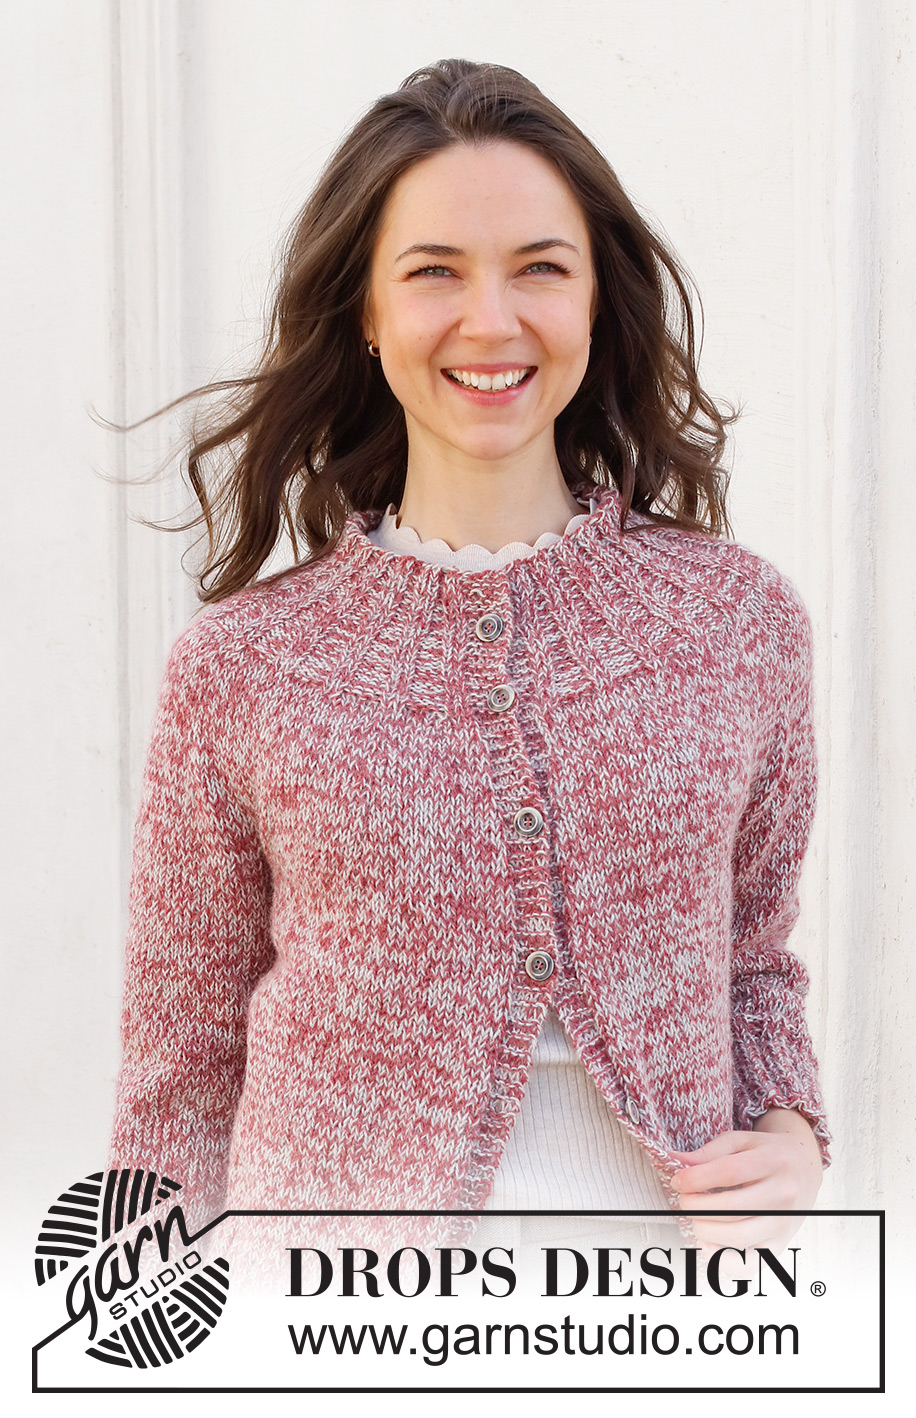
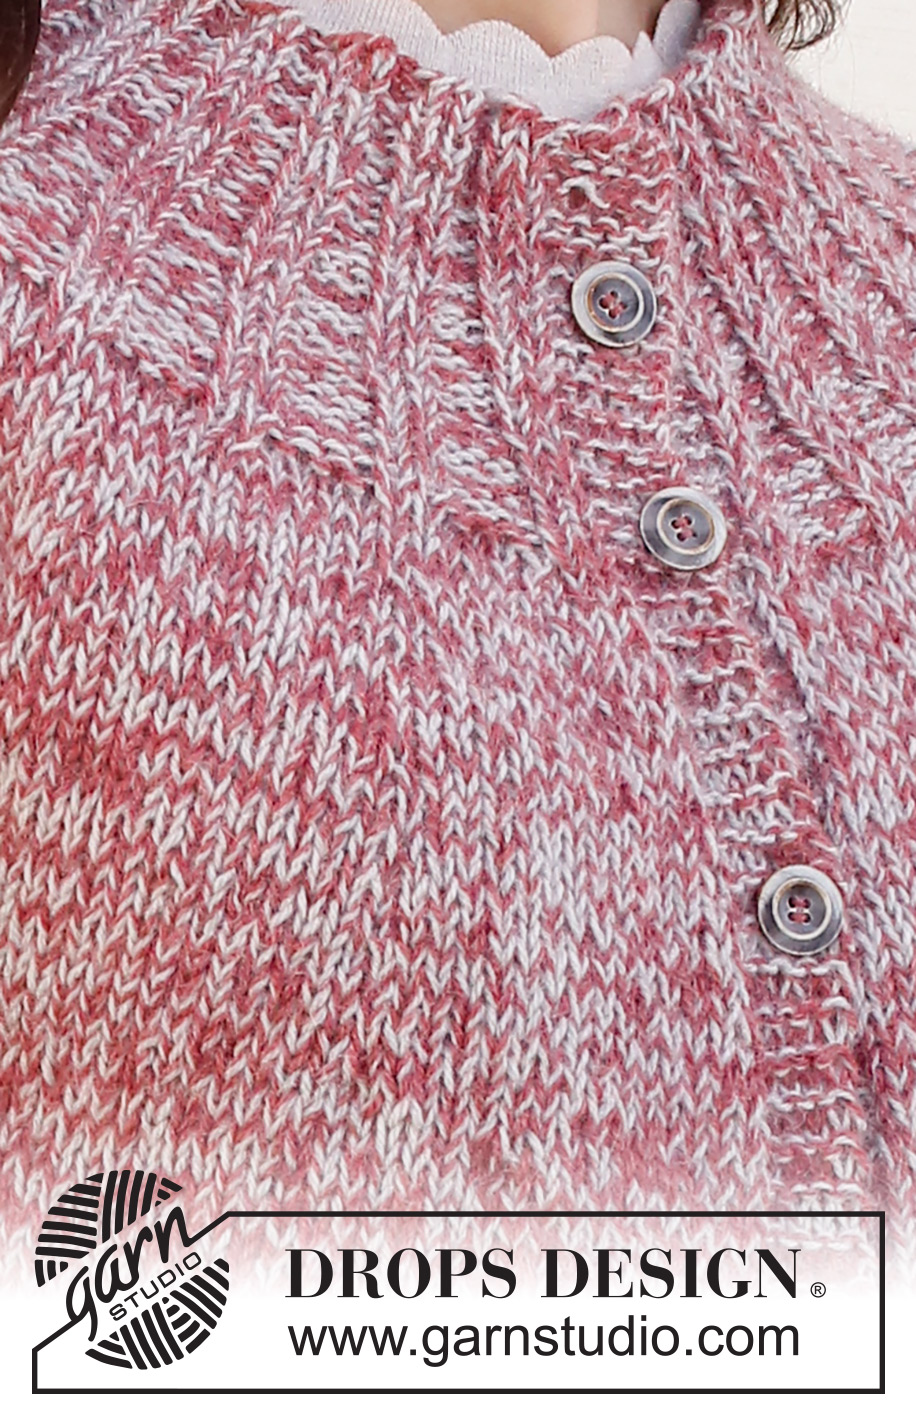
Knitted jacket in 2 strands DROPS Alpaca. Piece is knitted top down with round yoke. Size XS – XXL.
DROPS 228-28 |
|||||||
|
---------------------------------------------------------- EXPLANATION FOR THE PATTERN: ---------------------------------------------------------- RIDGE/GARTER STITCH (worked back and forth): Knit all rows. 1 ridge = knit 2 rows. INCREASE TIP (evenly): To calculate how to increase, use the total number of stitches on row (e.g. 132 stitches), minus bands (e.g. 10 stitches) and divide the remaining stitches by number of increases to be done (e.g. 4) = 30.5. In this example increase by making 1 yarn over after alternately every 30th and 31st stitch (do not increase over bands). On next row work yarn overs twisted to avoid holes. BUTTONHOLES: Decrease for buttonholes on right band (when garment is worn). Decrease from right side when 3 stitches remain on row as follows: Make 1 yarn over, knit the next 2 stitches together, knit last stitch. On next row knit yarn over to make holes. Decrease first buttonhole when piece measures approx. 1 cm = ⅜". Then decrease the next 5-5-5-6-6-6 approx. 9½-9½-10-9-9-9 cm = 3⅝"-3⅝"-4"-3½"-3½"-3½" between each buttonhole. PATTERN: See diagram A.1. Work the entire pattern in stockinette stitch. Choose diagram for your size. DECREASE TIP (applies to sleeves): Decrease 1 stitch on each side of marker thread as follows: Work until 3 stitches remain before marker thread and knit 2 together, knit 2 (marker thread is between these 2 stitches), slip 1 stitch knitwise, knit 1, pass slipped stitch over stitch worked. BIND-OFF TIP: To avoid a tight bind-off edge when binding off, you may use a larger needle. If this still is too tight make 1 yarn over after approx. every 4th stitch while binding off (bind off yarn overs as stitches). ---------------------------------------------------------- START THE PIECE HERE: ---------------------------------------------------------- JACKET - SHORT OVERVIEW OF THE PIECE: Work neck edge and yoke back and forth on circular needle from mid front, work top down. Now divide yoke for body and sleeves. Work body back and forth on circular needle, top down. Work sleeves in the round on double pointed needles/a short circular needle, top down. NECK EDGE: Cast on 92-104-112-112-116-120 stitches (including 5 band stitches in each side towards mid front) on circular needle size 4 MM = US 6 with a strand of each color in DROPS Alpaca (= 2 strands). Purl 1 row from wrong side. Work next row as follows from right side: 5 band stitches in garter stitch, * knit 2, purl 2 *, repeat from *-* until 7 stitches remain, knit 2 and 5 band stitches in garter stitch. Work until rib measures 4 cm = 1½". Decrease for BUTTONHOLES on right band - read explanation above. Insert 1 marker at beginning of row mid front, measure yoke from this marker! Continue with rib. On next row from right side increase 1 stitch in all purl sections, increase by making a yarn over at the beginning of all purl sections = 112-127-137-137-142-147 stitches. On next row (= wrong side) knit yarn overs twisted, work the remaining stitches as before. Continue with rib = knit 2/purl 3. When piece measures 3 cm = 1⅛" from marker, and next row is from right side, increase 1 stitch in all purl sections, increase by making a yarn over at the end of all purl sections = 132-150-162-162-168-174 stitches. On next row (= wrong side) knit yarn overs twisted, work the remaining stitches as before. Continue with rib = knit 2/purl 4. Work until piece measures 5-5-5-6-6-6 cm = 2"-2"-2"-2⅜"-2⅜"-2⅜" from marker at the front. Rib measures 9-9-9-10-10-10 cm = 3½"-3½"-3½"-4"-4"-4" from cast-on edge. YOKE: Switch to circular needle size 5 MM = US 8. Knit 1 row from right side while increasing 4-4-1-0-2-4 stitches evenly - read INCREASE TIP = 136-154-163-162-170-178 stitches. Purl 1 row (continue bands in garter stitch). Now work as follows from the right side: 5 band stitches in garter stitch, A.1 over the next 126-144-153-152-160-168 stitches (= 14-16-17-19-20-21 repetitions of 9-9-9-8-8-8 stitches), finish with 5 band stitches in garter stitch. NOTE: Choose diagram for your size! REMEMBER THE KNITTING GAUGE! When A.1 has been worked vertically, there are 234-266-282-314-330-346 stitches on needle. Knit 1 row from right side while increasing 8-4-0-0-4-8 stitches evenly = 242-270-282-314-334-354 stitches. Continue with stockinette stitch and in garter stitch over bands until piece measures approx. 20-22-23-25-27-29 cm = 8"-8¾"-9"-9¾"-10⅝"-11⅜" from marker. Now divide yoke for body and sleeves as follows: Work 39-44-45-49-54-58 stitches (= front piece), slip the next 48-52-56-64-64-66 stitches on a thread for sleeve, cast on 6-6-8-8-10-12 new stitches on row (= in the side under sleeve), work 68-78-80-88-98-106 stitches (= back piece), slip the next 48-52-56-64-64-66 stitches on a thread for sleeve, cast on 6-6-8-8-10-12 new stitches on row (= in the side under sleeve) and work the remaining 39-44-45-49-54-58 stitches (= front piece). Finish body and sleeves separately. NOW MEASURE THE PIECE FROM HERE! BODY: = 158-178-186-202-226-246 stitches. Continue with one strand of each color, stockinette stitch and 5 band stitches in garter stitch in each side towards mid front. Work until piece measures 23 cm = 9" in all sizes. 12 cm = 4¾" remain until finished measurements. Try the jacket and work to desired length. Now increase stitches to stop the rib from contracting. Knit 1 row from right side while increasing 34-34-38-42-46-50 stitches evenly - remember INCREASE TIP = 192-212-224-244-272-296 stitches. Switch to circular needle size 4 MM = US 6 and work next row – from wrong side as follows: 5 band stitches in garter stitch, * purl 2, knit 2 *, repeat from *-* until 7 stitches remain, purl 2 and 5 band stitches in garter stitch. Work rib like this for 12 cm = 4¾". Bind off loosely with knit over knit and purl over purl - read BIND-OFF TIP. Jacket measures 58-60-62-64-66-68 cm = 22¾"-23⅝"-24⅜"-25¼"-26"-26¾" from shoulder and down. SLEEVE: Slip the 48-52-56-64-64-66 stitches from thread in one side of piece on double pointed needles or a short circular needle size 5 MM = US 8 and pick up 1 stitch in each of the 6-6-8-8-10-12 new stitches cast on under sleeve = 54-58-64-72-74-78 stitches. Insert 1 marker thread mid under sleeve, i.e. in the middle of the 6-6-8-8-10-12 stitches that were cast on under sleeves. Move the marker thread upwards when working; it should be used for decrease mid under sleeve. Begin round at the marker thread and work in stockinette stitch with a strand of each yarn in the round (= 2 strands). When sleeve measures 3 cm = 1⅛" from division, decrease 2 stitches mid under sleeve - read DECREASE TIP. Decrease like this every 8-5-3-2½-2-2 cm = 3⅛"-2"-1⅛"-1"-¾"-¾" 4-5-7-10-10-11 times in total = 46-48-50-52-54-56 stitches. Continue without decreases until sleeve measures 30-28-28-27-26-24 cm = 11¾"-11"-11"-10⅝"-10¼"-9½" from division (shorter measurements in the larger sizes because of wider neck and longer yoke). 12 cm = 4¾" remain until finished measurements. Try the jacket and work to desired length. Knit 1 round while increasing 6-4-6-4-6-4 stitches evenly = 52-52-56-56-60-60 stitches. Switch to double pointed needles size 4 MM = US 6. Work rib in the round = knit 2/purl 2 for 12 cm = 4¾". Bind off with knit over knit and purl over purl - remember BIND-OFF TIP. Sleeve measures approx. 42-40-40-39-38-36 cm = 16½"-15¾"-15¾"-15¼"-15"-14¼" from division. Work the other sleeve the same way. ASSEMBLY: Sew the buttons on to the left band. |
|||||||
Diagram explanations |
|||||||
|
|||||||
 |
|||||||
 |
|||||||
Have you finished this pattern?Tag your pictures with #dropspattern #frostedcranberriesjacket or submit them to the #dropsfan gallery. Do you need help with this pattern?You'll find 28 tutorial videos, a Comments/Questions area and more by visiting the pattern on garnstudio.com. © 1982-2026 DROPS Design A/S. We reserve all rights. This document, including all its sub-sections, has copyrights. Read more about what you can do with our patterns at the bottom of each pattern on our site. |
|||||||


With over 40 years in knitting and crochet design, DROPS Design offers one of the most extensive collections of free patterns on the internet - translated to 17 languages. As of today we count 324 catalogs and 12272 patterns - 12262 of which are translated into English (US/in).
We work hard to bring you the best knitting and crochet have to offer, inspiration and advice as well as great quality yarns at incredible prices! Would you like to use our patterns for other than personal use? You can read what you are allowed to do in the Copyright text at the bottom of all our patterns. Happy crafting!
Post a comment to pattern DROPS 228-28
We would love to hear what you have to say about this pattern!
If you want to leave a question, please make sure you select the correct category in the form below, to speed up the answering process. Required fields are marked *.