Comments / Questions (37)
![]() Alejandra Vera wrote:
Alejandra Vera wrote:
Hola! Por favor, qué es una hilera corta? Qué significa "estirar el hilo"? Gracias 😘
20.01.2020 - 21:42DROPS Design answered:
Ver la respuesta arriba
26.01.2020 - 23:07
![]() Maj-Britt Vollesen wrote:
Maj-Britt Vollesen wrote:
Er igang med hø forstykke. Kan slet ikke få ind og udtagninger ifm forkanten til at passe . Det drejer sig kun om midten - ikke ærmesiden vel ???
12.07.2019 - 00:00DROPS Design answered:
Hej Maj-Britt, du laver et omslag inden sidste maske mod midt foran og tager en maske ind indenfor kantmaskerne i retstrik. Ja det er kun forkantmaskerne du tager ind og ud. God fornøjelse!
30.09.2019 - 08:33
![]() Rita Harder wrote:
Rita Harder wrote:
1e deel van reactie. Ging even mis met posten. Hoe gaat het dan met het aantal te minderen steken aan de binnenkant van de voorbies? Ik citeer:” Brei tot een hoogte van 36-46 cm, meerder 1 st in de voorbies,,,. Meerder zo om de nld ... 8 keer in totaal..., minder TEGELIJKERTIJD st in tricost naast de voorbies st...” ik vat dit op als tegelijkertijd 8 st meerderen en 8 st minderen. Dus het blijven 44 st. Dan 22 voor de mouw erbij = 66. En dan zie 2e deel van mijn reactie
04.04.2019 - 13:39DROPS Design answered:
Dag Rita,
Bij MOUW staat beschreven hoe je mindert naast de voorbies en bij het rechter voorpand staat hier een verwijzing voor, er staat dus (bij rechtervoorpand): '... minder tegelijkertijd tricotsteken naast de voorbies en zet nieuwe steken op voor de mouw en kant af voor de split als volgt...' Dat zijn 3 dingen die je tegelijkertijd moet doen zoals beschreven in de paragraaf eronder) en daarnaast dus nog het meerderen voor de voorbies.
06.04.2019 - 21:19
![]() Rita Harder wrote:
Rita Harder wrote:
Verderop: “brei tot een hoogte van 47-52 cm, minder 1 st in tricotst naast de voorbies. Minder zo elke 4e nld 6-7 keer in totaal.” En dat brengt mij op 66-7 steken. Je ziet ook op de tekening dat de voorbies schuin afloopt en er dus aan de binnenkant steken geminderd worden. Ik begrijp het dus nog niet helemaal
04.04.2019 - 13:32DROPS Design answered:
Dag Rita,
Op een gegeven moment kant je steken af voor de revers bij de kraag en in de volgend naald zet je weer steken op, zodat je een revers krijgt (soort van splitje bij de kraag). Vermoedelijk zijn dit de steken die je nog mist in je bereking (...?): ...Brei tot een hoogte van 57-59-61-63-65-67 cm, brei dan als volgt aan de goede kant: kant de eerste 8 st af (= revers), brei de overgebleven st. Keer en brei de teruggaande nld, zet aan het einde van de nld 6 nieuwe st op (= 14 st voor de kraag).
06.04.2019 - 21:28
![]() Rita Harder wrote:
Rita Harder wrote:
Het gaat om het rechtervoorpand. Ik brei maat xl. Zoals ik het lees: Opzetten 44 steken, meerderen voor de bies 8 steken, zelfde aantal minderen naast de voorbies. Dus bij begin mouw nog steeds 44 steken. Dan voor mouw 22 opzetten. Samen 66 steken. 7 keer minderen naast de voorbies = 59 steken. Dan voor de kraag 8 eraf en daarna 6 erbij. Totaal 57 steken. In de beschrijving staat echter dat er aan het eind 66 steken over zijn. Waar zie ik iets over het hoofd?
03.04.2019 - 11:33DROPS Design answered:
Dag Rita,
Je zet 44 steken op en meerdert 8 steken bij de bies en deze kant je later ook weer af bij de kraag = 44 st. Voor de mouw zet je 2 keer 3 st (=6), 1 keer 4 st en 1 keer 12 st op: 44+6+4+12=66 st, daarna minder je nog 1 st. bij de voorbies = 65 st.
04.04.2019 - 08:36
![]() Tekla wrote:
Tekla wrote:
Hi.. At the back piece in size L, we cast on 66 sts then increase for the sleeves by 24 sts. So i have 90 sts i total. but you say at this point i should have 114 sts. Could you please explain where the difference comes from? Thanks in advance.
21.01.2019 - 02:20DROPS Design answered:
Dear Tekla, you have to cast on 24 sts on EACH side for the sleeves and you'll end up with 114 sts. Happy knitting!
21.01.2019 - 06:44
![]() Guillemette wrote:
Guillemette wrote:
Bonjour, Combien faut-il acheter de pelotes de chaque pour une taille M ? Merci de votre réponse.
14.11.2018 - 16:35DROPS Design answered:
Bonjour Guillemette, il vous faut 7 pelotes de DROPS ALPACA BOUCLÉ et 7 pelotes de DROPS BRUSHED ALPACA SILK dans la taille M. Bon tricot!
14.11.2018 - 16:41
![]() Sylvia A. wrote:
Sylvia A. wrote:
Est-ce possible de modifier ce patron pour en faire une veste à manches longues? Car ce modèle est exactement ce que je cherchais sauf pour les manches!
10.11.2018 - 12:27DROPS Design answered:
Bonjour Sylvie, probablement, toutefois, le résultat serait différent. Nous ne sommes pas en mesure de pouvoir ajuster chaque modèle à chaque demande. Pour toute assistance complémentaire, merci de contacter le magasin où vous avez acheté votre laine - par mail ou téléphone - ou de consulter les autres modèles analogues avec manches longues. Bon tricot!
12.11.2018 - 09:15
![]() Mieke wrote:
Mieke wrote:
Die steken opzetten lukt wel maar hoe moet ik dan minderen ?? want anders is de mouw onderaan veel te wijd
12.08.2018 - 18:45DROPS Design answered:
Dag Mieke, In het patroon zitten verder geen minderingen in de mouw naar de manchet (/pols) toe, het blijft een wijde mouw, dus je kunt gewoon extra steken opzetten en verder het patroon volgen. Als je toch meer aanpassingen in het patroon wilt doen, dan zou je eventueel hulp kunnen vragen bij de winkel waar je het garen hebt gekocht. Het is voor ons helaas niet mogelijk om persoonlijke aanpassingen op het patroon te doen.
14.08.2018 - 10:26
![]() Mieke wrote:
Mieke wrote:
Hallo, Graag zou ik dit vest met lange mouwen willen breien. Enig idee hoe ik dit zou moeten doen?
11.08.2018 - 21:44DROPS Design answered:
Dag Mieke, Dit zou je kunnen doen door de laatste keer dat je steken opzet voor de mouwen bij de panden, extra steken op te zetten. Dus de keer dat je 1 keer 16-16-14-12-10-9 steken opzet, zet je meer steken op. Aan de hand van de stekenverhouding en de tekening met de maten onderaan het patroon, kun je voor jezelf uitrekenen hoeveel steken extra je op moet zetten.
12.08.2018 - 17:32
Clarice#claricecardigan |
|
|
|
|
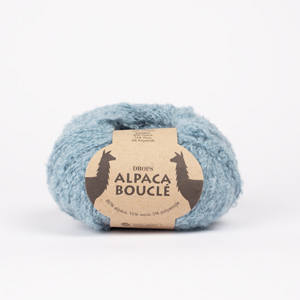
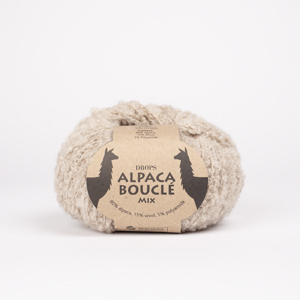
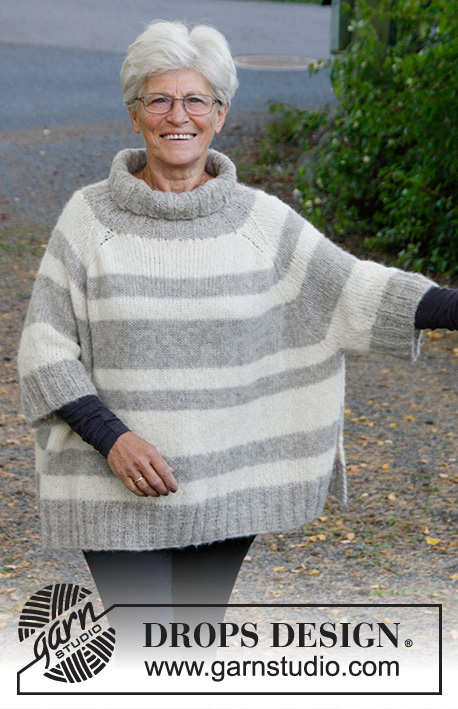
Knitted DROPS jacket with pockets and collar in "Alpaca Bouclé" and "Brushed Alpaca Silk". Size S-XXXL.
DROPS 173-30 |
|
|
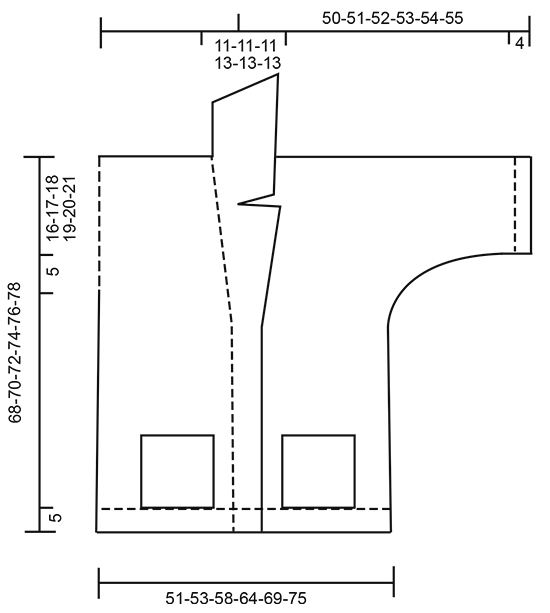
GARTER ST (back and forth): K all rows. 1 ridge = K2 rows. SHORT ROWS: Work short rows over sts in band to avoid it contracting vertically. Work as follows from RS on every 10th row: K over all sts in band, turn, tighten yarn and K back, turn and work over all sts as before. NOTE! When working short ros on left band start from WS. DECREASE TIP: All dec are done from RS! Dec as follows on right front piece (i.e. after band sts): Slip 1 st as if to K, K 1, psso Dec as follows on left front piece (i.e. before band sts): Work until 2 sts remain before band, K 2 tog. INCREASE TIP: All inc are done from RS. Inc 1 st on right band as follows: Work until 1 st remains in band, 1 YO, work last sts in band. Inc 1 st on left band as follows: Work 1 st, 1 YO, work the remaining sts in band. On next row K YO twisted to avoid holes. BUTTONHOLES: Dec for buttonholes on right band. 1 buttonhole = K tog third and fourth st from edge and make 1 YO. Dec for buttonholes when piece measures: SIZE S: 28 and 36 cm SIZE M: 30 and 38 cm SIZE L: 32 and 40 cm SIZE XL: 34 and 42 cm SIZE XXL: 36 and 44 cm SIZE XXXL: 38 and 46 cm ---------------------------------------------------------- JACKET: Piece is worked back and forth in parts and sewn tog when finished. BACK PIECE: Cast on 58-60-66-72-78-84 sts (includes 1 edge st in each side) on circular needle size 8 mm / US 11 with 1 strand Alpaca Bouclé and 1 strand Brushed Alpaca Silk (= 2 strands). Work in GARTER ST - see explanation above - for 5 cm / 2". On next row from RS work in stockinette st with 1 edge st in garter st in each side. REMEMBER THE KNITTING GAUGE When piece measures 47-48-49-50-51-52 cm / 18½"-19"-19¼"-19¾"-20"-20½", cast on new sts at the end of every row for sleeves as follows: 3 sts 2 times, 4 sts 1 time and 16-16-14-12-10-9 st 1 time (= 26-26-24-22-20-19 sts inc for sleeve in each side) = 110-112-114-116-118-122 sts. Now continue in stockinette st with 4 sts in garter st in each side (= sleeve edge). When piece measures 66-68-70-72-74-76 cm / 26"-26¾"-27½"-28⅜"-29⅛"-30", bind off the middle 10-10-10-12-12-12 sts for neck and finish each shoulder separately. Continue to bind off 1 st on next row from neck = 49-50-51-51-52-54 sts. When piece measures 68-70-72-74-76-78 cm / 26¾"-27½"-28⅜"-29⅛"-30"-30¾", work on next row from RS 1 ridge over all sts. Bind off with K. Work the other shoulder the same way. RIGHT FRONT PIECE: Cast on 37-38-41-44-47-50 sts (includes 1 edge st in the side) on circular needle size 8 mm / US 11 with 1 strand Alpaca Bouclé and 1 strand Brushed Alpaca Silk (= 2 strands). Work in garter st - see explanation above - for 5 cm / 2". On next row from RS work as follows: Work 8 band sts in garter st, stockinette st until 1 sts remain, 1 edge sts in garter st. Work SHORT ROWS - see explanation above - over all sts in band. REMEMBER BUTTONHOLES! When piece measures 36-38-40-42-44-46 cm / 14¼"-15"-15¾"-16½"-17¼"-18", inc 1 st in band – see INCREASE TIP. Inc like this every other row (i.e. every row from RS) 8 times in total (= 16 sts in band), AT THE SAME TIME dec sts in stockinette st inside band st, cast on new sts for sleeve and bind off sts for vent in collar as follows: READ ALL OF THE FOLLOWING SECTION BEFORE CONTINUING! SLEEVE: When piece measures 47-48-49-50-51-52 cm / 18½"-19"-19¼"-19¾"-20"-20½", cast on new sts for sleeve at the end of every row from RS as follows: 3 sts 2 times, 4 sts 1 time and 16-16-14-12-10-9 sts 1 time (= 26-26-24-22-20-19 sts inc for sleeve). Work the new sts in stockinette st with 4 sts in garter st at the edge (= sleeve edge). DECREASE TIP INSIDE BAND: When piece measures 47-48-49-50-51-52 cm / 18½"-19"-19¼"-19¾"-20"-20½", dec 1 st in stockinette st inside band sts – see DECREASE TIP. Dec like this every 4th row (i.e. every other row from RS) 6-6-6-7-7-7 times in total. COLLAR: When piece measures 57-59-61-63-65-67 cm / 22½"-23¼"-24"-24¾"-25½"-26⅜", work as follows from RS: bind off the first 8 sts (= lapel), work the remaining sts. Turn and work back, at the end of row cast on 6 new sts (= 14 sts for collar). When all inc and dec are done, there are 63-64-65-65-66-68 sts on needle. Continue to work until piece measures 68-70-72-74-76-78 cm / 26¾"-27½"-28⅜"-29⅛"-30"-30¾". Then work 1 ridge in garter st over all sts. On next row from RS work as follows: Work the first 14 sts, bind off the remaining 49-50-51-51-52-54 sts for shoulder/sleeve. Cut the yarn. Now work collar as follows: Beg from WS and work over all 14 sts, * turn and work 8 sts back, turn and work back, turn, work over all sts, turn and work over all sts *, repeat from *-* until collar measures 8-8-8-9-9-9 cm / 3"-3"-3"-3½"-3½"-3½" on the shortest side. Bind off. LEFT FRONT PIECE: Cast on and work as right front piece. NOTE: Do not dec for buttonholes on left band. Cast on new sts for sleeve at the end of row from WS. When binding off sts for vent in collar, work as follows from WS: bind off the first 8 sts (= lapel), work the remaining sts. Turn and work back, at the end of row cast on 6 new sts (= 14 sts for collar). When piece measures 68-70-72-74-76-78 cm / 26¾"-27½"-28⅜"-29⅛"-30"-30¾", work 1 ridge over all sts. Then work as follows from RS: bind off the first 49-50-51-51-52-54 sts, then work the remaining 14 sts in band. Turn and work short rows over band as follows: Beg from WS and work back over all 14 sts, turn and work over all sts, * turn and work 8 sts back, turn and work back, turn, work over all sts, turn and work over all sts *, repeat from *-* until collar measures 8-8-8-9-9-9 cm / 3"-3"-3"-3½"-3½"-3½" on the shortest side. Bind off. ASSEMBLY: Sew the shoulder seams tog. Sew the collar tog mid back and sew it to neck edge. Sew underarm and side seams in one inside 1 edge st in garter st. Fasten off. POCKETS: Worked back and forth on needle. LOOSELY cast on 20 sts on circular needle size 8 mm / US 11 with 1 strand of each yarn (= 2 strands). Then work in garter st. When piece measures 20 cm / 8", bind off. Place pocket on front piece so that there are 3 sts in stockinette st between pocket and band, and bottom of pocket goes all the way down to edge in garter st at the bottom of body. Sew pocket with 1 strand of each quality in one and one st so that pocket is flat on front piece. Repeat on the other front piece. Fasten off. |
|
 |
|
Have you finished this pattern?Tag your pictures with #dropspattern #claricecardigan or submit them to the #dropsfan gallery. Do you need help with this pattern?You'll find 20 tutorial videos, a Comments/Questions area and more by visiting the pattern on garnstudio.com. © 1982-2026 DROPS Design A/S. We reserve all rights. This document, including all its sub-sections, has copyrights. Read more about what you can do with our patterns at the bottom of each pattern on our site. |


Post a comment to pattern DROPS 173-30
We would love to hear what you have to say about this pattern!
If you want to leave a question, please make sure you select the correct category in the form below, to speed up the answering process. Required fields are marked *.