
Popular categories
Looking for a yarn?


Comments / Questions (43)
![]() GRAVELINES Hélène wrote:
GRAVELINES Hélène wrote:
Bonjour, J'ai voulu commencer ce pull qui me plaît particulièrement, mais je ne trouve pas le diagramme A1 dans les explications, comme j'avais pu trouver les diagrammes du poncho Isla lorsque je l'ai fait l'année dernière. Pouvez-vous me dire où il se trouve ? Merci d'avance.
22.07.2015 - 13:51Gravelines answered:
Oups ! C'est bon, je l'ai vu ! Il est tellement petit... Je n'avais pas mis mes lunettes.
22.07.2015 - 14:29
![]() Melinda Fülöp wrote:
Melinda Fülöp wrote:
Har en fråga ang mönstret som man ska sticka. Det står att man ska sticka 2 m räta tillsammans, 1 omslag mellan 2 m. När ska man göra omslaget? Ska man sticka tillsammans och göra omslag och sen tillsammans igen? Eller sticka tillsammans, 1 m, omslag och 1 m igen? Har stickat tillsammans, omslag, och sen 2 vanliga m. Tack på förhand! Melinda Fülöp
18.06.2015 - 08:17DROPS Design answered:
Hej. Du ska sticka 2 m räta tillsammans och sedan omslag. Detta upprepas hela det varvet, dvs 2 rm tills, omslag, 2 rm tills, omslag osv.. Lycka till!
18.06.2015 - 11:14
![]() Andrea Stellke wrote:
Andrea Stellke wrote:
Der Rumpfteil wird ab dem Marker der neuen Maschen unter dem Ärmel gemessen, beginne ich auch dort das Rumpfteil zu stricken? Oder stricke ich bis zum Marker und folge dann der Anleitung? Gruss
12.04.2015 - 21:51DROPS Design answered:
Der Rumpf wird ja einfach nur glatt re gestrickt, daher ist es egal, wo Sie die Rd beginnen. Wenn Sie den Faden nicht abschneiden, bleibt der Rd-Beginn an der hinteren Mitte, Sie können also einfach weiterstricken und an den beiden markierten Seiten wie beschrieben ab- und zunehmen. Wenn Sie den Rd-Beginn lieber an der Seite haben, können Sie den Faden neu ansetzen und an der Seite beginnen.
13.04.2015 - 09:19
![]() Sara wrote:
Sara wrote:
Es fehlt nicht! Es ist unter dem Ärmel von dem Diagram ganz unten.
03.04.2015 - 18:55
![]() Rebekka wrote:
Rebekka wrote:
Hier fehlt das Diagramm A.1 Bitte ergänzen. Vielen Dank
03.04.2015 - 13:36DROPS Design answered:
Antwort siehe oben! :-) Das Diagramm ist sehr klein und neben der Maßskizze zu finden. :-)
03.04.2015 - 20:34Tineke wrote:
Goedemorgen, Ik kan mij vergissen, maar dit is volgens mij dezelfde als 161-11 Groetjes, Tineke
07.03.2015 - 08:28
![]() Andrea wrote:
Andrea wrote:
Hallo im Video wird gezeigt wie ein Umschlag in der Rückreihe abgetsrickt wird aber nicht in der Runde... Geht das anders?
28.02.2015 - 08:24DROPS Design answered:
Sie stricken den Umschlag in der Runde einfach wie eine rechte M ab, d.h. Sie stechen in das vordere M-Glied ein und stricken eine M. Dadurch bildet sich dann ein Loch.
01.03.2015 - 20:43
![]() Brandy wrote:
Brandy wrote:
Deja vu
08.02.2015 - 13:51
![]() MOntse wrote:
MOntse wrote:
Me gusta mucho, espero ver pronto el patrón
27.01.2015 - 16:15Fitflops?? wrote:
Fitflop?????
27.01.2015 - 00:33
|
|||||||
Athena Jumper#athenajumper |
|||||||
 |
 |
||||||
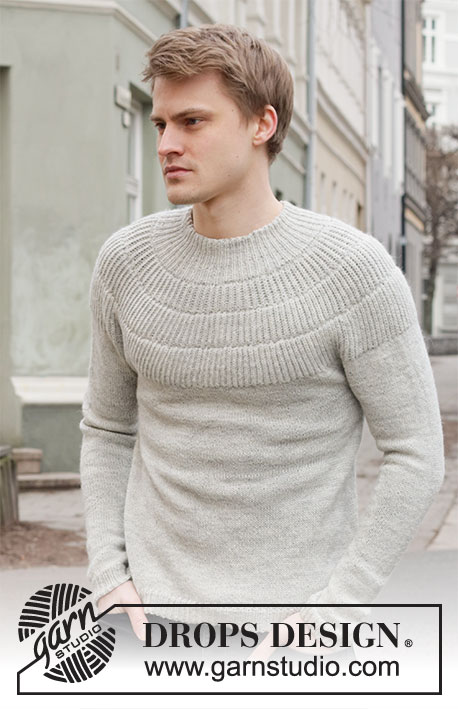
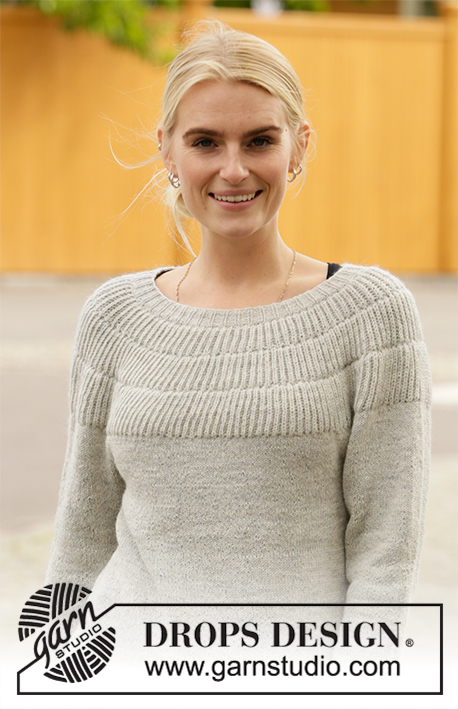
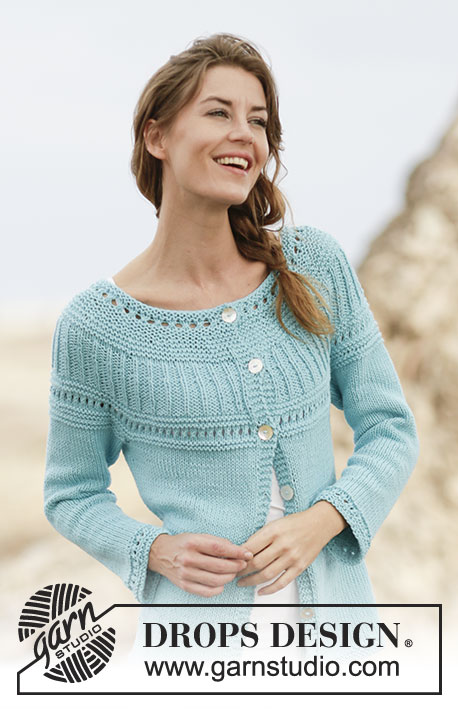
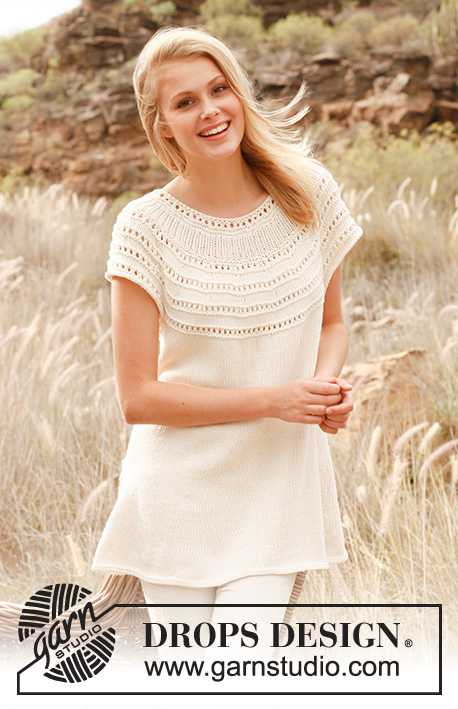
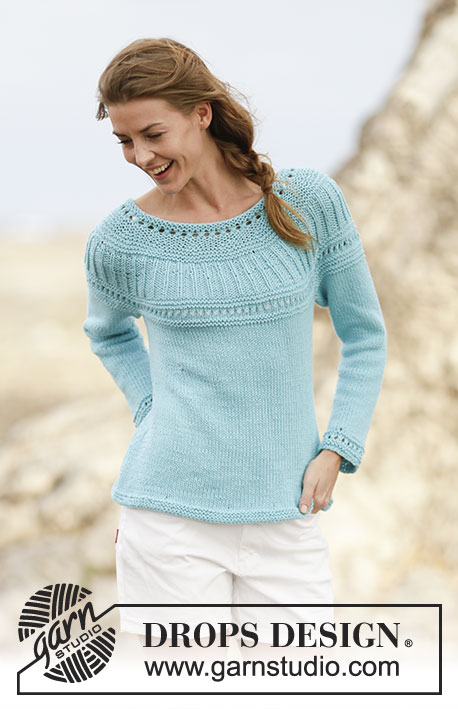
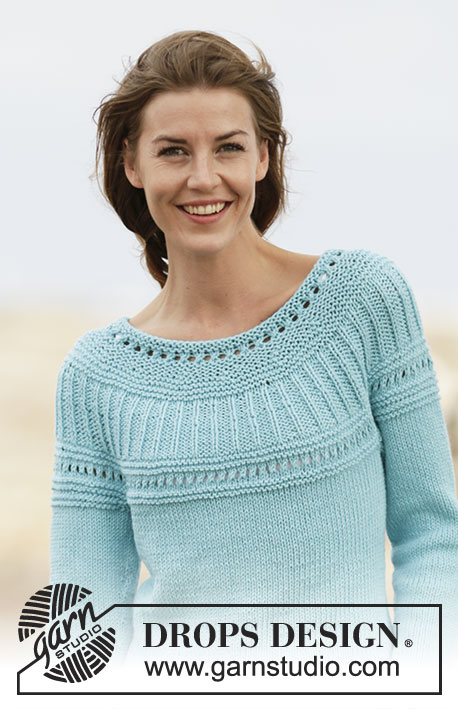
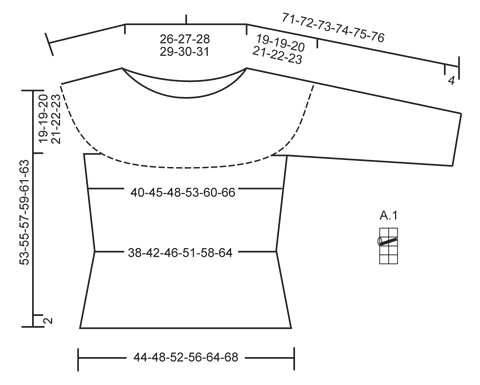
Knitted DROPS jumper in stockinette st, garter st with lace pattern and round yoke, worked top down in ”Paris”. Size: S - XXXL.
DROPS 161-9 |
|||||||
|
GARTER ST (worked in the round): * K 1 round and P 1 round *, repeat from *-*. 1 ridge = 2 rounds. PATTERN: See diagram A.1. INCREASE TIP 1: Inc 1 st by making 1 YO, on next round work YO twisted (i.e. work in back loop of st instead front) to avoid holes. INCREASE TIP 2: Inc with YO on each side of 2 sts in each side (the marker sits inbetween these sts). Knit YO twisted on next round. DECREASE TIP: Dec as follows before 1 st in stockinette st and marker: K 2 tog. Dec after marker and 1 st in stockinette st as follows: Slip 1 st as if to K, K 1, psso. ---------------------------------------------------------- JUMPER: Worked in the round on circular needle, top down. Rounds beg = mid back. YOKE: Cast on 92-96-100-104-108-112 sts on circular needle size 4.5 mm / US 7 with Paris. Work 2 ridges in GARTER ST - see explanation above. Switch to circular needle size 5 mm / US 8 and work A.1, AT THE SAME TIME on first round in diagram inc 12-16-18-18-20-20 sts evenly - READ INCREASE TIP 1 = 104-112-118-122-128-132 sts. When A.1 has been worked vertically, switch back to circular needle size 4.5 mm / US 7. Work in garter st AT THE SAME TIME inc 10 sts evenly on 2nd ridge and 6-7-13-15-21-26 sts evenly on 5th ridge (NOTE: Inc on a round with K) = 120-129-141-147-159-168 sts. REMEMBER THE KNITTING GAUGE When 7-7-8-8-8-10 ridges have been worked in total, piece measures approx. 7-7-8-8-8-9 cm / 2¾"-2¾"-3"-3"-3"-3½", switch to circular needle size 5 mm / US 8. Work 2 rounds in stockinette st. Now work rib as follows: * K 1, P 2 *, repeat from *-* the entire round. When rib measures 2 cm / ¾", inc by making 1 YO before K st in every section P the entire round (= 40-43-47-49-53-56 sts inc) = 160-172-188-196-212-224 sts. On next round P YOs twisted (i.e. work in back loop of st instead of front) to avoid holes. Continue with K 1/P 3. Repeat inc before every st with K when rib measures 4-4-4-5-6-6 cm / 1½"-1½"-1½"-2"-2½"-2½" = 200-215-235-245-265-280 sts. Continue with K 1/P 4 until rib measures 6-6-6-7-8-8 cm / 2½"-2½"-2½"-2¾"-3"-3" in total. Work 2 rounds in stockinette st. Now switch to circular needle size 4.5 mm / US 7. Work 2 ridges while AT THE SAME TIME on first round inc 8-11-11-15-21-28 sts evenly = 208-226-246-260-286-308 sts. Switch to circular needle size 5 mm / US 8 and continue with A.1. When A.1 has been worked vertically, switch to circular needle size 4.5 mm / US 7. Work 2 ridges while AT THE SAME TIME on first round inc 8-10-10-16-22-28 sts evenly = 216-236-256-276-308-336 sts. Now continue on circular needle size 5 mm / US 8 as follows: Work the first 30-34-37-41-47-52 sts (= back piece), slip the next 48-50-54-56-60-64 sts on a stitch holder (= sleeve), cast on 8 new sts under sleeve, work the next 60-68-74-82-94-104 sts (= front piece), slip the next 48-50-54-56-60-64 sts on a stitch holder (= sleeve), cast on 8 new sts under sleeve, work the remaining 30-34-37-41-47-52 sts (= back piece) on round. BODY: There are now 136-152-164-180-204-224 sts for body. Insert a marker in each side of body where new sts were cast on under sleeves (= 4 new sts on each side of marker). MEASURE PIECE FROM HERE. Continue in stockinette st. When piece measures 4 cm / 1½", dec on each side of each markers (= 4 sts dec) - READ DECREASE TIP! Repeat dec when piece measures 11-10-9-8-7-6 cm / 4½"-4"-3½"-3"-2¾"-2½" = 128-144-156-172-196-216 sts. When piece measures 18-17-16-15-14-13 cm / 7"-6¾"-6¼"-6"-5½"-5", inc 1 st on each side of each marker - READ INCREASE TIP 2 (= 4 sts inc). Repeat inc every 2-2½-3-3-3½-4 cm / ¾"-⅞"-1⅛"-1⅛"-1¼"-1½" 4 more times = 148-164-176-192-216-236 sts. When piece measures 32-33-34-35-36-37 cm / 12½"-13½"-13⅜"-13¾"-14¼"-14½", inc 10-8-11-10-14-8 sts evenly = 158-172-187-202-230-244 sts. Switch to circular needle size 4.5 mm / US 7 and work 3 ridges. Loosely bind off. SLEEVE: Work sleeve in stockinette st in the round on circular needle/double pointed needles. There are 48-50-54-56-60-64 sts for each sleeve. Slip sts from stitch holder back on circular needle/double pointed needles size 5 mm / US 8 and cast on 8 new sts under sleeve = 56-58-62-64-68-72 sts. First work 2 ridges and continue hereafter in stockinette st, AT THE SAME TIME insert a marker in the middle of the new sts under sleeve. NOW MEASURE THE PIECE FROM HERE. When piece measures 4 cm / 1½", dec 1 st on each side of markes - READ DECREASE TIP! Repeat dec every 4-3½-3-2½-2½-2 cm / 1½"-1¼"-1⅛"-⅞"-⅞"-¾" 7-8-9-9-11-12 more times = 40-40-42-44-44-46 sts. When sleeve measures 35-35-35-34-34-34 cm = 13¾"-13¾"-13¾"-13⅜"-13⅜"-13⅜", work 1 ridge over all sts and then work A.1. When A.1 has been worked vertically, switch to double pointed needles size 4.5 mm / US 7 and inc 1-1-3-3-3-3 sts evenly = 41-41-45-47-47-49 sts. Work 2 ridges and bind off, sleeve measures approx. 39-39-39-38-38-38 cm / 15¼"-15¼"-15¼"-15"-15"-15". Make another sleeve the same way. ASSEMBLY: Sew the openings under the sleeves. |
|||||||
Diagram explanations |
|||||||
|
|||||||
 |
|||||||
Have you finished this pattern?Tag your pictures with #dropspattern #athenajumper or submit them to the #dropsfan gallery. Do you need help with this pattern?You'll find 29 tutorial videos, a Comments/Questions area and more by visiting the pattern on garnstudio.com. © 1982-2026 DROPS Design A/S. We reserve all rights. This document, including all its sub-sections, has copyrights. Read more about what you can do with our patterns at the bottom of each pattern on our site. |
|||||||


With over 40 years in knitting and crochet design, DROPS Design offers one of the most extensive collections of free patterns on the internet - translated to 17 languages. As of today we count 325 catalogs and 12298 patterns - 12288 of which are translated into English (US/in).
We work hard to bring you the best knitting and crochet have to offer, inspiration and advice as well as great quality yarns at incredible prices! Would you like to use our patterns for other than personal use? You can read what you are allowed to do in the Copyright text at the bottom of all our patterns. Happy crafting!
Post a comment to pattern DROPS 161-9
We would love to hear what you have to say about this pattern!
If you want to leave a question, please make sure you select the correct category in the form below, to speed up the answering process. Required fields are marked *.