
Popular categories
Looking for a yarn?


Comments / Questions (176)
![]() Mette wrote:
Mette wrote:
Jeg er i gang med venstre forstykke og er nået til, at der sættes 48 masker på tråd og pinden strikkes ud. Dernæst strikker jeg tilbage og nu skal der strikkes de 5 første masker og så \"sæt derefter m ind på samme tråd og strikkes de resterende m på p\". Samme tråd? Er det den tråd, hvor de 48 masker er på? Og sættes denne ene maske på foran eller bag de 5 masker, jeg lige har strikket? Det er lidt forvirrende for mig. På forhånd tak.
18.01.2026 - 14:41DROPS Design answered:
Hei Mette. Du strikker de 5 første maskene på pinnen og disse 5 maskene setter du på tråden sammen med de 48 andre maskene på tråden. Strikk de resterende maskene på pinnen, snu arb og strikk tilbake over alle maskene *, gjenta fra *-* totalt 15 ganger. mvh DROPS Design
30.01.2026 - 07:59
![]() Martina Robert wrote:
Martina Robert wrote:
Ich verstehe die Anleitung der Ärmel und Schulterpartie nicht!!! Bin erfahrene Strickerin, aber ich komme mit dieser Anleitung nicht klar! Ist auch nicht das erste Mal 🙈
19.05.2025 - 15:01DROPS Design answered:
Liebe Frau Robert, am Anfang einer Hin-Reihe ketten Sie die ersten Maschen (siehe Größe) ab, dann stricken Sie die restlichen 15-36 M (siehe Größe) wie zuvor, bei der 3 ersten Größen wenden Sie, dann stricken Sie diese 15 M wie zuvor und schlagen Sie neuen Maschen an und stricken Sie alle Maschen wieder. In den 3 letzten Grössen stricken Sie die Rückreihe, dann ketten Sie zuerst 16-17-18 M dann noch einmal 17-17-18 M am Anfang der nächste Hinreihe, dann schlagen Sie 17-17-18 M am Ende der Rückreihe + 16-17-18 M am Ende der nächste Rückreihe, und dann stricken Sie die stillgelegten Maschen wieder. Viel Spaß beim Stricken!
19.05.2025 - 16:08
![]() Ania wrote:
Ania wrote:
Proszę o informacje jak wykonać taki sweterek z długim rekawem.
18.06.2024 - 14:05DROPS Design answered:
Witaj Aniu, należałoby nabrać oczka wzdłuż podkroju rękawa, ale nie pod pachą. Wykonywać na górze rzędy skrócone w tę i z powrotem, a jak główka rękawa będzie miała odpowiednią długość (będzie to wyglądać jak na zdjęciu), nabrać oczka na dole podkroju rękawa i dalej przerabiać rękaw na okrągło (już bez rzędów skróconych). Zobacz video TUTAJ. Jak zamykać oczka pod spodem rękawa zależy od tego jaki ma być rękaw (wąski/szeroki, prosty). Pozdrawiamy!
19.06.2024 - 08:50
![]() Martina wrote:
Martina wrote:
I have the same question as Debbie had earlier (13.4.2017). I don't understand, how to proceed with the sleeve opening without adding new yarn? Working yarn is on the far right side on the stitch holder. In your answer to Debbie you say to put stitches at the end of a row. At which point exactly? In the instructions the casting of the new stitches comes later on. My problem comes at this point: Slip the 44 sts from the first stitch hoIder back on circular needle and work armhole as follows..
15.11.2023 - 15:14DROPS Design answered:
Dear Martina, you will first work the bottom of jacket (under sleeve) (the top 44 sts on the left are not worked now) and cut the yarn when these 2 cm are worked; then join the yarn working the 44 stitches on the left side slipped on a thread: start casting off (from RS) the first 29 stitches for armhole, work to the end of the row (15 sts), turn and work the next row from WS casting on the same number of stitches as you cast off, ie purl 19 sts and cast on 15 sts = 44 sts. Work now the 69 sts from the side. Happy knitting!
16.11.2023 - 09:24
![]() Marla wrote:
Marla wrote:
How do I save this file as a pdf to use it on knit companion?
26.10.2023 - 14:02DROPS Design answered:
Dear Maria, to save the patterns as a .PDF you will have to print the pattern choosing a virtual printer - but it might not work on knit companion. Happy knitting!
27.10.2023 - 08:14
![]() Hanna-Maija Lahtinen wrote:
Hanna-Maija Lahtinen wrote:
Voiko ohjeen tehdä pitkillä hihoilla? Miten sitä pitäisi muuttaa?
30.12.2022 - 17:16
![]() Rita Coenen wrote:
Rita Coenen wrote:
Is het niet mogelijk om middenrug gewoon verder te breien, en dus alles in 1 stuk zonder middenachter-naad? Wat zou de reden kunnen zijn om dit niet te doen?
14.03.2022 - 14:05DROPS Design answered:
Dag Rita,
Blijkbaar heeft de ontwerper het zo bedacht met een naad midden achter :) Jou zou hem inderdaad uit 1 stuk kunnen breien, waarbij je na het linker pand verder breit voor het rechter pand, maar dan in spiegelbeeld, dus je breit dan voor het rechter voorpand vanaf midden achter naar voren.
18.03.2022 - 08:20
![]() Arga Moree wrote:
Arga Moree wrote:
Waar kan ik vinden hoeveel draadlengte ik nodig heb voor dit leuke vest? Maat XL . Ik zou graag een dun garen willen voor naald 3 ongeveer. Ik dacht aan bamboe/katoen, maar zag dat niet op jullie site.
22.03.2021 - 15:29DROPS Design answered:
Dag Arga,
Bovenaan bij de lijst met materialen staat per maat aangegeven hoeveel gram je nodig hebt. Het vest wordt met 2 draden gebreid, 1 draad Alpaca en 1 draad Vivaldi. Bij niet meer leverbare garens (onder de knop garens in het menu vind je een link) kun je de looplengte checken en op basis daarvan ander garen aanschaffen.
22.03.2021 - 21:14
![]() Mary Jones wrote:
Mary Jones wrote:
HI! I've started the Fly Away and know I'm going to love it. I need help clarifying the Right front piece. If I work the pattern knitting everything as though it's a wrong side then it will match the Left front piece? Sorry...not used to a pattern that says to mirror.
27.01.2021 - 17:13DROPS Design answered:
Dear Mrs Jones, working a piece mirrored means that everything that was worked on the right side will be worked now on the left side and reversed. So that you will work the same way but slip the stitches on the right side (= beg of row from RS) ie starting on a WS row, work the first stitches and slip the remaining sts on a thread. And then cast off stitches for amrhole starting from WS (instead of from RS). Happy knititng!
28.01.2021 - 09:19
![]() Maryel Campos Cardoso wrote:
Maryel Campos Cardoso wrote:
Solo comentar que me encanta mucho todo lo que veo de su página aunque no entiendo muchas cosas o no sé descifrarlas me encanta todo porque tejer 🧶 es una de las cosas que más me gusta y lo disfruto mucho
23.04.2019 - 20:08
|
|||||||||||||
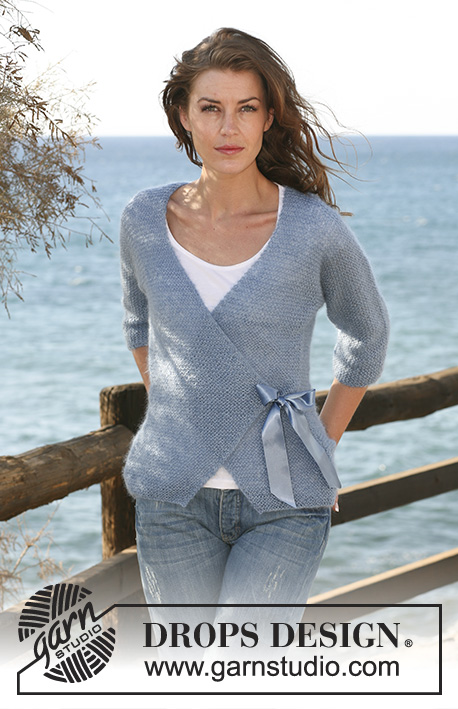
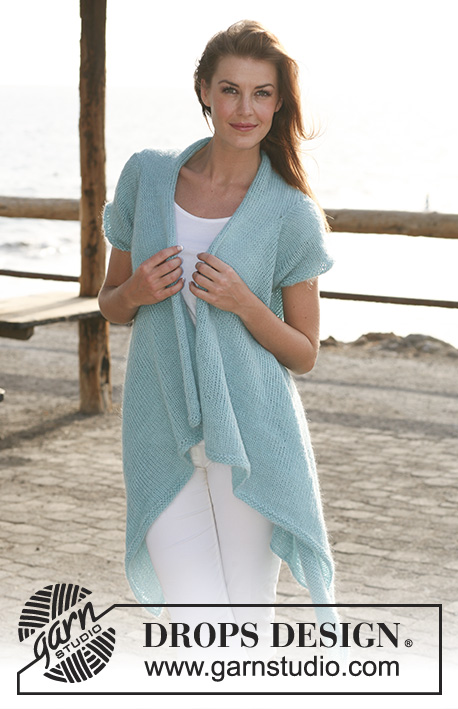
Fly Away#flyawaycardigan |
|||||||||||||
 |
 |
||||||||||||
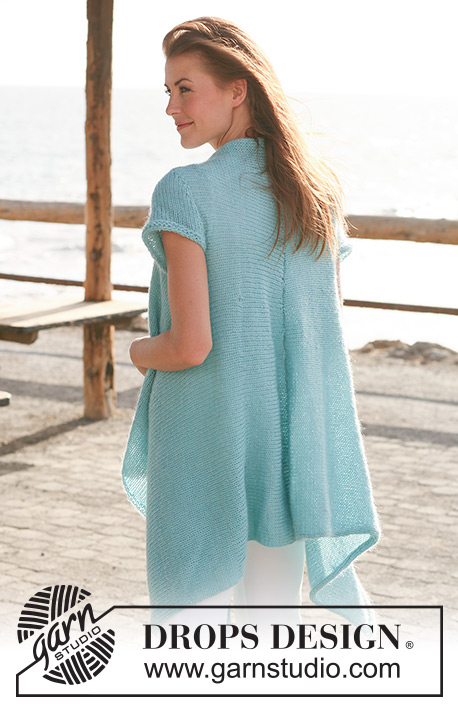
Long DROPS jacket with short sleeves knitted from side to side in Alpaca and Vivaldi or Brushed Alpaca Silk. Size S - XXXL
DROPS 119-1 |
|||||||||||||
|
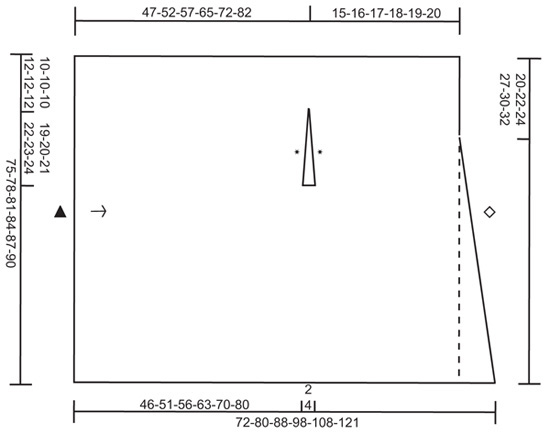
GARTER ST (back and forth on needle): K all rows. --------------------------------------------------------- --------------------------------------------------------- JACKET: Worked back and forth on circular needle in order to fit in all sts. Beg mid front on left front piece and knit towards the side, bind off for armhole and continue to mid back and bind off. Work right front piece in the same way but mirrored and sew tog the 2 pieces mid back. Work the sleeves separately and set in. LEFT FRONT PIECE: LOOSELY cast on 113-117-121-126-130-135 sts on circular needle size 5 mm / US 8 with Alpaca and Vivaldi or Brushed Alpaca SIlk (= 2 threads). Work 4 rows GARTER ST - see above (first row = RS). Change to circular needle size 6 mm / US 10 and continue in stockinette st with 2 garter sts each side. REMEMBER THE GAUGE! When piece measures approx 46-51-56-63-70-80 cm / 18"-20"-22"-24¾"-27½"-31½" - make sure that next row is from RS – slip 44-45-46-51-52-54 sts on left side of piece (as seen from RS) on a stitch holder. Work 4-4-4-8-8-8 rows stockinette st with 2 garter sts each side (= 2-2-2-4-4-4 cm / ¾"-¾"-¾"-1½"-1½"-1½") on the remaining 69-72-75-75-78-81 sts on needle. Now slip these sts on a stitch holder. Slip the 44-45-46-51-52-54 sts from the first stitch holder back on circular needle size 6 mm / US 10 and work armhole as follows from RS: Size S + M + L: bind off the first 29-30-31 sts at beg of row, work remaining 15 sts on needle as before. Insert a marker in the outermost st on right side of piece (as seen from RS – this marks where sleeve cap is sewn to armhole). Turn piece, work the 15 sts on needle as before and then cast on 29-30-31 sts at the end of row. Size XL + XXL + XXXL: bind off the first 16-17-18 sts at beg of row, work remaining 35-35-36 sts on needle as before, turn piece. Work the 35-35-36 sts on needle as before, turn piece. Bind off the first 17-17-18 sts at beg of row and work remaining 18 sts as before. Insert a marker in the outermost st on right side of piece (as seen from RS – this marks where sleeve cap is sewn to armhole). Turn piece, work the 18 sts as before, cast on 17-17-18 new sts at the end of row, turn piece. Work the 35-35-36 sts on needle as before, turn piece. Work the 35-35-36 sts on needle as before and cast on 16-17-18 new sts at the end of row. ALL SIZES: Now slip the 69-72-75-75-78-81 sts from stitch holder back on needle and continue in stockinette st with 2 garter sts each side on all 113-117-121-126-130-135 sts again. When piece measures 61-67-73-82-90-101 cm / 24"-26⅜"-28¾"-32¼"-35½"-39¾" (measured on left side of piece as seen from RS, piece measures approx 62-68-74-84-92-103 cm / 24⅜"-26¾"-29⅛"-33"-36¼"-40½" on right side) work shortened rows to create extra width mid back as follows (beg from WS = from neckline): Work the first 30-33-36-41-45-48 sts on needle and then slip these sts on a stitch holder, work the remaining sts on needle, turn piece and work return row, * work the first 11-8-7-7-6-5 sts on needle, slip these sts on the same stitch holder and work remaining sts on needle, turn piece and work return row *, repeat from *-* a total of 7-9-11-11-13-15 times. Turn piece, work the remaining 6-12-8-8-7-12 sts. Now slip the 107-105-113-118-123-123 sts from stitch holder back on needle and work 2 rows garter st on all sts, bind off LOOSELY = mid back. Piece measures approx 62-68-74-83-91-102 cm / 24⅜"-26¾"-29⅛"-32¾"-35¾"-40" on left side of piece (as seen from RS) and 72-80-88-98-108-121 cm / 28⅜"-31½"-34⅝"-38½"-42½"-47½" on right side of piece – measured in the knitting direction. RIGHT FRONT PIECE: Cast on and work like left front piece, but mirrored, i.e. make all measurements on right side of piece - as seen from RS. When working the 4-4-4-8-8-8 rows under sleeve, adjust so that first row is worked from WS (and not RS) and slip the outermost 44-45-46-51-52-54 sts on left side of piece as seen from WS (and not RS) on a stitch holder. Work armhole as described for left front piece, but from WS (and not RS). Beg working shortened rows mid back from RS (and not WS). SLEEVE: Worked back and forth on circular needle. Cast on 41-43-44-47-50-53 sts (includes 1 edge st each side) on circular needle size 5 mm / US 8 with Alpaca and Vivaldi (= 2 threads). Work 4 rows garter st, change to circular needle size 6 mm / US 10 and work stockinette st. When piece measure 5 cm/2" dec 1 st at beg of following 2 rows, repeat dec at 10 cm/4", and then dec 1 st at the beg of every row a total of 4-4-5-6-7-8 times each side. Bind off 4 sts at the beg of the next 2 rows and then bind off remaining sts. Sleeve measures approx 15-15-16-17-18-19 cm / 6"-6"-6¼"-6¾"-7"-7½". ASSEMBLY: Sew jacket tog mid back inside bind off rows. Set in sleeves - NOTE: Sew sleeve cap to marker on shoulder and set in sleeve each side along the armhole marked by stars in diagram (no seam mid under sleeve, i.e. leave open where the 4-4-4-8-8-8 rows were knitted). |
|||||||||||||
Diagram explanations |
|||||||||||||
|
|||||||||||||
 |
|||||||||||||
Have you finished this pattern?Tag your pictures with #dropspattern #flyawaycardigan or submit them to the #dropsfan gallery. Do you need help with this pattern?You'll find 17 tutorial videos, a Comments/Questions area and more by visiting the pattern on garnstudio.com. © 1982-2026 DROPS Design A/S. We reserve all rights. This document, including all its sub-sections, has copyrights. Read more about what you can do with our patterns at the bottom of each pattern on our site. |
|||||||||||||


With over 40 years in knitting and crochet design, DROPS Design offers one of the most extensive collections of free patterns on the internet - translated to 17 languages. As of today we count 325 catalogs and 12298 patterns - 12288 of which are translated into English (US/in).
We work hard to bring you the best knitting and crochet have to offer, inspiration and advice as well as great quality yarns at incredible prices! Would you like to use our patterns for other than personal use? You can read what you are allowed to do in the Copyright text at the bottom of all our patterns. Happy crafting!
Post a comment to pattern DROPS 119-1
We would love to hear what you have to say about this pattern!
If you want to leave a question, please make sure you select the correct category in the form below, to speed up the answering process. Required fields are marked *.