
Popular categories
Looking for a yarn?


Comments / Questions (7)
![]() Anne Santier wrote:
Anne Santier wrote:
Faut-il rabattre la partie jersey avant ou après avoir relevé les mailles le long des bords devant et encolure ? Merci.
27.01.2022 - 13:54DROPS Design answered:
Bonjour Mme Santier, pourriez-vous préciser votre question? J'ai peur de ne pas vous suivre, où en êtes-vous exactement? À quelle partie jersey faites-vous référence?
28.01.2022 - 10:21
![]() Lone Petersen wrote:
Lone Petersen wrote:
Jeg forstår ikke indtagning til ærmegab.
06.01.2022 - 07:36DROPS Design answered:
Hej Lone, skriv gerne hvad du ikke forstår og hvilken størrelse du strikker, så prøver vi at hjælpe dig :)
13.01.2022 - 11:55
![]() Irene Golden wrote:
Irene Golden wrote:
DROPS Macao I don't see any instructions for decreasing sts on neck edge on the front. It's supposed to be open and not closed. Am I missing something?
29.11.2020 - 19:01DROPS Design answered:
Dear Mrs Golden, you will decrease for right front piece on the side as you did for back piece and and decrease towards mid front (= neck) on every 6th row: 1 st 17-18 times. Happy knitting!
30.11.2020 - 09:37
![]() Irene wrote:
Irene wrote:
Thank you for reply. However, it does not help at all. Why decrease only to INCREASE again a few rows later? and back to approximately the same number of sts? Sorry. I just don't get it.
14.11.2020 - 19:40DROPS Design answered:
Dear Irene, you then increase only on the sides to make the sides be slanted, ie as shown in the diagram. Happy knitting!
16.11.2020 - 08:37
![]() Irene wrote:
Irene wrote:
I'm confused about using garter st. I did 4 rows and ripped it back. Why would you decrease sts in the beginning and then increase them a few rows later.? The instructions are confusing to me and I am an experienced knitter. Can you explain? Thank you.
05.11.2020 - 14:49DROPS Design answered:
Dear Irene, the first 4 rows in garter stitch are worked with smaller needles, this means you need more stitches for same width than when working with larger needles, reason why you have to decrease on first row with larger needles. Hope this helps. Happy knitting!
05.11.2020 - 17:15
![]() Hazel wrote:
Hazel wrote:
Thanks for getting back to me. If I end on row 19 the next row is on the purl side. Is this correct? So I now have to work the repeat pattern from the wrong side? I just want to understand what is intended? Thank you.
08.12.2017 - 10:33DROPS Design answered:
Dear Hazel, starting with row 1 from RS, row 19 will be worked also from RS. Work 1 more row from WS (with K over K and P over P) so that you can start next repeat with row 1 from RS. Happy knitting!
08.12.2017 - 13:35
![]() Hazel wrote:
Hazel wrote:
Should there be 20 rows to this pattern and not 19 as shown?
07.12.2017 - 11:40DROPS Design answered:
Dear Hazel, diagram shows 19 rows but I guess you can work a 20th row to get same number of rows in each stocking st square and so that you repeat diagram from row 1 from RS. Happy knitting!
07.12.2017 - 13:45
|
|||||||||||||||||||
DROPS 8-13 |
|||||||||||||||||||
|
|
|||||||||||||||||||
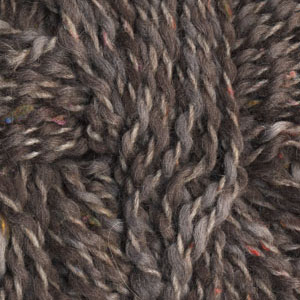
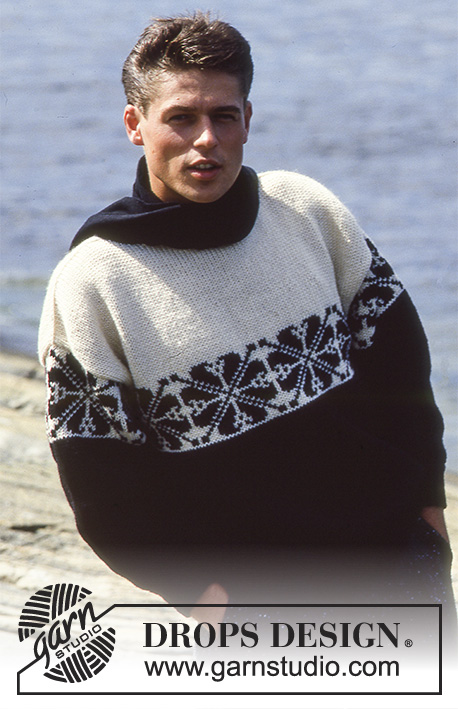
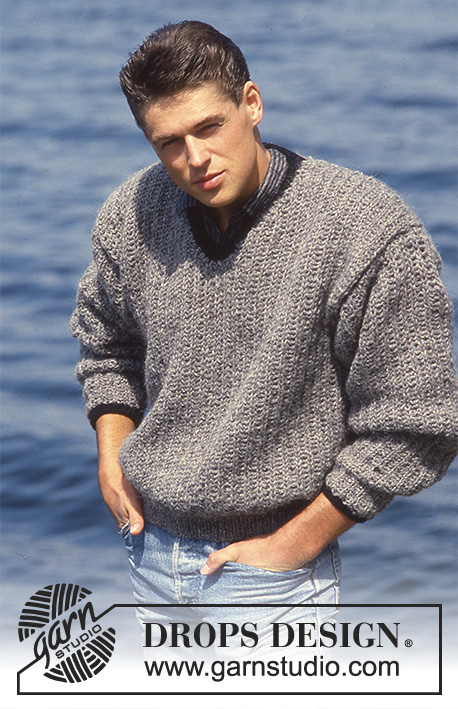
DROPS men ’s jacket in “Macao”. Size S-L.
DROPS 8-13 |
|||||||||||||||||||
|
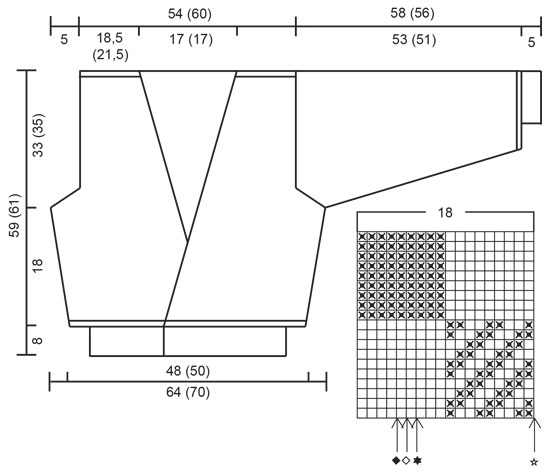
Rib: * K1, P1 *, repeat from *-*. Edge: 8 cm = 3⅛" stockinette st, P 1 row (= folding edge, measure piece from here), 8 cm = 3⅛" stockinette st. Fold edge double towards WS and fasten. Garter st, back and forth on needle: K all rows. Pattern: See diagram. The diagram shows the pattern from the RS. 1 square = 1 st x 1 row Høyre forstk (midten) = right front piece (middle) Erme = sleeve Bakstk = back piece Venstre forstk (siden) = Left front piece (the side) Back piece: Cast on 94-100 sts on needle size 3 MM = US 2.5 and work Edge. Change to needle size 5 MM = US 8 and work 4 rows garter st – see above – at the same time dec 22-28 sts evenly on first row = 72-72 sts. Continue in pattern, at the same time inc 1 st each on every other and 3rd row alternately 12-15 times = 96-102 sts. Incorporate inc sts in pattern as you go along. Remember the knitting gauge! When piece measures 26 cm = 10¼" bind off for armhole each side at the beg of every row: 3 sts 1 time, 2 sts 1 time, 1 st 2 times = 82-88 sts. When piece measures 58-60 cm = 22¾"-23⅝" work 4 rows garter st on all sts and bind off. Right front piece: Cast on 46-50 sts on needle size 3 MM = US 2.5 and work Edge. Change to needle size 5 MM = US 8 and work 4 rows garter st, at the same time dec 6-10 sts evenly on first row = 40-40 sts. Continue in pattern at the same time inc at the side as described for back piece, and dec towards mid front on every 6th row: 1 st 17-18 times. When piece measures 26 cm = 10¼" bind off for armhole at the side as described for back piece. When piece measures 58-60 cm = 22¾"-23⅝" work 4 rows garter st on all sts and bind off remaining 28-30 sts on shoulder. Left front piece: Like right front piece but mirrored, and make 2 buttonholes on Edge as follows: after 4 rows bind off 4 sts 2 sts from the edge and cast on 4 new sts over bind off sts on return row. Repeat when Edge measures 6 cm = 2⅜" from folding edge. Remember buttonholes on piece in stockinette st to be folded towards WS! Sleeve: Worked back and forth on needle. Cast on 37-40 sts on needle size 3 and work Edge, but for 5 cm = 2" instead of 8 cm = 3⅛". Change to needle size 5 MM = US 8 and work 4 rows garter st, at the same time inc 9-8 sts evenly on first row = 46-48 sts. Continue in pattern, at the time inc 1 st each side on every 3rd row 26-28 times = 98-104 sts. When piece measures 48-52 cm = 19"-20½" bind off for sleeve cap each side at the beg of every row: 5 sts 1 time, 3 sts 1 time, 2 sts 3 times. Bind off remaining 70-76 sts when piece measures 58-56 cm = 22¾"-22". Assembly: Sews shoulder seams. Pick up approx 115 sts on needle size 3 MM = US 2.5 from mid back and down along right front piece, work 4 rows garter st and bind off. Repeat along left front piece. Sew front bands tog mid back. Set in sleeves, sew side and sleeve seams. Sew on buttons. |
|||||||||||||||||||
Diagram explanations |
|||||||||||||||||||
|
|||||||||||||||||||
 |
|||||||||||||||||||
Have you finished this pattern?Tag your pictures with #dropspattern or submit them to the #dropsfan gallery. Do you need help with this pattern?You'll find 23 tutorial videos, a Comments/Questions area and more by visiting the pattern on garnstudio.com. © 1982-2026 DROPS Design A/S. We reserve all rights. This document, including all its sub-sections, has copyrights. Read more about what you can do with our patterns at the bottom of each pattern on our site. |
|||||||||||||||||||


With over 40 years in knitting and crochet design, DROPS Design offers one of the most extensive collections of free patterns on the internet - translated to 17 languages. As of today we count 324 catalogs and 12290 patterns - 12280 of which are translated into English (US/in).
We work hard to bring you the best knitting and crochet have to offer, inspiration and advice as well as great quality yarns at incredible prices! Would you like to use our patterns for other than personal use? You can read what you are allowed to do in the Copyright text at the bottom of all our patterns. Happy crafting!
Post a comment to pattern DROPS 8-13
We would love to hear what you have to say about this pattern!
If you want to leave a question, please make sure you select the correct category in the form below, to speed up the answering process. Required fields are marked *.