
Popular categories
Looking for a yarn?


Comments / Questions (47)
![]() Christine wrote:
Christine wrote:
Bonjour Pour l empiècement, lorsque l'on reprend les mailles il faut commencer par la manche droite pour ensuite tricoter en aller-retour ? Les mailles supplémentaires pour la boutonnière se montent le tour suivant ? Merci
20.02.2026 - 11:10DROPS Design answered:
Bonjour Christine, sur l'endroit vous commencez par la manche droite, puis vous tricotez le dos, la manche gauche et le devant en terminant par monter 4 m pour la bordure de boutonnage du devant. Vous continuez en allers et retours avec 4 m point mousse de chaque côté devant/manche droite). Les boutonnières se trouvent sur la manche, cf. emplacement pour chaque taille sous BOUTONNIÈRES Raglan au début des explications. Bon tricot!
23.02.2026 - 07:16
![]() Kathrin wrote:
Kathrin wrote:
Wenn man auf der rechten Seite mit der Raglanschräge anfängt, wie macht man dann die Knopfeiste, die 4 Maschen gehen doch schon bei der ersten Abnahme für die Raglanschräge drauf... Aber mein größtes Problem, ich habe eigentlich gar keinen Anfang, um in Reihen zu stricken? Wo ist mein Fehler?
11.11.2025 - 21:19DROPS Design answered:
Liebe Kathrin, die Reihen bei der Passe beginnen mit dem Vorderteil, dh mit den 4 neuen Maschen für die Knopfblende, die Raglanabnahmen sind bei den Hinreihen nach diesen 4 Maschen und am Ende der Reihe vor den 4 letzten Maschen gestrickt; so sind es immer 4 Maschen krausrechts beidseitig und es wird für den Raglan innerhalb diese 4 Maschen abgenommen - siehe auch Tipp für das Abketten (gilt die Raglanschrägung): am Anfang der Anleitung. Viel Spaß beim Stricken!
21.11.2025 - 15:14
![]() Laura wrote:
Laura wrote:
I have put the body and sleeves onto one cable. Do I start on the right seam when looking at the jumper or the right seam for the wearer? In the picture the buttons are on the left side of the jumper but starting on the right this wouldn’t work?
05.01.2025 - 21:26DROPS Design answered:
Dear Laura, yoke starts on the right side of raglan on front piece (when worn, ie just as shown on the picture); ie from RS rows will start with right sleeve and end with front piece. Happy knitting!
06.01.2025 - 10:57
![]() Carolin Ströhlein wrote:
Carolin Ströhlein wrote:
Wenn ich Körper und Ärmel auf eine Rundstricknadel lege und stricken will, dehne ich beim Stricken die Ärmel total auf. Auch mit einer zweiten Rundstricknadel geht es nicht. Es ist doch richtig, dass die Ärmel mit einem Nadelspiel rund gestrickt werden. Nur dann geht das Legen mit dem Körper auf eine Rundstricknadel nicht. Können Sie mir bitte weiterhelfen?
09.11.2024 - 08:09DROPS Design answered:
Liebe Frau Ströhlein, die Ärmel werden in Runde und die Passe wird in Hin und Rückreihen gestrickt, die ersten Reihen können etwas tricky sein aber nach einpaar Reihen wird es einfacher sein, dafür können Sie am Anfang mit einem anderen Stricknadel oder wie beim Magic loop stricken. Siehe auch Video. Viel Spaß beim Stricken!
11.11.2024 - 08:10
![]() Simon Frohm wrote:
Simon Frohm wrote:
Och jag förstår inte hur man ska kunna fortsätta sticka runt när man lägger 13 maskor på tråd. Blir inte det konstigt? Byter man då tråd före och efter de 13 maskorna på varje varv?
30.10.2024 - 19:46DROPS Design answered:
Hej Simon, du strikker frem og tilbage, først i den ene side og så i den anden side :)
31.10.2024 - 08:57
![]() Simon Frohm wrote:
Simon Frohm wrote:
Hej! Jag stickar näst minsta storleken. När man ska sätta maskor på en tråd för halsen så skriver ni att det gäller de 13 mittersta maskorna. Menar ni då mitten av framstycket?
30.10.2024 - 19:33DROPS Design answered:
Hej Simon, ja det stemmer, det er de midterste 13 masker midt foran du sætter på en tråd til hals :)
31.10.2024 - 08:56
![]() Vilde wrote:
Vilde wrote:
Hei. I flere av oppskriftene deres kan jeg ikke forstå antall masker. En babylue som skal passe 1-2 år som man skal legge opp 90 masker på for eksempel. Det ville jo passet en voksen og vell som det. Er det noe jeg tyder feil?
11.07.2024 - 09:07DROPS Design answered:
Hei Vilde. Til denne lue legges det opp 90 masker i str. 12/18 mnd, som vil passe et hodemål på 44/46 cm. Strikkefasthete som er oppgitt her er 19 masker = 10 cm, 90 masker blir da ca 47 cm, men strikkefastheten er oppgitt i glattstrikk, mens luen strikkes med (riller og) fletter. Fletter gjør at mønstret vil trekke seg noe sammen og bli mindre enn ca 47 cm. mvh DROPS Design
11.07.2024 - 09:56
![]() Amanda wrote:
Amanda wrote:
Jag undrar hur man fortsätter sticka varvet runt när man satt maskor på tråd för halsen. Och var ska man maska av mot halsen? Är det maskorna intill de som satts på tråd?
23.12.2023 - 21:26DROPS Design answered:
Hej Amanda, når du har sat masker på en tråd til hals, fortsætter du at strikke frem og tilbage og maskar av intill de som satts på tråd ja :)
02.01.2024 - 09:41
![]() Káte Hansen wrote:
Káte Hansen wrote:
Hej igen Når ryg- og forstykke strikkes på rundpind, skal der så sættes mærketråde ved siderne i samtlige omgange eller kun hvert anden omgang?
02.12.2022 - 21:53DROPS Design answered:
Hei Káte. La merketrådene følge arbeidet samtidig som det strikkes, slik at du hele tiden kan se hvor sidene i arbeidet er. Se gjerne hjelpevideoen: Hvordan sættes en mærketråd imellem 2 masker mvh DROPS Design
05.12.2022 - 12:58
![]() Káte Hansen wrote:
Káte Hansen wrote:
Hej Jeg er i gang med at strikke trøjen med snoninger og har fået rynker ved siderne, hvor mærketråde indsættes. Jeg har fulgt videoen med eksemplet på, hvordan mærketråde skal indsættes, men får alligevel rynkede sider.
29.11.2022 - 18:13DROPS Design answered:
Hej, mærketråde kan ikke gøre siderne rynkede.... vi forstår ikke rigtig hvad det er som bliver rynket... Prøv at spørge i butikken hvor du har købt garnet :)
01.12.2022 - 14:02
|
|||||||||||||
Toby Set#tobyset |
|||||||||||||
 |
 |
||||||||||||
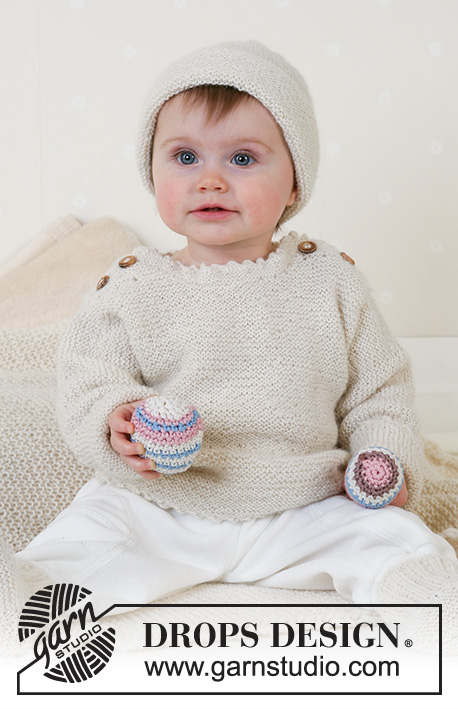
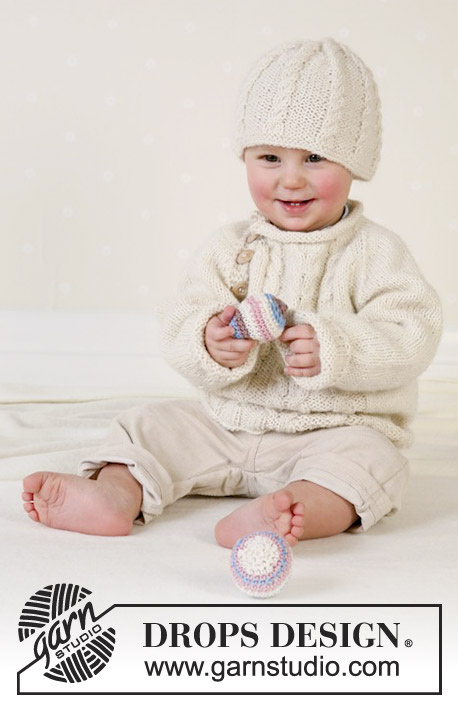
DROPS Jumper, hat, ball and rattle in Alpaca
DROPS Baby 13-7 |
|||||||||||||
|
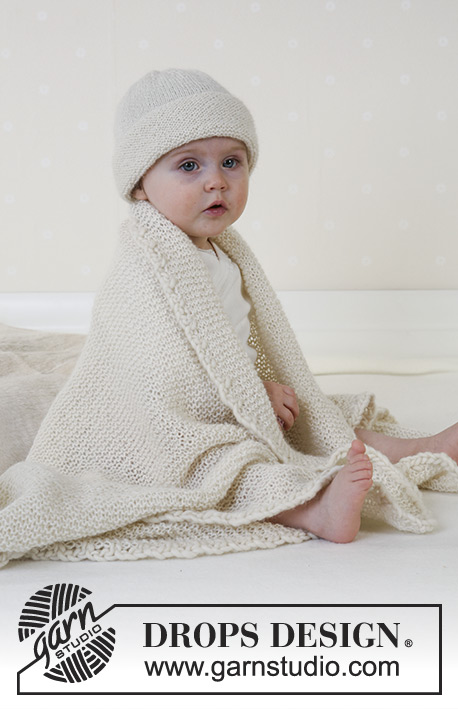
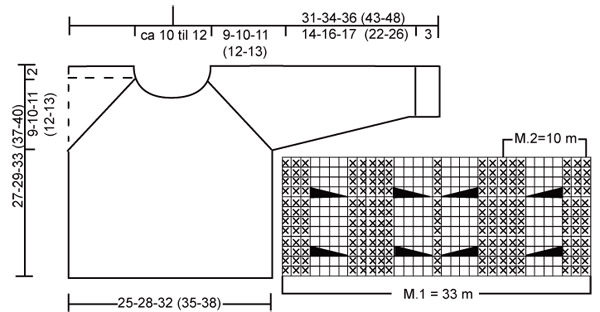
Rib: *K3, P3*, repeat from *-*. Pattern: See diagrams M.1 and M.2. The diagrams show the pattern from the right side and repeat the pattern until finish measures. Bind off tips (for the raglan): Bind off as follows from the right side: K 4 edge sts in garter sts, P2 tog. *Knit until 3 sts left before the next marker, slip a sts as if to knit, K1, psso, K2, K2 tog* repeat from *-* at the next 2 markers and continue until 6 sts left on row, slip a st as if to knit, K1, psso, K4 front edge sts in garter sts. Bind off as follows from the wrong side: K 4 edge sts in garter sts, K2 tog. *Knit until 3 sts left before the next marker, P2 twisted tog (this means instead of knitting into the back part of the st knit in the front part), P2, P2 tog* repeat from *-* at the next 2 markers and continue until 6 sts left on row, P 2 twisted tog, K4 front edge sts in garter sts. Button hole (for the raglan): Bind off for button holes on the raglan edge on the sleeve. Bind off as follows: K1, K2 tog, make a yo, K1. Bind off for button holes when the front edge measures as follows: Size 1/3 months: 2, 5 and 8 cm Size 6/9 months: 3, 6 and 9 cm Size 12/18 months: 3, 7 and 10 cm Size 2 years: 3, 7 and 10 cm Size 3/4 years: 4, 8 and 12 cm --------------------------------------------------------------- JUMPER: Front and back piece: Cast on 102-114-126 (138-150) sts with 2 strands of Alpaca on circular needle size 3.5 mm / US 4. Knit 1 round of stockinette sts and continue in Rib until the piece measures 3 cm / 1⅛". Change to circular needle size 4 mm / US 6 and knit 1 round of stockinette sts. Knit the next round as follows: 11-14-17 (20-23) sts of stockinette sts, insert a marker into the 1st st of these sts (=the side), M.1 (= 33 sts) 11-14-17 (20-23) sts of stockinette sts insert a marker into the last of these sts (= the side), 47-53-59 (65-71) sts of stockinette sts. Continue until the piece measures 16-17-20 (23-25) cm / 6¼"-6¾"-8" (9"-9¾"). Bind off 5 sts each side for the armhole (= the sts with the marker + 2 sts each side) = 49-55-61 (67-73) sts for the front piece and 43-49-55 (61-67) sts for the back piece. Put the piece aside and knit the sleeves. SLEEVE Cast on 30-30-36 (36-36) sts with 2 strands of Alpaca on double pointed needles size 3.5 mm / US 4. Knit in round in stockinette sts and continue in Rib until the piece measures 3 cm / 1⅛". Change to double pointed needles size 4 mm / US 6 and continue in stockinette sts. At the same time when piece measures 6 cm / 2⅜", inc 2 sts at the mid center underneath the sleeve on every 3rd-2nd-3rd (2.5-2.5) cm a total of 4-6-5(7-9) times = 38-42-46 (50-54) sts. When the piece measures 17-19-20 (25-29) cm bind off 5 sts at the mid under the sleeve = 33-37-41(45-49) sts. Put the piece aside and knit another sleeve. YOKE Put sleeves in on the same needle as body piece where you bind off for armholes = 158-178-198 (218-238) sts. Insert a marker where sleeve meets body (= 4 markers). Knit forward and backward from the right "raglan seam" at the front. Cast on 4 more sts at the front piece ( = button edge) =162-182-202 (222-242) sts. Read all of the next section before continuing! Continue in stockinette sts and with cables at the center mid front and 4 garter sts at the beginning and end of each row (for the button edge). At the same time bind off for the raglan – see bind off tips – bind off on every other row 11-11-12 (12-13) times and hereafter on every row 1-3-4 (6-7) times. Note: Bind off for button hole too – see explanation above. At the same time when the piece measures 23-25-29 (32-35) cm put 13-13-13 (15-15) sts at the center mid front on a holder for the neck. Continue to bind off for the neck on every other row: 2 sts 1 time, 1 st 2-2-2 (3-3) times. After all bind off for the raglan and the neck 45-49-53 (53-57) sts left on row. NECK Pick up approx. 23-27 sts at the front neck (including the sts on the holder) = a total of 68 to 84 sts all around the neck. Put all the sts on a circular needle size 4 mm / US 6 – knit 1 row of stockinette sts seen from the right side at the same time decrease the number of sts evenly distributed on row to 50-54-58 (62-66) sts. Knit 8 rows of stockinette sts and bind off loosely – the neck should roll around. ASSEMBLY Sew the openings under the sleeves together. Put the button edges on top of each other with the button hole edge at the top and sew the the bottom of the edge from the wrong side. Sew in the buttons. -------------------------------------------------------- HAT: To fit head circumference: Approx. 40/42 – 42/44 – 44/46 (48/50 -50/52) cm. Cast on 80-90-90 (100-100) sts on double pointed needles size 4 mm / US 6 with 2 strands of Alpaca. Knit 4 rounds of garter sts. Continue in M.2. When the piece measures 10-11-12 (13-14) cm / 4"-4⅜"-4¾" (5⅛"-5½") bind off 1 purl st in between each cable. Repeat the bind off on every other row until all the purl sts are bound off = 32-36-36 (40-40) sts. On next round K2 tog around= 16-18-18 (20-20) sts. Cut the thread and pull it through the remaining sts. The hat now measures approx. 15-16-17 ( 18-19) cm in the length. |
|||||||||||||
Diagram explanations |
|||||||||||||
|
|||||||||||||
 |
|||||||||||||
Have you finished this pattern?Tag your pictures with #dropspattern #tobyset or submit them to the #dropsfan gallery. Do you need help with this pattern?You'll find 26 tutorial videos, a Comments/Questions area and more by visiting the pattern on garnstudio.com. © 1982-2026 DROPS Design A/S. We reserve all rights. This document, including all its sub-sections, has copyrights. Read more about what you can do with our patterns at the bottom of each pattern on our site. |
|||||||||||||


With over 40 years in knitting and crochet design, DROPS Design offers one of the most extensive collections of free patterns on the internet - translated to 17 languages. As of today we count 324 catalogs and 12290 patterns - 12280 of which are translated into English (US/in).
We work hard to bring you the best knitting and crochet have to offer, inspiration and advice as well as great quality yarns at incredible prices! Would you like to use our patterns for other than personal use? You can read what you are allowed to do in the Copyright text at the bottom of all our patterns. Happy crafting!
Post a comment to pattern DROPS Baby 13-7
We would love to hear what you have to say about this pattern!
If you want to leave a question, please make sure you select the correct category in the form below, to speed up the answering process. Required fields are marked *.