
Popular categories
Looking for a yarn?


|
|||||||||||||
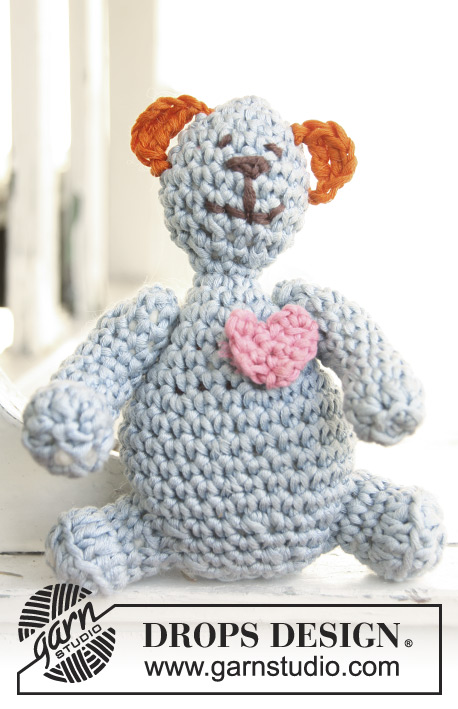
Toby |
|||||||||||||
 |
 |
||||||||||||
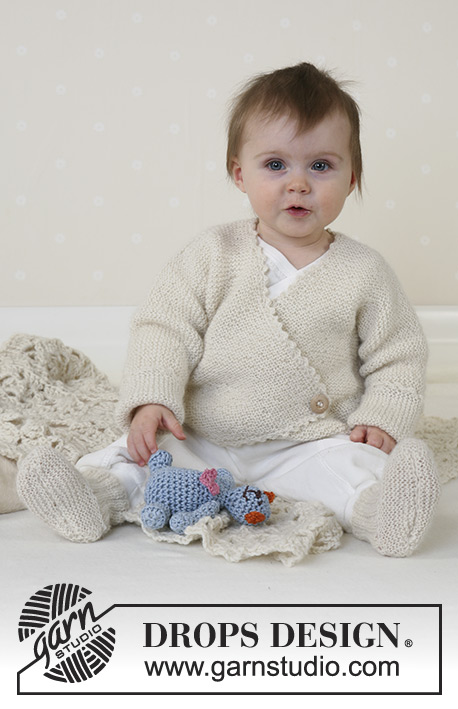
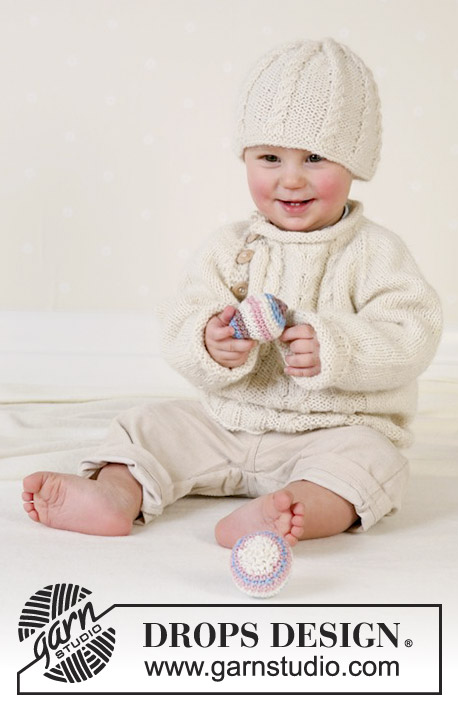
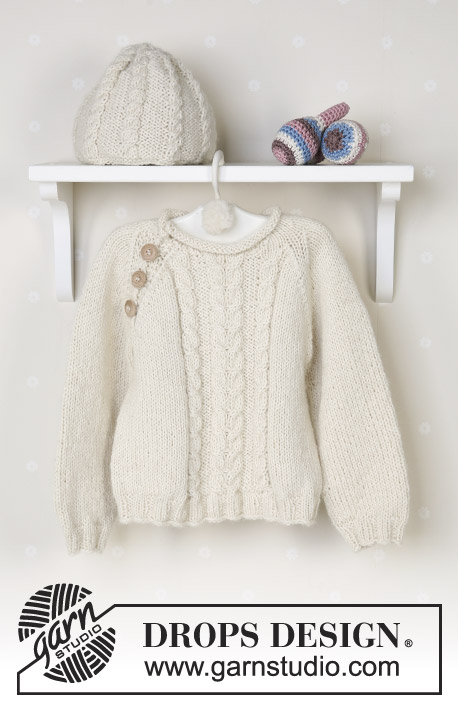
DROPS Jumper, hat, ball and rattle in Alpaca
DROPS Baby 13-7 |
|||||||||||||
|
Knitting tension: 19 sts x 25 rows on needles size 4 mm and 2 threads of Alpaca in stocking sts = 10 x 10 cm. Rib: *K3, P3*, repeat from *-*. Pattern: See diagrams M.1 and M.2. The diagrams show the pattern from the right side and repeat the pattern until finish measures. Bind off tips (for the raglan): Bind off as follows from the right side: K 4 edge sts in garter sts, P2 tog. *Knit until 3 sts left before the next marking thread, slip a sts as if to knit, K1, psso, K2, K2 tog* repeat from *-* at the next 2 marking threads and continue until 6 sts left on row, slip a st as if to knit, K1, psso, K4 front edge sts in garter sts. Bind off as follows from the wrong side: K 4 edge sts in garter sts, K2 tog. *Knit until 3 sts left before the next marking thread, P2 twisted tog (this means instead of knitting into the back part of the st knit in the front part), P2, P2 tog* repeat from *-* at the next 2 marking threads and continue until 6 sts left on row, P 2 twisted tog, K4 front edge sts in garter sts. Button hole (for the raglan): Bind off for button holes on the raglan edge on the sleeve. Bind off as follows: K1, K2 tog, make a yo, K1. Bind off for button holes when the front edge measures as follows: Size 1/3 months: 2, 5 and 8 cm Size 6/9 months: 3, 6 and 9 cm Size 12/18 months: 3, 7 and 10 cm Size 2 years: 3, 7 and 10 cm Size 3/4 years: 4, 8 and 12 cm --------------------------------------------------------------- JUMPER: Front and back piece: Cast on 102-114-126 (138-150) sts with 2 threads of Alpaca on circular needle size 3.5mm. Knit 1 round of stocking sts and continue in Rib until the piece measures 3 cm. Change to circular needle size 4 mm and knit 1 round of stocking sts. Knit the next round as follows: 11-14-17 (20-23) sts of stocking sts, insert a marking thread into the 1st st of these sts (=the side), M.1 (= 33 sts) 11-14-17 (20-23) sts of stocking sts insert a marking thread into the last of these sts (= the side), 47-53-59 (65-71) sts of stocking sts. Continue until the piece measures 16-17-20 (23-25) cm. Bind off 5 sts each side for the armhole (= the sts with the marking thread + 2 sts each side) = 49-55-61 (67-73) sts for the front piece and 43-49-55 (61-67) sts for the back piece. Put the piece aside and knit the sleeves. SLEEVE Cast on 30-30-36 (36-36) sts with 2 threads of Alpaca on double pointed needles size 3.5 mm. Knit in round in stocking sts and continue in Rib until the piece measures 3 cm. Change to double pointed needles size 4 mm and continue in stocking sts. At the same time when piece measures 6 cm, inc 2 sts at the mid center underneath the sleeve on every 3rd-2nd-3rd(2.5-2.5) cm a total of 4-6-5(7-9) times = 38-42-46 (50-54) sts. When the piece measures 17-19-20(25-29) cm bind off 5 sts at the mid centre underneath the sleeve = 33-37-41(45-49) sts. Put the piece aside and knit another sleeve. YOKE Put sleeves in on the same needle as body piece where you cast off for armholes = 158-178-198 (218-238) sts. Insert a marking thread where sleeve meets body (= 4 marking threads). Knit forward and backward from the right “raglan seam” at the front. Cast on 4 more sts at the front piece ( = button edge) =162-182-202 (222-242) sts. Read all of the next section before continuing! Continue in stocking sts and with cables at the center mid front and 4 garter sts at the beginning and end of each row (for the button edge). At the same time bind off for the raglan – see bind off tips – bind off on every other row 11-11-12 (12-13) times and hereafter on every row 1-3-4 (6-7) times. NB: Bind off for button hole too – see explanation above. At the same time when the piece measures 23-25-29 (32-35) cm put 13-13-13 (15-15) sts at the center mid front on a thread for the neck. Continue to bind off for the neck on every other row: 2 sts 1 time, 1 st 2-2-2 (3-3) times. After all bind off for the raglan and the neck 45-49-53 (53-57) sts left on row. NECK Pick up approx. 23-27 sts at the front neck (including the sts on the thread) = a total of 68 to 84 sts all around the neck. Put all the sts on a circular needle size 4 mm – knit 1 row of stocking sts seen from the right side at the same time decrease the number of sts evenly distributed on row to 50-54-58 (62-66) sts. Knit 8 rows of stocking sts and bind off loosely – the neck should roll around. ASSEMBLY Sew the openings under the sleeves together. Put the button edges on top of each other with the button hole edge at the top and sew the the bottom of the edge from the wrong side. Sew in the buttons. _________________________________________ HAT: To fit head circumference: Approx. 40/42 – 42/44 – 44/46 (48/50 -50/52) cm. Cast on 80-90-90 (100-100) sts on double pointed needles size 4 mm with 2 threads of Alpaca. Knit 4 rounds of garter sts. Continue in M.2. When the piece measures 10-11-12 (13-14) cm bind off 1 purl st in between each cable. Repeat the bind off on every other row until all the purl sts are bound off = 32-36-36 (40-40) sts. On next round K all sts together 2 and 2 = 16-18-18 (20-20) sts. Cut the thread and pull it through the remaining sts. The hat now measures approx. 15-16-17 ( 18-19) cm in the length. _________________________________________ Ball and rattle: See pattern no. BabyDROPS 13 - 8 |
|||||||||||||
Diagram explanations |
|||||||||||||
|
|||||||||||||

|
|||||||||||||
|
Have you made this or any other of our designs? Tag your pictures in social media with #dropsdesign so we can see them! Do you need help with this pattern?You'll find tutorial videos, a Comments/Questions area and more by visiting the pattern on garnstudio.com. © 1982-2024 DROPS Design A/S. We reserve all rights. This document, including all its sub-sections, has copyrights. Read more about what you can do with our patterns at the bottom of each pattern on our site. |
|||||||||||||


With over 40 years in knitting and crochet design, DROPS Design offers one of the most extensive collections of free patterns on the internet - translated to 17 languages. As of today we count 304 catalogues and 11422 patterns - 11422 of which are translated into English (UK/cm).
We work hard to bring you the best knitting and crochet have to offer, inspiration and advice as well as great quality yarns at incredible prices! Would you like to use our patterns for other than personal use? You can read what you are allowed to do in the Copyright text at the bottom of all our patterns. Happy crafting!
Comments / Questions (40)
Jag undrar hur man fortsätter sticka varvet runt när man satt maskor på tråd för halsen. Och var ska man maska av mot halsen? Är det maskorna intill de som satts på tråd?
23.12.2023 - 21:26DROPS Design answered:
Hej Amanda, når du har sat masker på en tråd til hals, fortsætter du at strikke frem og tilbage og maskar av intill de som satts på tråd ja :)
02.01.2024 - 09:41Hej igen Når ryg- og forstykke strikkes på rundpind, skal der så sættes mærketråde ved siderne i samtlige omgange eller kun hvert anden omgang?
02.12.2022 - 21:53DROPS Design answered:
Hei Káte. La merketrådene følge arbeidet samtidig som det strikkes, slik at du hele tiden kan se hvor sidene i arbeidet er. Se gjerne hjelpevideoen: Hvordan sættes en mærketråd imellem 2 masker mvh DROPS Design
05.12.2022 - 12:58Hej Jeg er i gang med at strikke trøjen med snoninger og har fået rynker ved siderne, hvor mærketråde indsættes. Jeg har fulgt videoen med eksemplet på, hvordan mærketråde skal indsættes, men får alligevel rynkede sider.
29.11.2022 - 18:13DROPS Design answered:
Hej, mærketråde kan ikke gøre siderne rynkede.... vi forstår ikke rigtig hvad det er som bliver rynket... Prøv at spørge i butikken hvor du har købt garnet :)
01.12.2022 - 14:02Estimados hay dos errores. Cuando se indica disminuir para el raglán por el lado derecho dice que se debe tejer dos puntos juntos por lado REVÉS, y debe decir DERECHO. De igual forma se indica erradamente cuando es por el lado revés dice tejer dos puntos junto lado derecho y debe decir revés. Lo digo porque existe otro pullover igual sin botones y en ese si se indica correctamente.
19.05.2021 - 04:03Hola tengo una duda en la Pechera: dice disminuir cada dos hileras, esto significa tejer una donde disminuyó, luego tejer dos (que no disminuyo), luego la siguiente si disminuyó? Gracias
17.05.2021 - 04:36DROPS Design answered:
Hola Ximena, cada dos hileras es: en una se disminuye, en la siguiente no, y en la siguiente sí. La explicación que has dado tú sería para cada 3 hileras.
30.05.2021 - 21:05El pullover se teje en redondo? Es que no lo indica.
29.04.2021 - 01:40DROPS Design answered:
Hola Ximena, si, se teje en redondo. Buen trabajo!
29.04.2021 - 13:43Que voulez-vous dire par boutonnière lorsqu’il n’y a pas de bouton sur ce chandail???
09.01.2021 - 23:33DROPS Design answered:
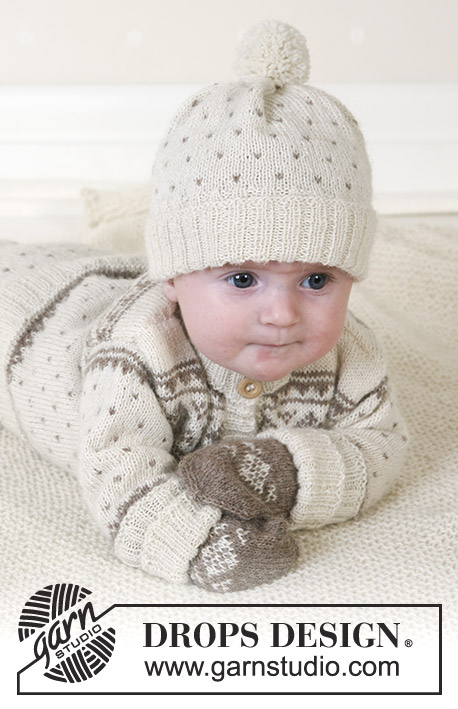
Bonjour Mme Turcotte, pour ce modèle, on a 3 boutons le long de la bordure du raglan - vous les verrez mieux sur la 2ème photo. Bon tricot!
11.01.2021 - 09:03Bonjour, Dans ce modèle, est-ce que devant et dos se tricotent en rond ? Et pourquoi les manches se tricotent-elles en aiguilles double pointe et non en rond avec aiguilles circulaires ? Merci de votre aide !
25.11.2020 - 15:45DROPS Design answered:
Bonjour Mme Soulié, on tricote effectivement le dos et le devant en rond sur une petite aiguille circulaire jusqu'aux emmanchures. Les manches se tricotent sur doubles pointes en raison du nombre de mailles, mais vous pouvez utiliser une circulaire et la technique du magic loop si vous le souhaitez. Bon tricot!
25.11.2020 - 16:41Hej! Jag stickar mönstret strl 6-9månader. I mönstret står följande: "Samtidigt när arb mäter 23-25-29 (32-35) cm sätts de mittersta 13-13-13 (15-15) m på 1 tråd till hals." Menas med detta de 13 mittersta av samtliga maskor (de hamnar då över vänster axel), eller menas de 13 mittersta på framstycket? Sistnämnda verkar mest rimligt dels ur mönstersynpunkt och dels då det senare i mönstret står: Plocka upp ca 23-27 m fram i halsen (inkl m på tråden) = 68-84 m. MVH, Jenny
17.07.2020 - 20:29DROPS Design answered:
Hej Jenny, det er de midterste masker til halsen som sættes på en tråd. God fornøjelse!
30.07.2020 - 15:17Bonjour. Je réalise le bonnet et lorsque j'arrive aux diminutions, il faut diminuer 1 m envers dans chaque torsades. Pouvez vous me dire comment réaliser ces diminutions. D'avance merci.
12.04.2020 - 13:09DROPS Design answered:
Bonjour Danielle, vous allez diminuer 1 maille dans les sections 6 mailles envers de M.2 jusqu'à ce que toutes les mailles envers aient été diminuées ; tricotez ensemble à l'envers les 2 premières mailles après chaque torsade par exemple, la fois suivante, tricotez ensemble à l'envers les 2 m avant chaque torsade et continuez ainsi en diminuant alternativement après et avant chaque torsade. Bon tricot!
14.04.2020 - 11:25