
Popular categories
Looking for a yarn?


Comments / Questions (22)
![]() Wiola wrote:
Wiola wrote:
Dzień dobry. Jestem na początku robienia karczmy, rozmiar S I proszę o pomoc. Nie rozumiem Jak należy powtarzać w kolejnych rzędach schemat A1. Pierwszy rząd jest dla mnie jasny Ale nie rozumiem jak to jest w kolejnych rzędach powtarzania. Ile oczek należy zrobić żeby narzucić oczka jak na schemacie. Dziękuję
02.02.2019 - 10:14DROPS Design answered:
Cześć Wiolu! Umieść maker w oczko środkowe każdego schematu A.1 (będzie to 4-te oczko), a wykonując kolejne narzuty (co 2 rzędy) zawsze wykonuj 1 narzut o 1 oczko wcześniej przed oczkiem z markerem i o 1 oczko później za oczkiem z markerem> przez cały czas będą 3 oczka między 2 narzutami, one utworzą równą (skośną) oś reglanu. Powodzenia!
04.02.2019 - 07:23
![]() Mirte wrote:
Mirte wrote:
Is het mooie vest op de foto gebreid door 2 bollen af te wisselen? Het is mij niet duidelijk uit de tekst of dit een suggestie is voor aanpassing, of bij het patroon hoort. Alvast bedankt!
12.09.2018 - 09:46DROPS Design answered:
Dag Mirte, Deze vraag (of de afbeelding met of zonder de tip om het vest streperiger te maken) heb ik even bij de designafdeling neergelegd. Als je ik een reactie heb laat ik het z.s.m. weten)
12.09.2018 - 13:35
![]() Susanne wrote:
Susanne wrote:
Hej, Jeg vil gerne strikke denne jakke i Fabel. Vil I anbefale at gå en halv pinde størrelse ned, altså til 3.5 i stedet for str. 4 ? Jeg tænker jo på, at Fabel er en smule tyndere :-) Mvh. Susanne
31.07.2018 - 23:57DROPS Design answered:
Hej Susanne, du er nødt til at lave en lille strikkeprøve så du er sikker på at du får samme strikkefasthed som i opskriften, prøv med p 3,5 eller 4 :)
15.08.2018 - 08:30
![]() Lorna wrote:
Lorna wrote:
To place the button holes the pattern says \"work from the right side until there are 3 stitches left on the row\". By doing this won\'t the button holes be on the left hand band and not the right?
21.06.2018 - 22:13DROPS Design answered:
Dear Lorna, jacket is worked top down (= from RS you first work left front piece, and end with right front piece), so that buttonhole will be worked at the end of row from RS so that they will be on the right front band. Happy knitting!
22.06.2018 - 08:12
![]() Billaudel wrote:
Billaudel wrote:
Au premier lavage le tricot s’est beaucoup allongé et en plus la laine a perdu énormément de « bouloches ». Je suis extrêmement déçue par le modèle ET la laine qui est de très mauvaise qualité. Les deux sont à éviter
02.06.2018 - 16:08DROPS Design answered:
Bonjour Mme Billaudel, pensez toujours à laver votre échantillon avant de le mesurer, afin d'avoir les bonnes mesures à la fin, et ajustez la taille des aiguilles en conséquence si nécessaire et respectez bien les consignes d'entretien en plus de celles de l'étiquette - n'hésitez pas à vous adresser à votre magasin pour toute information complémentaire, merci. Bon tricot!
04.06.2018 - 10:11
![]() Nathalie wrote:
Nathalie wrote:
Je suis à figurer la boutonnière , si vous dites sur un rang endroit à la fin du rang on fait le jeté donc pour qu'elle soit à droite cela veut t'il dire que le tout premier rang est un rang envers?
11.05.2018 - 03:13DROPS Design answered:
Bonjour Nathalie, ce gilet se tricote de haut en bas, en commençant par le devant gauche et en terminant par le devant droit (= sur l'endroit). On ouvre les boutonnières sur la bordure devant droit, sur l'endroit, donc en fin de rang sur l'endroit. Bon tricot!
11.05.2018 - 08:12
![]() Kari wrote:
Kari wrote:
Vil maskeantallet i raglanen forbli det samme hele veien? Skal man da flytte markøren inn en maske i hver side etter at økningen blir gjort? Kan ikke forstå ut av forklaringene men ved å se på bildet ser det ut som maskeantallet forblir det samme hele veien.
26.04.2018 - 00:32DROPS Design answered:
Hej Kari, du øger på hver side af de 3 midterste masker i A.1 hele vejen op, god fornøjelse!
26.04.2018 - 09:41
![]() Emily wrote:
Emily wrote:
Warum soll der Faden des 2. Knäuels mitgeführt werden? Kann ich nicht einfach am Anfang jeder 2. Reihe das Knäuel wechseln? Liebe Grüße :)
07.04.2018 - 10:30DROPS Design answered:
Liebe Emily, ja genau, Knäuel wird immer am Anfang jeder 2. Reihe gewechselt. Viel Spaß beim stricken!
09.04.2018 - 09:38
![]() Olga wrote:
Olga wrote:
Hallo! Ich möchte diese Jacke mit Fabel Stricken, muss ich da auch mit zwei Knäueln arbeiten damit man schönere Muster bekommt?
20.03.2018 - 23:25DROPS Design answered:
Liebe Olga, die Farbverläufen sind unterschiedlich im Fabel (Print oder Long Print) und Delight, das sollen Sie dann selbst entscheiden, wie Sie am besten möchten, Ihr DROPS Laden wird Ihnen auch gerne damit helfen. Viel Spaß beim stricken!
21.03.2018 - 09:25
![]() Billaudel Nathalie wrote:
Billaudel Nathalie wrote:
Je viens de commencer le gilet Cecina et ne ne comprends absolument rien à vos explications pour le raglan. Où puis je trouver plus d’informations ?
11.03.2018 - 19:40DROPS Design answered:
Bonjour Mme Billaudel, n'hésitez pas à bien expliquer ici ce que vous ne comprenez pas, en indiquant bien la taille que vous tricotez. Pour toute assistance personnalisée, vous pouvez également contacter le magasin où vous avez acheté votre laine, même par mail ou téléphone. Bon tricot!
12.03.2018 - 11:03
|
||||||||||||||||
Cecina#cecinacardigan |
||||||||||||||||
 |
 |
|||||||||||||||
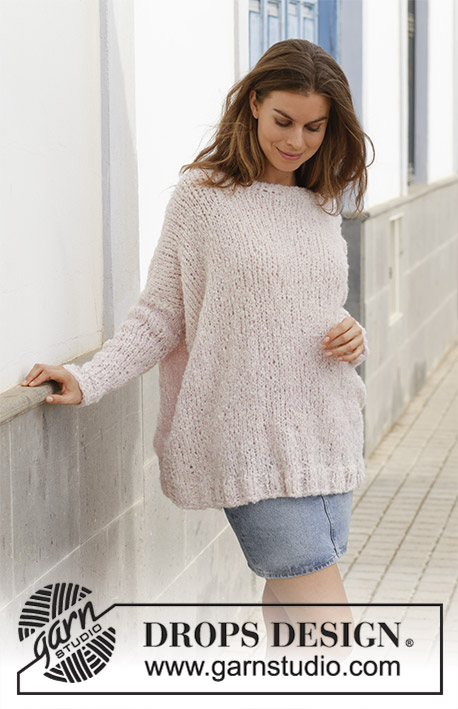
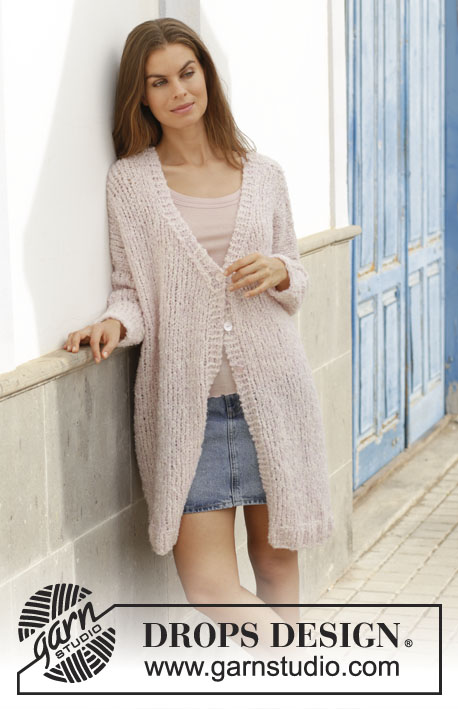
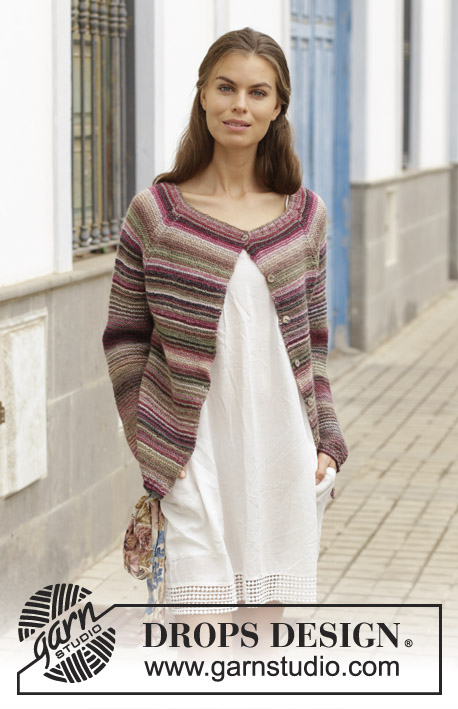
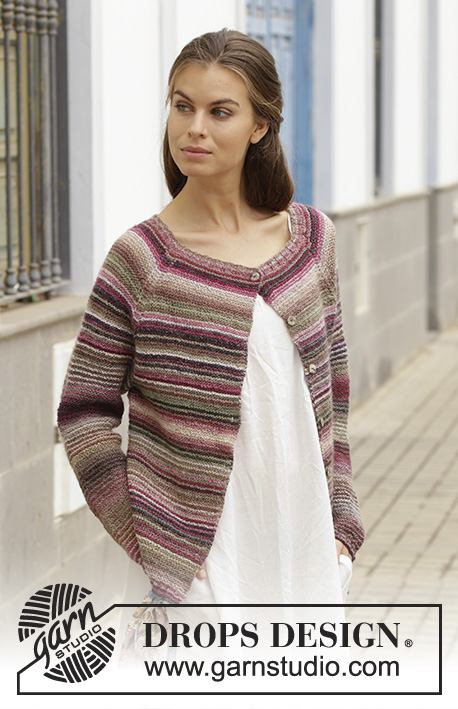
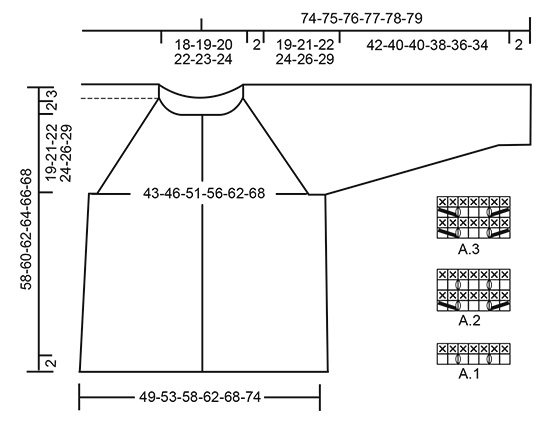
Knitted jacket with garter stitch and raglan, worked top down. Sizes S - XXXL. The piece is worked in DROPS Delight.
DROPS 188-25 |
||||||||||||||||
|
INFORMATION FOR THE PATTERN: RIDGE/GARTER STITCH (worked back and forth): 1 ridge = Knit 2 rows. RIDGE/GARTER STITCH (worked in the round – for sleeves): 1 ridge = 2 rounds. Knit 1 round and purl 1 round. PATTERN: See diagrams A.1 to A.3. The diagrams show all the rows in the pattern seen from the right side. STRIPES: To make the garment more stripy, work with 2 alternate balls of the same colour; adjust the balls so that you start with 2 different colours. * Work 2 rows with the first ball, then work 2 rows with the other *, work from *-*. The first row with a new ball is worked from the right side. The strands are carried forward as you work. INCREASE TIP (for sides of body): All increases are made from the right side! Work until there is 1 stitch left before the marker, make 1 yarn over, knit 2 stitches (the marker sits in the middle of these 2 stitches), make 1 yarn over (= 2 stitches increased). Repeat at both markers (= a total of 4 stitches increased). On the next row (wrong side) knit the yarn overs twisted to avoid holes. DECREASE TIP (for sleeves): Decrease on each side of the marker thread as follows: Start 4 stitches before the marker thread, knit 2 stitches together, knit 4 (the marker thread sits in the middle of these 4 stitches), slip 1 stitch as if to knit, knit 1, pass the slipped stitch over the knitted stitch (= 2 stitches decreased). BUTTONHOLES: Work buttonholes on the right band (when the garment is worn). Work from the right side until there are 3 stitches left on the row, then make 1 yarn over, knit the next 2 stitches together and knit the last stitch. On the next row knit the yarn over to leave a hole. The first buttonhole is worked when the rib in the neck measures approx. 1½ cm. Then work the other 7 buttonholes with approx. 7-7½-8-8-8½-8½ cm between each. ---------------------------------------------------------- JACKET: The yoke and body are worked back and forth on circular needle, top down. The sleeves are worked in the round with double pointed needles. YOKE: Cast on 132-136-144-148-156-160 stitches with circular needle size 3 mm and Delight. Work 5 band stitches in GARTER STITCH – see description above, work rib (= knit 2 /purl 2) until there are 7 stitches left, finish with knit 2 and 5 band stitches in garter stitch. Work STRIPES – see description above, to finished length. Remember BUTTONHOLES – see description above. When the rib measures 2 cm, change to circular needle size 4 mm. Work as follows from the right side: Work 5 band stitches in garter stitch, 16-17-19-20-22-23 stitches in garter stitch (= left front piece), A.1 (= 7 stitches), 15 stitches in garter stitch, A.1 over 7 stitches (= left sleeve), 32-34-38-40-44-46 stitches in garter stitch (= back piece), A.1 over 7 stitches, 15 stitches in garter stitch, A.1 over 7 stitches (= right sleeve), 16-17-19-20-22-23 stitches in garter stitch, 5 band stitches in garter stitch (= right front piece). REMEMBER THE KNITTING TENSION! The increased stitches in A.1 are worked in garter stitch, increase 2 stitches in each A.1 on each row from the right side (= a total of 8 stitches increased every 2nd row). Work A.1 a total of 4-8-13-13-16-19 times in height = 164-200-248-252-284-312 stitches. Then work A.2 over A.1. Increase 2 stitches in each A.2 every 4th row (= a total of 8 stitches increased every 4th row). Work A.2 a total of 15-14-13-16-16-16 times = 284-312-352-380-412-440 stitches. Then work A.3 over A.2, the remaining stitches are worked in garter stitch. When the piece measures 21-23-24-26-28-31 cm from the cast-on edge, divide the piece as follows from the right side: Work 43-46-52-57-63-69 stitches in garter stitch (= left front piece), place the next 60-68-76-80-84-86 stitches on a thread for sleeve (= left sleeve), cast on 12 new stitches under the sleeve, 77-83-95-105-117-129 stitches in garter stitch (= back piece), place the next 60-68-76-80-84-86 stitches on a thread for sleeve (= right sleeve), cast on 12 new stitches under the sleeve and finish with 44-47-53-58-64-70 stitches in garter stitch. BODY: = 188-200-224-244-268-292 stitches. Insert 1 marker thread in the piece. THE PIECE IS NOW MEASURED FROM HERE! Insert 1 marker 49-52-58-63-69-75 stitches in from each side of the piece (= front pieces = 90-96-108-118-130-142 stitches on back piece). Allow the markers to follow your work onwards. Continue with garter stitch and stripes. When the piece measures 2 cm, increase 1 stitch on each side of each marker (= 4 stitches increased) – read INCREASE TIP. Increase like this every 4½-3-4-5-5-4 cm a total of 6-8-7-6-6-7 times = 212-232-252-268-292-320 stitches. When the piece measures 32-32-33-33-33-32 cm increase 28-32-36-36-40-44 stitches evenly on next row (do not increase over the bands) = 240-264-288-304-332-364 stitches. Change to circular needle size 3 mm and work rib (the first row is worked from the wrong side) as follows: Work 5 band stitches in garter stitch, work rib (= purl 2 / knit 2) until there are 7 stitches left, purl 2 and finish with 5 band stitches in garter stitch. Cast off with knit when the rib measures 2 cm (the piece measures a total of 55-57-59-61-63-65 cm from the neck edge). Make sure you cast off loosely; you can use a needle 1 size larger if necessary. SLEEVE: Place the 60-68-76-80-84-86 stitches from the thread on the one side of the piece onto double pointed needles size 4 mm and knit up 1 stitch in each of the 12 stitches cast on under the sleeve = 72-80-88-92-96-98 stitches. Insert 1 marker thread in the piece, THE PIECE IS NOW MEASURED FROM HERE! The piece is worked in the round. Insert 1 marker in the middle of the 12 stitches knitted up under the sleeve. Leave the marker thread where it is; the marker follows your work onwards! Work GARTER STITCH – see description above, and stripes. When the piece measures 2 cm decrease 1 stitch on each side of the marker – read DECREASE TIP. Decrease like this every 1 cm 0-7-11-14-17-17 times, then every 3 cm a total of 13-9-8-6-4-4 times = 46-48-50-52-54-56 stitches. When the piece measures 42-40-40-38-36-34 cm from the marker thread, increase 2-0-2-0-2-0 stitches evenly on round = 48-48-52-52-56-56 stitches. Change to double pointed needles size 3 mm and work rib (= knit 2 / purl 2). . When the rib measures 2 cm (the piece measures a total of 65-65-66-66-66-67 cm from the neck edge) cast off with knit. Make sure you cast off loosely; you can use a needle 1 size larger if necessary. Work the other sleeve in the same way. ASSEMBLY: Sew the buttons onto the left band. |
||||||||||||||||
Diagram explanations |
||||||||||||||||
|
||||||||||||||||
 |
||||||||||||||||
Have you finished this pattern?Tag your pictures with #dropspattern #cecinacardigan or submit them to the #dropsfan gallery. Do you need help with this pattern?You'll find 29 tutorial videos, a Comments/Questions area and more by visiting the pattern on garnstudio.com. © 1982-2026 DROPS Design A/S. We reserve all rights. This document, including all its sub-sections, has copyrights. Read more about what you can do with our patterns at the bottom of each pattern on our site. |
||||||||||||||||


With over 40 years in knitting and crochet design, DROPS Design offers one of the most extensive collections of free patterns on the internet - translated to 17 languages. As of today we count 324 catalogues and 12290 patterns translated into English (UK/cm). 12290
We work hard to bring you the best knitting and crochet have to offer, inspiration and advice as well as great quality yarns at incredible prices! Would you like to use our patterns for other than personal use? You can read what you are allowed to do in the Copyright text at the bottom of all our patterns. Happy crafting!
Post a comment to pattern DROPS 188-25
We would love to hear what you have to say about this pattern!
If you want to leave a question, please make sure you select the correct category in the form below, to speed up the answering process. Required fields are marked *.