
Popular categories
Looking for a yarn?


Comments / Questions (50)
![]() Jonna wrote:
Jonna wrote:
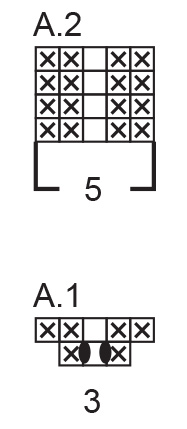
Skall precis påbörja efter halsringning: Jag citerar, sticka slätstickning o använd A2 fortsätt med raglan ökningar - men A2 innehåller inte ökningar, det gör A1?
27.04.2026 - 12:59DROPS Design answered:
Hej Jonna, du börjar med A.1 så du får extra maskor enligt A.1, du ökar till raglan enligt förklaringen (utöver de maskor du ökar i A.1). Sedan fortsätter du med A.2 över A.1. Och ökar till raglan på varje sida om A.2 enligt förklaringen till raglan :)
28.04.2026 - 08:01
![]() Brenda wrote:
Brenda wrote:
Can you please explain the A2 increases on the wrong size as the video does not seem to show those increases only the ones on the right side. I have ripped back twice now as I don’t have the right amount of stitches Thanks
25.01.2026 - 20:29DROPS Design answered:
Dear Brenda, you will see in this video how to work the yarn overs/raglan increases on each side of A.2 from wrong side when working the short rows for neckline, - remember to increase also from wrong side when stated (only for front and back pieces, not for sleeves) and here how to work them from RS when working in the round. Happy knitting!
27.02.2026 - 15:37
![]() Brenda wrote:
Brenda wrote:
Sorry previous comment wouldn’t hold my country of Canada
25.01.2026 - 18:37
![]() Brenda wrote:
Brenda wrote:
Very confused as I followed the video step by step on how to increase raglan while doing short rows. I only have 116 stitches . The video does not show increases on the wrong side as I am reading. Sorry but this is a very difficult pattern to understand. Have done other drops and didn’t have this issue. Is there another video showing both increases or better pattern instructions
25.01.2026 - 18:35
![]() Monika wrote:
Monika wrote:
Hallo,kann ich diese Anleitung auch mit 2 Fäden Kid Silk machen als Ersatz für Nepal ? Danke
09.01.2026 - 14:30DROPS Design answered:
Liebe Monika, solange Sie die gewünschte Maschenprobe haben, dann können Sie ja mit 2 Fäden Kid-Silk anstatt strickend, beachten Sie nur, daß die Textur etwas unterschiedlich aussehen wird, da beide Wollen verschieden sind. Viel Spaß beim Stricken!
12.01.2026 - 08:20
![]() Abi wrote:
Abi wrote:
I have ripped back and done again, the instructions on the neckline need to be amended, they state 8 sts increased on row 1, this should read 16. The yoke section explains how to increase either side of A2 for the raglan increases, this is the first time this is mentioned, hence the confusion on the neckline section. Have these patterns been test knit before publication?!
03.01.2026 - 00:37
![]() Abi Marshall-Smith wrote:
Abi Marshall-Smith wrote:
This is so complicated and not at all written in a user friendly manner! I see from a previous comment that for the neckline section, 16 sts are increased on the first round - for raglan and for A1. I understand the A1 increases, but where are the raglan increases to be added - this makes absolutely no sense! Why can you not just write out the instructions rather than making knitters move up and down through the instructions - up for the increase instructions and down for the charts?!
03.01.2026 - 00:00
![]() Kel wrote:
Kel wrote:
Perhaps I've done something wrong, I can't see how I would get the yoke to 120 after the short rows (size m). I started with 88, I increased 8, then 4, then 8, then 4. That's only 112?
24.11.2025 - 19:44DROPS Design answered:
Hi Kel, after short rows, in size M, you should have 124 sts. In row 1 you will add 16 sts (8 for raglan and 8 in A.1 diagrams), in row 2 you will increase 4 sts (raglan for front and back only, not the sleeves), row 3: 8 sts increased for raglan, row 4: 4 sts increased (raglan for front and back only, not the sleeves) > 92+16+4+8+4=124 sts. Happy knitting!
30.11.2025 - 18:16
![]() Linda wrote:
Linda wrote:
Sorry, ignore my question. It's my bad maths ! Of course it's 284
30.10.2025 - 21:23
![]() Linda wrote:
Linda wrote:
Hello, I can't see how you get a total of 284 sts for size M after raglan increases are done... Surely it should be 282 after all increases? My understanding for the second part is 16 increases, 8 will have 8 sts and 8 will have only 4 sts. This gives a total of 282 with the 188 we already have.
30.10.2025 - 21:02
|
||||||||||
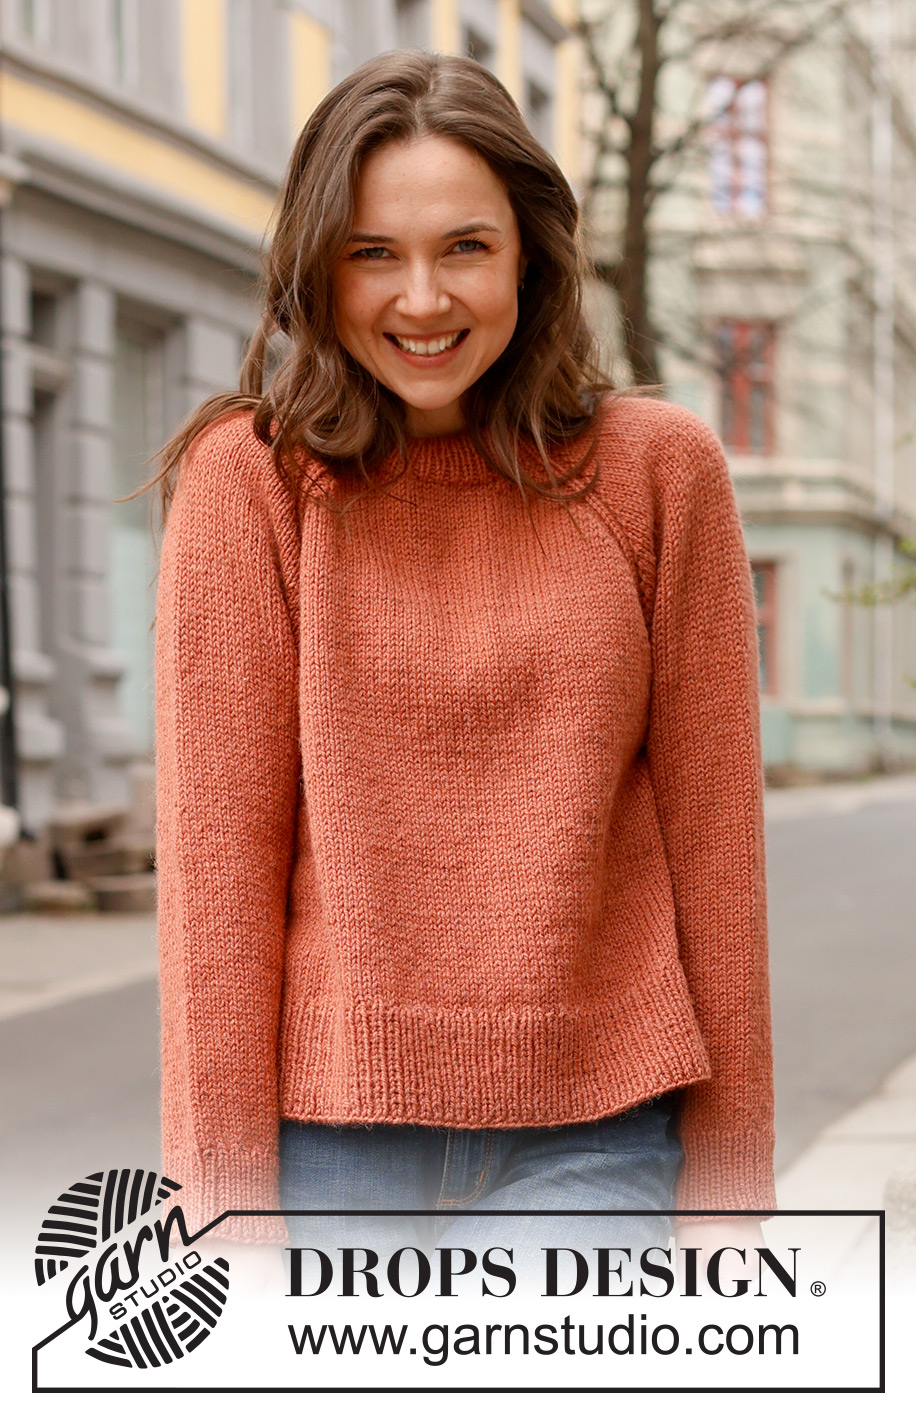
October Breeze#octoberbreezesweater |
||||||||||
 |
 |
|||||||||
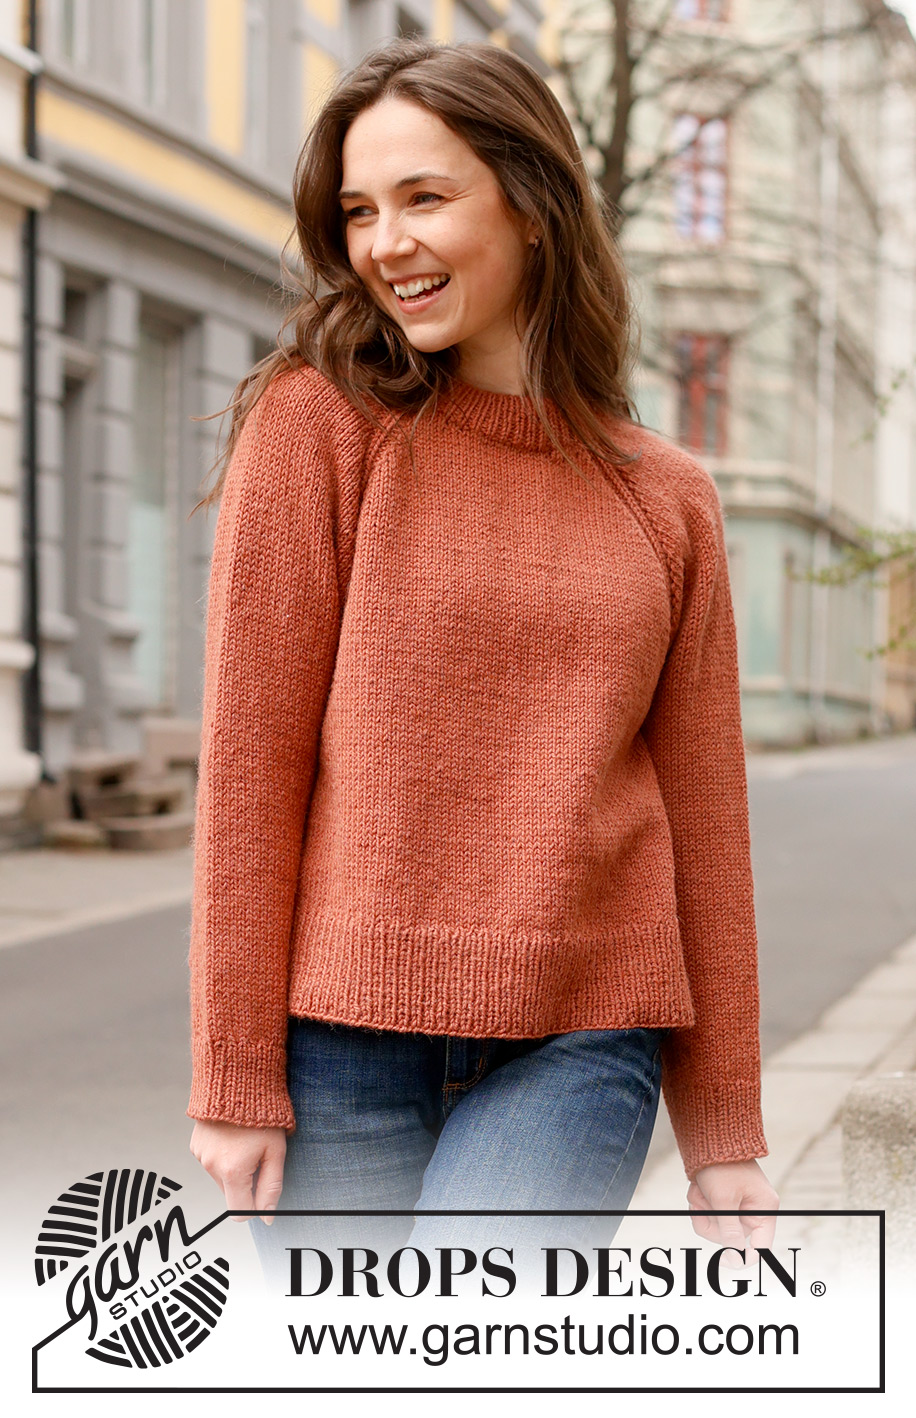
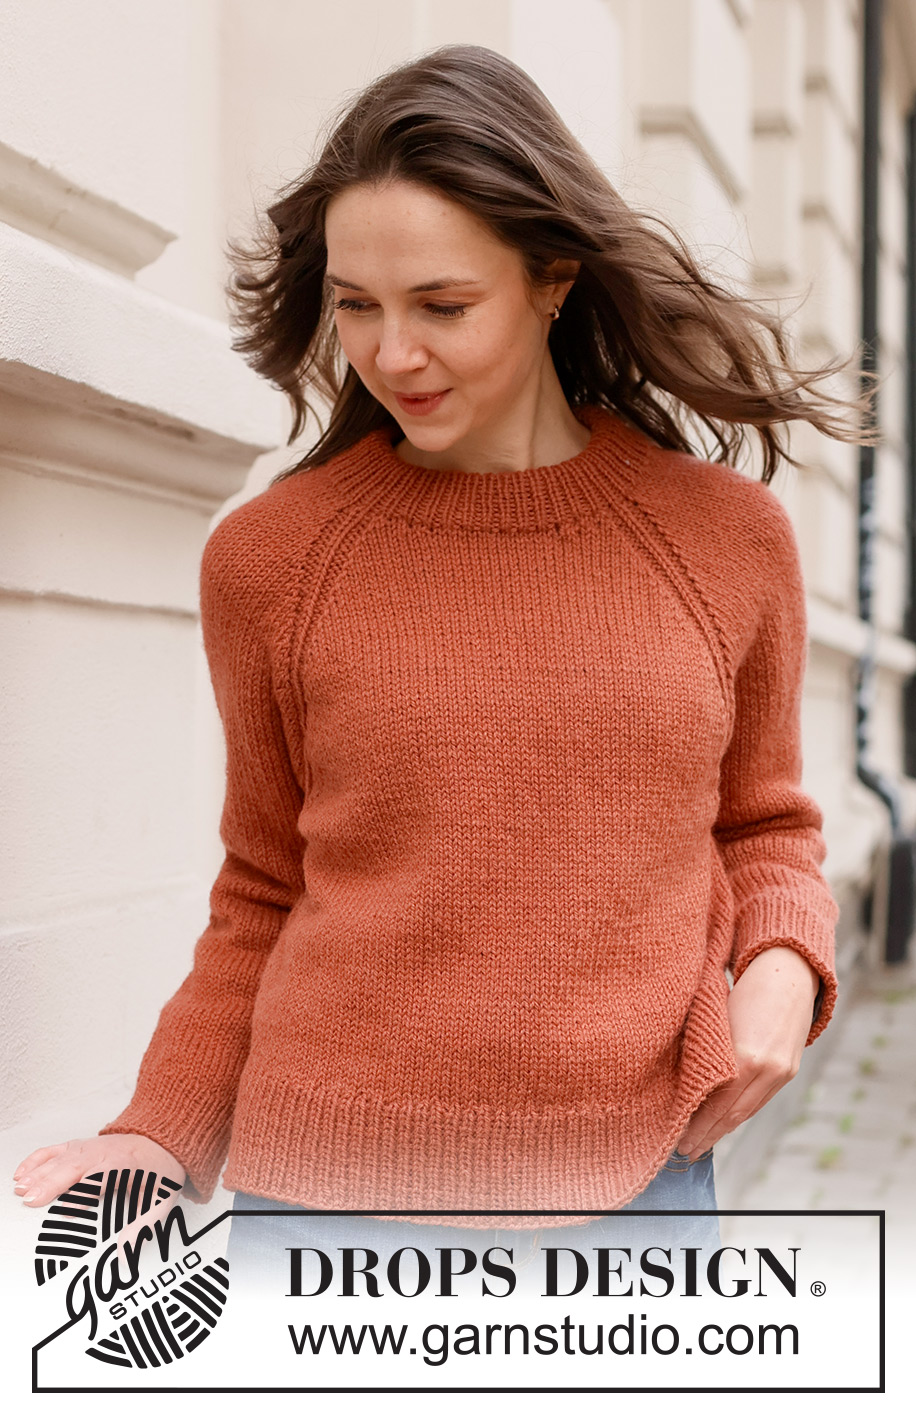
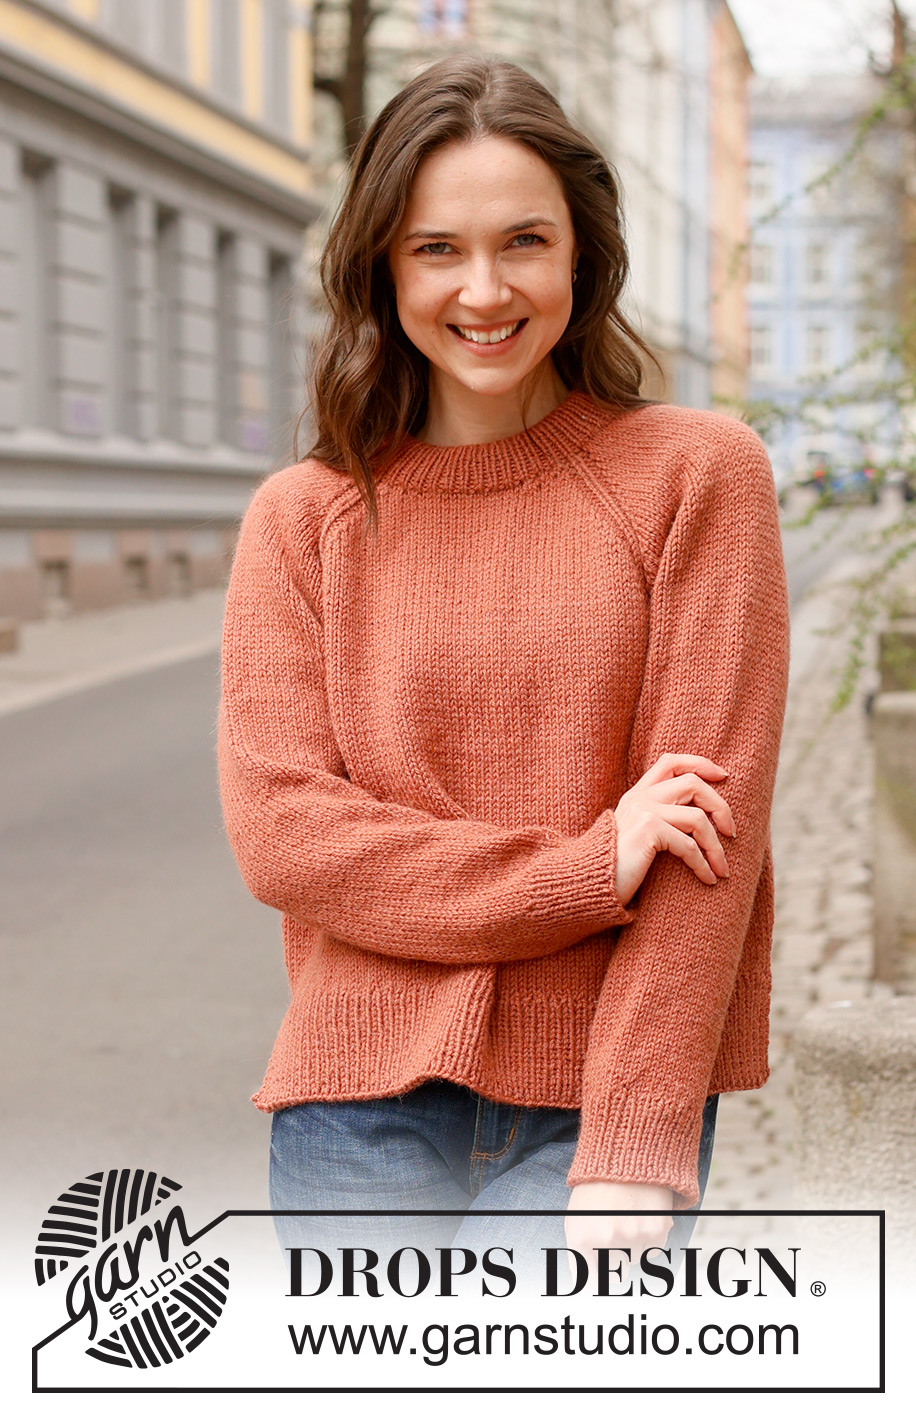
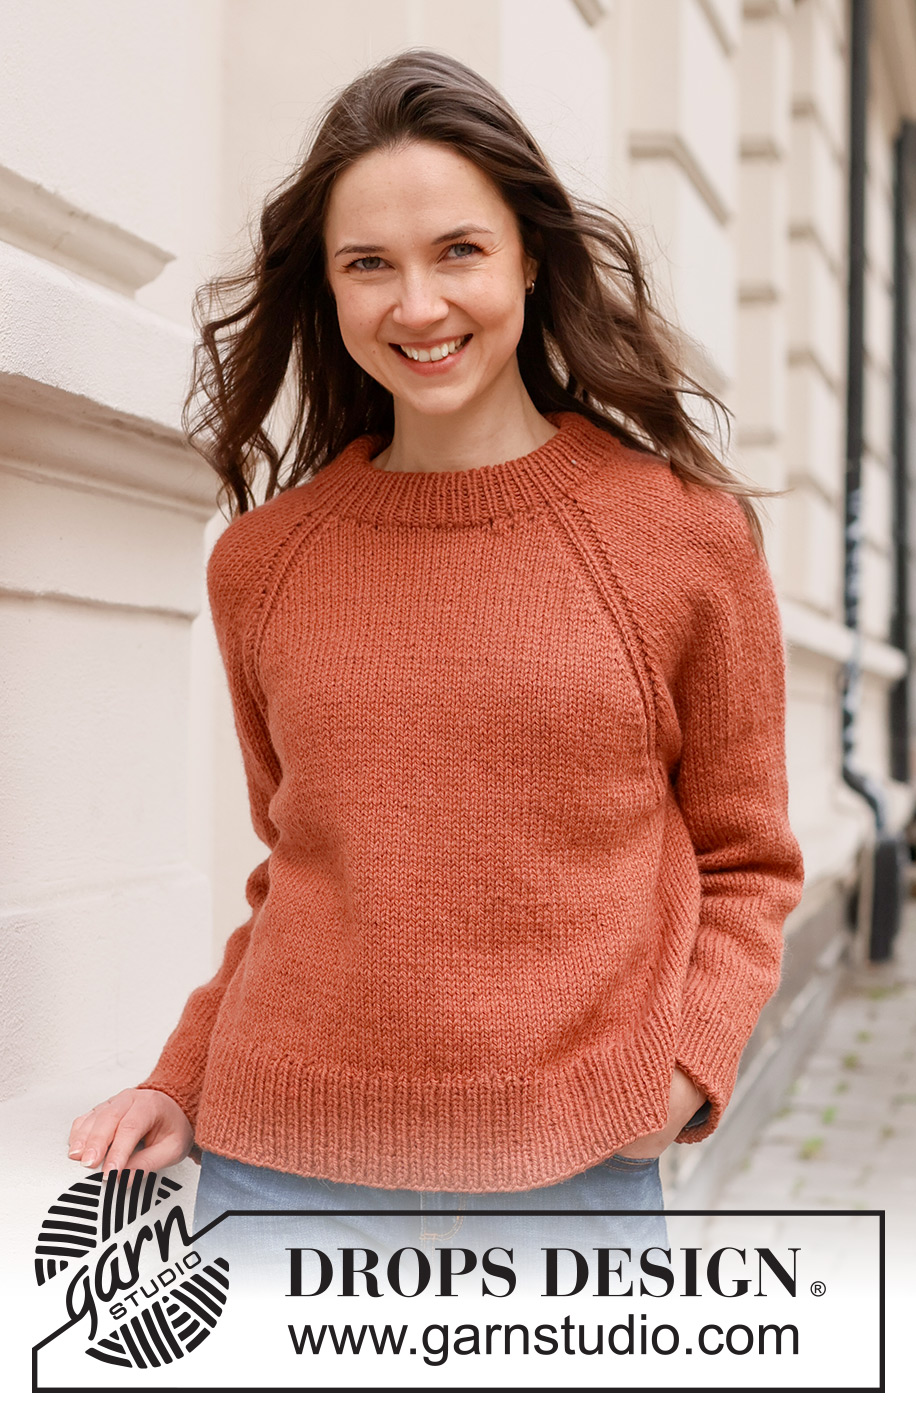
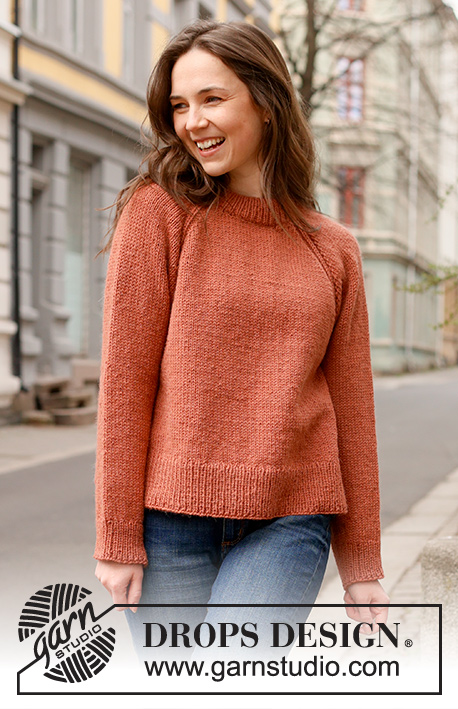
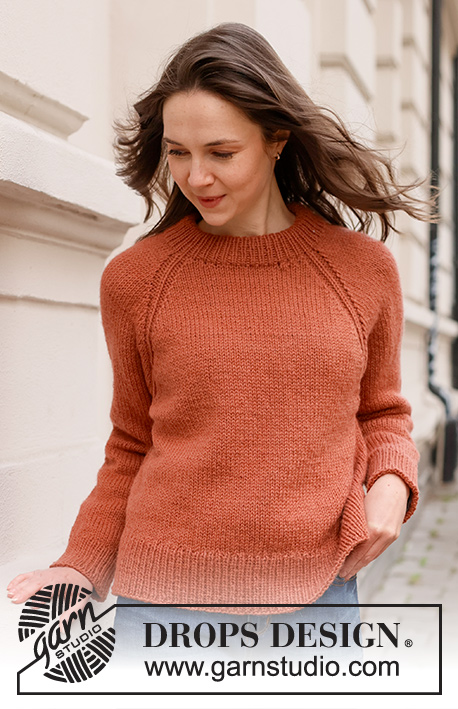
Knitted jumper in DROPS Nepal. The piece is worked top down with double neck and raglan. Sizes XS - XXL.
DROPS 236-14 |
||||||||||
|
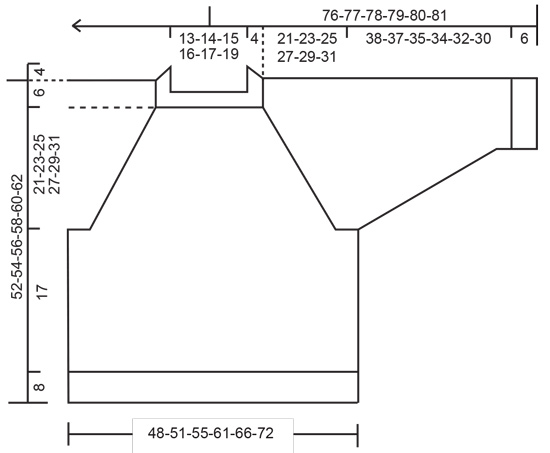
------------------------------------------------------- EXPLANATIONS FOR THE PATTERN: ------------------------------------------------------- RIDGE/GARTER STITCH (worked back and forth): Knit all rows. 1 ridge = knit 2 rows. PATTERN: See diagrams A.1 and A.2. The diagrams show all rows in the pattern from the right side. RAGLAN: All increases before/after A.1/A.2 (marker-stitch is the middle stitch in A.1/A.2). Increase for the body before markers 1 and 3 and after markers 2 and 4 when working from the right side and after markers 1 and 3 and before markers 2 and 4 when working from the wrong side. Increase for the sleeves after markers 1 and 3 and before markers 2 and 4 (always increase from the right side on the sleeves). Increase 1 stitch by making 1 yarn over. The yarn overs are worked as follows from the wrong side: BEFORE MARKER: Purl the back loop. No hole. AFTER MARKER: Slip the yarn-over off the left needle and replace it twisted (insert the left needle from the back when replacing it). Purl the front loop. No hole. The yarn overs are worked as follows from the right side: BEFORE MARKER: Slip the yarn-over off the left needle and replace it twisted (insert the left needle from the back when replacing it). Knit the front loop. The stitch twists to the right. No hole. AFTER MARKER: Knit the back loop (the stitch twists to the left). No hole. DECREASE TIP (for sleeves): Start 3 stitches before the marker, knit 2 together, knit 2 (marker sits between these 2 stitches), slip 1 stitch as if to knit, knit 1 and pass the slipped stitch over the knitted stitch. ------------------------------------------------------- START THE PIECE HERE: ------------------------------------------------------- JUMPER – SHORT OVERVIEW OF THE PIECE: The neck and yoke are worked in the round with circular needle, from mid back and top down. The yoke is divided for body and sleeves and the body is continued in the round with circular needle. The sleeves are worked with short circular needle/double pointed needles. DOUBLE NECK: Cast on 84-88-92-96-100-104 stitches with DROPS Nepal using short circular needles size 4 and 5 mm held together. Remove the needle size 5 mm keeping the stitches on the needle size 4 mm (this gives you an elastic cast-on edge). Work rib in the round (knit 1, purl 1) for 9 cm. Fold the neck double to the inside and work 1 more round of rib, working every 2nd stitch together with its corresponding stitch on the cast-on edge. You now have a double neck. Insert 4 markers without working the stitches, which are then used when increasing to raglan. Count 10-12-12-14-14-16 stitches (half back piece), insert marker-1 in the next stitch, count 19 stitches (sleeve), insert marker-2 in the next stitch, count 21-23-25-27-29-31 stitches (front piece), insert marker-3 in the next stitch, count 19 stitches (sleeve), insert marker-4 in the next stitch, there are 11-11-13-13-15-15 stitches left after the last marker (half back piece). Cut the strand. NECK-LINE: Change to circular needle size 5 mm. Now work a neck-line with short rows AT THE SAME TIME as increasing for raglan. In addition work A.1 at each marker (marker-stitch is the middle stitch in A.1): Start from the right side, 2 stitches before marker-3 (front left-hand side of the neck when the garment is worn). Work stocking stitch, A.1 and increase for RAGLAN on both sides of each A.1 – read description above, until you are 2 stitches past marker-2 (front right-hand side of neck and 8 stitches increased). Turn, tighten the strand and work from the wrong side, increasing for raglan only on the body, to 2 stitches past where the short rows began (4 stitches increased). Turn, tighten the strand and work from the right side to 2 stitches past where you turned last time – working A.2 over each A.1 and increasing for raglan on both sides of each A.2. Turn, tighten the strand and work from the wrong side to 2 stitches past where you turned last time, increasing for raglan only on the body. Cut the strand. YOKE: = 116-120-124-128-132-136 stitches. Work in the round over all stitches in the different sizes as follows: SIZES XS, S, M and L: Start mid-back, work stocking stitch, A.2, and increase raglan on the body and sleeves (on each side of A.2) every 2nd round 3-3-8-10 times = 140-144-188-208 stitches. Continue with stocking stitch, A.2 and increase for raglan, but every 2nd increase is only on the body (4 stitches increased); i.e. increase on the body every 2nd round and on the sleeves every 4th round. Increase like this 18-20-16-18 times on the body (9-10-8-9 times on the sleeves). A total of 25-27-28-32 times on the body and 14-15-18-21 times on the sleeves. After the last increase there are 248-264-284-316 stitches. Go to ALL SIZES. SIZES XL and XXL: Start mid-back, work stocking stitch, A.2 and continue to increase for raglan every round on the body 2-6 more times and every 2nd round on the sleeves 1-3 times = 144-172 stitches. Then increase on the body and sleeves (both sides of each A.2) every 2nd round 9-9 times = 216-244 stitches Continue with stocking stitch, A.2 and increase for raglan, but every 2nd increase is only on the body (4 stitches increased) – increase on the body every 2nd round and on the sleeves every 4th round. Increase like this 20-20 times on the body (10-10 times on the sleeves). A total of 35-39 times on the body and 22-24 times on the sleeves. After the last increase there are 336-364 stitches. Go to ALL SIZES. ALL SIZES. = 248-264-284-316-336-364 stitches. Work stocking stitch and A.2 without further increases until the yoke measures 21-23-25-27-29-31 cm after the neck, measured mid-front. On the next round divide for the body and sleeves: Work 37-41-42-48-51-57 stitches (half back piece), place the next 49-51-57-63-65-69 stitches on a thread for the sleeve, cast on 6-6-8-8-10-10 stitches (in side under sleeve), work 75-81-85-95-103-113 stitches (front piece), place the next 49-51-57-63-65-69 stitches on a thread for the sleeve, cast on 6-6-8-8-10-10 stitches (in side under sleeve), work 38-40-43-47-52-56 stitches (half back piece). Finish the body and sleeves separately. The piece is now measured from here! BODY: = 162-174-186-206-226-246 stitches. Insert 1 marker in the middle of the new stitches under each sleeve. Allow the markers to follow your work onwards; they are used when working the split in each side. Work stocking stitch in the round for a further 17 cm. On the next round divide the piece at both markers, place 81-87-93-103-113-123 stitches between the markers on circular needle size 4 mm and keep the remaining 81-87-93-103-113-123 stitches on the circular needle size 5 mm. Knit 1 row from the right side and increase 20-20-22-24-24-28 stitches evenly spaced = 101-107-115-127-137-151 stitches. Work back from the wrong side as follows: 1 stitch in GARTER STITCH – read description above, * purl 1, knit 1 *, work from *-* until there are 2 stitches left, purl 1 and 1 stitch in garter stitch. Continue this rib for 8 cm. Cast off a little loosely with knit over knit and purl over purl. Place the last 81-87-93-103-113-123 stitches back on circular needle 4 mm and knit 1 row from the right side increasing 20-20-22-24-24-28 stitches evenly spaced = 101-107-115-127-137-151 stitches. Work rib for 8 cm as for the first piece. Cast off a little loosely with knit over knit and purl over purl. The jumper measures approx. 52-54-56-58-60-62 cm from the shoulder down. SLEEVES: Place the 49-51-57-63-65-69 stitches from the thread on the one side of the piece on short circular needle/double pointed needles size 5 mm and knit up 1 stitch in each of the new stitches cast on under the sleeve = 55-57-65-71-75-79 stitches. Insert a marker in the middle of the new stitches under the sleeve. Allow the marker to follow your work onwards; it is used when decreasing under the sleeve. Work stocking stitch in the round for 4-4-4-3-3-3 cm. Now decrease 2 stitches on each side of the marker – read DECREASE TIP. Decrease like this every 6-6-3½-3-2½-2 cm a total of 6-6-9-11-12-13 times = 43-45-47-49-51-53 stitches. Continue working until the sleeve measures 38-37-35-34-32-30 cm from the division (or to desired length. There is approx. 6 cm left). Knit 1 round and increase 9 stitches evenly spaced = 52-54-56-58-60-62 stitches. Change to double pointed needles size 4 mm and work rib (knit 1, purl 1) for 6 cm. Loosely cast off with knit over knit and purl over purl. The sleeve measures approx. 44-43-41-40-38-36 cm from the division. Work the other sleeve in the same way. |
||||||||||
Diagram explanations |
||||||||||
|
||||||||||
 |
||||||||||
 |
||||||||||
Have you finished this pattern?Tag your pictures with #dropspattern #octoberbreezesweater or submit them to the #dropsfan gallery. Do you need help with this pattern?You'll find 37 tutorial videos, a Comments/Questions area and more by visiting the pattern on garnstudio.com. © 1982-2026 DROPS Design A/S. We reserve all rights. This document, including all its sub-sections, has copyrights. Read more about what you can do with our patterns at the bottom of each pattern on our site. |
||||||||||


With over 40 years in knitting and crochet design, DROPS Design offers one of the most extensive collections of free patterns on the internet - translated to 17 languages. As of today we count 324 catalogues and 12290 patterns translated into English (UK/cm). 12290
We work hard to bring you the best knitting and crochet have to offer, inspiration and advice as well as great quality yarns at incredible prices! Would you like to use our patterns for other than personal use? You can read what you are allowed to do in the Copyright text at the bottom of all our patterns. Happy crafting!
Post a comment to pattern DROPS 236-14
We would love to hear what you have to say about this pattern!
If you want to leave a question, please make sure you select the correct category in the form below, to speed up the answering process. Required fields are marked *.