
Popular categories
Looking for a yarn?


Comments / Questions (155)
![]() Robin Scott wrote:
Robin Scott wrote:
Re: Foggy Autumn Cardigan Yoke Instruction The size L pattern indicates stitch increase to 104 - which I have done. However the marker placement does not add up as indicated in the instructions. Says 18 - 14 - 36 - 14 with 18 remaining after last marker. That adds to 100 - 4 stitches unaccounted for. Please verify the appropriate marker placement. Thank you!
06.04.2026 - 21:29DROPS Design answered:
Hi Robin, Your 4 missing stitches are the marker-stitches. Each marker is inserted in a stitch (not between stitches), before you count onwards to the next marker-stitch. Regards, Drops Team.
07.04.2026 - 06:46
![]() Christelle CARON wrote:
Christelle CARON wrote:
Bonjour, je ne comprend pas combien de mailles qu’il faut monter pour le col en raille L. Dans l’attente de vous lire.
05.04.2026 - 12:08DROPS Design answered:
Bonjour Mme Cardon, pensez à utiliser l'outil de sélection de taille pour que toutes les indications de la vôtre soit entourée, ainsi vous pourrez mieux repérer votre taille. On va donc monter 88 mailles en taille L. Bon tricot!
08.04.2026 - 10:31
![]() Agnieszka wrote:
Agnieszka wrote:
Pomóżcie z tym obszycie prawego przodu. Próbuję juz od dwóch dni. Dziękuję
02.04.2026 - 08:22
![]() Kjerstin wrote:
Kjerstin wrote:
Viktig at det står tydeleg at stolpane på jakka skal strikkast heilt opp, saman med halsen. Lett å misforstå når det berre står framstykket.
24.03.2026 - 18:14
![]() Elly wrote:
Elly wrote:
Goedenmiddag, Ik vraag mij af met welke naald nr ik de voor biezen moet breien. Ik haal de de eerste steken op met nld 5. Ik ben overgestapt op nld 4,5, maar de bies lijkt mij te breed en te los worden. Zo,n 9cm. Klopt dit wel? Vriendelijke groet Elly
10.03.2026 - 16:50DROPS Design answered:
Dag Elly,
De biezen in tricotsteek worden met 5 mm gebreid, een beetje dunnere naald dan de rest van het breiwerk in tricotsteek, maar een beetje dikker dan de delen in boordsteek. Mocht je dit toch te losjes vinden, dan kun je natuurlijk een dunnere naald gebruiken.
10.03.2026 - 19:54
![]() Susan wrote:
Susan wrote:
Really looking forward to making this
09.03.2026 - 10:05
![]() Berta wrote:
Berta wrote:
Hola, he terminado el canesú y ahora he dividido la prenda para las mangas y no entiendo el paso "montar 8-8-10-10-12-12 puntos bajo la manga". He mirado el vídeo "Cómo levantar los puntos bajo la manga" y no veo la manera de poderlo hacer en este patrón ya que aún no hay ningún punto debajo de la manga para poder levantar los puntos. ¿Me podéis ayudar? Muchas gracias.
06.03.2026 - 19:45DROPS Design answered:
Hola Berta, tienes que montar puntos, no levantarlos. Los puntos alrededor de la parte superior de la manga se encuentran en un hilo o gancho auxiliar, pero tenemos que montar puntos para las sisas, para que los delantero y la espalda estén unidos y trabajar la parte de la sisa, a la que uniremos la manga después. Puedes ver un ejemplo de cómo se hace esto en este video
09.03.2026 - 00:32
![]() Erika wrote:
Erika wrote:
Salve c'è un video che spieghi bene come fare i bordi?
02.03.2026 - 15:48
![]() Birgitte wrote:
Birgitte wrote:
Hvilken sværhedsgrad har denne opskrift? Tak
26.02.2026 - 14:10DROPS Design answered:
Hei Birgitte. Noen vil syns den er lett, andre litt mer vanskelig. Vil mene at den ikke er vanskelig, bortsett fra stolpen som bare vil ta litt tid. Og er det noe du lurer på underveis, har vi mange hjelpevideo du kan se på ellers så svarer vi på Spørsmål som blir lagt under oppskriften. Lykke til :) mvh DROPS Design
09.03.2026 - 13:32
![]() Cecile wrote:
Cecile wrote:
Ik snap niets van de biezen. 12 steken. Is dit niet te breed. Hoe brei je dit. Aan de goede kant recht of brei je het in boord steek. Graag meer uitleg Brei groetjes Cecile
17.02.2026 - 21:47DROPS Design answered:
Dag Cecile,
In een van de video's die bij het patroon staat wordt uitgelegd hoe je een dubbele bies aan het voorpand breit op deze manier. Hopelijk biedt dat verduidelijking.
20.02.2026 - 17:43
|
|
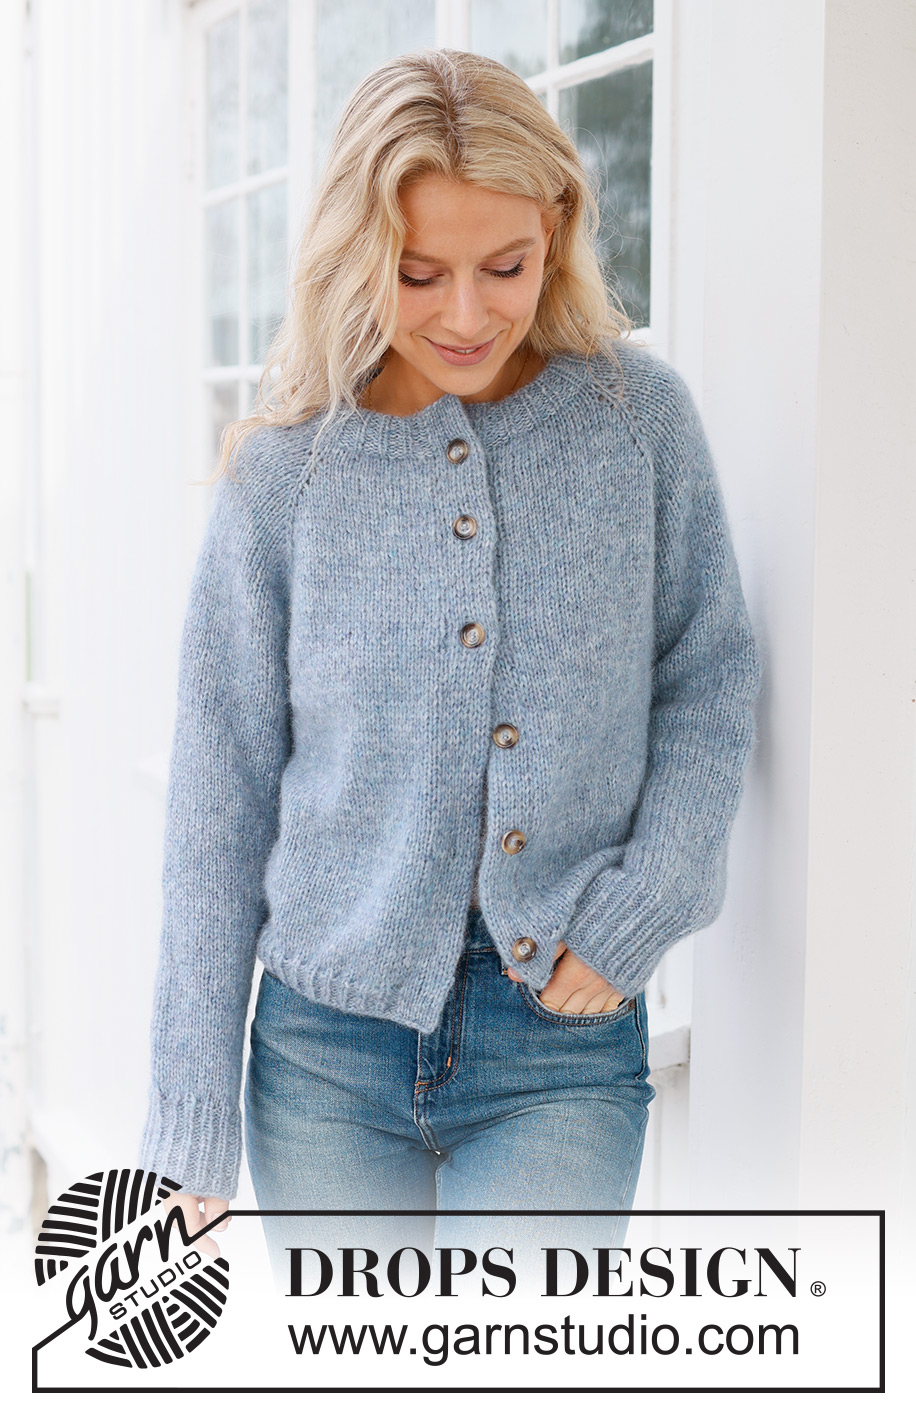
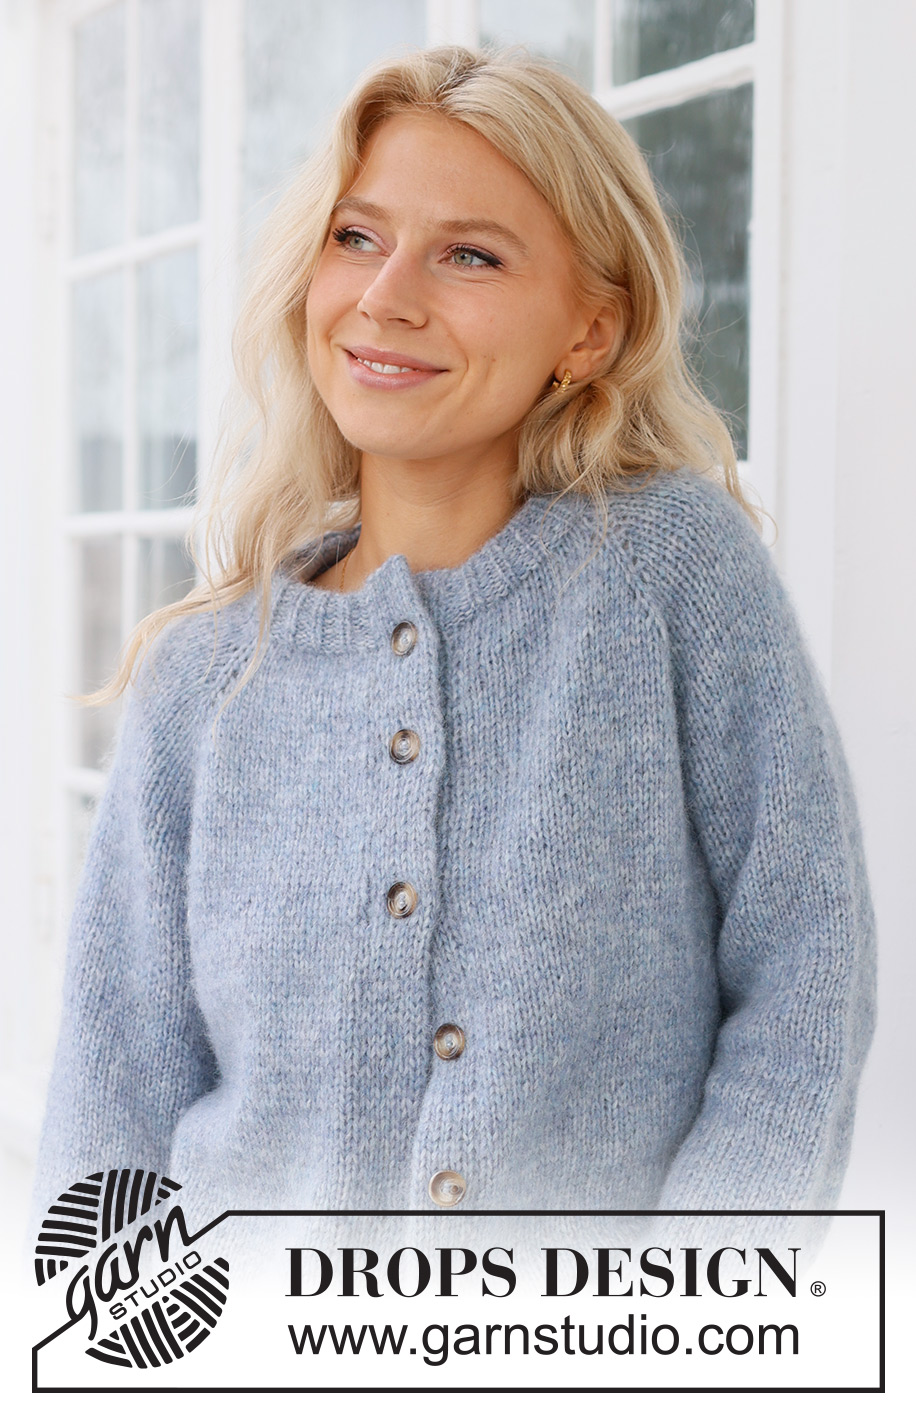
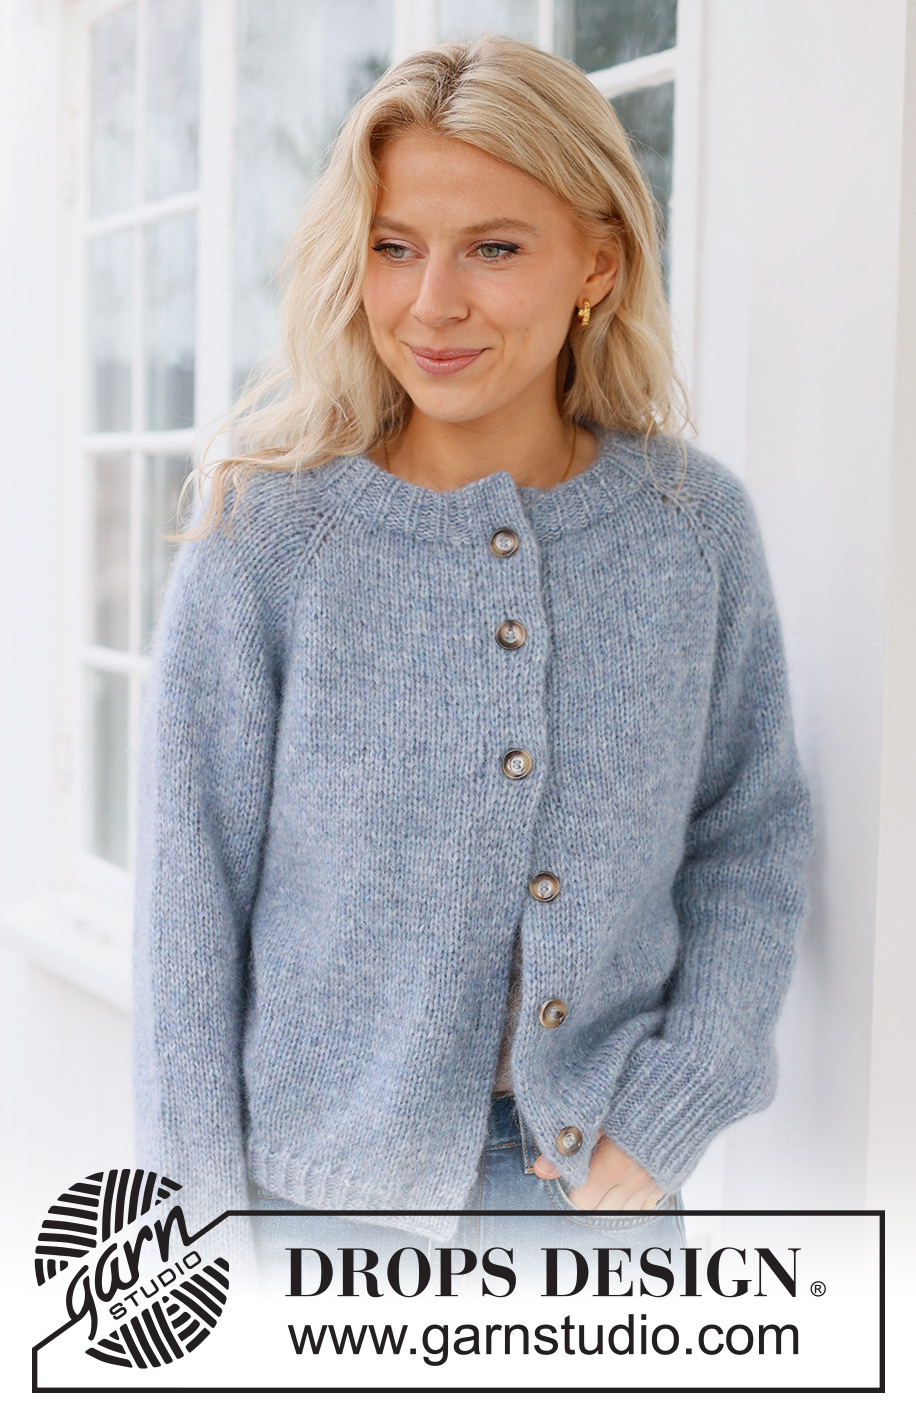
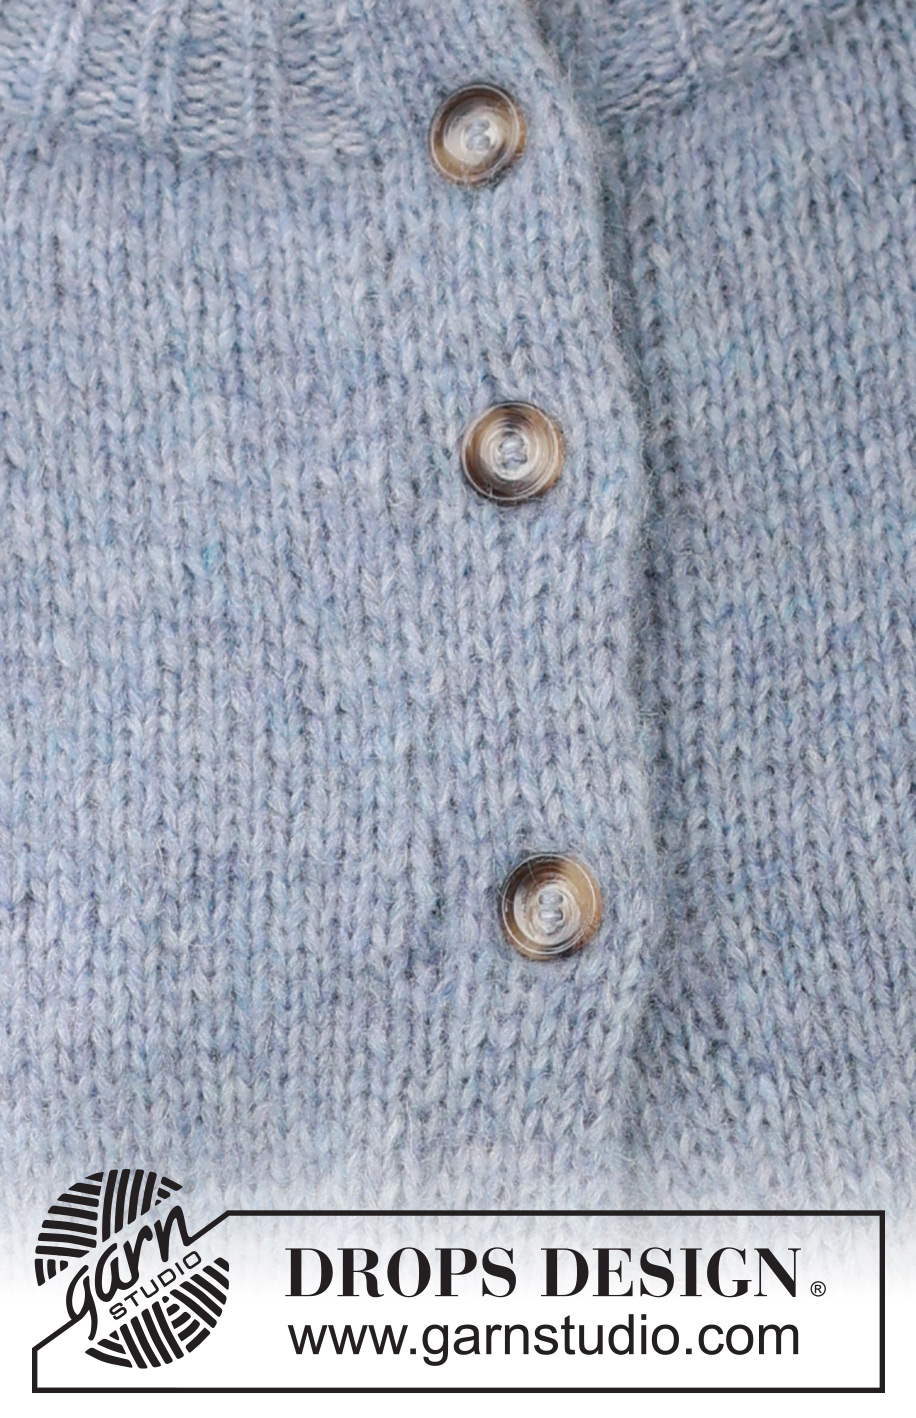
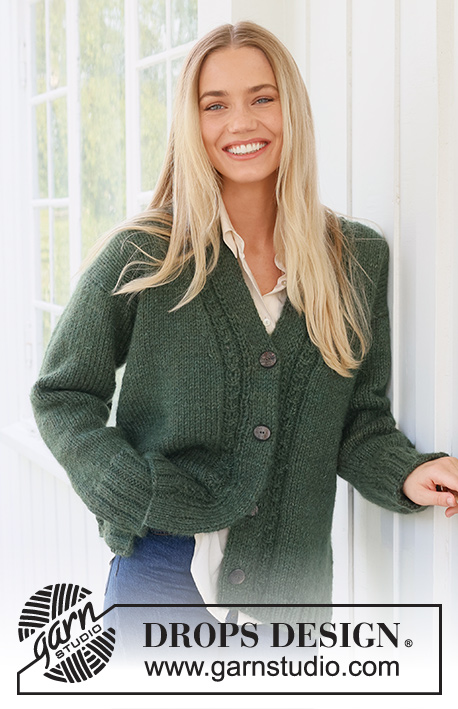
Foggy Autumn Cardigan#foggyautumncardigan |
|
 |
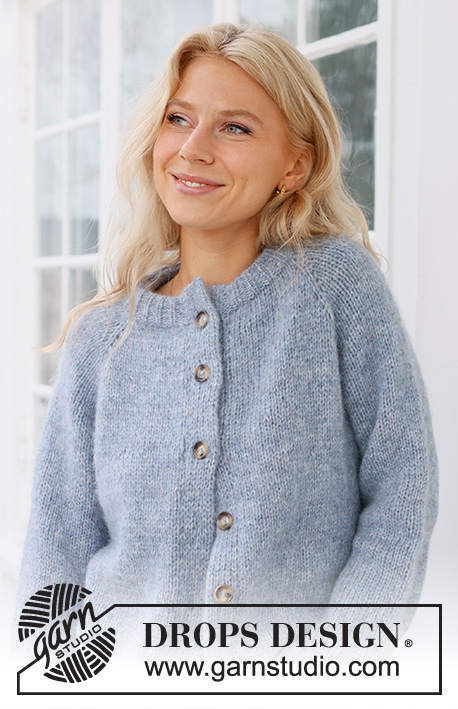 |
Knitted jacket in DROPS Air. The piece is worked top down, with raglan and double bands. Sizes S - XXXL.
DROPS 236-33 |
|
|
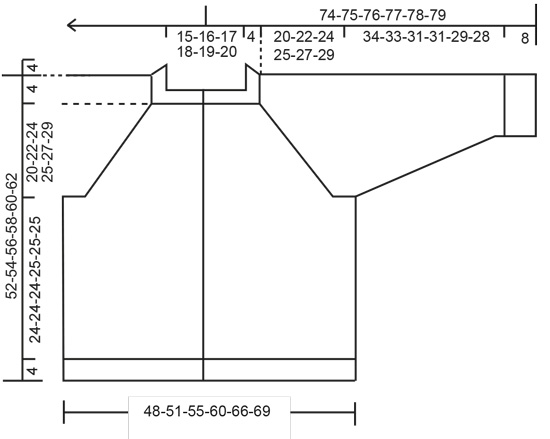
------------------------------------------------------- EXPLANATIONS FOR THE PATTERN: ------------------------------------------------------- RIDGE/GARTER STITCH (worked back and forth): Knit all rows. 1 ridge = knit 2 rows. RAGLAN: All increases are worked from the right side! Increase to raglan on each side of each marker-stitch as follows: Work to the marker-stitch, 1 yarn over, knit the marker-stitch, 1 yarn over (= 8 stitches increased). On the next row (wrong side) work the yarn overs as follows: BEFORE marker-stitch: Purl the yarn over twisted. AFTER marker-stitch: Slip the yarn over onto the right needle as if to knit, place it back onto the left needle the other way round (twisted), purl the yarn over. DECREASE TIP (sleeves): Decrease 1 stitch on either side of the marker as follows: Work until there are 3 stitches left before the marker, knit 2 together, knit 2 (marker sits between these 2 stitches), slip 1 stitch as if to knit, knit 1 and pass the slipped stitch over the knitted stitch (2 stitches decreased). BUTTONHOLES: The buttonholes are worked on the right band: Work the first 6 stitches, turn and work the same stitches back, turn and work these 6 stitches again. Cut the strand. Work 4 rows over the remaining 6 band stitches (first row from the right side) and knit together the last stitch from the right side and the stitch on the edge of the jacket. On the last row from the right side work all the band stitches as before. Work the buttonholes when the band measures: S: 4, 13, 22, 31, 40 and 48 cm. M: 4, 14, 23, 33, 41 and 50 cm. L: 4, 14, 24, 34, 43 and 52 cm. XL: 6, 16, 26, 36, 45 and 54 cm. XXL: 4, 13, 22, 31, 40, 48 and 56 cm. XXXL: 5, 14, 23, 32, 41, 50 and 58 cm. ------------------------------------------------------- START THE PIECE HERE: ------------------------------------------------------- JACKET – SHORT OVERVIEW OF THE PIECE. The neck and yoke are worked back and forth with circular needle, top down. The yoke is divided for body and sleeves and the body continued back and forth with circular needle. The sleeves are worked in the round with double pointed needles. DOUBLE NECK: Cast on 79-82-88-91-94-97 stitches with DROPS Air using 2 circular needles, sizes 4 and 5.5 mm, held together. Pull out the needle size 5.5 mm and work with circular needle size 4 mm (doing this gives you an elastic cast-on edge). Purl 1 row from the wrong side. Work rib from the right side as follows: 1 edge stitch in GARTER STITCH – read description above, * purl 2, knit 1 *, work from *-* until there are 3 stitches left, purl 2, 1 edge stitch in garter stitch. When the rib measures 9 cm, fold the neck double to the inside. On the next row, knit from right side, at the same time work every 2nd stitch together with every 2nd stitch from the cast-on edge. Change to circular needle size 5.5 mm. Insert 1 marker inside the 1 edge stitch; the yoke is measured from this marker! YOKE: Purl 1 row from the wrong side and increase 13-14-16-9-10-13 stitches evenly spaced = 92-96-104-100-104-110 stitches. Insert 4 markers (without working the stitches) as follows: Count 15-16-18-17-18-19 stitches (front piece), insert 1 marker in the next stitch, count 14 stitches (sleeve), insert 1 marker in the next stitch, count 30-32-36-34-36-40 stitches (back piece), insert 1 marker in the next stitch, count 14 stitches (sleeve), insert 1 marker in the next stitch, there are 15-16-18-17-18-19 stitches after the last marker-stitch (front piece). Continue with stocking stitch and 1 edge stitch in garter stitch on each side. On the next row from the right side increase 1 stitch on each side of each marker-stitch – read RAGLAN above. Increase like this, each row from the right side, a total of 17-19-20-24-26-27 times = 228-248-264-292-312-326 stitches. REMEMBER THE KNITTING TENSION! Continue with stocking stitch and 1 edge stitch in garter stitch on each side until the yoke measures 20-22-24-25-27-29 cm. Now divide for the body and sleeves as follows: Work 34-37-39-43-47-49 stitches, place the next 46-50-54-60-62-64 stitches on a thread for the sleeve, cast on 8-8-10-10-12-12 stitches under the sleeve, work 68-74-78-86-94-99 stitches, place the next 46-50-54-60-62-64 stitches on a thread for the sleeve, cast on 8-8-10-10-12-12 stitches under the sleeve, work the last 34-37-39-43-47-50 stitches. BODY: = 152-164-176-192-212-222 stitches. Continue with stocking stitch and 1 edge stitch in garter stitch on each side for a further 24-24-24-25-25-25 cm. Now increase 14-14-17-19-20-22 stitches evenly on the next row from the right side = 166-178-193-211-232-244 stitches. Change to circular needle size 4 mm. Work rib from the wrong side as follows: 1 edge stitch in garter stitch, * knit 2, purl 1 *, work from *-* until there are 3 stitches left, knit 2 and 1 edge stitch in garter stitch. Continue this rib for 4 cm. Cast off. The jacket measures approx. 52-54-56-58-60-62 cm, from the shoulder down. SLEEVES: Place the 46-50-54-60-62-64 stitches from the thread on the one side of the piece on double pointed needles size 5.5 mm and knit up 1 stitch in each of the 8-8-10-10-12-12 stitches cast on under the sleeve = 54-58-64-70-74-76 stitches. Insert a marker in the middle of the new stitches under the sleeve. Work stocking stitch in the round for 2 cm. Now decrease 2 stitches under the sleeve – read DECREASE TIP. Decrease like this every 4½-4-3-2-2-1½ cm a total of 7-8-10-13-14-14 times = 40-42-44-44-46-48 stitches. When the sleeve measures 34-33-31-31-29-28 cm from the division, increase 5-6-7-7-5-6 stitches evenly spaced = 45-48-51-51-51-54 stitches. Change to double pointed needles size 4 mm and work rib (purl 2, knit 1) for 8 cm. Cast off. The sleeve measures approx. 42-41-39-39-37-36 cm from the division. Work the other sleeve in the same way. RIGHT BAND: The band is worked bottom up. Wind out a 90 to 120 cm yarn-end and use it to knit up stitches along the front piece (this means you can continue working without cutting the strand afterwards): Start at the bottom and knit up 1 stitch in each row, inside the 1 edge stitch, with circular needle size 5 mm and DROPS Air. Work from the end of the needle, where the wool-ball is = bottom of the front piece. Cast on 12 stitches from the wrong side, extending the band outwards. Work back and forth over these 12 stitches and work the band together with the front piece as follows: ROW 1 (right side): Slip the first stitch onto the right needle as if to purl, keeping the strand at the front, * knit 1, slip 1 stitch onto the right needle as if to purl, keeping the strand in front *, work from *-* until there is 1 stitch left on the band, slip the last stitch onto the right needle as if to knit, keeping the strand at the back, knit the next stitch and pass the slipped stitch over the knitted stitch, turn. ROW 2 (wrong side): * Slip the first/next stitch onto the right needle as if to purl, keeping the strand in front, knit 1 *, work from *-* over all 12 band-stitches, turn. Repeat rows 1 and 2. NB! If the band becomes too long for the front piece, the band stitches can be worked together with 1 extra stitch from the front piece. Then work every 10th row as follows from the right side: Work until 1 stitch remains of the 12 band stitches, slip the last stitch onto the right needle as if to knit, with the yarn behind the work, knit the next 2 stitches together, pass the slipped stitch over the stitches knitted together, turn. Remember the BUTTONHOLES – read description above. When all the stitches on the front piece are worked together with the band, knit all stitches together 2 and 2, then cast off. LEFT BAND: The band is worked bottom up. Start at the top and knit up 1 stitch down the front piece in each row, working inside the 1 edge stitch, with circular needle size 5 mm and DROPS Air. Cast on 12 stitches at the bottom, extending the band outwards. Work back and forth over these 12 stitches and work the band together with the front piece as follows: ROW 1 (wrong side): Knit 1, * slip 1 stitch onto the right needle as if to purl, keeping the strand in front, knit 1 *, work from *-* until there is 1 stitch left on the band, slip the next 2 stitches onto the right needle as if to purl together, keeping the strand in front, turn. ROW 2 (right side): Knit 2 together, * slip 1 stitch onto the right needle as if to purl, keeping the strand in front, knit 1 *, work from *-* until there is 1 stitch left, slip the last stitch onto the right needle as if to purl, keeping the strand in front, turn. Repeat rows 1 and 2. NB! If the band becomes too long for the front piece, the band stitches can be worked together with 1 extra stitch from the front piece on every 9th and 10th row as follows: slip 3 stitches onto the right needle at the end of the row from the wrong side and knit 3 together from the right side. When all the stitches on the front piece are worked together with the band, work together as follows from the right side: Slip 1 stitch onto the right needle as if to knit, knit 1, pass the slipped stitch over, cast off. ASSEMBLY: Sew the buttons onto the left band. |
|
 |
|
Have you finished this pattern?Tag your pictures with #dropspattern #foggyautumncardigan or submit them to the #dropsfan gallery. Do you need help with this pattern?You'll find 36 tutorial videos, a Comments/Questions area and more by visiting the pattern on garnstudio.com. © 1982-2026 DROPS Design A/S. We reserve all rights. This document, including all its sub-sections, has copyrights. Read more about what you can do with our patterns at the bottom of each pattern on our site. |
|


With over 40 years in knitting and crochet design, DROPS Design offers one of the most extensive collections of free patterns on the internet - translated to 17 languages. As of today we count 324 catalogues and 12290 patterns translated into English (UK/cm).
We work hard to bring you the best knitting and crochet have to offer, inspiration and advice as well as great quality yarns at incredible prices! Would you like to use our patterns for other than personal use? You can read what you are allowed to do in the Copyright text at the bottom of all our patterns. Happy crafting!
Post a comment to pattern DROPS 236-33
We would love to hear what you have to say about this pattern!
If you want to leave a question, please make sure you select the correct category in the form below, to speed up the answering process. Required fields are marked *.