
Popular categories
Looking for a yarn?


Comments / Questions (28)
![]() Quest wrote:
Quest wrote:
Hi! Can I translate this pattern in Japanese? Do you arrow to make tutorial video in Japanese and put on Youtube? Just wonder. Thank you.
05.03.2020 - 19:28DROPS Design answered:
Dear Quest, could you please send your request to media@garnstudio.com ? Thank you very much in advance.
06.03.2020 - 09:30
![]() Carla wrote:
Carla wrote:
Hola, como se trabajan los puntos nuevos en la manga, no entiendo cuando dice "sin trabajar los puntos juntos con las hebras."?
08.02.2020 - 15:32
![]() Es Kiesewetter wrote:
Es Kiesewetter wrote:
In naald 2 staat niet hoe je de omslag en afgehaalde steek breidt.
19.01.2020 - 08:47
![]() Loredana wrote:
Loredana wrote:
Buongiorno, c'è un video che mostra come fare gli aumenti (sulle coste inglesi) previsti da questo modello? Grazie Loredana
19.01.2020 - 06:53DROPS Design answered:
Buongiorno Loredana. Al momento il video non è disponibile. Per aumentare, deve lavorare insieme a diritto la maglia e la maglia gettata, lascia queste maglie sul ferro sinistro, inserisce una maglia gettata sul ferro destro e lavora di nuovo insieme a diritto la maglia e la maglia gettata. Buon lavoro!
21.01.2020 - 12:35
![]() Michèle wrote:
Michèle wrote:
J'adore les manches larges , pull décontracté..
11.01.2020 - 18:06
![]() Gabriele wrote:
Gabriele wrote:
Ich würde mich sehr freuen wenn diese Anleitung erscheinen würde - einfach schön.
09.01.2020 - 10:09
![]() Hélène wrote:
Hélène wrote:
Pull ''doudou''. Vaporeux et sûrement amusant à tricoter.
18.12.2019 - 11:49
![]() Orphée wrote:
Orphée wrote:
Nymphalidae
13.12.2019 - 10:34
|
|
Cheers to Life#cheerstolifesweater |
|
 |
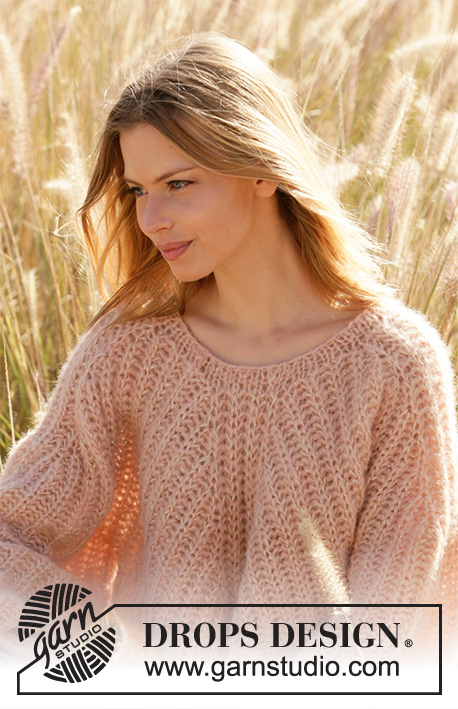 |
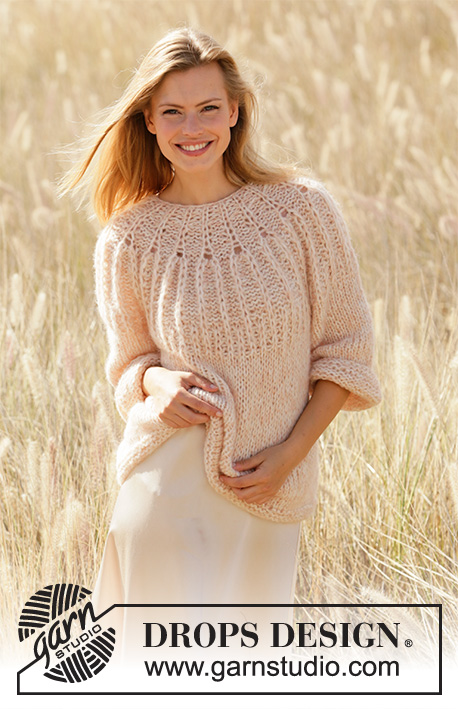
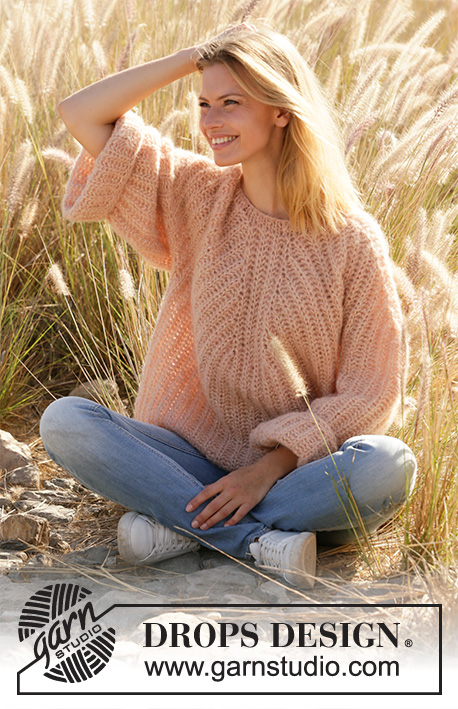
Knitted sweater with round yoke in 2 strands DROPS Brushed Alpaca Silk and 1 strand Glitter. The piece is worked top down in English rib. Sizes S - XXXL.
DROPS 212-28 |
|
|
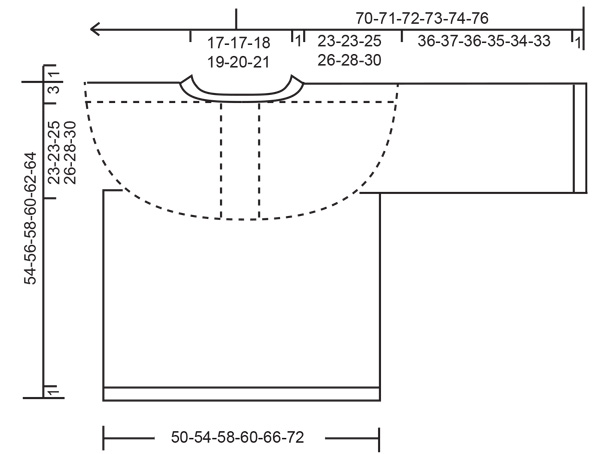
------------------------------------------------------- EXPLANATIONS FOR THE PATTERN: ------------------------------------------------------- DECREASE TIP (evenly spaced): To work out how to decrease evenly, count the total number of stitches on needle (e.g. 55 stitches) and divide by number of decreases to be made (e.g. 7) = 7.85. In this example decrease by knitting approx. each 7th and 8th stitch together. ENGLISH RIB WITH YARN OVERS – in the round: ROUND 1: * Make 1 yarn over, slip 1 stitch as if to purl, knit 1 *, work from *-* to end of round. ROUND 2: * Purl together the yarn over and slipped stitch, make 1 yarn over, slip 1 stitch as if to purl *, work from *-* to end of round. ROUND 3: * Make 1 yarn over, slip 1 stitch as if to purl, knit together the yarn over and slipped stitch *, work from *-* to end of round. Repeat rounds 2 and 3. INCREASE TIP: All increases are worked on a round where yarn overs and slipped stitches are knitted together. INCREASE AS FOLLOWS IN THE STITCHES WITH PURPLE MARKERS: Work 3 stitches in the stitch and yarn over and move the marker as follows: Knit together the yarn over and stitch, move the purple marker to this stitch (i.e. stitch on right needle), but do not slip the stitch and yarn-over off the left needle, make 1 yarn over the right needle and knit together the stitch and yarn over 1 more time, slip the knitted stitch and yarn over that was knitted in off the left needle = 3 stitches (= 2 stitches increased). The marker sits in the first increased stitch (= knitted stitch). The next time you increase, work in the stitch with the marker. INCREASE AS FOLLOWS IN THE STITCHES WITH GREEN MARKERS: Work 3 stitches in the stitch and yarn over and move the marker as follows: Knit together the yarn over and stitch, but do not slip the stitch and yarn-over off the left needle, make 1 yarn over the right needle and knit together the stitch and yarn over 1 more time and move the green marker to this stitch, slip the knitted stitch and yarn over that was knitted in off the left needle = 3 stitches (= 2 stitches increased). The marker sits in the last increased stitch (= knitted stitch). The next time you increase, work in the stitch with the marker. On the next round work the 3 stitches into the English rib pattern as follows: Make 1 yarn over, slip 1 stitch as if to purl, purl the yarn over, make 1 yarn over, slip 1 stitch as if to purl. Then continue in English rib. BINDING-OFF TIP: To avoid the bind-off edge being tight you can bind off with a larger size needle. If the edge is still tight, make 1 yarn over after approx. each 4th stitch at the same time as binding off; the yarn overs are bind off as normal stitches. ------------------------------------------------------- START THE PIECE HERE: ------------------------------------------------------- SWEATER – SHORT OVERVIEW OF THE PIECE: The neck and yoke are worked in the round with circular needle from mid-back and top down. Increases are worked for body and sleeves mid-front/back and mid-top of sleeves. The yoke is divided for body and sleeves. The body is continued in the round with circular needle. The sleeves are worked in the round with double pointed needles/short circular needle, top down. NECK: Cast on 55-55-58-60-62-65 stitches with circular needle size 7 mm = US 10,75 and 2 strands Brushed Alpaca Silk and 1 strand Glitter. Knit 2 rounds. Knit 1 round and decrease 7-7-10-4-6-9 stitches evenly spaced – read DECREASE TIP = 48-48-48-56-56-56 stitches. Change to circular needle size 8 mm = US 11. Insert 1 marker at the beginning of the round (= mid-back); the yoke will be measured from this marker! YOKE: Now insert 8 markers in the piece as follows: Using 2 different colored markers. Knit 3-3-3-3-5-5, insert 1 purple marker in the next stitch and then knit this stitch, * knit 5-5-3-5-3-3, insert 1 green marker in the next stitch and then knit this stitch, knit 5-5-7-7-9-9, insert 1 purple marker in the next stitch and then knit this stitch *, work from *-* a total of 3 times, knit 5-5-3-5-3-3, insert 1 green marker in the next stitch, knit this stitch and then knit 2-2-4-4-4-4. The 5-5-7-7-9-9 stitches between the green and the purple markers are the stitches mid front, mid back and on top of each sleeve. You will increase in the stitches with markers later. Now continue with ENGLISH RIB WITH YARN OVERS – read description above. On round 3 in the pattern start to increase as follows: Increase 2 stitches in each knitted stitch with markers (= a total of 16 stitches increased) and move the markers each time you increase – read INCREASE TIP! In other words you increase stitches before the green markers and increase after the purple markers. The 5-5-7-7-9-9 stitches between the markers remain the same, the stitches increased are increased on each side of these stitches. REMEMBER THE KNITTING GAUGE! Increase like this every 6th round a total of 2-3-5-4-5-7 times, then every 8th round a total of 2-2-2-3-3-2 times and every 10th round a total of 2-2-1-1-1-1 times = 144-160-176-184-200-216 stitches. Continue working until the piece measures 23-23-25-26-28-30 cm = 9"-9"-9¾"-10¼"-11"-11¾" from the marker mid-back. Now divide the piece for body and sleeves as follows: Work the first 23-25-27-28-31-34 stitches, place the next 27-31-35-37-39-41 stitches on a thread for the sleeve and cast on 5 stitches under the sleeve, work the next 45-49-53-55-61-67 stitches, place the next 27-31-35-37-39-41 stitches on a thread for the sleeve and cast on 5 stitches under the sleeve, work the last 22-24-26-27-30-33 stitches. BODY: = 100-108-116-120-132-144 stitches. Continue in the round with English rib. On the first round work the 5 new stitches under the sleeve without working the stitches together with yarn overs. When the piece measures 27-29-29-30-30-30 cm = 10⅝"-11⅜"-11⅜"-11¾"-11¾"-11¾" from the division, knit 3 rounds over all stitches. Bind off – read BINDING-OFF TIP. SLEEVES: Place the 27-31-35-37-39-41 stitches from the thread on the one side of the piece on double pointed needles/short circular needle size 8 mm = US 11 and knit up 1 stitch in each of the 5 stitches cast on under the sleeve = 32-36-40-42-44-46 stitches. Continue in the round with English rib as before. On the first round work the 5 new stitches under the sleeve without working the stitches together with yarn overs. When the piece measures 36-37-36-35-34-33 cm = 14¼"-14½"-14¼"-13¾"-13⅜"-13" from where the sleeve was divided from the body, knit 3 rounds over all stitches. Then bind off. Work the other sleeve in the same way. |
|
 |
|
Have you finished this pattern?Tag your pictures with #dropspattern #cheerstolifesweater or submit them to the #dropsfan gallery. Do you need help with this pattern?You'll find 15 tutorial videos, a Comments/Questions area and more by visiting the pattern on garnstudio.com. © 1982-2026 DROPS Design A/S. We reserve all rights. This document, including all its sub-sections, has copyrights. Read more about what you can do with our patterns at the bottom of each pattern on our site. |
|


With over 40 years in knitting and crochet design, DROPS Design offers one of the most extensive collections of free patterns on the internet - translated to 17 languages. As of today we count 325 catalogs and 12298 patterns - 12288 of which are translated into English (US/in).
We work hard to bring you the best knitting and crochet have to offer, inspiration and advice as well as great quality yarns at incredible prices! Would you like to use our patterns for other than personal use? You can read what you are allowed to do in the Copyright text at the bottom of all our patterns. Happy crafting!
Post a comment to pattern DROPS 212-28
We would love to hear what you have to say about this pattern!
If you want to leave a question, please make sure you select the correct category in the form below, to speed up the answering process. Required fields are marked *.