
Popular categories
Looking for a yarn?


Comments / Questions (68)
![]() Julia wrote:
Julia wrote:
Hallo liebes Drops Team Direkt nach dem Ende des Ärmels steht "(...) In jeder 2. R 4 x 3 M und 9-10-11-12-13 x 2 M abketten, dann in jeder 4. R 3 x 1 M abketten." Beispielsweise für Größe L: heißt das, ich kette 4mal je 3 M ab in jeder 2ten Reihe? Also über 8 Reihen? Und kommen die 11x 2M dann danach? Oder gleichzeitig? Ich verstehe nicht wie die Form am Ende aussehen soll, das ist das erste Mal dass ich einen Ärmel stricke. 😅 Viele Grüße!
06.06.2026 - 01:05
![]() Julia wrote:
Julia wrote:
Hallo liebes Drops Team Direkt nach dem Ende des Ärmels steht "(...) In jeder 2. R 4 x 3 M und 9-10-11-12-13 x 2 M abketten, dann in jeder 4. R 3 x 1 M abketten." Beispielsweise für Größe L: heißt das, ich kette 4mal je 3 M ab in jeder 2ten Reihe? Also über 8 Reihen? Und kommen die 11x 2M dann danach? Oder gleichzeitig? Ich verstehe nicht wie die Form am Ende aussehen soll, das ist das erste Mal dass ich einen Ärmel stricke. 😅 Viele Grüße!
06.06.2026 - 01:05DROPS Design answered:
Liebe Julia, für das Vorderteil wird man zuerst 3 Maschen am Anfang der Reihe ab Anfang Vorderteil abketten, dann in jeder 2. Reihe noch 3 Mal 3 Maschen (1 Reihe mit Abkette, 1 Reihe ohne) und diese 2 Reihen noch 3 Mal (= insgesamt 4 Mal 3 Maschen abgekettet), dann so weiter abketten aber dieses Mal 2 Maschen 11 Mal und dann 3 Maschen noch 1 Mal aber in jeder 4. Reihe. Gleichzeitg wird man für das Rückenteil abnehmen, so am Ende einer Reihe gegen Rückenteil 2 Maschen 3 Mal anschlagen, 1 Masche 7 Mal anschlagen und dann in jeder 4. Reih 1 Masche 4 Mal anschlagen. Viel Spaß beim Stricken!
08.06.2026 - 08:44
![]() Carin wrote:
Carin wrote:
Hur långt ska man sticka på resåren runt nacken, sidor och rygg innan man maskar av? Vad jag kan se står det ingenstans. Stickar 134/140.
17.05.2026 - 14:53DROPS Design answered:
Hei Carin. Det er ikke oppgitt cm mål, men det står: Efter sista v med ökning ska det vara 3 rm/ 3 am hela vägen runt, du har da riktig mål i den str. du strikker. mvh DROPS Design
18.05.2026 - 11:28
![]() Sandra wrote:
Sandra wrote:
Hola! no entiendo la parte despues de cuando se realizan los aumentos y disminuciones y dice que hay que pasar 10 puntos a aguja auxiliar. Podrias ayudarme en esa parte? Muchas gracias!
29.03.2026 - 15:05DROPS Design answered:
Hola Sandra, después de terminar los aumentos y disminuciones, continúas trabajando en punto jersey. Cuando la pieza mida 18-19-20-21-22 cm, trabajas por el lado derecho hasta que te queden 10 puntos en la aguja; estos puntos se pasan a un gancho auxiliar. Girar y trabajar de vuelta. Girar y trabajar hasta que queden 10 puntos antes del anterior giro, pasar estos puntos a la misma aguja que antes. Girar y trabajar de vuelta. Continuar de esta manera hasta tener 4x10 (= 40) pts en la aguja auxiliar, quedan 8-11-14-16-20 pts restantes en las agujas. Estos puntos se devolverán al patrón más adelante, y ayudarán a dar forma a la chaqueta.
29.03.2026 - 23:50
![]() Aija Purho wrote:
Aija Purho wrote:
Ohje on hyvin vaikea. Tähän asti olen arvaillut mitä pitää tehdä, Olen nyt puolivälissä työtä, jossa olen neulonut selän keskelle. Ymmärrys loppui täysin kohdassa: \"Kiinnitä uusi merkkilanka keskelle taakse niskaan\", jäin täysin jumiin. Mikä kohta on niskan keskiosa? Auttakaa pian!
26.02.2026 - 21:06DROPS Design answered:
Hei, kun olet neulonut työn ensimmäisen puolikkaan, eli kun olet selän keskellä, kiinnitä uusi merkkilanka työn yläreunaan. Tällä tavoin selän keskikohta erottuu paremmin ja työn mitat otetaan jatkossa tästä merkistä.
27.02.2026 - 19:33
![]() Angelica wrote:
Angelica wrote:
I didn’t use stitch markers because I didn’t realize they’d be used to pick up from earlier parts of the garment and added back to the work later. Can I proceed with the pattern without this? It seems like you knit from sleeve to sleeve - is this correct? Many many thanks for helping me get back on track after failing to follow all the instructions. Best Angelica
27.10.2025 - 14:05DROPS Design answered:
Hi Angelica, stitch markers are used for measurements, you can use short treads of yarn. You knit from sleeve to sleeve. Happy knitting!
06.11.2025 - 08:19
![]() Birgitte wrote:
Birgitte wrote:
Jeg kan ikke finde ud af hvordan jeg kommer videre med sjælevarmeren (mom and me ,pige 13/14år)når arb måler 18 cm sættes der masker på 1 tråd fra nederst på rygstykke og op mod nakken osv ? Håber i kan hjælpe mig.
24.06.2025 - 19:00DROPS Design answered:
Hej Birgitte de nederste masker på rygstykket sættes på en tråd, så du får flere pinde strikket over de øverste masker på ryggen. Først strikker du 11 masker, sætter dem på en tråd, strikker pinden ud. Vender, strikker tilbage, så strikker du de næste 11 masker (som nu er nederst) og sætter dem på en tråd, det gør du 3 gange og har 13 masker tilbage :)
26.06.2025 - 14:08
![]() Marceline wrote:
Marceline wrote:
I am unable to proceed with the centre back instructions as it is ver confusing?
22.05.2025 - 11:58DROPS Design answered:
Dear Marceilline, front and back piece will be shaped at the same time; towards front piece you will cast off at the beginning of row from front piece and for back piece you will cast on new stitches towards back piece (on the other side) at the end of each row towards bottom/back piece. Number of sts will vary depending on the size. Then you will slip stitches at the beg of back piece side on a thread; then work short rows the other way: working by and by more stitches to create reversed/mirrored short rows. Then you will cast off at the beg of rows from back piece and increase/cast on new stitches at the end of each row towards front piece (reversed as 1st side). Happy knitting!
22.05.2025 - 15:18
![]() Line Beir Sveen Beck wrote:
Line Beir Sveen Beck wrote:
Hei, det står at man skal legge opp på pinne nr. 5 mm og kan ikke se i oppskriften at pinne 4,5 mm skal brukes, stemmer dette? Skal alt strikkes på pinne 5 mm?
08.05.2025 - 22:46DROPS Design answered:
Hei Line, Du bruker pinne nr 5 mm til alt, bortsett fra monteringen hvor pinne nr 4.5 mm er brukt til kanten. God fornøyelse!
09.05.2025 - 06:53
![]() Jordan Tarlie wrote:
Jordan Tarlie wrote:
Après les augmentations de la manche il faut rabattre 3 m puis on rabat où on diminue 10 fois 2 maille? Et les augmentations fait les augmentations dans la dernière maille où on rajoute des mailles a la suite? On parle de diminution et augmentation mais il est pas dit comment les faire ni si dans la 1ère et dernière maille ou a une maille du bord. Merci
12.02.2025 - 20:48DROPS Design answered:
Bonjour Mr Tarlie, sur le côté devant, on va rabattre les mailles (utilisez votre méthode habituelle pour rabattre) = on va ainsi diminuer le nombre de mailles de ce côté; et sur le côté dos, on va augmenter le nombre de mailles en montant de nouvelles mailles, utilisez cette technique vidéo ou leçon. Bon tricot!
13.02.2025 - 09:58
|
|
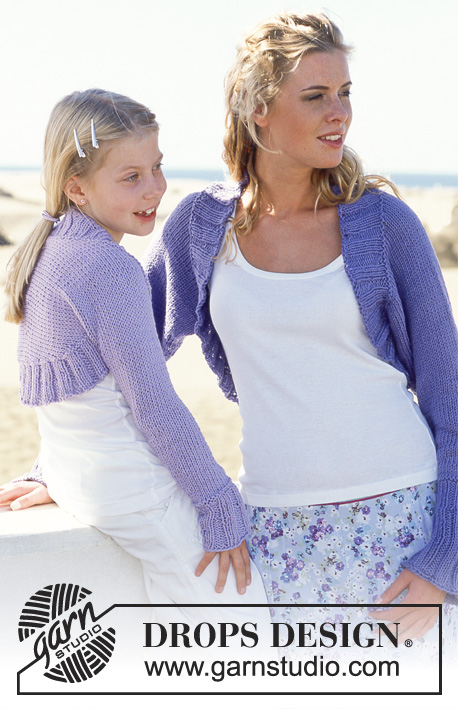
Mom and Me |
|
 |
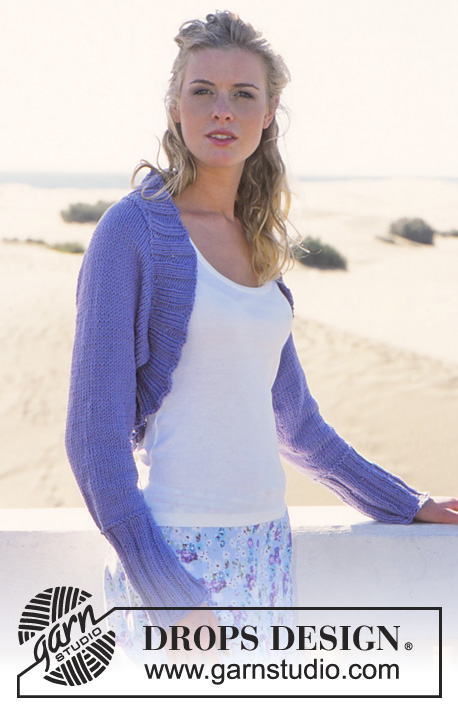 |
DROPS Shrug in Paris for Women and Girls
DROPS 89-13 |
|
|
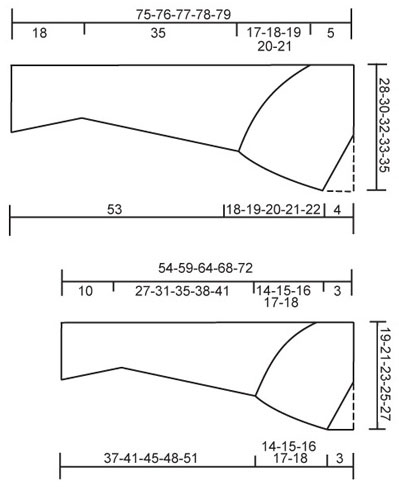
WOMEN’S SIZES: Gauge: 17 sts x 22 rows on larger needles in stockinette st = 10 x 10 cm. Rib: * K 3, P 3 *, repeat * - *. Note on the diagram: The shrug is knit from cuff to cuff. The diagram shows the shrug after assembly – that is, with the sleeve seam sewn. The dotted line indicates the center back – the sloping line indicates the front edge. Right side: Loosely cast on 50-50-56-56-56 sts on larger needles. P 1 row (wrong side), then knit rib, keeping 1 edge st at each side in garter st. When the piece measures 12 cm dec all P 3 to P 2 = 42-42-47-47-47 sts. Continue the rib with K 3/P 2. When the piece measures 18 cm K 1 row (right side row), then K 1 row (wrong side), adjusting (inc/dec as needed) to 42-42-46-48-48 sts, then continue in stockinette st. When the piece measures 20-20-20-25-21 cm inc 1 st at each side every 3-2.5-2.5-2-2 cm a total of 12-14-14-15-17 times = 66-70-74-78-82 sts. After last inc the piece measures 53 cm, put 1 marker at each side – measure the piece from here. Now dec at one side of piece (= front) at the same time cast on new sts at the other side of piece (= back) as follows: At front edge: on 1st row bind off 3 sts, then bind off every other row: 3 sts 3 times and 2 sts 9-10-11-12-13 times, then every 4 rows: 1 st 3 times. At back edge: inc every other row: 2 sts 3 times and 1 st 5-6-7-6-9 times, then every 4 rows: 1 st 4-4-4-5-4 times. After all incs and decs there are 48-51-54-56-60 sts. When the piece measures 18-19-20-21-22 cm put 10 sts on a st holder from lower edge of back up toward the neck every other row 4 times = 8-11-14-16-20 sts remain on needles. The shrug is now knit to the center back (halfway). Place a new marker at center back of neck. Knit 1 row stockinette st over all sts on needles, then knit the other half, reversing shaping as follows: put 10 sts back on needles every other row 4 times = 48-51-54-56-60 sts. When sts are put back on needles pick up 1 st between the last st on needles the first st on st holder, K tog this st with the first st on st holder. This prevents a hole where the sts are returned to the needles. When the piece measures 5 cm from the marker in back of the neck inc/cast on for front (= the side of piece you previously bound off) every 4 rows: 1 st 3 times, then every other row: 2 sts 9-10-11-12-13 times and 3 sts 4 times. At the same time, when the piece measures 8 cm from the marker in back of the neck dec for back (= the side you previously increased) every 4 rows: 1 st 4-4-4-5-4 times, then every other row: 1 st 5-6-7-6-9 times and 2 sts 3 times. After all incs and decs are complete there are 66-70-74-78-82 sts. Put a marker at each side – measure the work from here. Now dec 1 st at each side every 3-2.5-2.5-2-2 cm a total of 12-14-14-15-17 times = 42-42-46-48-48 sts. When the piece measures 34 cm P 1 row (right side) and P 1 row (wrong side), adjusting (inc/dec as needed) to 42-42-47-47-47 sts. Now knit rib (= K 3/P 2) keeping 1 edge st at each side in garter st. When cuff measures 6 cm from the P rows inc all P 2 to P 3 = 50-50-56-56-56 sts. When cuff measures 18 cm from the P rows K 1 row (right side) and then bind off loosely. Assembly: Sew sleeve seams using edge sts as seam allowance, up to markers. Pick up sts around opening = 180-195-210-225-225 sts (divisible by 15) on smaller circular needles. If you pick up more or less sts, adjust on the 2nd row evenly distributed. Join and knit in the round as follows (seen from the right side): P 1 row and K 1 row, then knit rib (= K 3/P 2). When edge measures 2 cm inc every 3rd P 2 to P 3 = 192-208-224-240-240 sts. Repeat inc when edge measures 5 and 8 cm, so that each P 2 is now P 3 = 216-234-252-270-270 sts. Bind off loosely in rib. GIRLS’ SIZES: Sizes: 5/6 years - 7/8 years - 9/10 years - 11/12 years -13/14 years Finished measurements: Wrist to center back: 54-59-64-68-72 cm [21.25" - 23.25" - 25.25" - 26.75" - 28.25"] Underarm to center back: 17-18-19-20-21 cm [6.75" - 7" - 7.5" - 7-⅞" - 8.25"] Materials: DROPS PARIS from Garnstudio 250-250-250-300-300 gr nr 05, light lilac DROPS 5 mm [US 8] needles, or sizes needed to obtain correct gauge. DROPS 4.5 mm [US 7] circular needles (for rib edge), or sizes needed to obtain correct gauge. Gauge: 17 sts x 22 rows on larger needles in stockinette st = 10 x 10 cm. Rib: * K 3, P 3 *, repeat * - *. Note on the diagram: The shrug is knit from cuff to cuff. The diagram shows the shrug after assembly – that is, with the sleeve seam sewn. The dotted line indicates the center back – the sloping line indicates the front edge. Right side: Loosely cast on 38-44-44-50-50 sts on larger needles. P 1 row (wrong side), then continue in rib, keeping 1 edge st at each side in garter st. When the piece measures 6 cm dec all P 3 to P 2 = 32-37-37-42-42 sts. Continue the rib with K 3/P 2. When the piece measures 10 cm K 1 row (right side) and K 1 row (wrong side), decreasing evenly distributed to 28-30-32-32-34 sts, then continue in stockinette st. When the piece measures 13-14-13-15-15 cm inc 1 st at each side every 3-3-3.5-3-3 cm a total of 9-10-10-12-13 times = 46-50-52-56-60 sts. After last inc the piece measures approx. 37-41-45-48-51 cm, put 1 marker at each side – measure the piece from here. Now dec at one side of piece (= front) at the same time cast on new sts at the other side of piece (= back) as follows: At front edge: on 1st row bind off 3 sts, then bind off every other row: 2 sts 5-6-6-7-8 times and 1 st 10-10-11-11-11 times. At back edge: inc every other row: 2 sts 2-3-4-5-5 times and then every 4 rows: 1 st 5-5-5-5-6 times. After all decs and incs are complete there are 32-36-39-43-46 sts. When the piece measures 14-15-16-17-18 cm put sts onto a st holder from lower edge of back up toward the neck every other row: 8-9-10-11-11 sts 3 times = 8-9-9-10-13 sts remain on needles. The shrug is now knit to the center back (halfway). Place a new marker at center back of neck. Knit 1 row stockinette st over all sts on needles, then knit the other half, reversing shaping as follows: Put 8-9-10-11-11 sts back on needles every other row 3 times = 32-36-39-43-46 sts. When sts are put back on needles pick up 1 st between the last st on needles the first st on st holder, K tog this st with the first st on st holder. This prevents a hole where the sts are returned to the needles. When the piece measures 3 cm from the marker in back of the neck inc for front (= the side you previously bound off) every other row: 1 st 10-10-11-11-11 times, 2 sts 5-6-6-7-8 times and 3 sts 1 time. At the same time when the piece measures 6 cm from the marker in back of the neck dec for back (= the side you previously increased) every 4 rows: 1 st 5-5-5-5-6 times and then every other row: 2 sts 2-3-4-5-5 times. After all incs and decs are complete 46-50-52-56-60 sts. Put 1 marker at each side – measure the piece from here. Now dec 1 st at each side every 3-3-3.5-3-3 cm a total of 9-10-10-12-13 times = 28-30-32-32-34 sts. When the piece measures 26-30-34-37-40 cm, P 1 row (right side), then P 1 row (wrong side), increasing to 32-37-37-42-42 sts. Now knit rib (= K 3/ P 2), keeping 1 edge st at each side in garter st. When cuff measures 4 cm from the P rows inc all P 2 to P 3 = 38-44-44-50-50 sts. When cuff measures 10 cm from the P rows P 1 row (wrong side) and then bind off loosely. Assembly: Sew sleeve seams using edge sts as seam allowance, up to markers. Pick up sts around opening = 135-150-165-180-180 sts (divisible by 15) on smaller circular needles. If you pick up more or less sts, adjust on the 2nd row evenly distributed. Join and knit in the round as follows (seen from the right side): P 1 row and K 1 row, then knit rib (= K 3/P 2). When edge measures 2 cm inc every 3rd P 2 to P 3 = 144-160-176-192-192 sts. Repeat inc when edge measures 5 and 8 cm, so that each P 2 is now P 3 = 162-180-198-216-216 sts. Bind off loosely in rib. |
|
 |
|
Have you finished this pattern?Tag your pictures with #dropspattern or submit them to the #dropsfan gallery. Do you need help with this pattern?You'll find 21 tutorial videos, a Comments/Questions area and more by visiting the pattern on garnstudio.com. © 1982-2026 DROPS Design A/S. We reserve all rights. This document, including all its sub-sections, has copyrights. Read more about what you can do with our patterns at the bottom of each pattern on our site. |
|


With over 40 years in knitting and crochet design, DROPS Design offers one of the most extensive collections of free patterns on the internet - translated to 17 languages. As of today we count 325 catalogs and 12298 patterns - 12288 of which are translated into English (US/in).
We work hard to bring you the best knitting and crochet have to offer, inspiration and advice as well as great quality yarns at incredible prices! Would you like to use our patterns for other than personal use? You can read what you are allowed to do in the Copyright text at the bottom of all our patterns. Happy crafting!
Post a comment to pattern DROPS 89-13
We would love to hear what you have to say about this pattern!
If you want to leave a question, please make sure you select the correct category in the form below, to speed up the answering process. Required fields are marked *.