
Popular categories
Looking for a yarn?


Comments / Questions (43)
![]() Randy Komitor wrote:
Randy Komitor wrote:
Love this pattern and also the people at Drops who answer my questions when I need help!
31.07.2023 - 19:57
![]() Randy Komitor wrote:
Randy Komitor wrote:
On back piece Darcy jacket size 1-3. Binding off Beginning off 4 each row in each side. I assume you are binding off at beginning of row only - not begining AND end. Binding of 4 one time beginning only would be 110 minus 8=102. Then bind off 5.. 5times Rs,WS,RS,WS,RS would give me 25 bound off. 102-25 is 77. I am supposed to wind up with 52. So am I supposed to Bind off 5 stitches beginning of row 5 times on RS AND 5 times on WS which would give me 52 ? Thanks! Baby due Aug 13!
31.07.2023 - 16:05DROPS Design answered:
Dear Randy, you cast off 4 stitches once at the beginning of a row from the RS and a row from the WS. So in total you cast off 8 stitches. Next, you cast off 5 stitches 5 times at the beginning of rows from both the RS and WS. Following the previous logic, it's 5 rows from the RS and 5 rows from the WS (so 10 rows in total), so you have cast off 50 stitches and not 25. Happy knitting!
31.07.2023 - 18:52
![]() Randy Komitor wrote:
Randy Komitor wrote:
Perhaps you can give me specifics? I need it spelled out. Working neck ofl eft front piece. Are 5 stitches for neck that are placed on holder are worked from RS or WS? I know you have to knit them first before placing on holder. If I put on holder from RS do I COMPLETE row , turn around to WS and thena bind off stitches on every WS. Or, if I place the 5 stitches on hold from the WS . Do I immediately start binding off on the WS row before completing the row. Thanks!
19.07.2023 - 01:01DROPS Design answered:
Dear Randy, for the left side of the neck, work the whole row from the right side and then slip the first stitches at the beginning of the row from the WS. Complete the row from the WS, work 1 row from the RS and then start to cast off at the beginning of every row from the WS. Happy knitting!
20.07.2023 - 12:29
![]() Randy Komitor wrote:
Randy Komitor wrote:
Darcy baby garter stitch jacket. Thanks for response but still not enough for me as new knitter. Can you write exactly what I’m supposed to do starting with P1 from WS. Don’t even understand if I’m still supposed to do that. Or is now RS. Need directions laid out for left as you have done for right. Love pattern. Grandson due in august and as can see I’m slow!
25.06.2023 - 17:11DROPS Design answered:
Dear Mrs Komitor, work the same way, ie purl 1 row from WS just as you done for first front piece, work the rib starting from the side (from RS) with P2 after the edge stitch so that you end with K2 before the edge stitch towards mid front. Happy knitting!
26.06.2023 - 08:59
![]() Randy K wrote:
Randy K wrote:
Little Darcy knitted baby jacket in garter stitch. 1) For Left Front Piece says work in reverse. Help! On Right Front Piece after casting on it says P1 row from WS. for Left Front Piece do you knit 1row on the RS? Purl 1 row on RS? Do that row exactly same as Right Front piece, P1 row on the WS , because reverse starts with rib? 2) For the ribbing. On Right front piece first row rib I K1 at beginning (edge?), repeated k2p2, k1 at end(edge?) so now I P1( repeat p2k2) and P1 at end of row?
24.06.2023 - 21:16DROPS Design answered:
Dear Randy, to work in reverse means that the sleeve will be on the opposite side of the left front piece, compared to the right front piece. For example, in the right front piece you cast on for the sleeve at the end of the right side rows, while on the left front piece you will cast on stitches at the end of wrong side rows. This is also applied to the neck shaping. So you don't need to reverse the actual rows in principle. For the rib, you will always knit the edge stitches but you can work p2k2 instead so that the rib is symmetrical in the middle of the front piece. Happy knitting!
25.06.2023 - 16:13
![]() Anne-Beate Dokken wrote:
Anne-Beate Dokken wrote:
Hvordan er det best og sy denne sammen som er strikket i to farger. Takk for fine nettsider.
27.10.2022 - 10:55DROPS Design answered:
Hej Anne-Beate, se videoerne nederst i opskriften, vi har en som hedder "Hvordan sy sammen i rille"
27.10.2022 - 13:25
![]() Kerryn wrote:
Kerryn wrote:
Hello, I’m confused about where to place the marker “mid shoulder” and if I then knit from the marker to the end of the sleeve or the other direction to the neck line for 1 cm. This is for the right hand front piece. I’m fairly new to knitting and would appreciate your help as I don’t want to mess it up. Thank you so much, Kerryn
11.01.2022 - 21:52DROPS Design answered:
Dear Kerryn, insert this marker in the middle of the row (maybe somewhat more towards shoulder than towards sleeve edge), this marker will be the top of shoulder and will be used to measure back piece matching front piece. Hope it will help, happy knitting!
12.01.2022 - 07:25
![]() Rose-Marie Ohlson wrote:
Rose-Marie Ohlson wrote:
Little Darcy, randig stickad babykofta Fram och bakstycken på koftan är lika breda innan man stickar till 2,5 cm framkanter. Det blir inte bra när koftan ska knäppas.
26.08.2021 - 17:08
![]() Solvej Larsen wrote:
Solvej Larsen wrote:
Jeg vil gerne strikke denne lille trøje i den mindste str.Jeg har noget garn som jeg gerne vil bruge som hedder Perfect og er 22m =10.cm på p. 3 *3 1/2.jeg skal være oldemor og er nød til at bruge noget af det garn jeg har. Håber i kan hjælpe mig ? Opskriften .hedder Little Darcy,
10.08.2021 - 23:30
![]() Birgitte wrote:
Birgitte wrote:
Jeg har svært ved at forstå, på Venstre forstykke skal der slåes nye masker op til ærme i slutningen af vrangpinden, samtidigt skal der lukkes af til hals i begyndelsen af vrangpinden, hvorfor er det anderledes end højre forstykke?...
15.06.2021 - 11:05DROPS Design answered:
Hej Birgitte, det er lettere at tage ud i slutningen af pinden, derfor er du nødt til at tage ud fra vrangen på venstre forstykke (det der ligger til højre når det ligger foran dig) :)
16.06.2021 - 13:02
|
|
Little Darcy#littledarcycardigan |
|
 |
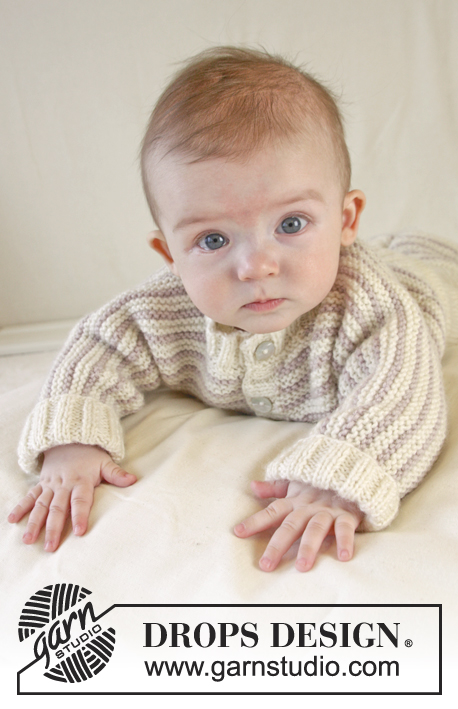 |
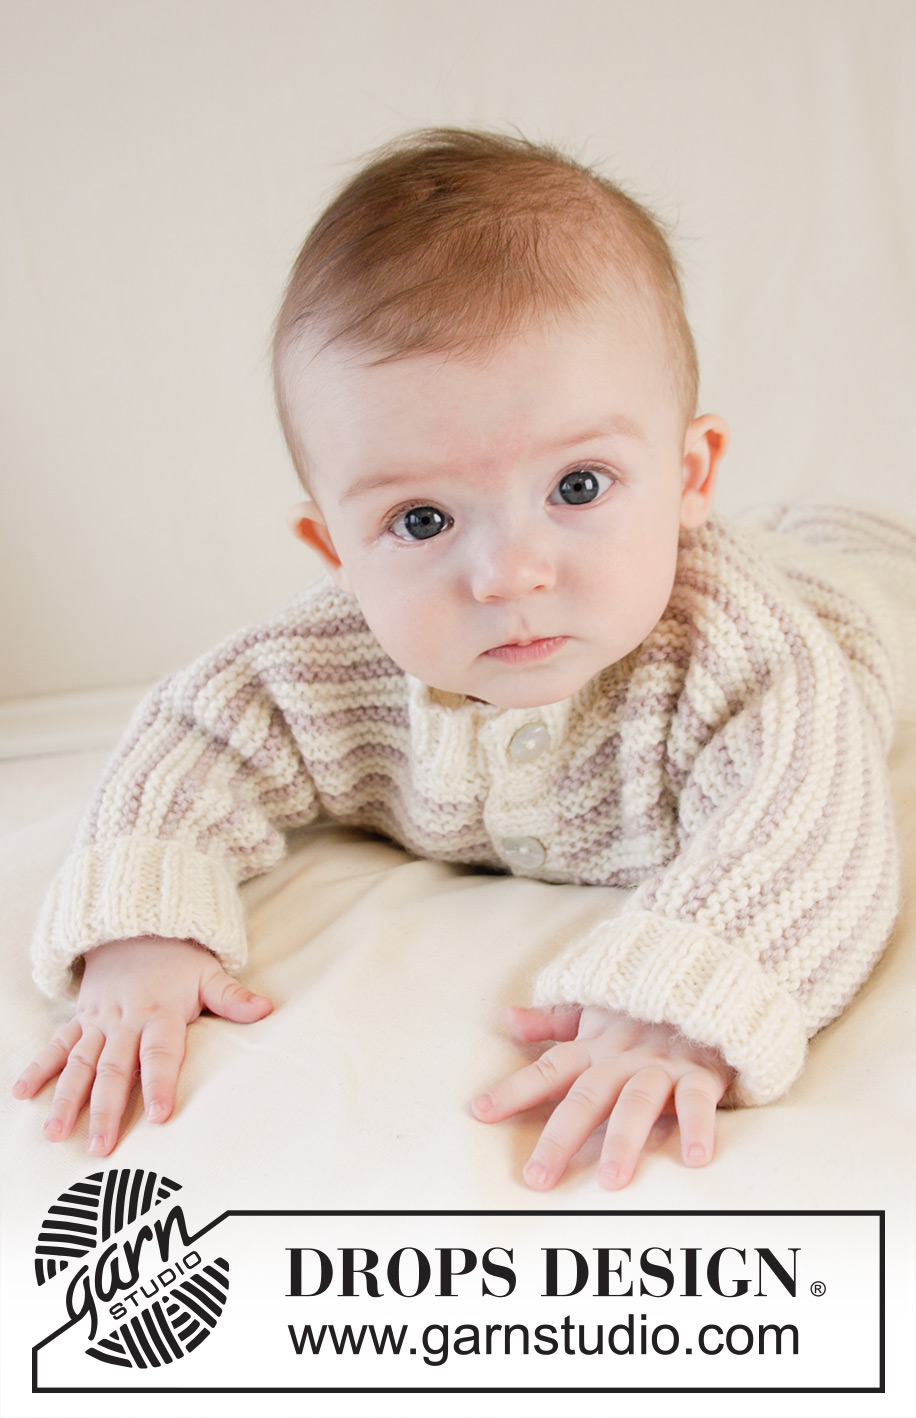
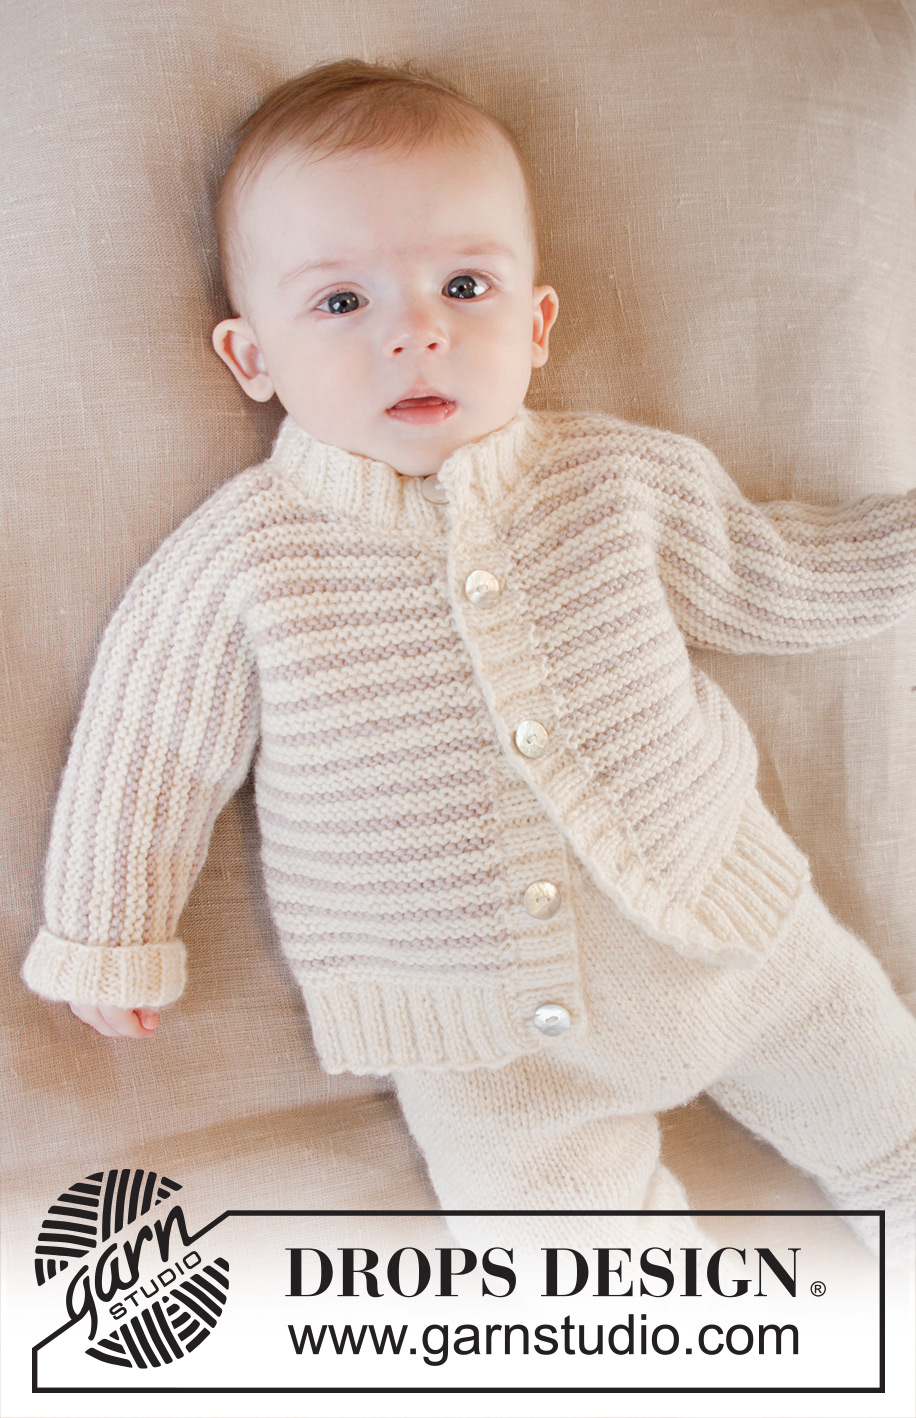
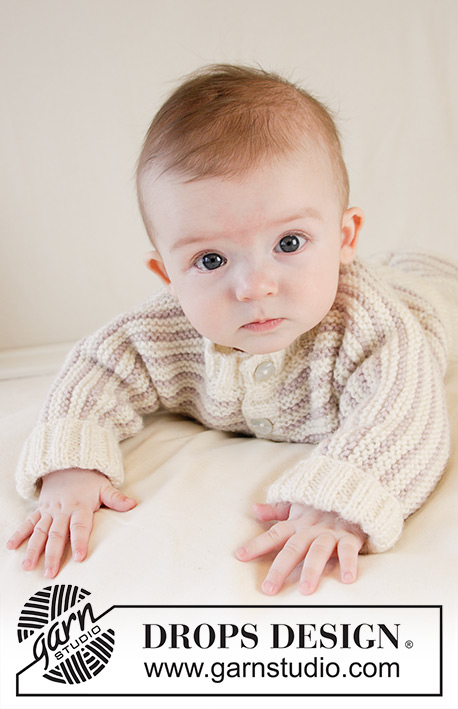
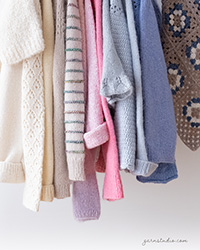
Knitted baby jacket in garter st with stripes and rib edges in DROPS Karisma. Size 0 – 4 years
DROPS Baby 25-18 |
|
|
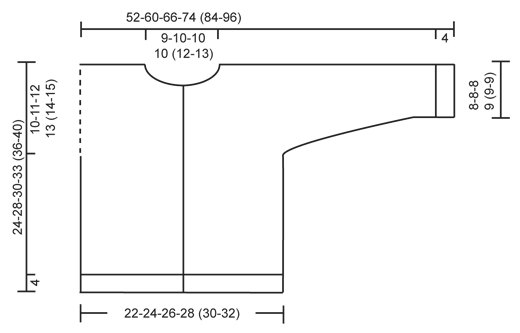
GARTER ST (back and forth on circular needle): K all rows. 1 ridge = K2 rows. STRIPES: * 1 ridge off white, 1 ridge light beige, 1 ridge off white *, repeat from *-* (i.e. when repeating there will be 2 ridges in off white between every ridge with light beige). ---------------------------------------------------------- JACKET: Worked back and forth on circular needle. Beg on front piece, cast on new sts for sleeve and work up to the shoulder. Put piece aside and work the other front piece. Then place both front pieces tog and work down the back piece. RIGHT FRONT PIECE: Cast on 34-38-38-42 (42-46) sts (includes 1 edge st in each side) on circular needle size 3 mm / US 2.5 with off white. P 1 row from WS. Then work next row as follows from RS: 1 edge st in GARTER ST - see explanation above - * K 2, P 2 *, repeat from *-* until 1 st remains and finish with 1 edge st in GARTER ST. Continue rib like this. When piece measures 4 cm / 1½", K 1 row from RS while AT THE SAME TIME dec 9-11-9-11 (9-10) sts evenly = 25-27-29-31 (33-36) sts. Switch to circular needle size 4 mm / US 6 and K 1 row from WS. Then work in GARTER ST – see explanation above while AT THE SAME TIME working STRIPES – see explanation above. REMEMBER THE GAUGE! When piece measures 14-17-18-20 (22-25) cm / 5½"-6¾"-7"-8" (8¾"-9¾"), cast on new sts for sleeve at the end of every row from RS as follows: Cast on 5 sts 3-5-0-0 (4-5) times in total, 4 sts 0-0-7-8 (5-7) times in total and then 7-4-5-7 (8-4) sts 1 time = 47-56-62-70 (81-93) sts. After last inc continue in garter st and stripes until piece measures 20-24-26-28 (31-35) cm / 8"-9½"-10¼"-11" (12¼"-13¾"). Now slip the first 4-5-6-6 (7-8) sts at beg of row from RS on 1 stitch holder for neck (work sts before slipping them on holder to avoid cutting the yarn). Then bind off at beg of every row from RS as follows: bind off 2 sts 2 times and then 1 st 2-2-2-2 (3-3) times = 37-45-50-58 (67-78) sts. Continue to work until piece measures 24-28-30-33 (36-40) cm / 9½"-11"-11¾"-13" (14¼"-15¾"). Insert 1 marker (= mid on top of shoulder) – NOW MEASURE PIECE FROM HERE! Continue in garter st and with stripes as before until 1 cm / ½" has been worked from marker but on last row from WS cast on 2 new sts at the end of row towards the neck. Slip 39-47-52-60 (69-80) sts on 1 stitch holder. LEFT FRONT PIECE: Cast on and work as right but reversed, i.e. rib beg with 2 P after 1 edge st in the side and ends with 2 K before 1 edge st towards mid front. When casting on new sts for sleeve at the end of every row from WS, dec for neck at beg of every row from WS and when casting on 2 new sts towards the neck, this is done at the end of last row from RS, then K 1 row from WS so that both front pieces end after 1 row K from WS. BACK PIECE: Work the 39-47-52-60 (69-80) sts from left front piece (1st row = K from RS and continue stripes as before), cast on 14-16-18-18 (22-24) new sts on needle (= neckline in the back of neck) and work the 39-47-52-60 (69-80) sts from right front piece on to same circular needle = 92-110-122-138 (160-184) sts. Continue in garter st and with stripes. When piece measures 8-8-8-9 (9-9) cm / 3"-3"-3"-3½" (3½"-3½") from marker on shoulder (make sure that no of rows and stripes is the same on front piece according to marker on shoulder), now bind off at beg of every row in each side as follows: bind off 7-4-5-7 (8-4) sts 1 time, 4 sts 0-0-7-8 (5-7) times in total and 5 sts 3-5-0-0 (4-5) times in total = 48-52-56-60 (64-70) sts remain on back piece. Work until piece measures 20-24-26-29 (32-36) cm / 8"-9½"-10¼"-11½" (12½"-14¼") from marker on shoulder – adjust according to front piece and make sure to finish stripes the way they started on front piece. Switch to circular needle size 3 mm / US 2.5 and off white and K 1 row from RS AT THE SAME TIME inc 20-20-20-20 (20-22) sts evenly = 68-72-76-80 (84-92) sts. Work next row as follows from WS: 1 edge st in garter st, * P 2, K 2 *, repeat from *-* until 3 sts remain and finish with P 2 and 1 edge st in garter st (from RS there are 2 K sts in each side inside edge st). Continue rib like this. When rib measures 4 cm / 1½" (piece measures approx. 24-28-30-33 (36-40) cm / 9½"-11"-11¾"-13" (14¼"-15¾") from marker on shoulder), K 1 row (from RS) over all sts before loosely binding off. RIGHT BAND: Pick up from RS approx. 42 to 74 sts along right front piece inside 1 edge st in garter st on circular needle size 3 mm / US 2.5 with off white. K 1 row from WS. K 1 row from RS while AT THE SAME TIME inc evenly to 53-61-65-73 (81-89) sts. Work next row as follows from WS: 1 edge st in garter st, * P 2, K 2 *, repeat from *-* until 4 sts remain and finish with P 2 and 2 edge sts in garter st. Continue rib like this. When band measures 1 cm / ½", dec on next row from RS for 4-4-4-5 (5-5) buttonholes evenly. 1 buttonhole = P 2 tog and make 1 YO (dec in a P-section seen from RS will look more pretty). Upper buttonhole should be approx. 4 cm / 1½" from neck edge, and bottom buttonhole approx. 2 cm / ¾" from bottom edge. Continue to work until band measures 2½-2½-2½-3 (3-3) cm / ¾"-¾"-¾"-1" (1"-1") and loosely bind off with K over K and P over P. LEFT BAND: Work as right band but do not dec for buttonholes on left band. NECK EDGE: Pick up from RS approx. 56 to 78 sts (incl sts on stitch holders) around the neck (also over bands) on circular needle size 3 mm / US 2.5 with off white. K 1 row from WS. K 1 row from RS while AT THE SAME TIME inc evenly to 68-72-76-80 (88-92) sts. Work next row as follows from WS: 1 edge st in garter st, * P 2, K 2 *, repeat from *-* until 3 sts remain and finish with P 2 and 1 edge sts in garter st. Continue rib like this. When neck edge measures 1 cm / ½", dec for 1 buttonhole over the other holes on right band. Continue to work until neck edge measures 2½-2½-2½-3 (3-3) cm / ¾"-¾"-¾"-1" (1"-1") and loosely bind off with K over K and P over P. ASSEMBLY: Sew side and underarm seams in one inside 1 edge st. Sew on buttons. SLEEVE EDGE: Pick up from RS approx. 34 to 38 sts at the bottom around the sleeve on double pointed needles size 3 mm / US 2.5 with off white. P 1 round. K 1 round while AT THE SAME TIME inc evenly to 40-40-40-44 (48-48) sts. Then work rib = K 2/P 2. When sleeve edge measures 4 cm / 1½", loosely bind off with K over K and P over P. Repeat at the bottom around the other sleeve. |
|
 |
|
Have you finished this pattern?Tag your pictures with #dropspattern #littledarcycardigan or submit them to the #dropsfan gallery. Do you need help with this pattern?You'll find 23 tutorial videos, a Comments/Questions area and more by visiting the pattern on garnstudio.com. © 1982-2026 DROPS Design A/S. We reserve all rights. This document, including all its sub-sections, has copyrights. Read more about what you can do with our patterns at the bottom of each pattern on our site. |
|


With over 40 years in knitting and crochet design, DROPS Design offers one of the most extensive collections of free patterns on the internet - translated to 17 languages. As of today we count 324 catalogs and 12190 patterns - 12180 of which are translated into English (US/in).
We work hard to bring you the best knitting and crochet have to offer, inspiration and advice as well as great quality yarns at incredible prices! Would you like to use our patterns for other than personal use? You can read what you are allowed to do in the Copyright text at the bottom of all our patterns. Happy crafting!
Post a comment to pattern DROPS Baby 25-18
We would love to hear what you have to say about this pattern!
If you want to leave a question, please make sure you select the correct category in the form below, to speed up the answering process. Required fields are marked *.