
Popular categories
Looking for a yarn?


Comments / Questions (47)
Grissel Castillo wrote:
Acabo de terminar de tejer este modelo pero el borde superior e inferior se enroscan. ¿Que debo hacer para que no ocurra esto ? Espero me puedan ayudar.
09.07.2017 - 20:43DROPS Design answered:
Hola Grissel. ¿Has hecho el remate de ganchillo como lo recomiendan en el modelo? Esa es la mejor solución. Puedes incluso hacer 1 fila de más que lo recomendado. Puede ser que hayas hecho demasiado prietas las filas de montaje y remate. En ese caso habría que montar los puntos y trabajar la vuelta de remate con una aguja medio número más grande.
10.07.2017 - 14:04Claudia Carolina wrote:
Hola Drops en Esp. y Latinoamérica. No entiendo el comienzo del calentador de cuello. Si hago la primera carrera en ida y vuelta antes de cerrar el cìrculo còmo es que en la foto no se ve un angulito abierto? Muchas gracias desde ya. Claudia
29.04.2016 - 16:23DROPS Design answered:
Hola Claudia, sólo se trabaja la primera fila en recto, después se une y se comienza a trabajar en redondo. Esto se hace para que el borde de la parte inferior no quede muy tenso. Esa pequeña abertura quedaría en el lado y no se aprecia en la foto. Además después se trabaja un remate a ganchillo con lo que queda prácticamente imperceptible.
30.04.2016 - 10:54
![]() Jen wrote:
Jen wrote:
Is this yarn itchy? I would love to make this shawl but I wonder if it would be itchy around my neck.
06.10.2015 - 04:51DROPS Design answered:
Dear Jen, every one's sensibility is different, you are welcome to contact your DROPS store, they will help you per mail or telephone. Happy knitting!
06.10.2015 - 09:22Rut wrote:
Kanske rapport?
12.11.2012 - 20:49
![]() Monica Domrös wrote:
Monica Domrös wrote:
Vad betyder rapp i mönster 134-45?
12.11.2012 - 17:03DROPS Design answered:
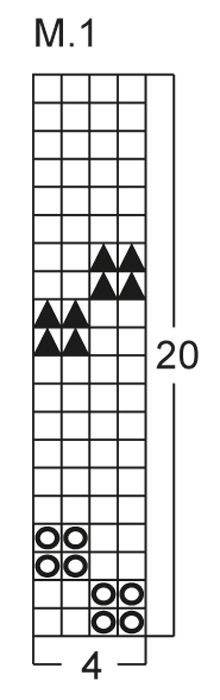
En rapport i höjden betyder när du har stickat M.1 én gång! Lycka till!
15.11.2012 - 10:49
![]() Gunvor B wrote:
Gunvor B wrote:
Mycket fin Pippi-själavärmare. Passar vid många tillfällen.
02.03.2012 - 14:10
![]() MAIGROT wrote:
MAIGROT wrote:
Bonjour Pouvrez vous nous informer sur les pays d origine de vos fils ?
26.02.2012 - 14:02DROPS Design answered:
L'origine de nos fils à tricoter est indiqué sur les étiquettes des pelotes. N'hésitez pas à demander à votre revendeur. Bon tricot !
28.02.2012 - 10:52
![]() Stine wrote:
Stine wrote:
Wie genau funktioniert der Farbwechsel hier? Auf dem Bild sieht es nicht so aus, wie fair-isle innen sonst aussieht...(schräge Innenfäden, nicht gerade)... In der Anleitung wird das leider nicht deutlich.
25.02.2012 - 21:38DROPS Design answered:
Die Arbeit wird im gewohnten fair-isle Stiel gestrickt.
27.02.2012 - 13:42
![]() Maria wrote:
Maria wrote:
Det gick åt nästan hela 200 g för mig med, så köp fyra nystan bottenfärg direkt så ni inte hamnar med två olika färgbad!
20.09.2011 - 18:28
![]() Kitty Elken wrote:
Kitty Elken wrote:
Herlig nytænkning,spændende design, inspirerende strik
19.08.2011 - 23:05
|
||||||||||
Pippi shawl#pippishawl |
||||||||||
|
|
||||||||||
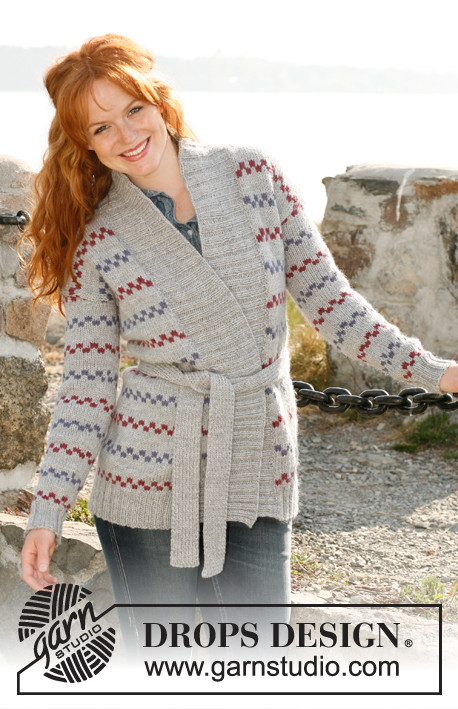
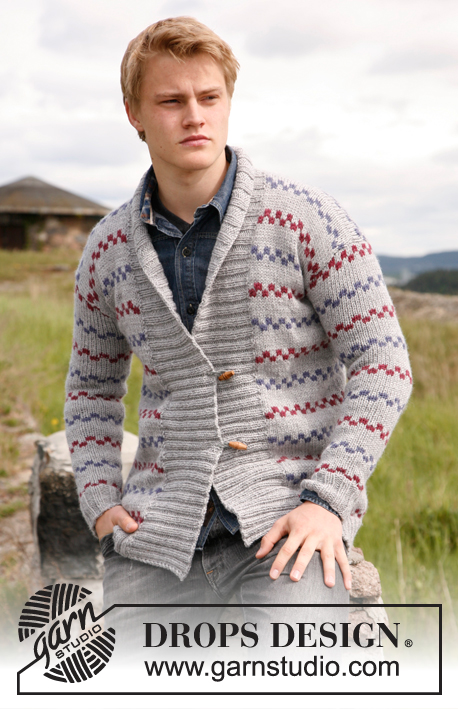
Knitted Pippi neck warmer in DROPS Alaska.
DROPS 134-45 |
||||||||||
|
PATTERN: See diagram M.1. DECREASE TIP: Dec 1 st on each side of marker as follows: Work until 2 sts remain before marker, slip 1 st as if to K, K 1, psso, marker, K tog the next 2 sts. -------------------------------------------------------- NECK WARMER: First worked back and forth on 1 row before working in the round on circular needle. Cast on 168 sts (= can be divided by 4) on circular needle size 5 mm / US 8 with denim blue. Switch to light gray and K 1 row (= RS). Then work in the round - insert a marker at beg of round (round beg in the side), and a marker after 84 sts (= the other side). Work 6 rounds in stockinette st. Then work 1st-6th round in diagram M.1. On next round (7th round in diagram M.1 = light gray), dec 1 st on each side of every marker - Read DECREASE TIP above = 4 sts dec on round. Work 1 round (= 8th round in diagram M.1). Dec another 4 sts the same way on next round (= 9th round in diagram M.1). Repeat dec on the 17th and 19th round (light gray) in diagram M.1. Repeat dec like this on the 7th, 9th, 17th and 19th round in diagram M.1 (= 4 dec sts per dec, 4 dec on 1 repetition of diagram M.1 vertically) a total of 3 times (= 12 dec). Then dec another 2 times on 7th and 9th round in diagram M.1 = 112 sts. Work 1 more round in light gray, then switch to denim blue and loosely bind off with P sts. CROCHET BORDER: Crochet around both edges with denim blue on hook size 6 mm / J/10. Work 1 sc in every st in the first and last round in light gray, fasten off. NOTE: Make sure that the crochet border is not too tight. |
||||||||||
Diagram explanations |
||||||||||
|
||||||||||
 |
||||||||||
Have you finished this pattern?Tag your pictures with #dropspattern #pippishawl or submit them to the #dropsfan gallery. Do you need help with this pattern?You'll find 7 tutorial videos, a Comments/Questions area and more by visiting the pattern on garnstudio.com. © 1982-2026 DROPS Design A/S. We reserve all rights. This document, including all its sub-sections, has copyrights. Read more about what you can do with our patterns at the bottom of each pattern on our site. |
||||||||||


With over 40 years in knitting and crochet design, DROPS Design offers one of the most extensive collections of free patterns on the internet - translated to 17 languages. As of today we count 325 catalogs and 12298 patterns - 12288 of which are translated into English (US/in).
We work hard to bring you the best knitting and crochet have to offer, inspiration and advice as well as great quality yarns at incredible prices! Would you like to use our patterns for other than personal use? You can read what you are allowed to do in the Copyright text at the bottom of all our patterns. Happy crafting!
Post a comment to pattern DROPS 134-45
We would love to hear what you have to say about this pattern!
If you want to leave a question, please make sure you select the correct category in the form below, to speed up the answering process. Required fields are marked *.