
Popular categories
Looking for a yarn?


Comments / Questions (70)
![]() Patricia Stiff wrote:
Patricia Stiff wrote:
You do not provide bust size in the pattern measurements. I am normally a UK size 10 or European size 38 but have full breasts. Please advise.
28.03.2018 - 20:51DROPS Design answered:
Dear Mrs Stiff, you will find at the bottom of the pattern a measurement chart with all measurements in cm - taken flat from side to side. Compare these to a similar garment you have and like the shape to find out the matching size. Read more about sizing here. Happy knitting!
30.03.2018 - 11:53
![]() Borbàs Catherine wrote:
Borbàs Catherine wrote:
Bonjour, j'aime beaucoup tous les genres de modèles que vous proposez sur votre site et j'en tricote souvent. Malheureusement, trop de modèles se tricotent en aiguilles circulaires. Ne serait-il pas possible de proposer les deux formules (aiguille circulaire et aiguilles traditionneles) cela nous éviterait de calculer ce qui est fastidieux et générateur de fautes éventuelles. Merci et continuez à nous proposer de jolis modèles.
26.08.2017 - 18:37
![]() Patti wrote:
Patti wrote:
Thank you --- I now understand! I guess I was confused by the "1 vertical repeat" which I took to mean that I would only repeat the chart one time, but now I realize that you finish your number of stitches needed to complete the round. Thanks for clarifying as I'm still learning how to pattern read.
23.05.2017 - 16:52
![]() Patti wrote:
Patti wrote:
Thank you for answering back --- I still have a question --- when it says work round and then continue with 1 vertical repeat of M.2 --- so after I've knitted K3/P3 all the way around --- then I start the chart on lower right and move upward 2 times for the one repeat --- that would still only be 144 sts and I still have 24 (not 12 as mentioned before) stitches left --- so do I start M.2 repeat again to complete the 24 sts left on needle? I'm still confused. Thanks
23.05.2017 - 16:24DROPS Design answered:
Dear Patty, there are 168 sts in size S, and you work M.2 a total of 28 times in width (= 28 x 6 sts = 168 sts). Happy knitting!
23.05.2017 - 16:33Patti wrote:
Once I have 168 sts left on my needle and I've worked K3/P3 --- and now working from the chart with 1 repeat there are only 144 sts to be worked and not 168 sts. where are the missing 12 sts . What am I doing wrong? Thank you for your help!
23.05.2017 - 06:12DROPS Design answered:
Dear Patti, after rib you work M.2 (= 6 sts) over the 168 sts = repeat 28 times M.2 in total = 28x6 sts = 168 sts. Then work M.1 (= 8 sts) a total of 21 times in width: 21 x 8 sts = 168 sts. Happy knitting!
23.05.2017 - 08:50Annette Lewis wrote:
The vertical lines running up the bodice seem to want to lean (twist) how do I fix it or does it fix itself when I wear it? I fear I will be forever pulling it round to straighten the lines as I wear it. Any suggestions?
27.12.2016 - 11:42DROPS Design answered:
Dear Mrs Lewis, the sts in diagram M.1 should be always straight, ie over the first 3 K sts you will work a lace pattern every other row, then you should have P5 all the way, make sure sts are not displaced when working. Happy knitting!
29.12.2016 - 14:36
![]() Demi wrote:
Demi wrote:
Ik wil graag dit truitje breien op 2 naalden. Zijn de teltekeningen door en heengaande naald uitgelegd? of alléén de doorgaande naalden (gezien met rondbreinaalden alléén doorgaande naalden zijn). En voor de ribbelsteek met rondbreinaald is av aan de goede kant dan rechts aan de averechtse kant met 2 naalden ? Jammer dat er geen beschrijvingen zijn voor 2 naalden. Ook bij de andere topjes
14.06.2016 - 15:27DROPS Design answered:
Hoi Demi. Er zijn ook patronen voor heen en weer breien. Je kan hier zien hoe je onze telpatronen moet lezen. Alle naalden zijn weergegeven, dus ga je nu heen en weer breien ipv in de rondte zal elke 2e nld (rij) op de verkeerde kant zijn. Veel plezier.
14.06.2016 - 15:37
![]() Dorothea wrote:
Dorothea wrote:
Skulle ni kunna göra bilden tydligare? Jag skulle vilja se mönstret i detalj på fotografiet. På bilden ser toppen ut att vara figurskuren i midjan, men inte på den tecknade bilden. Jag kan inte heller se i stickbeskrivningen att man stickar figurskuren.
21.02.2015 - 10:28DROPS Design answered:
Hej Dorothea, modellen sticka rak enligt beskrivningen, men mönstret i midjan gör att den drar ihop sig lite i midjan. Lycka till!
25.05.2015 - 15:52
![]() Martine wrote:
Martine wrote:
Bonjour Concerne le modèle n°101-23 Après séparation des Dos et Devant et diminutions des emmanchures, le nombre de mailles est faux pour les tailles L & XL = 93 et 100 au lieu de 96 et 103. Puis pour le devant après les dim. de l'encolure reste: 19-21-24-27-30 m et non 27-28-29-31-32 m. Ce qui fait que mes épaules ne sont pas aux même dimensions. Où se trouve le problème? Merci pour votre réponse.
06.10.2014 - 17:46DROPS Design answered:
Bonjour Martine, on a en effet 93-100 m pour le dos après les emmanchures (correction faite), merci. Pour le devant, on forme les emmanchures et les épaules comme pour le dos = 103-108 m puis on rabat les 21-22 m centrales pour l'encolure et 2 x 2 m (x 2 côtés) + 8 x 1 m (x 2 côtés) = 29-31 m pour chaque épaule. Bon tricot!
07.10.2014 - 09:14
![]() Ine Sanders wrote:
Ine Sanders wrote:
Er staat een fout / omwisseling in de patroonbeschrijving. Er wordt aangegeven eerst 2 nld boord 7 r/3 av. Daarna wordt de golfjesrand beschreven: *3 av/2 re etc. Het boordpatroon had andersom moeten beginnen: 3 av / 7 re. Heel vervelend, bij 310 steken, als je daar pas in de 4e naald van de golfjesrand achter komt!
30.03.2014 - 15:51DROPS Design answered:
Bedankt voor het melden, wij zullen het doorgeven aan de designafdeling.
08.04.2014 - 20:34
|
|||||||||||||
White Lily#whitelilytop |
|||||||||||||
 |
 |
||||||||||||
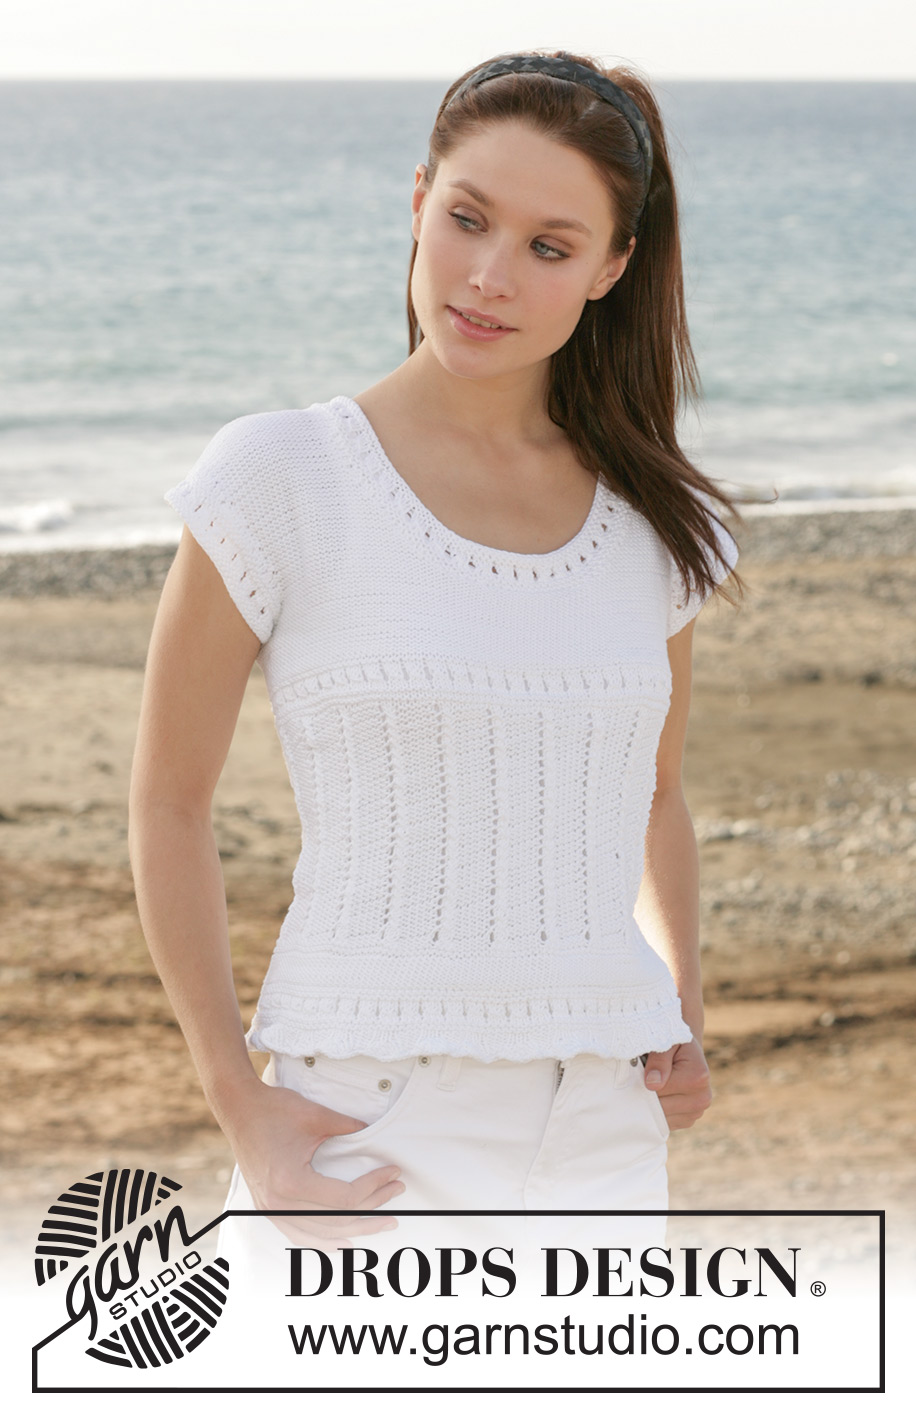
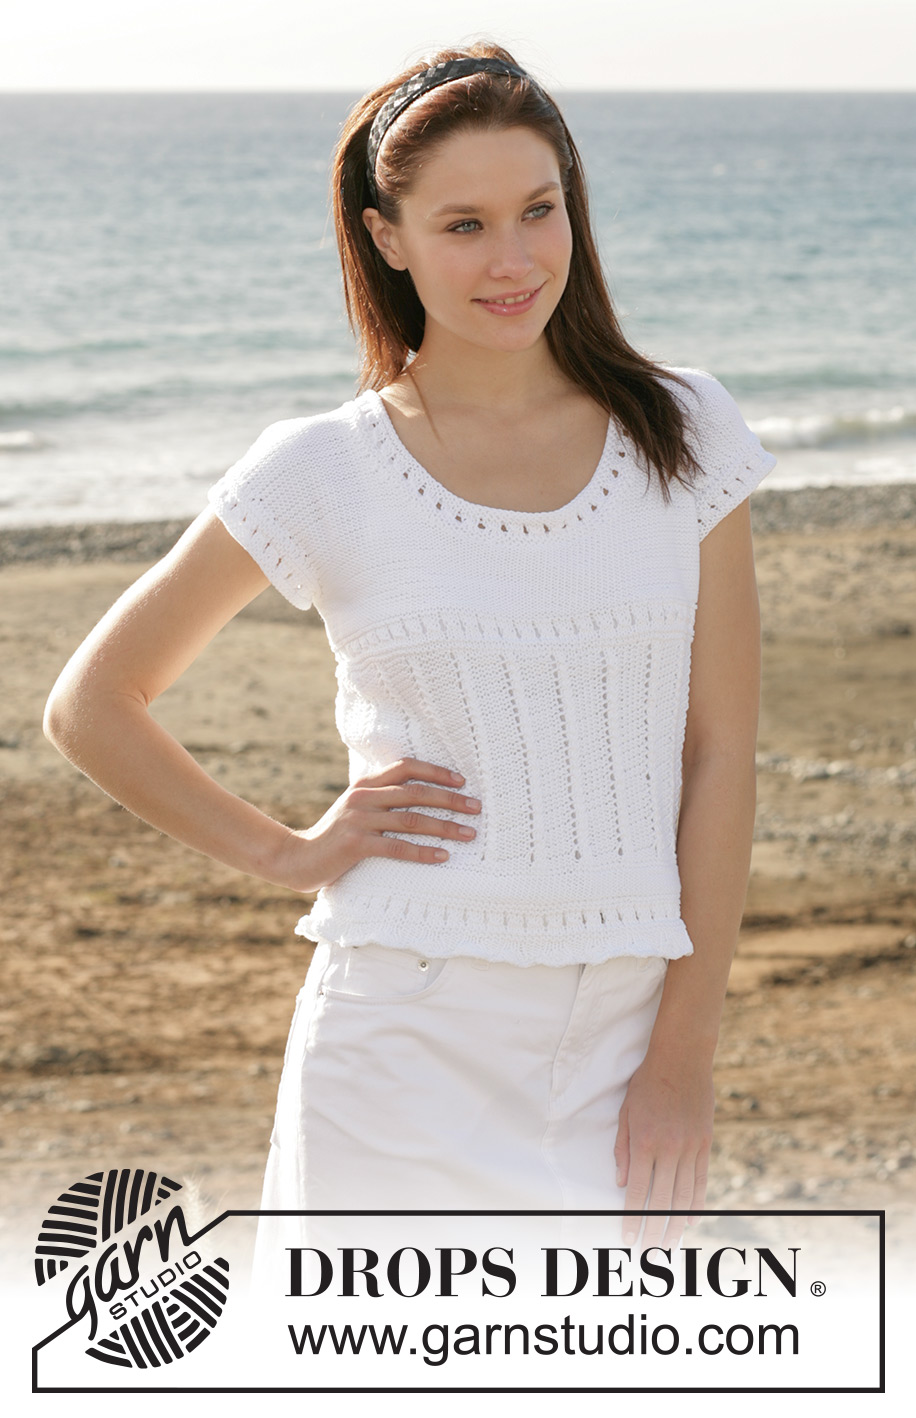
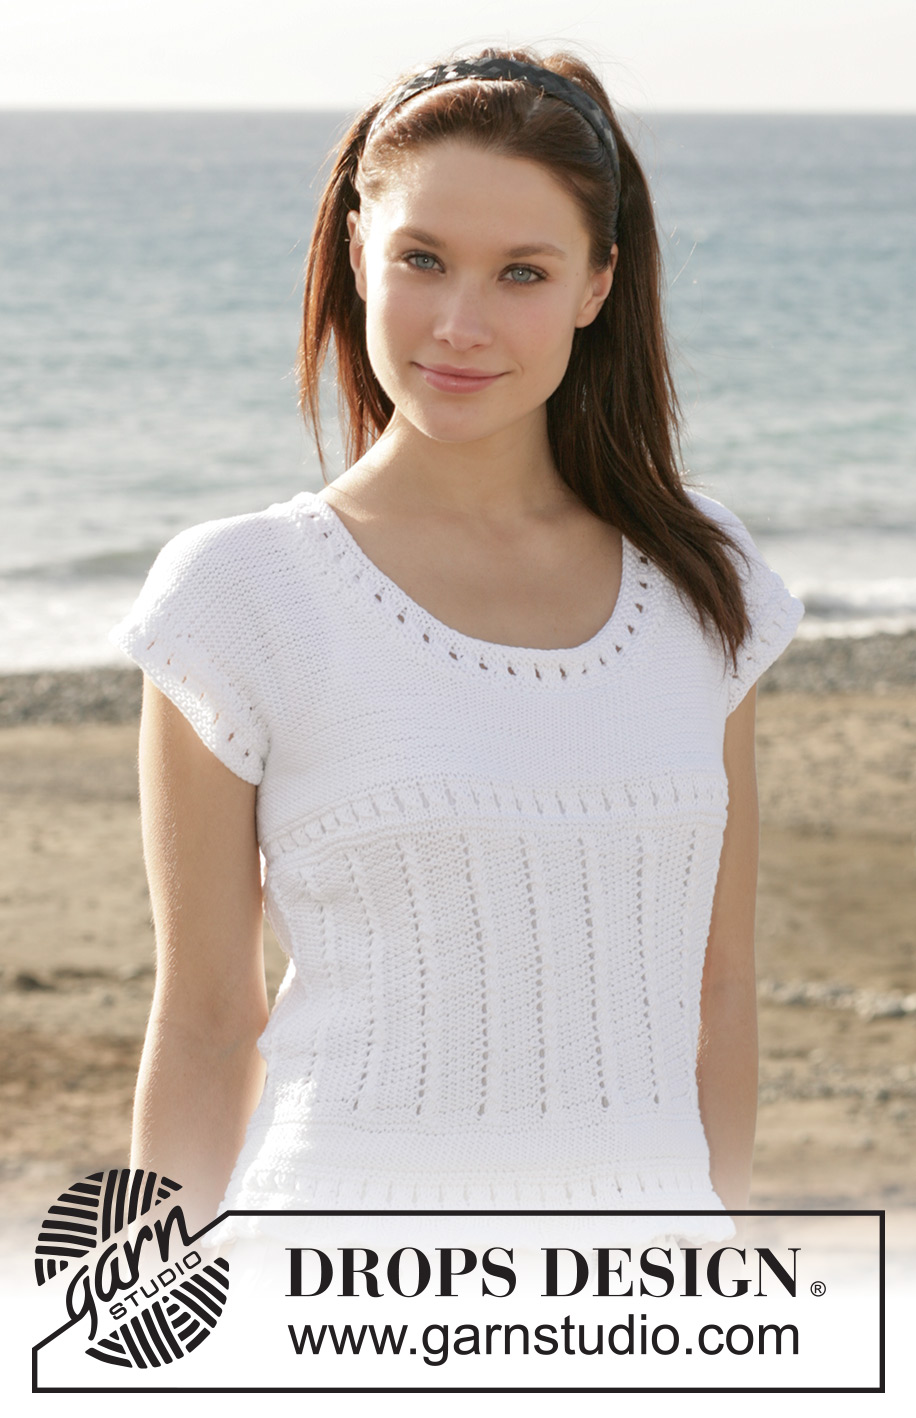
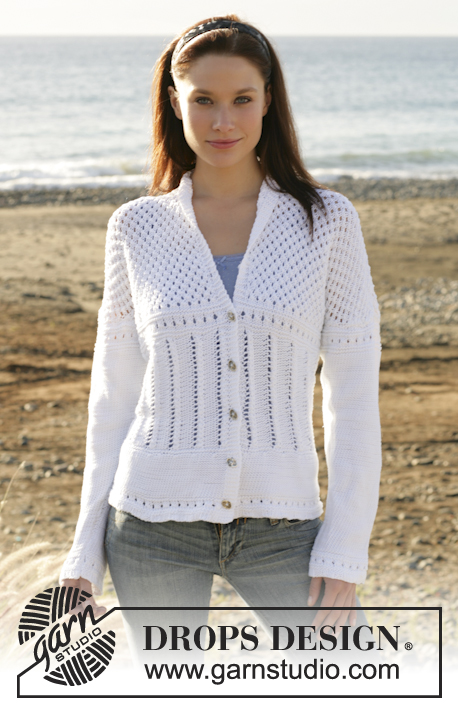
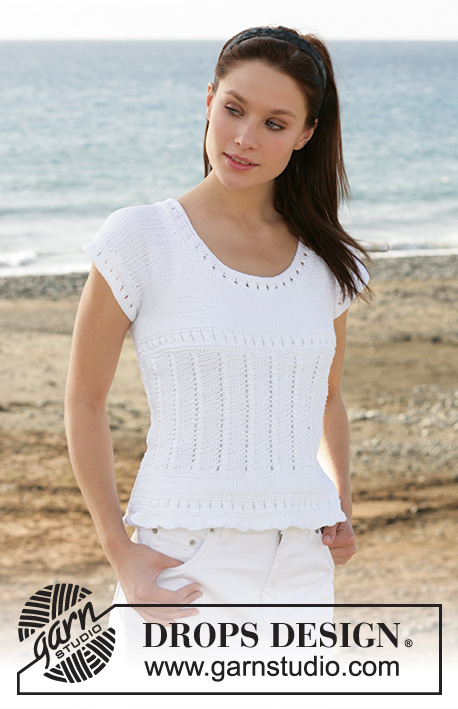
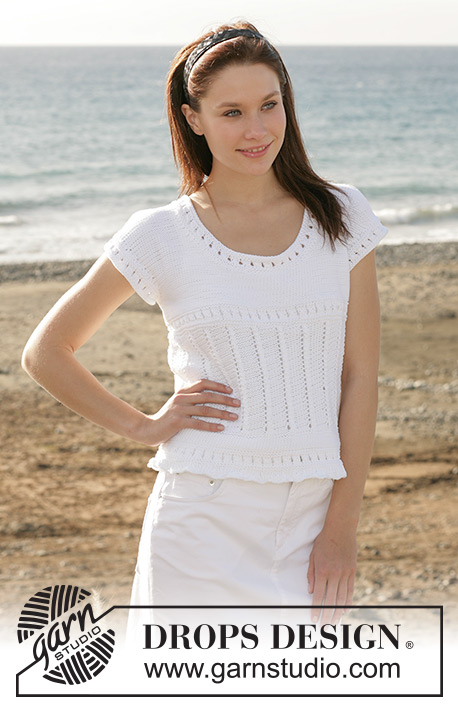
DROPS top with lace pattern in “Muskat”.
DROPS 101-23 |
|||||||||||||
|
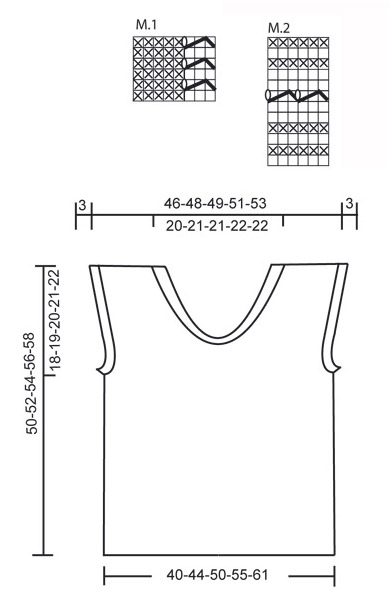
Knitting gauge: 21 sts x 28 rows on needles size 4 mm / US 6 in stockinette sts = 10 x 10 cm / 4" x 4". Garter st, in the round: K 1 round, P 1 round Pattern: See diagrams M.1 and M.2. The diagram is seen from the RS. Wavy border: 1st round: * K2, slip 1 st as if to knit, K2 tog, psso, K2, P3*, repeat from *-* 2nd round: K over K and P over P 3rd round: *K1, slip 1 st as if to knit, K2 tog, psso, K1, P3*, repeat from *-* 4th row: K over K and P over P (= K3/P3) Back and front piece: Worked in the round on circular needle. Cast on 280-310-350-390-430 sts on circular needle size 4 mm / US 6 and work 2 rounds in Rib, K7/P3. Continue with wavy border – see explanation above. After the border there are 168-186-210-234-258 sts on needle. Work 1 round with K3/P3 and then continue with 1 vertical repeat of diagram M.2. Then K 1 round and then continue in reverse stockinette st (purl all sts) until piece measures 9 cm / 3½". Now work 4 rounds in garter st, at the same time adjusting no of sts to 168-184-208-232-256 on the first round. Continue with M.1. When piece measures 25-26-27-28-29 cm / 9¾"-10¼"-10½"-11"-11½" work 1 repeat of M.2- at the same time adjusting no of sts back to 168-186-210-234-258 on the first round. After M.2 finish the piece in reverse stockinette st (P all sts). When piece measures 32-33-34-35-36 cm / 12½"-13"-13½"-13¾"-14¼" work next round as follows: 82-90-101-112-123 sts (= front piece), bind off 2-3-4-5-6 sts for armhole, 82-90-101-112-123 sts (= back piece), bind off 2-3-4-5-6 sts for armhole. Now complete each piece separately. Back piece: = 82-90-101-112-123 sts. Continue in reverse stockinette st, at the same time dec to shape the armhole on every other row: 1 st 1-2-4-6-8 times = 80-86-93-100-107 sts. When piece measures 37-40-42-45-48 cm / 14½"-15¾"-16½"-17¾"-19" inc for wide shoulders each side as follows: 1 st on every 4th row a total of 8-7-5-4-2 times = 96-100-103-108-111 sts. When piece measures 48-50-52-54-56 cm / 19"-19¾"-20½"-21¼"-22" bind off the middle 38-40-41-42-43 sts for neck and work each side separately. Continue and dec to shape the neckline on every other row: 1 st 2 times = 27-28-29-31-32 sts left on shoulder. Bind off when piece measures 50-52-54-56-58 cm / 19¾"-20½"-21¼"-22"-22¾". Front piece: = 82-90-101-112-123 sts. Continue in reverse stockinette st and dec for armhole and inc for wide shoulder as described for back piece. At the same time when piece measures 37-38-39-40-41 cm / 14½"-15"-15¼"-15¾"-16⅛" put the middle 18-20-21-22-23 sts on a holder for neck and work each side separately. Continue and dec to shape the neckline on every other row: 2 sts 2 times and 1 st 8 times = 27-28-29-31-32 sts left on shoulder. Bind off when piece measures 50-52-54-56-58 cm / 19¾"-20½"-21¼"-22"-22¾". Assembly: Sew shoulder seams. Neck border: Beg mid back and pick up approx 114 to 132 sts (divisible by 6) on double pointed needles size 4 mm / US 6 around the neck (including sts on stitch holder). Work 1 vertical repeat of M.2 and then bind off. Armhole border: Pick up approx 78 to 96 sts (divisible by 6) on double pointed needles size 4 mm / US 6 around the armhole. Work 1 vertical repeat of M.2 and then bind off. Repeat around the other armhole. |
|||||||||||||
Diagram explanations |
|||||||||||||
|
|||||||||||||
 |
|||||||||||||
Have you finished this pattern?Tag your pictures with #dropspattern #whitelilytop or submit them to the #dropsfan gallery. Do you need help with this pattern?You'll find 21 tutorial videos, a Comments/Questions area and more by visiting the pattern on garnstudio.com. © 1982-2026 DROPS Design A/S. We reserve all rights. This document, including all its sub-sections, has copyrights. Read more about what you can do with our patterns at the bottom of each pattern on our site. |
|||||||||||||


With over 40 years in knitting and crochet design, DROPS Design offers one of the most extensive collections of free patterns on the internet - translated to 17 languages. As of today we count 324 catalogs and 12290 patterns - 12280 of which are translated into English (US/in).
We work hard to bring you the best knitting and crochet have to offer, inspiration and advice as well as great quality yarns at incredible prices! Would you like to use our patterns for other than personal use? You can read what you are allowed to do in the Copyright text at the bottom of all our patterns. Happy crafting!
Post a comment to pattern DROPS 101-23
We would love to hear what you have to say about this pattern!
If you want to leave a question, please make sure you select the correct category in the form below, to speed up the answering process. Required fields are marked *.