
Popular categories
Looking for a yarn?


Comments / Questions (34)
![]() Roz wrote:
Roz wrote:
Regarding the straps on the front piece Page 4 I started the first strap in ribbing on 13 stitches I don’t understand what you mean by “try the front piece and work to desired length”
12.09.2022 - 08:23DROPS Design answered:
Dear Roz, you work the strap over 13 sts (in first 2 sizes) until 1 row remains before piece measures ca 40-42 cm (see size), then adjust this length depending on your own body working more or less rows on the strap. Happy knitting!
12.09.2022 - 11:59
![]() Ana Billenness wrote:
Ana Billenness wrote:
If this is not knitted in the round, when you get to the last 3 stitches, k1 and then garter, it ends up being 3 garter. Or do you meant second row, we would p and then garter?
28.07.2022 - 11:24DROPS Design answered:
Hi Ana, Yes, on the right side you have 3 knitted stitches on each side but on the wrong side the last stitch in the rib is purled and there are 2 knitted edge stitches (which is the definition of garter stitch, knitted on all rows). Happy crafting!
29.07.2022 - 06:58
![]() Amparo wrote:
Amparo wrote:
Cuando dice en el patrón al principio que se empieza por el derecho con dos puntos en PUNTO MUSGO, ¿que quiere decir? Yo he entendido que el punto musgo es hacer todo del derecho, tanto por el la parte derecha como por la izquierda ¿no es así?
15.07.2022 - 17:05DROPS Design answered:
Hola Amparo, sí, significa que esos dos puntos se trabajan siempre de derecho.
20.07.2022 - 17:39
![]() Anna wrote:
Anna wrote:
Buona giornata Sto lavorando il dietro .Debbo fare anche le bretelle come il davanti? Grazie mille
11.07.2022 - 10:33DROPS Design answered:
Buonasera Anna, deve lavorare il dietro come il davanti: le spalline vengono cucite all'altezza della spalla. Buon lavoro!
11.07.2022 - 20:30
![]() Anna wrote:
Anna wrote:
Buongiorno Quando dice 24 cm di altezza,si deve misurare comprese le coste 1/1? Posso fare più lungo il top Grazie
07.07.2022 - 09:01DROPS Design answered:
Buonasera Anna, se non diversamente indicato le misure si intendono dall'inizio del lavoro! Buon lavoro!
08.07.2022 - 17:46
![]() Annamaria wrote:
Annamaria wrote:
Sono dinuovo io Sto facendo così i diagramma inizio dal rigo 5 del diagramma A1 poi faccio lavoro 6 maglie poi passo al diagramma A2 e poi dinuovo 6 maglie Va bene così? Grazie mille
06.07.2022 - 10:37DROPS Design answered:
Buongiorno Annamaria, i diagrammi partono dal 1° ferro se non diversamente indicato, per cui il 1° ferro di A.1 sono 10 maglie a diritto. Deve iniziare in questo modo: 2 maglie a maglia legaccio, 4 maglie a maglia rasata, 10 maglie diritto (1° ferro di A.1) per 10 volte, 4 maglie diritto (1° ferro di A.2), 4 maglie a maglia rasata, e 2 maglie a maglia legaccio. Buon lavoro!
06.07.2022 - 16:21
![]() Annamaria wrote:
Annamaria wrote:
Buon giorno Non ho capito come devo impostare il diagramma A1 e A2 inizio lavoro Ho 116 maglie Grazie mille
06.07.2022 - 08:50DROPS Design answered:
Buongiorno Annamaria, deve procedere come indicato nella risposta precedente: i diagrammi si leggono dal basso verso l'alto e da destra a sinistra per i ferri di andata e da sinistra verso destra per quelli di ritorno. Buon lavoro!
06.07.2022 - 16:18
![]() Annamaria wrote:
Annamaria wrote:
Buon giorno Non ho capito come devo impostare il diagramma A1 e A2 inizio lavoro Ho 116 maglie Grazie mille
06.07.2022 - 08:42DROPS Design answered:
Buongiorno Annamaria, deve lavorare come indicato per la sua taglia: 2 maglie a maglia legaccio, 4 maglie a maglia rasata, ripetere il motivo A.1 per 10 volte, lavorare A.2, 4 maglie a maglia rasata, e 2 maglie a maglia legaccio. Buon lavoro!
06.07.2022 - 08:49
![]() Lola wrote:
Lola wrote:
Hello! What kind of decreases technique do I need to use with this part? When rib has been worked, knit 1 row from right side while decreasing 13-13-15-17-19-21 stitches evenly (do not decrease over the outermost 2 stitches in each side) = 88-96-106-116-128-140 stitches.
25.06.2022 - 16:31DROPS Design answered:
Dear Lola, to decrease, knit 2 together and to see how to decrease evenly check the following lesson: https://www.garnstudio.com/lesson.php?id=28&cid=19. Happy knitting!
26.06.2022 - 13:02
![]() Lola wrote:
Lola wrote:
Hello! may I know how to do this part? Work next row as follows from right side: 2 stitches in GARTER STITCH - read explanation above - * knit 1, purl 1 *, repeat from *-* until 3 stitches remain, knit 1, 2 stitches in garter stitch. Thank youuu
23.06.2022 - 17:30DROPS Design answered:
Dear Lola, you work 2 stitches in garter stitch (that is, knitted). Then, *knit 1, purl 1* and repeat this over all stitches in the round, stopping before working the last 3 stitches. Then, work: knit 1 and 2 stitches in garter stitch (knitted). Happy knitting!
23.06.2022 - 20:06
|
||||||||||
Midsummer's Day#midsummersdaytop |
||||||||||
 |
 |
|||||||||
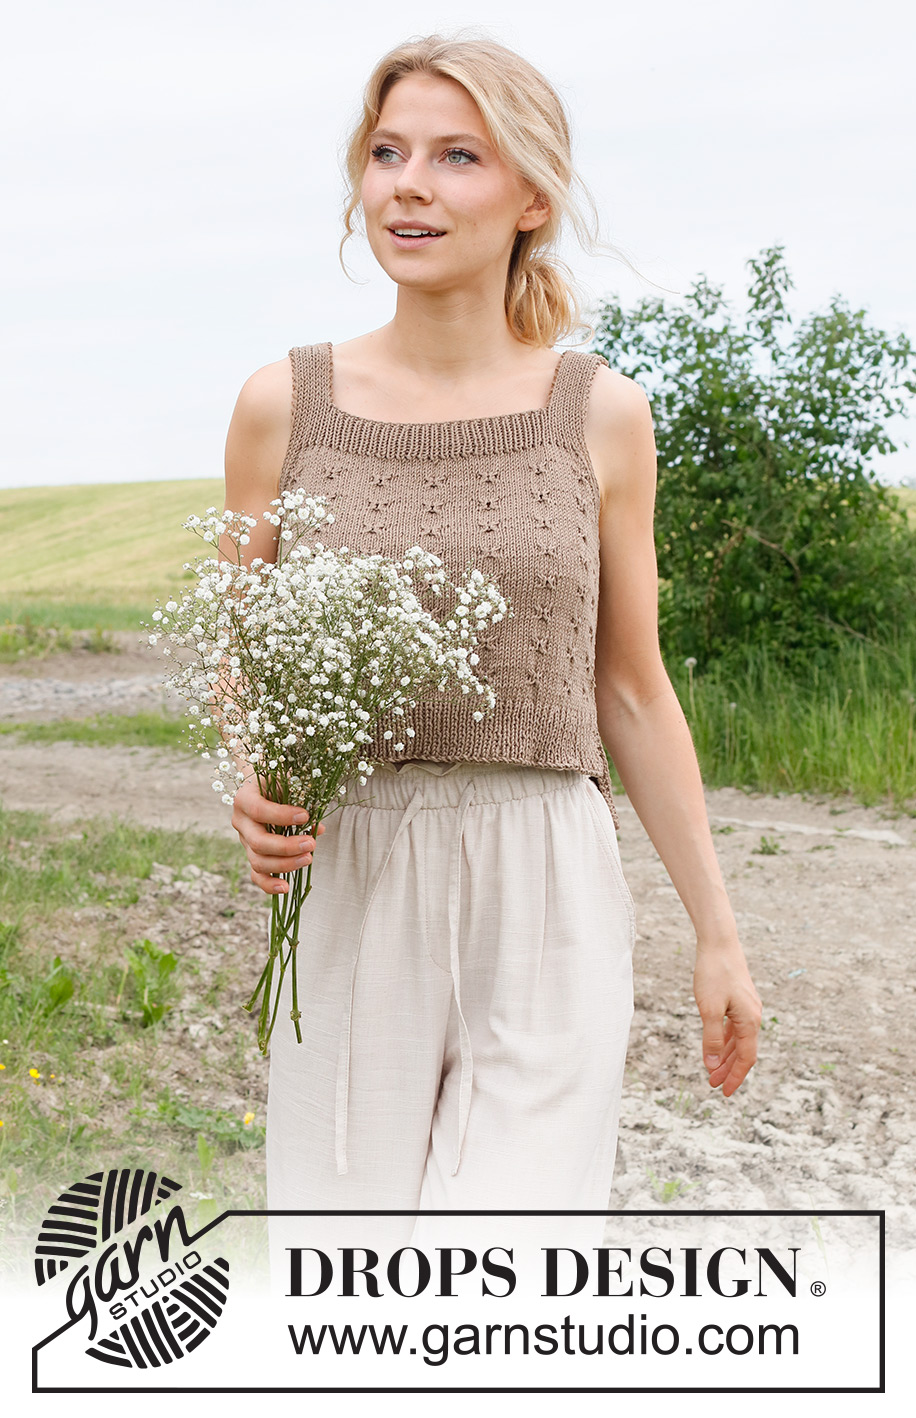
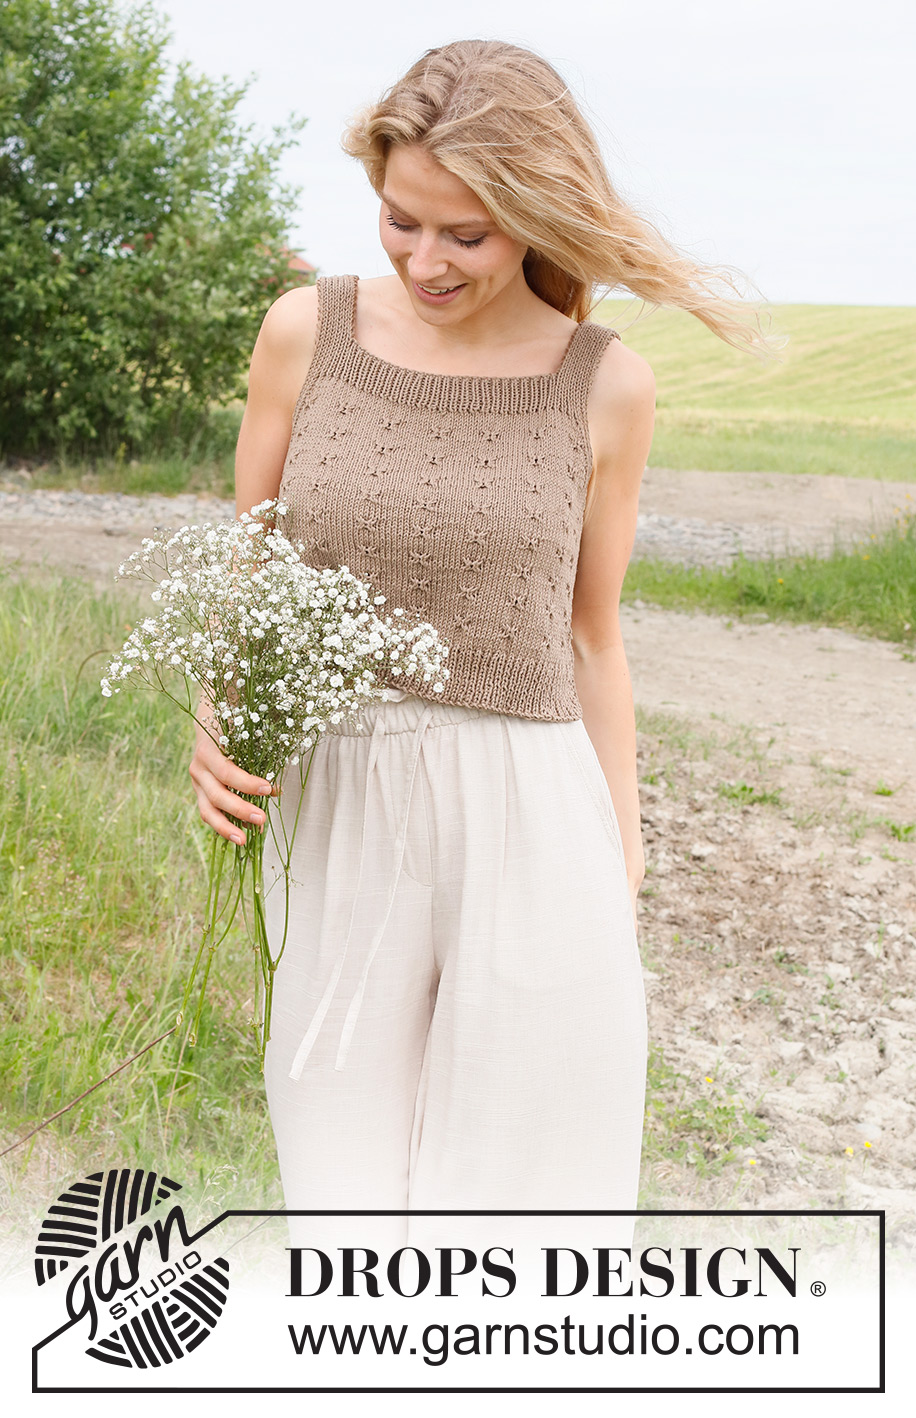
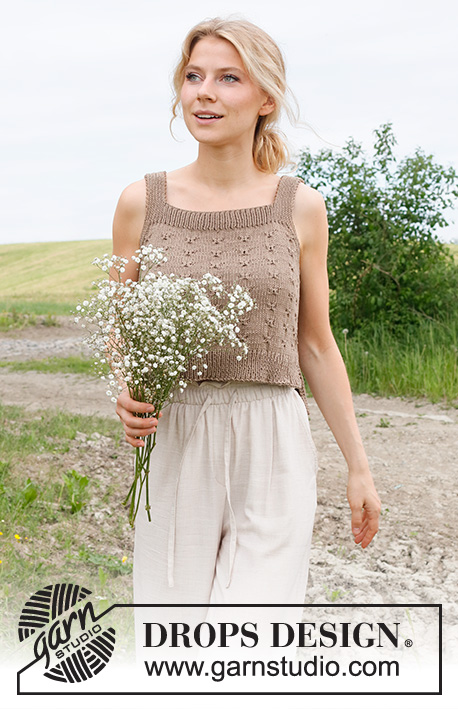
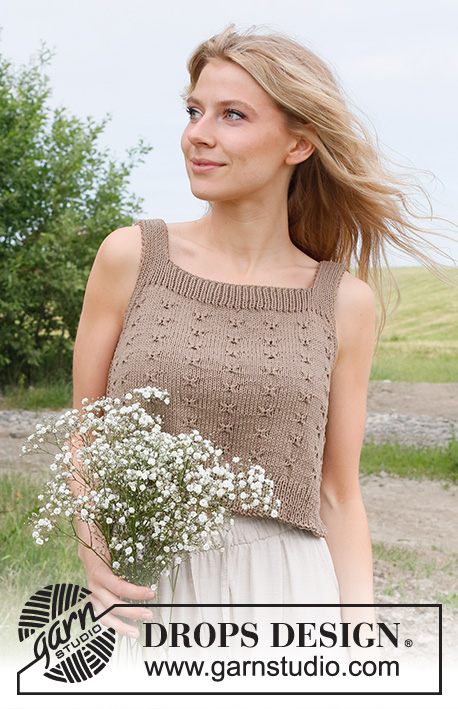
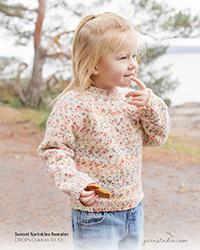
Knitted top/singlet in DROPS Cotton Light. Piece is knitted bottom up with relief pattern. Size: S - XXXL
DROPS 232-24 |
||||||||||
|
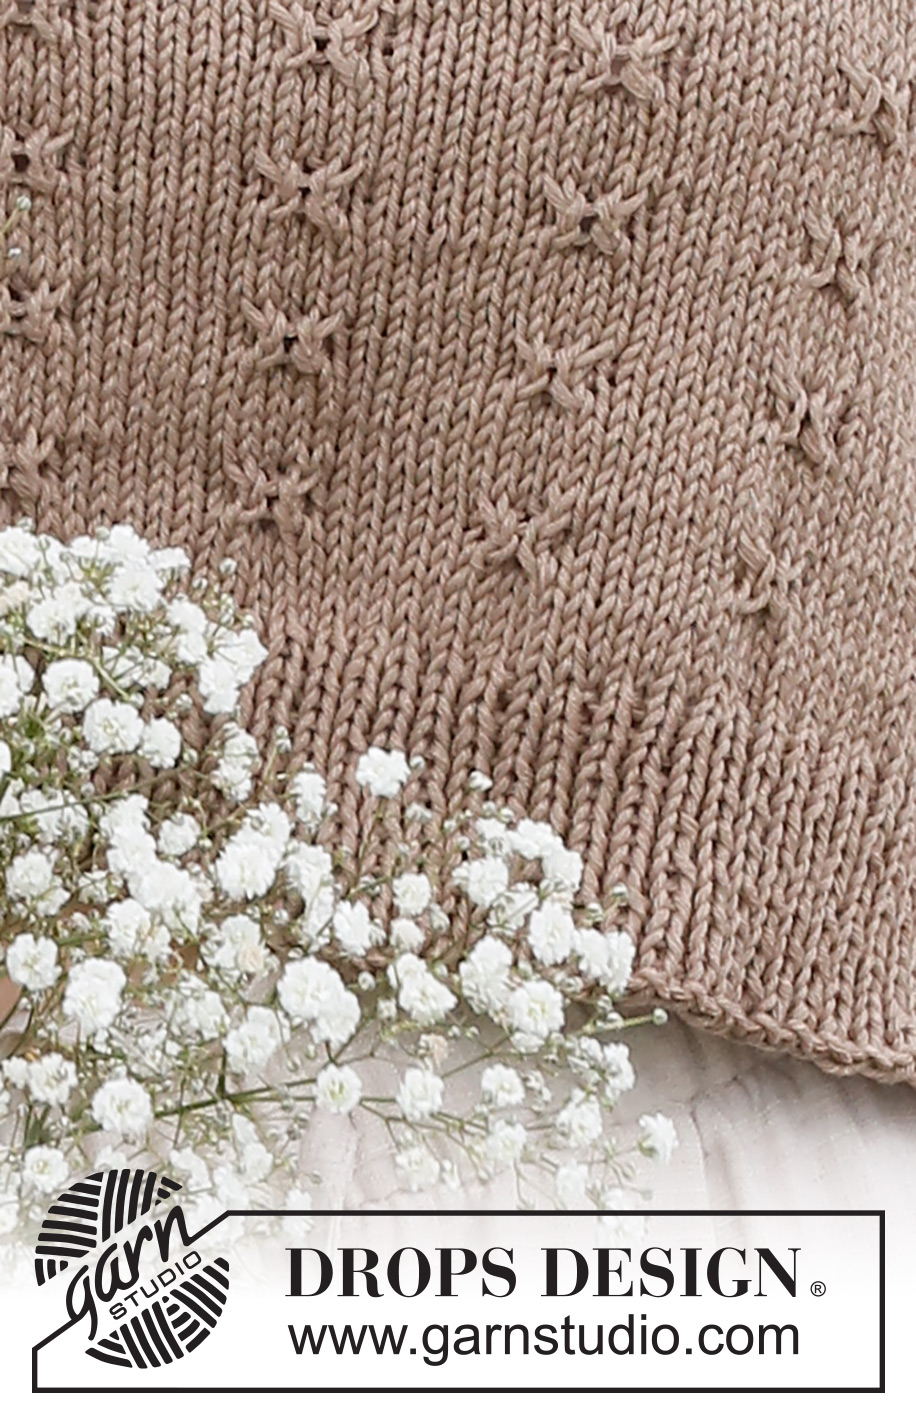
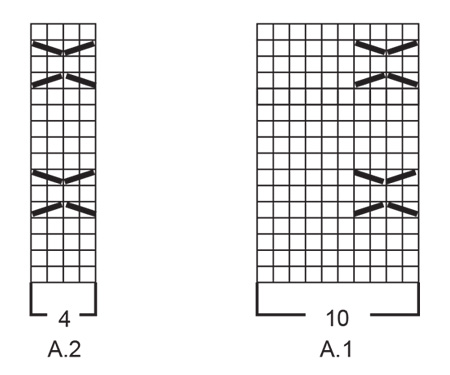
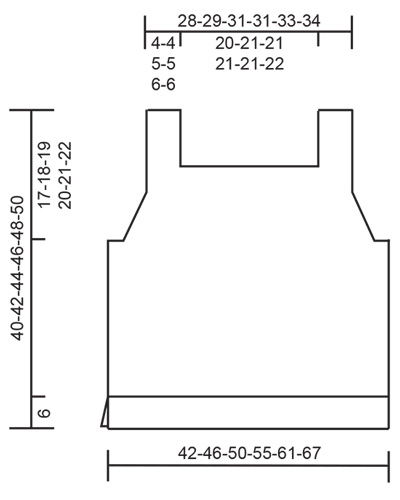
---------------------------------------------------------- EXPLANATION FOR THE PATTERN: ---------------------------------------------------------- GARTER STITCH (back and forth): Knit all rows. 1 ridge vertically = knit 2 rows. PATTERN: See diagrams A.1 and A.2. Diagrams show all rows in pattern seen from the right side. DECREASE TIP (applies to armholes): Decrease inside the outermost 5-5-7-7-9-9 stitches in each side. FROM RIGHT SIDE: DECREASE AT BEGINNING OF ROW AS FOLLOWS: Knit 5-5-7-7-9-9 stitches rib as explained in pattern, slip 1 stitch knitwise, knit 1, pass slipped stitch over stitch worked DECREASE AT END OF ROW AS FOLLOWS: Knit until 7-7-9-9-11-11 stitches remain on row, knit 2 together, knit 5-5-7-7-9-9 stitches rib as explained in pattern. FROM WRONG SIDE: DECREASE AT BEGINNING OF ROW AS FOLLOWS: Knit 5-5-7-7-9-9 stitches rib as explained in pattern, purl 2 together. DECREASE AT END OF ROW AS FOLLOWS: Knit until 7-7-9-9-11-11 stitches remain on row, purl 2 twisted together, knit 5-5-7-7-9-9 stitches rib as explained in pattern. ---------------------------------------------------------- START THE PIECE HERE: ---------------------------------------------------------- TOP - SHORT OVERVIEW OF THE PIECE: Piece is worked back and forth, bottom up in 2 equal parts. Sew the piece together on shoulders and in the sides as explained in pattern. FRONT PIECE: Cast on 101-109-121-133-147-161 stitches on single pointed needles size 3.5 MM = US 4 with DROPS Cotton Light. Purl 1 row from wrong side. Work next row as follows from right side: 2 stitches in GARTER STITCH - read explanation above - * knit 1, purl 1 *, repeat from *-* until 3 stitches remain, knit 1, 2 stitches in garter stitch. Continue rib back and forth like this for 6 cm = 2⅜". When rib has been worked, knit 1 row from right side while decreasing 13-13-15-17-19-21 stitches evenly (do not decrease over the outermost 2 stitches in each side) = 88-96-106-116-128-140 stitches. Purl 1 row from wrong side with 2 stitches in garter stitch in each side. Switch to single pointed needles 4 MM = US 6. Then work as follows: 2 stitches in garter stitch, 5-4-4-4-5-6 stitches in stockinette stitch, work A.1 7-8-9-10-11-12 times, A.2, 5-4-4-4-5-6 stitches in stockinette stitch, and 2 stitches in garter stitch. Continue this pattern. REMEMBER THE KNITTING GAUGE! When piece measures 21-22-23-24-25-26 cm = 8¼"-8¾"-9"-9½"-9¾"-10¼", work rib in each side as explained below before binding off for armholes – if the relief pattern meets with the rib and decrease for armholes, work stockinette stitch over these stitches instead of cable. Work first row as follows from right side: 2 stitches in garter stitch, * knit 1, purl 1 *, work from *-* 3-4-6-6-8-8 times in total, continue pattern as before until 8-10-14-14-18-18 stitches remain on needle, * purl 1, knit 1 *, work from *-* 3-4-6-6-8-8 times in total, 2 stitches in garter stitch. Continue back and forth like this. When piece measures 23-24-25-26-27-28 cm = 9"-9½"-9¾"-10¼"-10⅝"-11", bind off 3-5-7-7-9-9 stitches for armholes at the beginning of the 2 next rows = 82-86-92-102-110-122 stitches. Then bind off for sleeve as explained below. ARMHOLE: Continue pattern back and forth as before with 4-4-6-6-8-8 stitches rib and 1 stitch in garter stitch at the edge in each side (remember that if relief pattern meets rib when decreasing, work stockinette stitch over these stitches instead of cable). AT THE SAME TIME on first row from right side begin decrease for armhole - read DECREASE TIP. Decrease 1 stitch in each side on every row (both from right and wrong side) 0-0-3-7-11-19 times in total, then decrease 1 stitch in each side every other row (every row from right side) 7-8-6-6-4-1 times in total = 68-70-74-76-80-82 stitches. Now work rib over all stitches, but adjust so that at least 3 rows in stockinette stitch have been worked after a row with relief pattern and that last row is from wrong side – increase in addition 1 stitch on last row = 69-71-75-77-81-83 stitches. Switch to single pointed needles size 3.5 MM = US 4. Work as follows from right side: 1 stitch in garter stitch, * knit 1, purl 1 *, work from *-* until 2 stitches remain, knit 1, 1 stitch in garter stitch. Continue rib back and forth like this for 4 cm = 1½". Now bind off for neck as follows: Work 1 stitch in garter stitch, 12-12-14-14-16-16 stitches rib as before, then slip these 13-13-15-15-17-17 stitches on a thread for strap, bind off the next 43-45-45-47-47-49 stitches for neck, work 12-12-14-14-16-16 stitches rib as before and 1 stitch in garter stitch. Then work straps as explained below. STRAP: = 13-13-15-15-17-17 stitches. Work rib back and forth as before with 1 stitch in garter stitch in each side, until 1 row remain before piece measures 40-42-44-46-48-50 cm = 15¾"-16½"-17¼"-18"-19"-19¾" from cast-on edge. Try the front piece and work to desired length. Knit 1 row from right side while decreasing 4 stitches evenly = 9-9-11-11-13-13 stitches. Bind off by purling from wrong side. Work the other strap the same way. BACK PIECE: Cast on the same number of stitches as on front piece, and work the same way as front piece. ASSEMBLY: Sew strap together inside bind-off edge at the top of shoulders. Sew side seams – being at the top by armhole and sew in outer loops of edge stitch to get a flat seam, stop when 6 cm = 2⅜" remain at the bottom in each side (vents). |
||||||||||
Diagram explanations |
||||||||||
|
||||||||||
 |
||||||||||
 |
||||||||||
Have you finished this pattern?Tag your pictures with #dropspattern #midsummersdaytop or submit them to the #dropsfan gallery. Do you need help with this pattern?You'll find 20 tutorial videos, a Comments/Questions area and more by visiting the pattern on garnstudio.com. © 1982-2026 DROPS Design A/S. We reserve all rights. This document, including all its sub-sections, has copyrights. Read more about what you can do with our patterns at the bottom of each pattern on our site. |
||||||||||
With over 40 years in knitting and crochet design, DROPS Design offers one of the most extensive collections of free patterns on the internet - translated to 17 languages. As of today we count 324 catalogs and 12199 patterns - 12189 of which are translated into English (US/in).
We work hard to bring you the best knitting and crochet have to offer, inspiration and advice as well as great quality yarns at incredible prices! Would you like to use our patterns for other than personal use? You can read what you are allowed to do in the Copyright text at the bottom of all our patterns. Happy crafting!
Post a comment to pattern DROPS 232-24
We would love to hear what you have to say about this pattern!
If you want to leave a question, please make sure you select the correct category in the form below, to speed up the answering process. Required fields are marked *.