Comments / Questions (19)
![]() Petra Stammkötter wrote:
Petra Stammkötter wrote:
Hallo, nachdem ich 7 Maschen auf jeder Seite zugenommen habe geht die erste Musterreihe (Reihe 3) sehr gut auf. In Reihe 5 des Musters habe ich jedoch auf der linken Seite 4 Maschen als Randmaschen übrig statt 3. Auch nach 5 mal wieder anfangen. Können Sie mir weiter helfen? Vielen Dank
15.06.2017 - 21:13DROPS Design answered:
Liebe Frau Stammkötter, Sie sollen die Maschen so stricken: 3 M kraus rechts, A.1A x 1, A.1B wiederholen bis 7 M übrig sind, und die letzte M so stricken: A.1C (= 4 M), 3 M Kraus rechts. Fadenmarkierer können Sie zwischen jedem Rapport einsetzen, so kann es einfacher das Muster weiterzustricken. Viel Spaß beim stricken!
16.06.2017 - 08:56
![]() Yuliya wrote:
Yuliya wrote:
VII. Reihe kann ich gar nicht zusammen bringen. Wo fängt hier Rapport an? Ps: ging nur so mit Fragen, keine lange Kommentare zugelassen)
21.05.2016 - 23:22DROPS Design answered:
Stricken Sie fortlaufend das im Diagramm dargestellte Muster, ohne sich um den genauen Anfang und Ende des Mustersatzes zu sorgen - das ist nicht nötig und es wird aufgehen. Sie sehen wie das Zusammenstricken im Muster die Spitze des Motivs bildet.
23.05.2016 - 10:39
![]() Yuliya wrote:
Yuliya wrote:
Ist das richtig so? III. Reihe: 3 Maschen ( 2 m. zus., Umschlag, 1 m. re.) Rapport ( 2 m. re., Umschlag, 3 m.zus. Überzug, Umschlag, 1 m. re.) Ende der Reihe 4 Maschen ( 2 m. re., Umschlag, 2 m. zus. Überzug) V. Reihe: 3 Maschen ( 1 m. re., Umschlag, 2 m. zus. Überzug) Rapport ( 1m. re., 2 m. zus, Umschlag, 1m.re., Umschlag, 2 m. zus. Überzug) Ende der Reihe ( 1 m. re., 2 m. zus., Umschlag, 1 m. re.)
21.05.2016 - 23:21DROPS Design answered:
Hallo Yulia, auch hier müssen Sie daran denken, beidseitig je 2 M kraus re zu stricken, ansonsten folgen Sie bitte dem Diagramm.
23.05.2016 - 10:35
![]() Yuliya wrote:
Yuliya wrote:
Guten Tag. Ich verstehe nicht so ganz, wo Rapport anfängt und wo endet. I. Reihe: 3 Maschen (1 m. re, 2 m. zus., Umschlag), dann Rapport ( 1 m.re., Umschlag, 2 m. zus. Überschlag, 1m.re, 2 m. zus., Umschlag) Ende der Reihe 4 Maschen ( 1 m. re., Umschlag, 2 m. zus. Überschlag, 1 m.re)
21.05.2016 - 23:19DROPS Design answered:
Hallo Yulia, im Diagramm haben wir eingezichnet, wo die einzelnen Rapporte beginnen und enden. Denken Sie daran, vor A.1A 2 M kraus rechts zu stricken, dann geht das Muster auf.
23.05.2016 - 10:34
![]() Franca wrote:
Franca wrote:
Buongiorno ,mi piace molto questo coprispalle ma non so lavorare con i ferri circolari........posso utilizzare i ferri normali dritti???? grazie
16.05.2016 - 09:55DROPS Design answered:
Buongiorno Franca. Il capo è lavorato avanti e indietro sui ferri, quindi può usare i ferri dritti e seguire le spiegazioni come riportate. Vengono consigliati i ferri circolari per avere più spazio per le m. Buon lavoro!
16.05.2016 - 10:15Sia wrote:
It's seems to be a problem on the last line of the pattern as A.1A ends after starting 'slip 1 st as if to K, K 2 tog, psso' and it's hards to know from which stitch to repeat A. 1B. I'm looking forward to your reply as I have just started knitting it. Thank you in advance.
27.03.2016 - 20:59DROPS Design answered:
Dear Sia, on row 7 in A.1A work the last st in A.1 A tog with the 2 first sts in A.1B, then work the last st in A.1B with the first 2 sts in next A.1B in width, and on last repeat, work the last sts in A.1B tog with the first 2 sts in A.1C. Happy knitting!
29.03.2016 - 10:07
![]() Christel Johnsson wrote:
Christel Johnsson wrote:
Lace Bolero
24.01.2016 - 19:26
![]() Karin Reiter wrote:
Karin Reiter wrote:
Sehr schönes Teil. Mich würde es interessieren wie es in Größe 50 aussieht.
03.01.2016 - 11:37
![]() Gaudelas Odile wrote:
Gaudelas Odile wrote:
Il sera parfait sur ma robe bustier , pour le mariage de ma fille cet ete
28.12.2015 - 17:44
Always Cute#alwayscuteshoulderpiece |
||||||||||||||||
 |
 |
|||||||||||||||
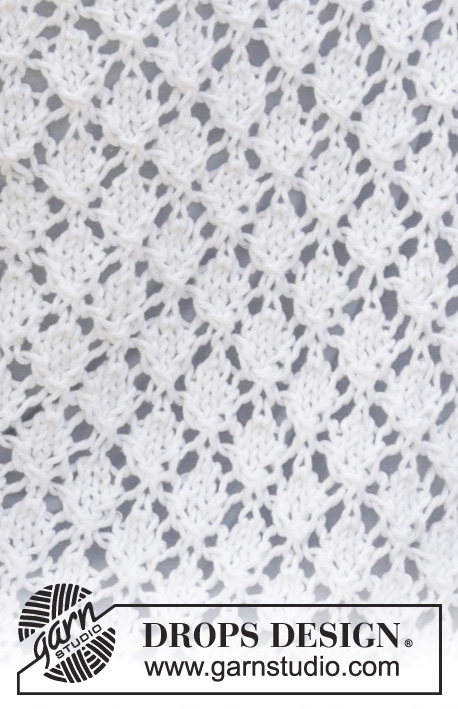
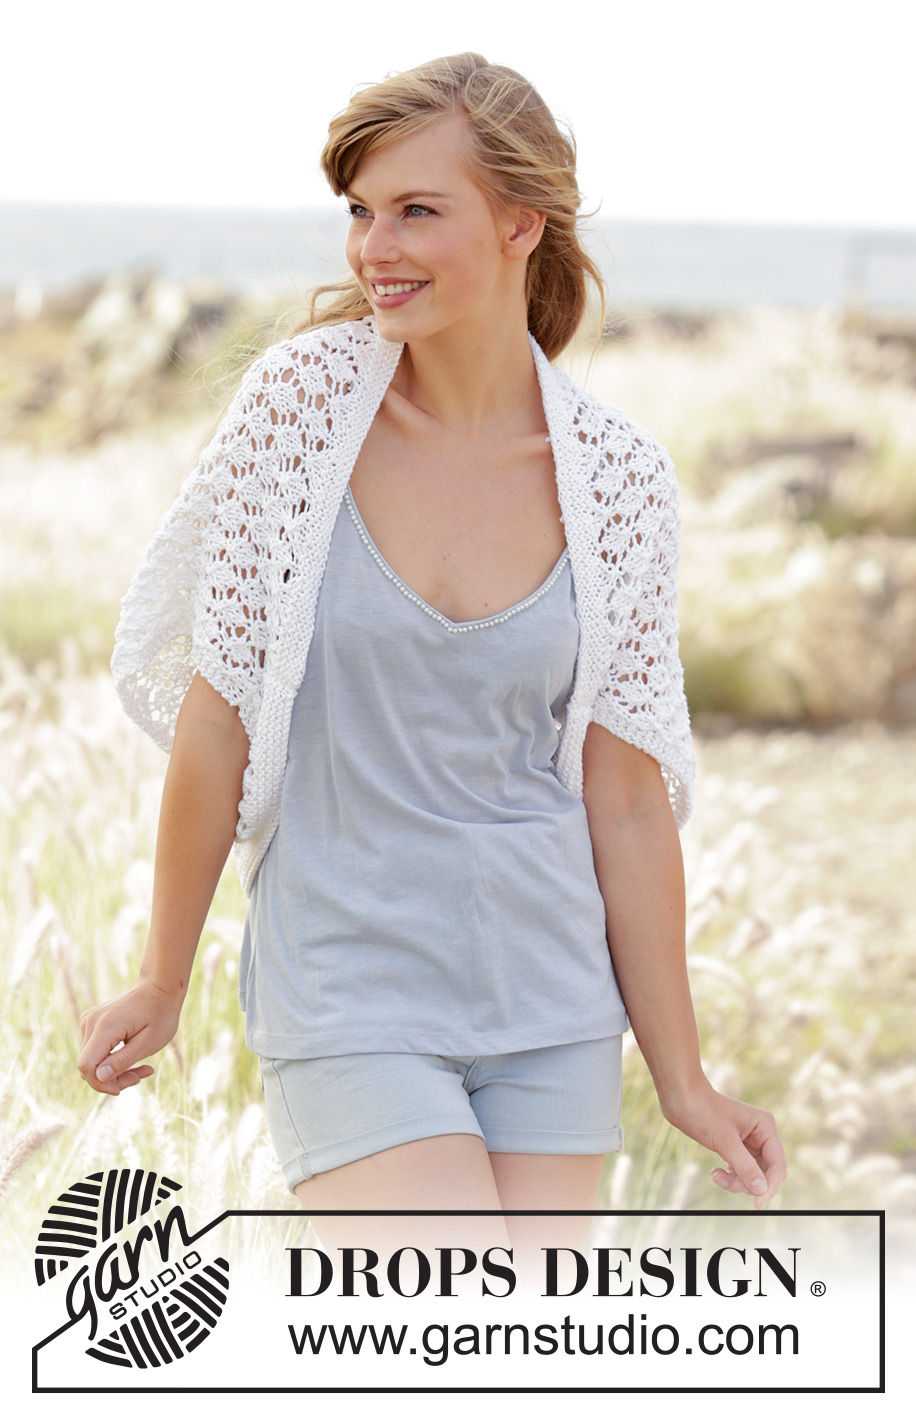
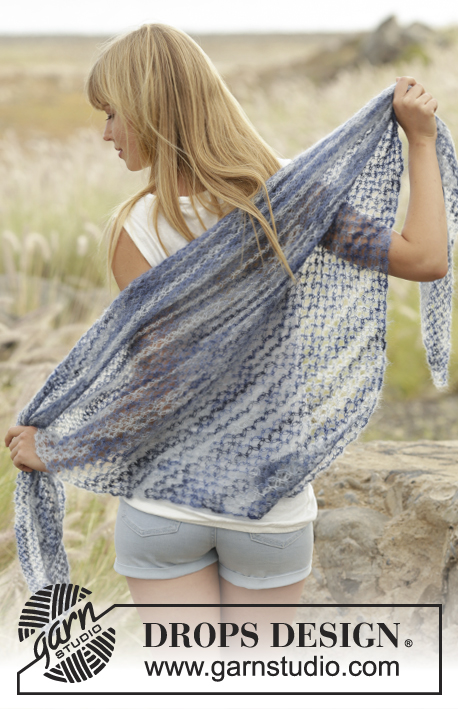
Knitted DROPS shoulder piece with lace pattern in ”Paris”. Size: S - XXXL.
DROPS 169-14 |
||||||||||||||||
|
GARTER ST (back and forth): K all rows. 1 ridge = K2 rows. PATTERN: See diagram A.1. The diagram show all rows in pattern seen from RS. DECREASE/INCREASE TIP: To calculate how often dec/inc should be done, use the total no of sts on row (e.g. 108 sts) and divide by no of dec/inc to be done (e.g. 19) = 5.68. I.e. in this example work alternately every 4th and 5th st K tog and every 5th and 6th K st tog (if dec). Or inc after alternately every 5th and 6th st. NOTE: Inc 1 st by making 1 YO. On next row K YO twisted to avoid holes. ---------------------------------------------------------- SHOULDER PIECE: Cast on 108-116-122-130-130-138 sts on circular needle size 4 mm / US 6 with Paris. Work 4 ridges in GARTER ST - see explanation above. AT THE SAME TIME when 1 ridge remains, dec 19-21-21-23-23-25 sts evenly from RS - READ DECREASE/INCREASE TIP = 89-95-101-107-107-113 sts. K last row from WS. Switch to circular needle size 5 mm / US 8 and work 2 rows in stockinette st with 2 edge sts in garter st in each side. Work next row as follows from RS: 2 edge sts in garter st, work A.1A (= 3 sts), work pattern according to diagram A.1B until 6 sts remain (= 13-14-15-16-16-17 repetitions of 6 sts), work A.1C (= 4 sts) and finish with 2 edge sts in garter st. Continue pattern like this. REMEMBER THE KNITTING GAUGE When piece measures 5-5-6-7-8-9 cm / 2"-2"-2½"-2¾"-3"-3½", cast on 7 new sts for sleeve at the end of the next 2 rows = 103-109-115-121-121-127 sts on needle. Continue A.1 with 3 edge sts in garter st in each side - NOTE: Make sure that the pattern comes above each other onwards - after casting on new sts in each side there is room for 2 repetitions more of A.1B. When piece measures 51-55-58-61-64-67 cm / 20"-21½"-22¾"-24"-25¼"-26½", bind off 7 sts at the beg of the next 2 rows = 89-95-101-107-107-113 sts remain on needle. Continue A.1 with 2 edge sts in garter st in each side until piece measures 53-57-61-65-69-73 cm / 21"-22½"-24"-25½"-27"-28¾", adjust to have worked the same length as on beg of piece and that next row is worked from RS. Work 2 rows in stockinette st with 2 edge sts in garter st in each side. Switch to circular needle size 4 mm / US 6 and work 4 ridges back and forth while AT THE SAME TIME inc 19-21-21-23-23-25 sts evenly on 1st row – READ DECREASE/INCREASE TIP = 108-116-122-130-130-138 sts. After ridges LOOSELY bind off with K from RS. ASSEMBLY: Place cast-on edge towards bind-off edge, WS against WS. Sew side and underarm seams in one - see dotted line on chart – NOTE: side seams are sewn edge to edge in outer loops of edge sts to get a flat seam, underarm seams are sewn inside bind-off and cast-on edge. |
||||||||||||||||
Diagram explanations |
||||||||||||||||
|
||||||||||||||||
 |
||||||||||||||||
Have you finished this pattern?Tag your pictures with #dropspattern #alwayscuteshoulderpiece or submit them to the #dropsfan gallery. Do you need help with this pattern?You'll find 18 tutorial videos, a Comments/Questions area and more by visiting the pattern on garnstudio.com. © 1982-2026 DROPS Design A/S. We reserve all rights. This document, including all its sub-sections, has copyrights. Read more about what you can do with our patterns at the bottom of each pattern on our site. |
||||||||||||||||








Post a comment to pattern DROPS 169-14
We would love to hear what you have to say about this pattern!
If you want to leave a question, please make sure you select the correct category in the form below, to speed up the answering process. Required fields are marked *.