
Popular categories
Looking for a yarn?



























Comments / Questions (43)
 Nathalie Rietvelt wrote:
Ik vind dit een moeilijk beschreven patroon waar veel taalfouten instaan, maar wil er graag aan beginnen. Bij strook 1: staat brei een rand van 8 nld als volgt, brei 2 ribbels in ribbelst. Wordt hiermee bedoelt brei twee naalden in ribbelsteek, of brei 2 steken in ribbelsteek?
28.04.2017 - 10:30DROPS Design answered:
Hoi Nathalie, Er worden 2 ribbels bedoeld. 1 ribbel is twee naalden recht. (Staat bovenaan het patroon)
28.04.2017 - 13:55
 Dina wrote:
Buongiorno! Innanzi tutto grazie mille per la prima risposta che mi avete dato sulla corretta lettura dei diagrammi. Un'ultima domanda: quando scrivete di finire i quadrati 1-5 nella striscia con 4 coste, significa che alla fine di ogni quadrato vanno lavorate 4 coste per separarlo dal successivo? Grazie!
06.03.2017 - 08:57DROPS Design answered:
Buongiorno Dina. Sì è corretto. Ci riscriva se è ancora in difficoltà . Buon lavoro!
06.03.2017 - 10:34
Dina wrote:
Buongiorno! Ho una domanda sul bordo della striscia 1: si comincia con il digramma A8, cioè devo iniziare il bordo con un gettato? L'altra perplessità riguarda la fine di tutti i bordi che siano da fare col digramma A9B o A10: si finisce con un gettato? Non rimane un buco o comunque è troppo lasco? Grazie!
05.03.2017 - 16:47DROPS Design answered:
Buongiorno Dina. I diagrammi vanno letti dal basso verso l'alto e da destra verso sinistra sui ferri di andata e da sinistra verso destra sui ferri di ritorno. In questo modo i gettati non si trovano né all'inizio né alla fine dei ferri. Buon lavoro!
05.03.2017 - 18:24
 Birgitte Larsen wrote:
Hej forstår ikke helt rude 4, kan det passe at der skal strikkes de 3 første masker i den sidste del af pinden, så strikkes der jo over 8 masker i mønstret, som jo kun dækker over 7 masker,
22.08.2016 - 17:27DROPS Design answered:
Hej Birgitte. Du strikker de förste 5 m af firkanten iflg de sidste 5 m af diagram A.4. Herefter gentager du hele A.4 (= 7 m) over de naeste 35 m (dvs, 5 hele gentagelser)
23.08.2016 - 14:27
 Pia Nilsson wrote:
Synd att man inte kan läsa alla kommentarer, frågor och svar på svenska!
15.08.2016 - 09:10
 Silke wrote:
Ich habe diese Decke für ein großes Doppelbett gestrickt. Da mir die Vorlage zu wenig war, habe ich mir noch 4 andere einfache Muster dazu gesucht. Sie ist super schön geworden. Vielen Dank für die tolle Inspiration.
25.04.2016 - 17:46
Joke Dolsma wrote:
Bij blok 1 moet je aan de goede kant eerst 8 laatste steken in A1 breien en aan het eind de eerste 8, dat kan dus niet, toch
12.04.2016 - 13:00DROPS Design answered:
Hoi Joke. Jawel, je breit gewoon 8 st ipv 9 van A.1 (dwz, je hebt 1 r st aan het eind minder).
12.04.2016 - 14:57
Ellenor Wäverstam wrote:
Hej! Undrar om kantmaska, en rät, är inräknad i maskantalet? Eller börjar man tex A8 med två tillsammans? Hälsning Ellenor
06.04.2016 - 12:49DROPS Design answered:
Hej Ellenor, Om vi inte skriver att det är en kantm, så börjar du direkt m A8 när du kommer till det. Lycka till!
07.04.2016 - 10:40
Ellenor Wävertam wrote:
Väntar på grannen, vill gärna sticka den här filten, men tycker mönstret är lite svårbegripligt, och jag brukar inte ha svårt för mönster, men jag återkommer
06.04.2016 - 09:22
 Carole wrote:
Bonjour, La bande 3 comporte 2 fois le carré n°5. Est-ce une erreur ou pas? De plus, je pense qu'il y a une erreur dans le diagramme A7, les lignes 45 et 49 n'ont que 31 mailles tricotées alors que le diagramme comporte 33 mailles. Merci pour votre aide.
05.04.2016 - 09:26DROPS Design answered:
Bonjour Carole, le carré 5 se tricote bien 2 fois dans la 3ème bande - après le rang 45, vous devez toujours avoir 45 m, la pointe de chaque coeur se tricote ainsi: 1 jeté, gliss 1 m, 1 m end, passez la m glissée par-dessus la m tricotée (= 1 surjet simple), 1 jeté, 1 surjet simple, 2 m ens à l'end, 1 jeté, 2 m ens à l'end, 1 jeté = 4 diminutions compensées par 4 jetés. Bon tricot!
05.04.2016 - 10:13
|
||||||||||||||||||||||
Timeless#timelessblanket |
||||||||||||||||||||||
 |
 |
|||||||||||||||||||||
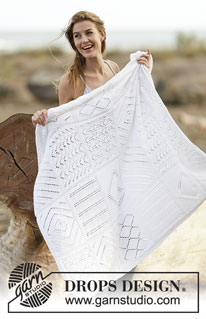
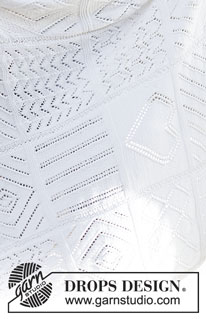
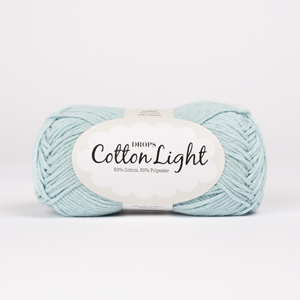
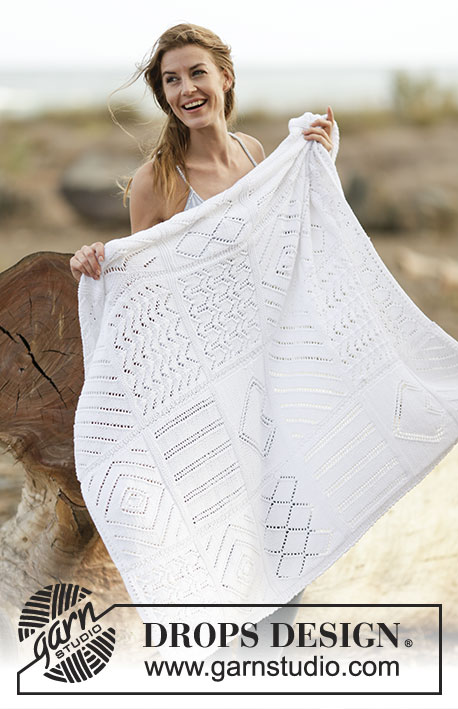
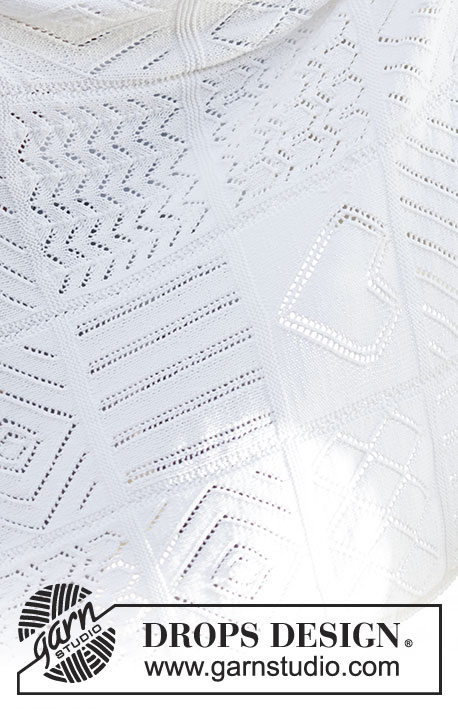
Knitted DROPS blanket with lace patterns in ”Cotton Light”.
DROPS 159-34 |
||||||||||||||||||||||
|
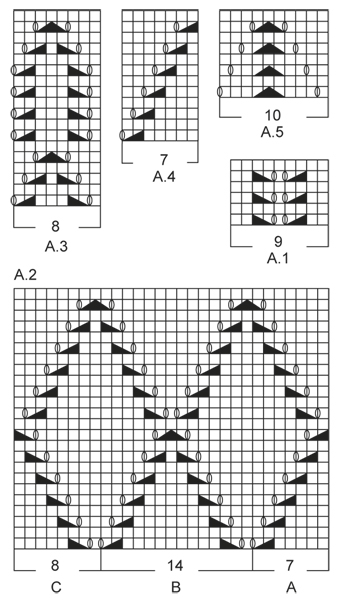
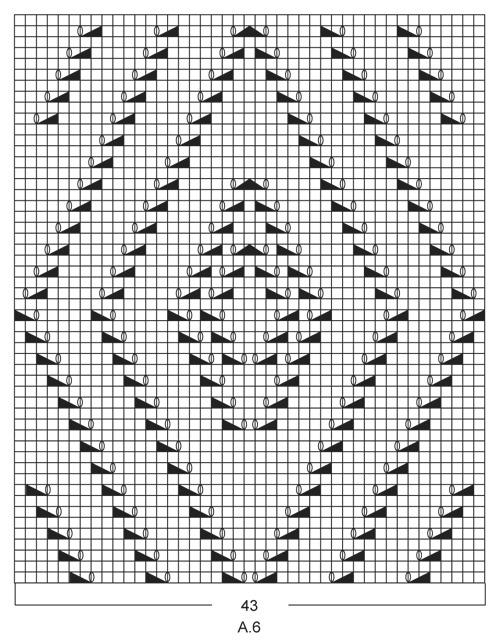
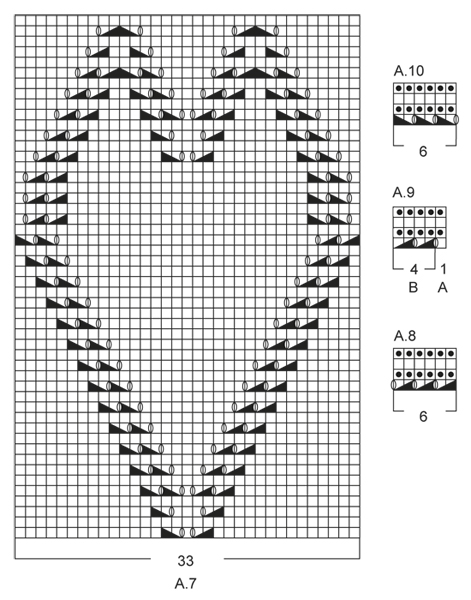
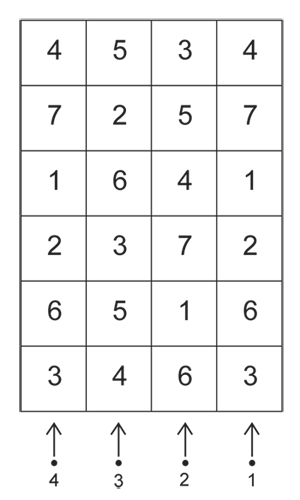
GARTER ST (back and forth): K all rows. 1 ridge = K2 rows. PATTERN: See diagrams A.1 - A.10. Diagrams show pattern seen from RS, first row = RS. NOTE: Diagram A.4: Diagram does not fit vertically when repeated, but eyelet rows will continue to displace as before, AT THE SAME TIME beg a new eyelet row every 15th row. SQUARE ORDER: Strip 1: Square 3, 6, 2, 1, 7 and 4. Strip 2: Square 6, 1, 7, 4, 5 and 3. Strip 3: Square 4, 5, 3, 6, 2 and 5. Strip 4: Square 3, 6, 2, 1, 7 and 4. SQUARE PATTERN: There are 7 different square patterns, they are worked as follows: Square 1: = 43 sts. Work 2 row in stockinette st. Work next row from RS as follows: Work the last 8 sts in A.1, A.1 over the next 27 sts (= 3 times), work the first 8 sts in A.1. Work A.1 9 times in total vertically. Square 2: = 43 sts. Work 4 row in stockinette st. Work next row from RS as follows: A.2A (= 7 sts), A.2B over the next 28 sts (= 2 times), finish with A.2C (= 8 sts). Work A.2 2 times in total vertically. Work 4 row in stockinette st. Square 3: = 43 sts. Work 2 row in stockinette st. Work next row from RS as follows: 1 st in stockinette st, A.3 over the next 40 sts (= 5 times), 2 sts in stockinette st. Work A.3 3 times in total vertically. Square 4: = 43 sts. Work 2 row in stockinette st. Work next row from RS as follows: Work the last 5 sts in A.4, A.4 over the next 35 sts (= 5 times), work the first 3 sts in A.4. Repeat A.4 until piece measures approx. 21.5 cm / 8½'' (adjust so that next row is from RS). Square 5: = 43 sts. Work next row from RS as follows: 1 st in stockinette st, A.5 over the next 40 sts (= 4 times), 2 sts in stockinette st. Repeat A.5 7 times in total vertically. Square 6: = 43 sts. Work 2 row in stockinette st. Work next row from RS as follows: A.6 (= 43 sts). Work A.6 1 time vertically. Work 2 row in stockinette st. Square 7: = 43 sts. Work 4 rows in stockinette st. Work next row from RS as follows: 5 sts in stockinette st, A.7 (= 33 sts) and 5 sts in stockinette st. Work A.7 1 time vertically. Work 2 rows in stockinette st. ---------------------------------------------------------- BLANKET: Piece is worked back and forth on needle in 4 strips and sewn tog when finished. Each strip consists of 6 squares, squares are worked in 7 different textures - read SQUARE ORDER above. STRIP 1: Cast on 51 sts on needle size 4.5 mm / US 7 with Cotton Light. Work and edge on 8 rows as follows (1st row = RS): Work 2 ridges in GARTER ST - see explanation above. Work diagram A.8 (= 6 sts), A.9A (= 1 st), A.9B over the next 44 sts. Then work as follows: A.8 (= 6 sts), SQUARE PATTERN – read explanation above (= 43 sts), 2 sts in garter st. Finish 1st-5th square in strip with 4 ridges. REMEMBER THE KNITTING GAUGE After last square in strip has been worked, work 2 ridges. Then work an edge on 4 rows as follows: A.8 (= 6 sts), A.9A (= 1 st), A.9B over the next 44 sts. Bind off. STRIP 2 and 3: Cast on 47 sts on needle size 4.5 mm / US 7 with Cotton Light. Work and edge on 8 rows as follows (1st row = RS): Work 2 ridges. Work diagram A.9A (= 1 st), A.9B over the next 46 sts. Then work as follows: 2 sts in garter st, square pattern (= 43 sts) and 2 sts in garter st. Finish 1st-5th square in strip with 4 ridges. After last square in strip has been worked, work 2 ridges. Then work an edge on 4 rows as follows: A.9A (= 1 st), A.9B over the next 46 sts. Bind off. STRIP 4: Cast on 51 sts on needle size 4.5 mm / US 7 with Cotton Light. Work and edge on 8 rows as follows (1st row = RS): Work 2 ridges. Work diagram A.9A (= 1 st), A.9B over the next 44 sts, A.10 (= 6 sts). Then work as follows: 2 sts in garter st, square pattern (= 43 sts) and A.10 (= 6 sts). Finish 1st-5th square in strip with 4 ridges. After last square in strip has been worked, work 2 ridges. Then work an edge as follows: A.9A (= 1 st), A.9B over the next 44 sts, A.10 (= 6 sts). Bind off. ASSEMBLY: Sew tog strips in outer loops of edge sts. |
||||||||||||||||||||||
Diagram explanations |
||||||||||||||||||||||
|
||||||||||||||||||||||
 |
||||||||||||||||||||||
 |
||||||||||||||||||||||
 |
||||||||||||||||||||||
 |
||||||||||||||||||||||
Have you finished this pattern?Tag your pictures with #dropspattern #timelessblanket or submit them to the #dropsfan gallery. Do you need help with this pattern?You'll find 6 tutorial videos, a Comments/Questions area and more by visiting the pattern on garnstudio.com. © 1982-2026 DROPS Design A/S. We reserve all rights. This document, including all its sub-sections, has copyrights. Read more about what you can do with our patterns at the bottom of each pattern on our site. |
||||||||||||||||||||||






With over 40 years in knitting and crochet design, DROPS Design offers one of the most extensive collections of free patterns on the internet - translated to 17 languages. As of today we count 333 catalogs and 12532 patterns - 12522 of which are translated into English (US/in).
We work hard to bring you the best knitting and crochet have to offer, inspiration and advice as well as great quality yarns at incredible prices! Would you like to use our patterns for other than personal use? You can read what you are allowed to do in the Copyright text at the bottom of all our patterns. Happy crafting!
Post a comment to pattern DROPS 159-34
We would love to hear what you have to say about this pattern!
If you want to leave a question, please make sure you select the correct category in the form below, to speed up the answering process. Required fields are marked *.