
Popular categories
Looking for a yarn?


Comments / Questions (209)
![]() Claudia wrote:
Claudia wrote:
In der Anleitung steht: "mit dem Muster weiterfahren und gleichzeitig nach 5 cm auf beiden Seiten der Partie...je zwei M. zusammen Stricken". Frage: 5 cm Gesamthöhe, also incl. Krausrippenreihen ? Oder nach 5 cm im Grundmuster?
09.03.2026 - 18:48DROPS Design answered:
Liebe Claudia, die 5 cm messen Sie ab Anschlagskante, dh Gesamthöhe incl. Krausrippen. Viel Spaß beim Stricken!
10.03.2026 - 09:45
![]() Gonny wrote:
Gonny wrote:
Prachtig vest. Kan ik deze ook breien met 2 breipennen i.p.v. een rondbreinaald of 4 pennen?
21.02.2026 - 11:40DROPS Design answered:
Dag Gonny,
Om een patroon aan te passen om op rechte naalden te breien hebben we een instructie gemaakt. Deze vind je hier.
22.02.2026 - 17:53
![]() MARIAN wrote:
MARIAN wrote:
Are there more detailed instructions for assembly of this cardigan?
15.02.2026 - 19:25DROPS Design answered:
Hi Marian, There are many ways to sew together a garment. Here is a link to our various videos for shoulder seams, sewing in sleeves, etc.. https://www.garnstudio.com/videos.php?c=assembly-sew-together&lang=en Regards, Drops Team.
16.02.2026 - 06:39
![]() Gabriele wrote:
Gabriele wrote:
Hier wird Material: Garnstudios DROPS ALPACA. Fb. Nr. 7120, hellgrau grün angegeben. Unter DROPS ALPACA kann ich die Fb. Nr. nicht finden. Sie wird bei Drops Nepal Garn Unicolor 7120 Graugrün Hell angegeben. Welche Fb Nr. nehme ich bei DROPS ALPACA, um den gleichen Farbton zu erhalten?
22.01.2026 - 18:50DROPS Design answered:
Liebe Gabriele, genau denselben Farbton gibt es bei Alpaca nicht mehr, aber Farbe 7139 mineralblau ist vom Farbton her ähnlich, aber ein wenig dunkler. Viel Spaß beim Stricken!
23.01.2026 - 11:08
![]() Lisa wrote:
Lisa wrote:
Hi with the sleeves, when casting off for sleeve cap, is this still done in the round or knitting back and forth?
04.01.2026 - 21:11DROPS Design answered:
Dear Lisa, since you are casting off at the beginning and end of the row you need to work back and forth. Happy knitting!
04.01.2026 - 23:17
![]() Mara wrote:
Mara wrote:
Buongiorno tutti i vostri modelli spesso vedo che sono fatti con i ferri circolari, come si fa a tramutarli con i ferri normali dritti? Grazie mille
23.11.2025 - 22:37DROPS Design answered:
Buongiorno Mara, i ferri circolari sono diffusissimi al di fuori dell'Italia, ma con i ferri circolari si può lavorare tranquillamente anche in piano, e tantissimi modelli DROPS sono lavorati in piano e non in tondo. Buon lavoro!
25.11.2025 - 08:59
![]() Kathryn wrote:
Kathryn wrote:
Is the entire cardigan knitted using 2 threads?
09.11.2025 - 10:40DROPS Design answered:
Hi Kathryn, Yes, you use 2 strands all the way through the pattern. Regards, Drops Team.
11.11.2025 - 06:55
![]() Marceau wrote:
Marceau wrote:
Comment faire la lisière du point mousse pour qu'elle soit jolie?
14.10.2025 - 18:32DROPS Design answered:
Bonjour Mme Marceau, dans ce modèle, elles sont simplement tricotées au point mousse, rien de plus - cf. cette vidéo par ex; mais vous pouvez aussi choisir une bordure I-cord côté devant, comme on le montre dans cette vidéo. Bon tricot!
15.10.2025 - 10:27
![]() Alex wrote:
Alex wrote:
Vad menas med att det stickas in 1 rätmaska i M.1 *varannan cm*? Blir det varje 2 centimeter då? Samtidigt ska ju också detta göras totalt 10 gånger inom spannet av 6 cm. Innebär detta att det egentligen ska stå varannat varv eller fortsätter man på samma sätt på framstycket efter att stickningen delats upp till fram- och bakstycke? Det är drt andra alternativet som det ser ut at vara baserad på bilden iallafall.
01.10.2025 - 01:36DROPS Design answered:
Hei Alex. Ja, det er det 2. alternativet du skriver. I oppskriften er det først beskrevet hva som begynner når arbeidet måler 20 cm og hvor ofte økningene skal gjenta, Så står det skrevet at SAMTIDIG når arbeidet måler 28/29 cm starter økningene der stolpemaskene blir flere. mvh DROPS Design
13.10.2025 - 08:25
![]() Christine Olander wrote:
Christine Olander wrote:
Stickar stl large Ska det avmaskas sammanlagt 40 maskor för ärmhål? Då blir 32 maskor kvar för ärmkullen
24.07.2025 - 12:09DROPS Design answered:
Hei Christine. På bakstykket har du i str. L 79 masker og når du er ferdig å felle til ermhull skal du 69 masker, så du feller bare 5 masker i hver side på bakstykket. mvh DROPS Design
11.08.2025 - 14:05
|
|||||||
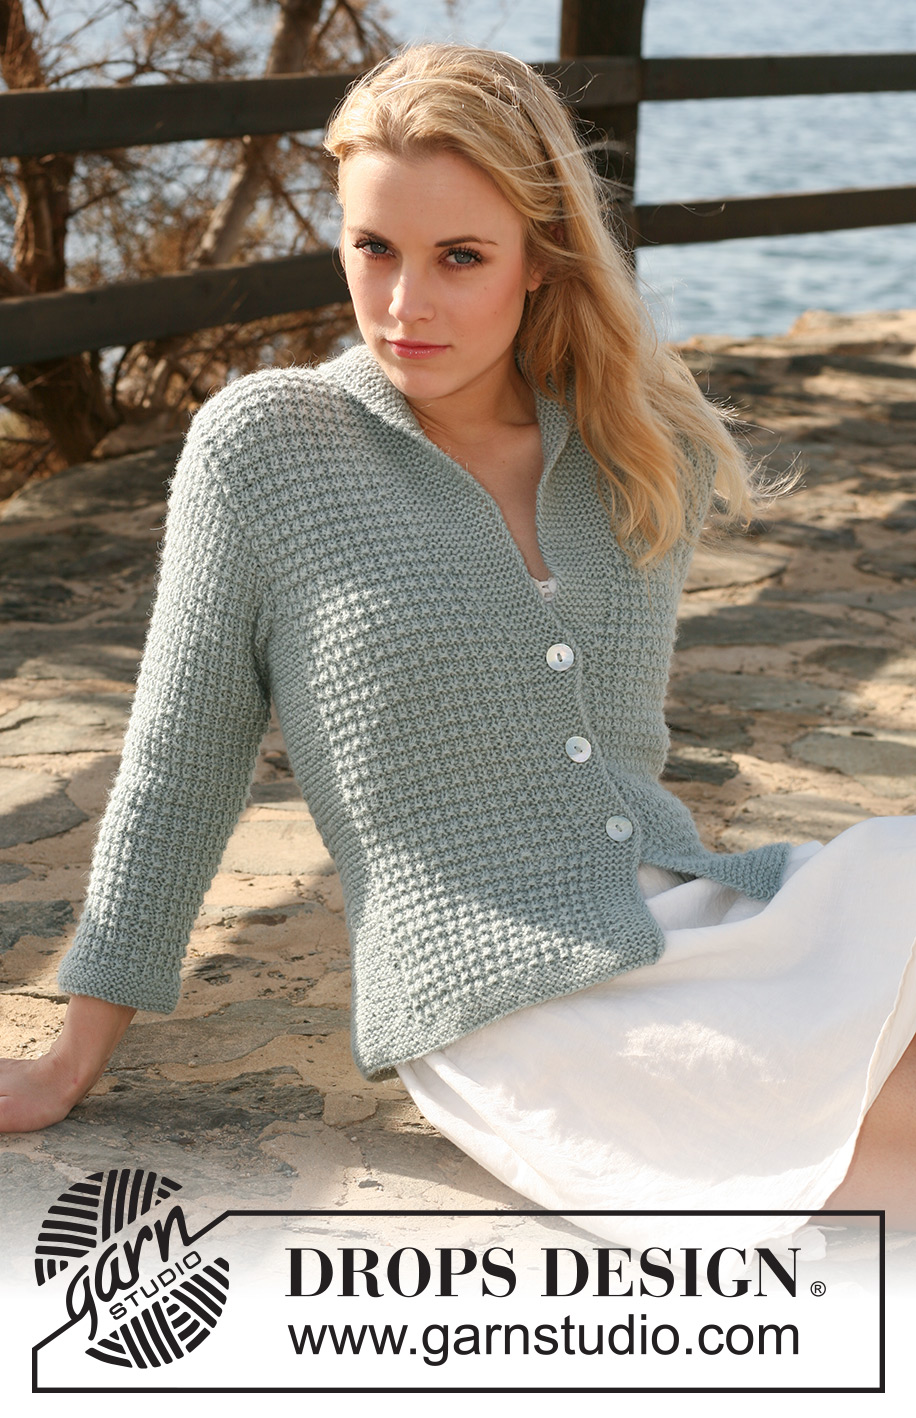
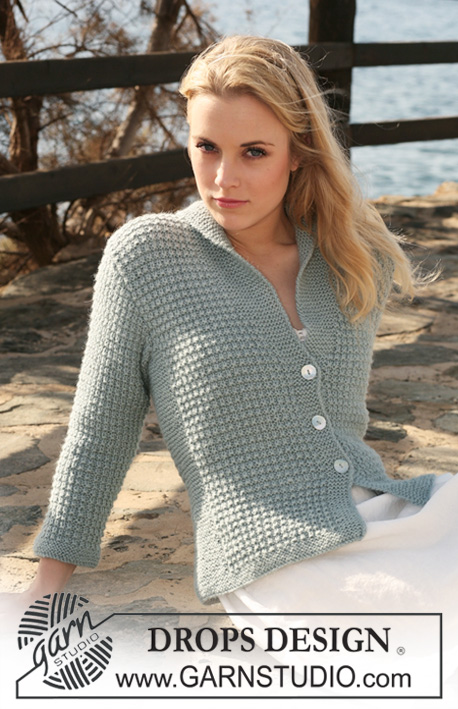
Marit#maritcardigan |
|||||||
 |
 |
||||||
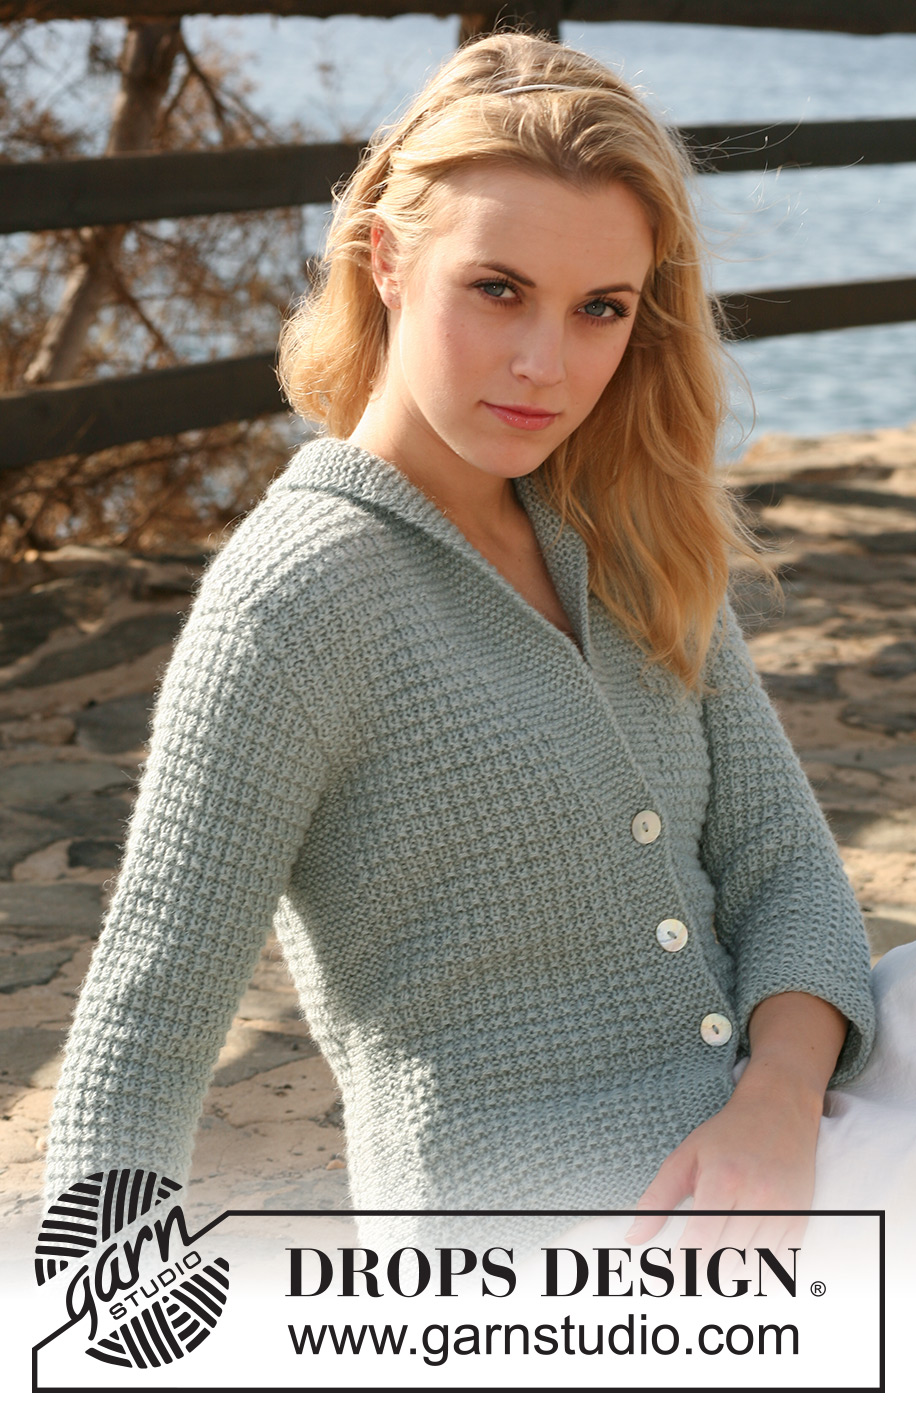
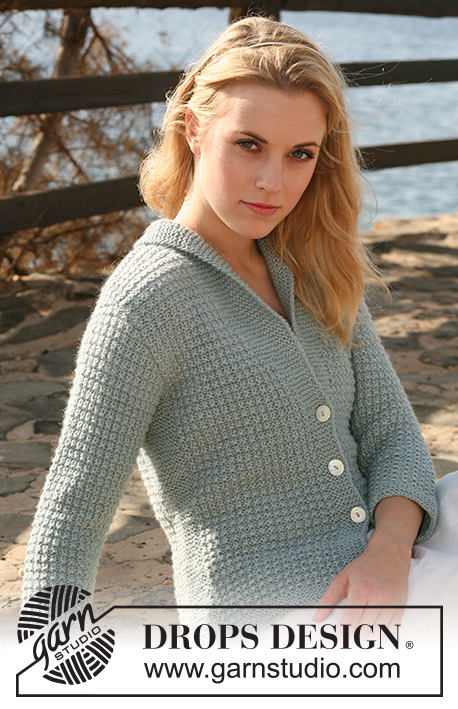
Knitted DROPS jacket with textured pattern and collar in 2 threads ”Alpaca”. Size S - XXXL.
DROPS 119-6 |
|||||||
|
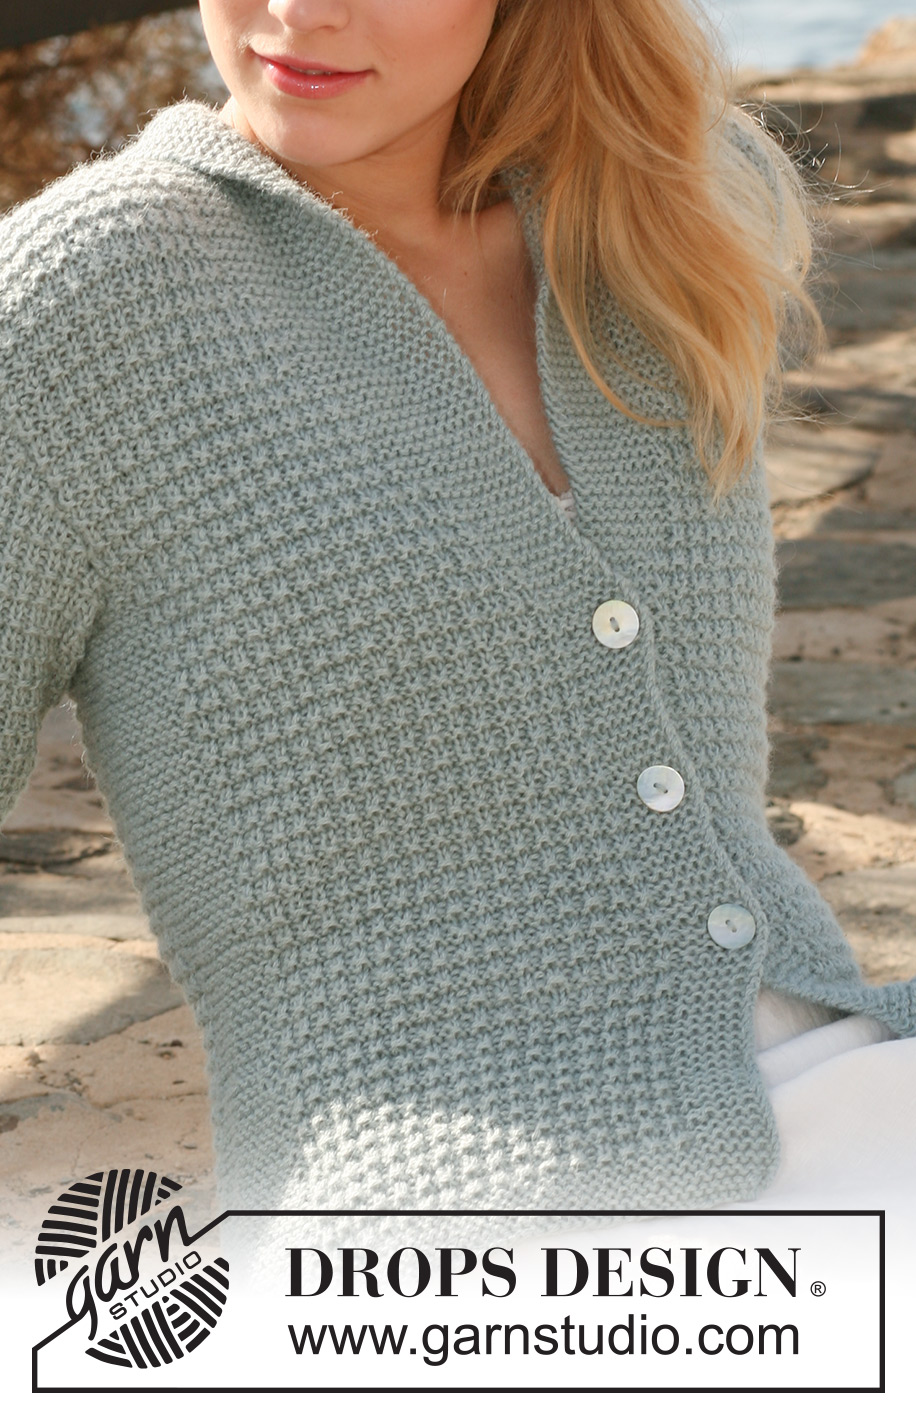
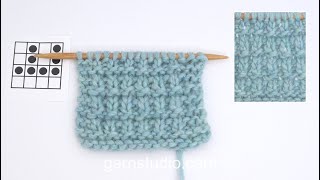
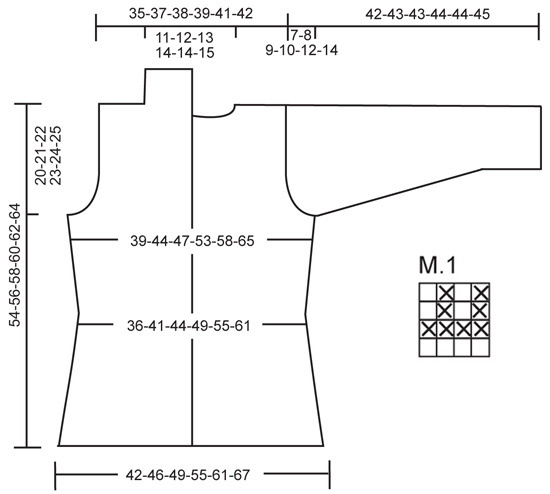
GARTER ST (back and forth on needle): K all rows. GARTER ST (in the round): K 1 round, P 1 round. PATTERN: See diagram M.1. Diagram shows the pattern from RS. BUTTONHOLES: Make buttonholes on right front band. 1 buttonhole = bind off 3rd front band st from mid front and cast on 1 new st on return row. Make buttonholes when piece measures: SIZE S, M, L: 14, 21 and 28 cm / 5½", 8¼" and 11". SIZE XL, XXL, XXXL: 15, 22 and 29 cm / 6", 8¾" and 11⅜". -------------------------------------------------------- -------------------------------------------------------- BODY PIECE: Worked back and forth on circular needle from mid front. Cast on 163-179-193-211-233-257 sts on circular needle size 4.5 mm / US 7 with 2 threads Alpaca. Insert a marker 44-48-52-56-62-68 sts in from each side (back piece = 75-83-89-99-109-121 sts). Work 8 rows GARTER ST – SEE ABOVE, and continue as follows from RS: 6 garter sts, M.1 on the next 29-33-37-41-47-53 sts, 18 garter sts (marker sits in the middle of these sts), M.1 on the next 57-65-71-81-91-103 sts, 18 garter sts (marker sits in the middle of these sts), M.1 on the next 29-33-37-41-47-53 sts, and finish with 6 garter sts. REMEMBER THE GAUGE! Continue in pattern like this, AT THE SAME TIME when piece measures 5 cm / 2" dec 1 st each side of garter sts each side by K2 tog, repeat the dec on every 2.5 cm / ⅞" a total of 5 times = 143-159-173-191-213-237 sts. Remember BUTTONHOLES on right front band – SEE ABOVE!! When piece measures 20 cm / 8" inc 1 st each side of garter sts each side, and repeat the inc on every 6-6-6-7-7-7 cm / 2⅜"-2⅜"-2⅜"-2¾"-2¾"-2¾" a total of 3 times = 155-171-185-203-225-249 sts. AT THE SAME TIME when piece measures 28-28-28-29-29-29 cm / 11"-11"-11"-11⅜"-11⅜"-11⅜" work 1 st from M.1 into front band (i.e. number of sts remain the same but no of garter sts on front band inc and no of sts in M.1 dec), and repeat this on every 2 cm / ¾" a total of 10-11-13-13-14-15 times (= 16-17-19-19-20-21 garter sts on front band). Continue in M.1 and garter st until piece measures 34-35-36-37-38-39 cm / 13⅜"-13¾"-14¼"-14½"-15"-15¼". Now bind off 6 sts each side for armhole (= 3 sts each side of marker) and complete each piece separately. BACK PIECE: = 65-73-79-89-99-111 sts. Continue in M.1 on all sts. Bind off for armhole each side at the beg of every row: 2 sts 0-1-2-3-4-6 times and 1 st 0-1-1-3-5-6 times = 65-67-69-71-73-75 sts. When piece measures 52-54-56-58-60-62 cm / 20½"-21¼"-22"-22¾"-23⅝"-24⅜" bind off the middle 17-19-21-23-23-25 sts for neck and complete each shoulder separately. Bind off 1 st on neckline on next row = 23-23-23-23-24-24 sts left on shoulder. Bind off when piece measures 54-56-58-60-62-64 cm / 21¼"-22"-22¾"-23⅝"-24⅜"-25¼". LEFT FRONT PIECE: Continue with garter st on front band and M.1 on remaining sts. Bind off for armhole at the side as described for back piece = 39-40-42-42-44-45 sts. When piece measures 54-56-58-60-62-64 cm / 21¼"-22"-22¾"-23⅝"-24⅜"-25¼" bind off the first 23-23-23-23-24-24 sts from RS for shoulder = 16-17-19-19-20-21 sts left on collar. Work remaining sts on row. Now work shortened rows on collar (with start from WS) as follows: * 2 rows on the first 8-8-8-9-9-10 sts only, 2 rows on all sts *, repeat from *-* until collar measures approx 6-6-7-7-8-8 cm / 2½"-2½"-2¾"-2¾"-3"-3" on the shorter side (measured from shoulder). Bind off. RIGHT FRONT PIECE: Like left front piece, but mirrored. SLEEVE: Worked in the round on double pointed needles. Cast on 44-46-48-50-52-54 sts on double pointed needles size 4.5 mm / US 7 with 2 threads Alpaca. Insert a marker at beg of round = mid under sleeve. Work 8 rows GARTER ST – SEE ABOVE, and continue in M.1 on all sts. When piece measures 5 cm / 2" inc 1 st each side of marker, and repeat the inc on every 3-2.5-2-2-1.5-1.5 cm / 1⅛"-⅞"-¾"-¾"-½"-½" a total of 9-11-12-14-15-16 times = 62-68-72-78-82-86 sts. Incorporate inc sts in M.1 as you go along. When piece measures 35-35-34-34-32-31 cm / 13¾"-13¾"-13⅜"-13⅜"-12½"-12¼" - NOTE! Less for the larger sizes because of longer sleeve cap and wider shoulder – bind off for sleeve cap each side at the beg of every row: 3 sts 1 time, 2 sts 3 times, 1 st 0-1-2-4-5-7 times, then 2 sts each side until piece measures 41-42-42-43-43-44 cm / 16⅛"-16½"-16½"-17"-17"-17¼", now bind off 3 sts 1 time each side and bind off remaining sts. Piece measures approx 42-43-43-44-44-45 cm / 16½"-17"-17"-17¼"-17¼"-17¾". ASSEMBLY: Sew shoulder seams. Set in sleeves. Sew collar tog mid back and sew to neckline on back piece. Sew on buttons. |
|||||||
Diagram explanations |
|||||||
|
|||||||
 |
|||||||
Have you finished this pattern?Tag your pictures with #dropspattern #maritcardigan or submit them to the #dropsfan gallery. Do you need help with this pattern?You'll find 17 tutorial videos, a Comments/Questions area and more by visiting the pattern on garnstudio.com. © 1982-2026 DROPS Design A/S. We reserve all rights. This document, including all its sub-sections, has copyrights. Read more about what you can do with our patterns at the bottom of each pattern on our site. |
|||||||


With over 40 years in knitting and crochet design, DROPS Design offers one of the most extensive collections of free patterns on the internet - translated to 17 languages. As of today we count 325 catalogs and 12298 patterns - 12288 of which are translated into English (US/in).
We work hard to bring you the best knitting and crochet have to offer, inspiration and advice as well as great quality yarns at incredible prices! Would you like to use our patterns for other than personal use? You can read what you are allowed to do in the Copyright text at the bottom of all our patterns. Happy crafting!
Post a comment to pattern DROPS 119-6
We would love to hear what you have to say about this pattern!
If you want to leave a question, please make sure you select the correct category in the form below, to speed up the answering process. Required fields are marked *.