
Popular categories
Looking for a yarn?


Comments / Questions (56)
![]() Herta Emilie wrote:
Herta Emilie wrote:
Thank you for this nice pattern
19.01.2019 - 16:00
![]() Ellen Kessel wrote:
Ellen Kessel wrote:
Wie oft wird beim Ärmel das Muster M2 gestrickt? Auf dem Foto sind Zwei mal M2 zu sehen, nach der Beschreibung wird M2 nur Ein mal gestrickt
12.03.2017 - 23:10DROPS Design answered:
Liebe Frau Kessel, M.2 wird 2 x ind er Höhe gestrickt - Anleitung wurder korrigiert. Viel Spaß beim stricken!
05.04.2017 - 10:34
![]() Alban wrote:
Alban wrote:
Man minskar ju i M1!
20.04.2014 - 07:50
![]() Siv Jeanette Iversen wrote:
Siv Jeanette Iversen wrote:
Herregud, er det mulig. M1 stemmer jo ikke, hvor skal det strikkes (), det er jo ikke tegnet inn på mønstret Grrr.....
20.04.2014 - 06:26DROPS Design answered:
Hej Siv. Hvor er du precis i mönstret og hvilken str strikker du, saa er det lidt nemmere at kigge efter :-). Og beskrivelserne mellem ( ) er for at tydeliggöre feks hvordan du skal strikke, hvor mange m du har imellem osv.
22.04.2014 - 17:10
![]() Siv Jeanette Iversen wrote:
Siv Jeanette Iversen wrote:
M1 er det feil og manlger. På bildet er det et kast,men ikke avtegnet i mønstret hvor det skal være. Er det mulig å få riktig mønster ?
20.04.2014 - 06:21Hannie Niemand wrote:
In patroon Drops 118-17 by de opschrift Lijf, wat bedoeld u by de 3de sin: brei bij de laatste herhaling van M.1 niet de laatste st? Wat moet je dan met de steek doen?
14.11.2013 - 16:01DROPS Design answered:
Hoi Hannie. Je breit patroon M.1 11-12-13-15-16-18 keer (afhankelijk van uw maat) over de nld. Dus als je de laatste herhaling breit moet u niet de laatste steek van het patroon breien (= je eindigt met 2 r) om het patroon symmetrisch te maken op de voorpanden.
29.11.2013 - 17:46Karen wrote:
The pattern says when shaping the neck to lie nicely to "K 2" knit 2 rows on the first 5 stitches. The first 5 stitches are garter stitches so now the pattern wants the short rows to deviate from garter to knit them in short rows. Is the correct reading?
28.05.2013 - 15:28DROPS Design answered:
Dear Karen, you will work these short rows on the 5 front band sts each side only once : work 2 rows on the first 5 sts, work 1 row on all sts as before, and work 2 rows on the first 5 sts on the other side. Then continue as stated. Happy knitting!
29.05.2013 - 11:36
![]() Karen wrote:
Karen wrote:
When shaping the neck to make it lie nicely shoud the first 5 stitches be "knited" as stated in the pattern or "purled" in the short rows to maintain the garter stitch look?
28.05.2013 - 14:52DROPS Design answered:
See below - it should help you. Happy knitting!
28.05.2013 - 15:23Karen wrote:
The pattern says "when the piece measures ...K 2 rows on the first 5 front band sts only, work 1 row on on all sts and K 2 rows on the first 5 front band sts the other side only (to make the neckline site nicely). Question: the first 5 stitches on then band have been purled to produce garter. Are the short rows to now be in "knited" stitches rather than "purled" stitches?
28.05.2013 - 14:49DROPS Design answered:
Dear Karen, the 6 front band sts are worked in garter sts, which is usually K on all row, if you choose to P on all row, then work these short rows as before, you should work 1 ridge garter st on the 5 front band sts each side. Happy knitting!
28.05.2013 - 15:22Karen wrote:
Pattern says when piece peasures..."K2 rows on the first 5 front band sts only, work 1 row on all sts and k 2 rows on the first 5 front band sts the other side only (to make the neckline sit nicely)." These first 5 stitches in pattern were purled to make garter, should they now be knitted stitches in the short row rather than purled stitches?
28.05.2013 - 14:45
|
|||||||||||||||||||||||||
Miramar#miramarcardigan |
|||||||||||||||||||||||||
 |
 |
||||||||||||||||||||||||
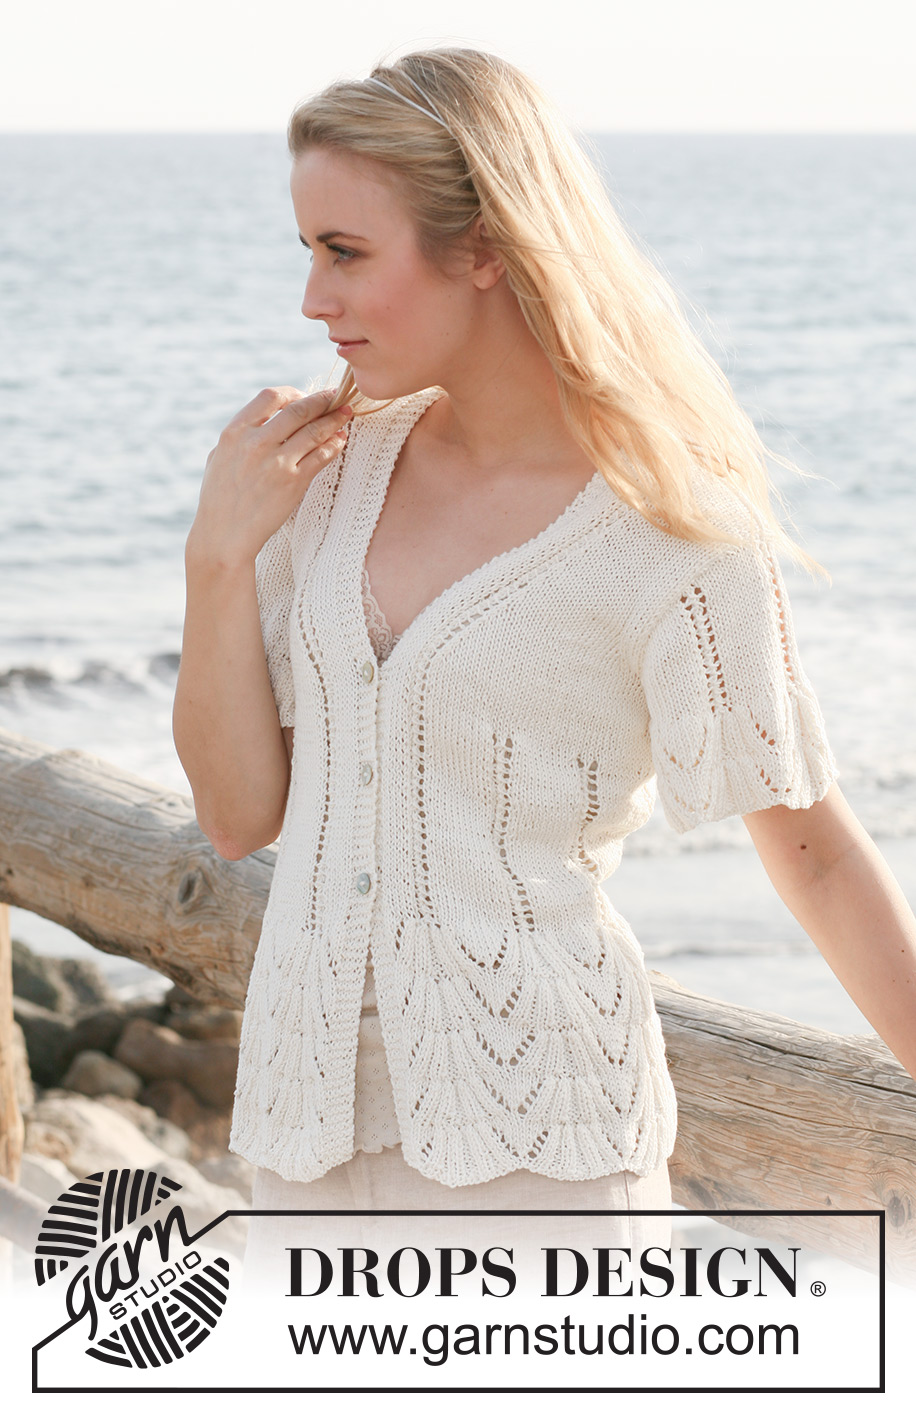
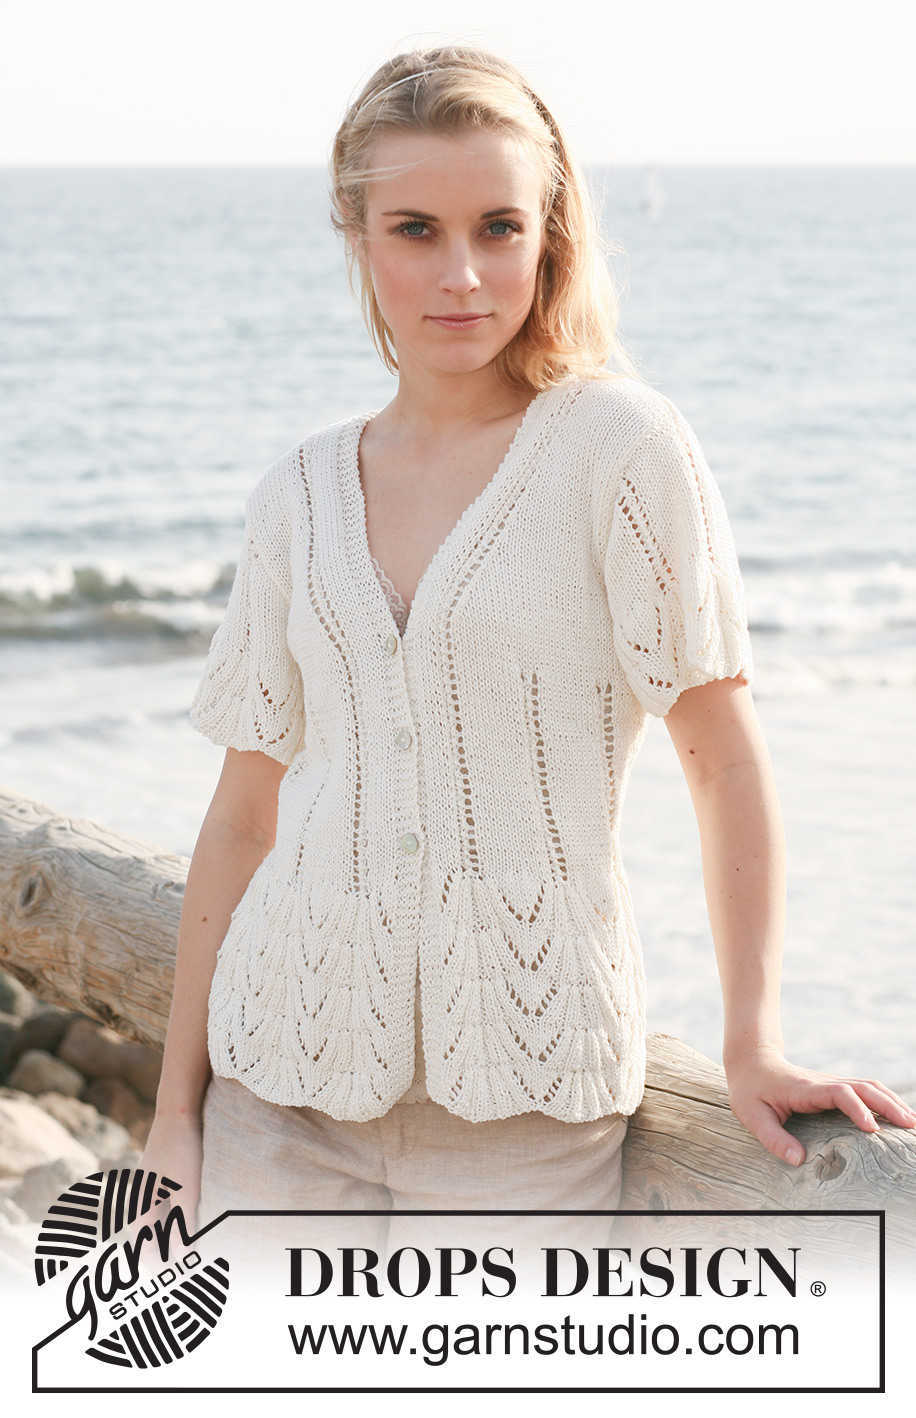
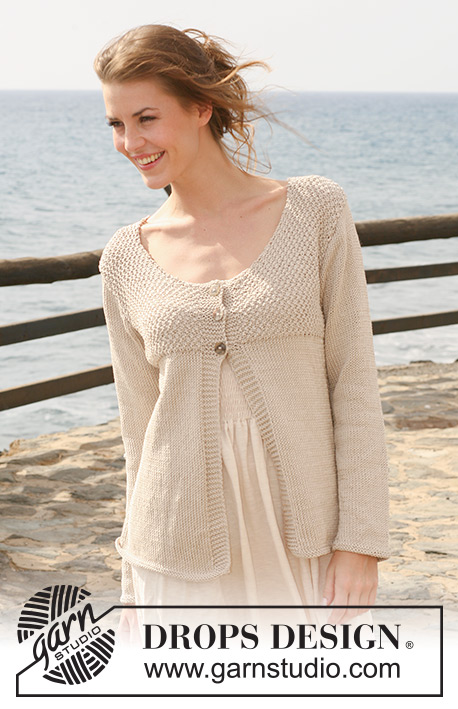
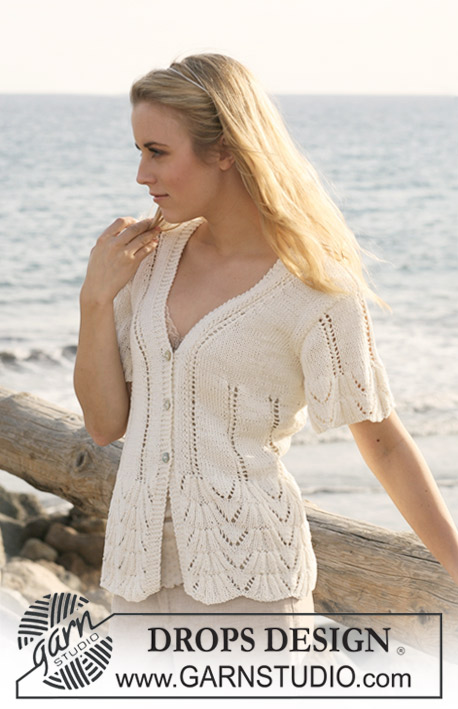
DROPS jacket in ”Muskat” with short sleeves and patterned rib borders. Size S to XXXL.
DROPS 118-17 |
|||||||||||||||||||||||||
|
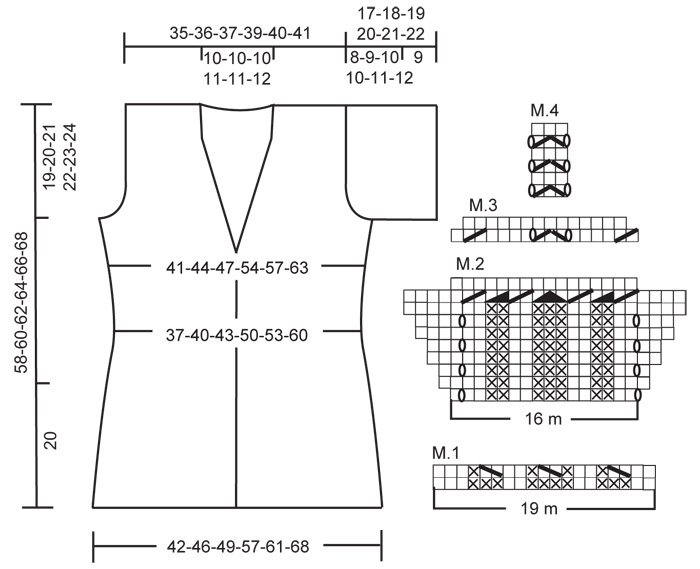
GARTER ST (back and forth on needle): K all rows. PATTERN: See diagrams M.1 to M.4 - pattern in diagram is seen from RS. BUTTONHOLES: Make 3 buttonholes from RS on right front band. 1 BUTTONHOLE = K tog 3rd and 4th st from mid front and make 1 YO. Make buttonholes when piece measures: Size S: 21, 28 and 35 cm / 8¼", 11" and 13¾". Size M: 22, 29 and 36 cm / 8¾", 11⅜" and 14¼". Size L: 23, 30 and 37 cm / 9", 11¾" and 14½". Size XL: 24, 31 and 38 cm / 9½", 12¼" and 15". Size XXL: 25, 32 and 39 cm / 9¾", 12½" and 15¼". Size XXXL: 26, 33 and 40 cm / 10¼", 13" and 15¾". DECREASING TIP-1 (applies to neck): Make all dec from RS inside 13 sts (= 5 front band sts in garter st, 5 stockinette sts and M.4). Dec as follows AFTER 13 sts: slip 1 st as if to K, K1 and psso. Dec as follows BEFORE 13 sts: K2 tog. DECREASING TIP-2 (applies to armhole): Make all dec from RS inside 4 stockinette sts: Dec as follows AFTER 4 sts: slip 1 st as if to K, K1, psso. Dec as follows BEFORE 4 sts: K2 tog. ------------------------------------------------------- -------------------------------------------------------- BODY PIECE: Worked back and forth on circular needle from mid front. Cast on 218-237-256-294-313-351 sts (includes 5 front band sts each side towards mid front) on circular needle size 4 mm / US 6 with Muskat. Continue as follows (first row = RS): 5 front band sts in GARTER ST – see above, chart M.1 11-12-13-15-16-18 times across the row - in the last repeat do not work the last st (in order to make pattern identical on both front pieces) – and 5 front band sts in garter st. After M.1 there are 185-201-217-249-265-297 sts on needle. Continue as follows: 5 front band sts in garter st, M.2 11-12-13-15-16-18 times across the row (in the last repeat do not work the last st) and 5 front band sts in garter st. Work 5 vertical repeats of M.2 like this, piece measures approx 20 cm / 8". Continue with M.3 over M.2. After M.3 there are 163-177-191-219-233-261 sts on needle. Continue as follows: 5 front band sts in garter st, 5 stockinette sts, * M.4, 11 stockinette sts *, repeat from *-* until 13 sts remain, M.4, 5 stockinette sts and 5 front band sts in garter st. REMEMBER THE GAUGE! AT THE SAME TIME when piece measures 21-22-23-24-25-26 cm / 8¼"-8¾"-9"-9½"-9¾"-10¼" make BUTTONHOLES – see above! Insert a marker 43-47-50-57-61-68 sts in from each side (= 77-83-91-105-111-125 sts between markers on back piece). When piece measures 26-27-28-29-30-31 cm / 10¼"-10⅝"-11"-11⅜"-11¾"-12¼" inc 1 st each side of both markers (inc by K2 in st each side of marker), and repeat the inc on every 3rd cm / 1⅛" a total of 4 times = 179-193-207-235-249-277 sts. AT THE SAME TIME when piece measures 33-34-35-36-37-38 cm / 13"-13⅜"-13¾"-14¼"-14½"-15" complete piece in stockinette st, BUT work the 13 sts each side towards mid front as before. When piece measures 36-37-38-39-40-41 cm / 14¼"-14½"-15"-14¼"-15¾"-16⅛" K 2 rows on the first 5 front band sts only, work 1 row on all sts and K 2 rows on the first 5 front band sts the other side only (to make the neckline sit nicely). On next row from RS dec 1 st each side towards mid front – SEE DECREASING TIP-1, and repeat the dec on every other row a total of 8-8-8-8-9-10 times and then on every 4th row a total of 7-8-7-8-8-8 times. AT THE SAME TIME when piece measures 39-40-41-42-43-44 cm / 15¼"-15¾"-16⅛"-16½"-17"-17¼" bind off 6-8-10-12-14-16 sts each side for armhole (i.e. 3-4-5-6-7-8 sts each side of marker). Now complete front and back pieces separately. LEFT FRONT PIECE: Continue dec for neck – AT THE SAME TIME on next row from RS dec 1 st towards armhole – SEE DECREASING TIP-2, and repeat the dec on every other row a total of 3-4-6-10-11-15 times. When all dec for armhole and neck are complete there are 26-27-28-29-30-31 sts left on shoulder. Bind off when piece measures 58-60-62-64-66-68 cm / 22¾"-23⅝"-24⅜"-25¼"-26"-26¾". RIGHT FRONT PIECE: Like left front piece but mirrored. BACK PIECE: = 79-83-89-101-105-117 sts. Dec for armhole each side as described for front piece = 73-75-77-81-83-87 sts. Continue until piece measures 55-57-59-61-63-65 cm / 21⅝"-22½"-23¼"-24"-24¾"-25½", now work 4 rows garter st on the middle 31-31-31-33-33-35 sts (work remaining sts as before), and then bind off the middle 21-21-21-23-23-25 sts for neck and complete each shoulder (= 26-27-28-29-30-31 sts) separately. Continue with 5 garter sts towards the neck until piece measures 58-60-62-64-66-68 cm / 22¾"-23⅝"-24⅜"-25¼"-26"-26¾", bind off. SLEEVE: Worked back and forth on circular needle. Cast on 97-97-116-116-116-135 sts (includes 1 edge st each side) on circular needle size 4 mm / US 6 with Muskat. Work M.1 (first row = RS) with 1 edge st each side. After M.1 there are 82-82-98-98-98-114 sts on needle. Continue in M.2 with 1 edge st in garter st each side. Work 2 vertical repeats of M.2, then work M.3 over M.2. After M.3 there are 72-72-86-86-86-100 sts on needle. Continue as follows: 1 edge st, 5 stockinette sts, * M.4, 11 stockinette sts *, repeat from *-* a total of 4-4-5-5-5-6 times, M.4, 6 stockinette sts and 1 edge st. When piece measures 9 cm / 3½" bind off for sleeve cap at the beg of every row each side: 4 sts 1 time, 2 sts 3 times and 1 st 3-5-6-7-9-10 times, then 2 sts each side until piece measures 16-17-18-19-20-21 cm / 6¼"-6¾"-7"-7½"-8"-8¼", now bind off 4 sts 1 time each side, and bind off remaining sts. Sleeve measures approx 17-18-19-20-21-22 cm / 6¾"-7"-7½"-8"-8¼"-8¾". ASSEMBLY: Sew shoulder seams. Sew sleeve seams inside 1 edge st and set in sleeves. Sew on buttons. |
|||||||||||||||||||||||||
Diagram explanations |
|||||||||||||||||||||||||
|
|||||||||||||||||||||||||
 |
|||||||||||||||||||||||||
Have you finished this pattern?Tag your pictures with #dropspattern #miramarcardigan or submit them to the #dropsfan gallery. Do you need help with this pattern?You'll find 20 tutorial videos, a Comments/Questions area and more by visiting the pattern on garnstudio.com. © 1982-2026 DROPS Design A/S. We reserve all rights. This document, including all its sub-sections, has copyrights. Read more about what you can do with our patterns at the bottom of each pattern on our site. |
|||||||||||||||||||||||||


With over 40 years in knitting and crochet design, DROPS Design offers one of the most extensive collections of free patterns on the internet - translated to 17 languages. As of today we count 325 catalogs and 12298 patterns - 12288 of which are translated into English (US/in).
We work hard to bring you the best knitting and crochet have to offer, inspiration and advice as well as great quality yarns at incredible prices! Would you like to use our patterns for other than personal use? You can read what you are allowed to do in the Copyright text at the bottom of all our patterns. Happy crafting!
Post a comment to pattern DROPS 118-17
We would love to hear what you have to say about this pattern!
If you want to leave a question, please make sure you select the correct category in the form below, to speed up the answering process. Required fields are marked *.