
Popular categories
Looking for a yarn?


Comments / Questions (83)
![]() Stine wrote:
Stine wrote:
Hvad betyder det, at 'masken ikke er med denne omgang'?
07.12.2013 - 14:32DROPS Design answered:
Du lukkede masken af på pinden før, så du har en maske mindre på denne omgang.
10.12.2013 - 09:06
![]() Kari wrote:
Kari wrote:
Skjønner ikke raglansfellingen. Skal den strikkes rundt og rundt på rundpinne eller frem og tilbake? Men da den vel syes sammen?
13.10.2013 - 18:28DROPS Design answered:
Det her er ikke raglansfelling! Du strikker rundt på rundpind og tager ind ifølge diagrammet, til du kommer dertil hvor du sætter 7 m på en tråd til hals, så er du nødt til at strikke frem og tilbage men tager stadigvæk ind ifølge diagrammet.
14.10.2013 - 11:34
![]() Solfrid wrote:
Solfrid wrote:
Denne har jeg også strikket, sitter perfekt! Laget også hel lengde på ermene. Flott fasong, enkel og grei å strikke
01.04.2013 - 16:56
![]() Sabrina wrote:
Sabrina wrote:
Nelle istruzioni c'è un piccolo errore, quando si tratta di mettere il segnapunti nel centro davanti bisogna contare le maglie all'esterno della manica non all'interno. Comunque bellissimo modello!
31.03.2013 - 13:10DROPS Design answered:
Buongiorno!I segnapunti nel maglione indicano i lati, mentre quello sulla manica indica il centro sotto della manica. A quale in particolare si riferisce?
01.04.2013 - 18:08
![]() Sylvia Räsenhöft wrote:
Sylvia Räsenhöft wrote:
Hallo, ich beginne gerade mit der Passe. Wird das Muster von oben nach unten gestrickt? Und ist jede Reihe eine Reihe, sprich ist jede zweite Reihe eine Rückreihe? Und warum soll ich bloß 20 Rapporte stricken? So komme ich mit 140 Maschen nicht rum- eine Runde sind ja 340 Maschen.
11.03.2013 - 18:15DROPS Design answered:
Liebe Frau Räsenhöft, im Diagramm ist jede R bzw. Rd abgebildet und das Muster wird von unten nach oben gestrickt (es muss ja auch zum Hals zu schmäler werden). Am Anfang der Passe haben Sie mit den 20 Rapporten die für Größe L angegebenen 340 M. Bei Stricken von M1 verringert sich dann die Maschenzahl.
12.03.2013 - 12:17
![]() Iris wrote:
Iris wrote:
Danke fuer die schnelle Antwort. Aber wie ich die Beschreibung verstehe , stricke ich nur so lange rund bis ich die Rapporte stilllege. Es steht auch geschrieben ' M1 hin und zurück stricken 'Dadurch wird der ruecken laenger. Danach nehme ich die stillgelegten M vom Faden und stricke rund
21.02.2013 - 13:52DROPS Design answered:
Hallo Iris, dann hatte ich Ihre Frage falsch verstanden: nach dem Halsausschnitt wird tatsächlich in Hin-und Rück-R gestrickt. Da die Reihe ja ständig beidseitig verkürzt wird, haben Sie keine Randmasche, die an einer Stelle hochläuft. Sie stricken die letzte /erste Masche einfach im Muster.
22.02.2013 - 11:27
![]() Iris wrote:
Iris wrote:
Dann habe ich noch eine Frage, was ich denn mit den Randmaschen mache. Stricke ich sie jeweils oder nur eine Reihe und dann abheben? Ich will keine Loecher haben. Auf dem Foto sehe ich keine Loecher, eher nur ein paar kleine Unebenheiten. Wie bekomme ich das hin? Schliesslich noch eine Frage zum Muster M1 Das ausgefuellte Quadrat sagt, M wird nicht gestrickt. Aber was mache ich damit? Danke
20.02.2013 - 12:09DROPS Design answered:
Hallo Iris, da die Arbeit rund gestrickt wird haben Sie gar keine Randmaschen. Und das schwarze Kästchen dient nur der Darstellung, es ist keine Masche und kann somit auch nicht gestrickt werden. Gutes Gelingen!
21.02.2013 - 09:13
![]() Iris wrote:
Iris wrote:
Hallo!Passe? Wenn ich bis zum Pfeil stricke,habe ich 14 M, die ich auf den Faden lege. Wenn ich jetzt wie erklaert bei Gr L, 4 mal 2 Maschen auf dem Hilfsfaden lege, habe ich erst 22 M. ISt vielleicht vergessen worden,beidseitg 2 M zu sagen? Wuerde auch fuer die Symmetrie mehr Sinn machen Dann stimmen auch die 30M
20.02.2013 - 12:07DROPS Design answered:
Hallo Iris, das ist natürlich so gemeint, ein Halsausschnitt ist immer symmetrisch.
21.02.2013 - 09:09
![]() Maria wrote:
Maria wrote:
Denne har jeg strikket, med supert resultat. Veldig fin passform og god lengde.
20.09.2012 - 21:24
![]() Gunilla Lindblad wrote:
Gunilla Lindblad wrote:
Mönster 114:2: När man börjar med diagrammet, skall man börja med första maskan i diagrammet eller den mittersta?
16.07.2012 - 14:36DROPS Design answered:
Du börjar med första maskan i diagrammet
25.12.2012 - 18:06
|
|||||||||||||||||||||||||
Hardanger#hardangersweater |
|||||||||||||||||||||||||
 |
 |
||||||||||||||||||||||||
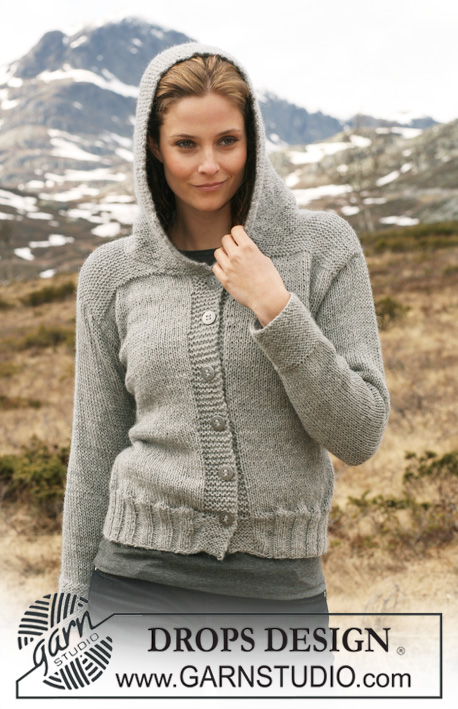
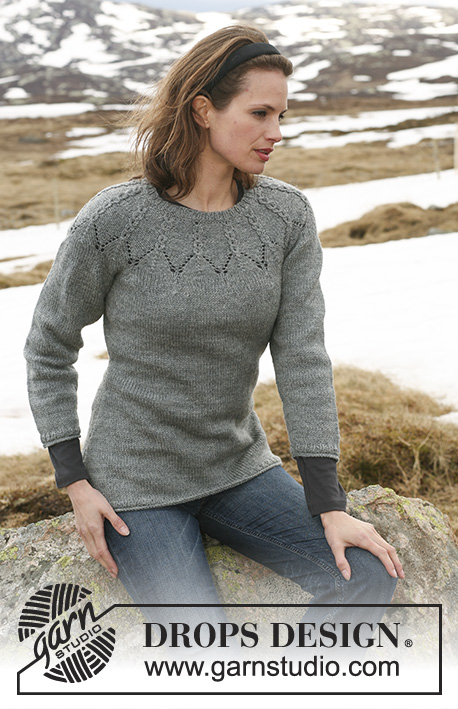
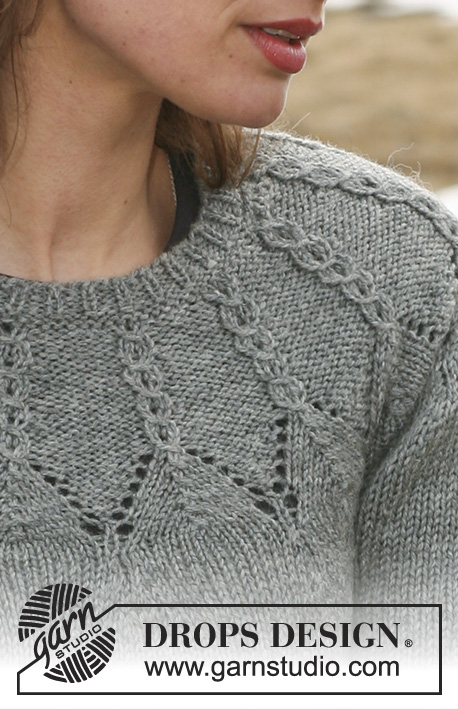
DROPS jumper with cables and round yoke sleeves in ”Karisma”. Size S - XXXL
DROPS 114-2 |
|||||||||||||||||||||||||
|
PATTERN: See diagram M.1. Diagram shows the pattern from RS. When later working M.1 back and forth on needle (from WS): slip 1 st, P2, psso. -------------------------------------------------------- -------------------------------------------------------- JUMPER: Worked in the round on circular needle. Cast on 192-210-225-249-273-297 sts on circular needle size 3.5 mm / US 4 with Karisma. K 2 rounds and work 4 rounds rib K1/ P2. Change to circular needle size 4 mm / US 6 and K 1 round, AT THE SAME TIME dec 0-2-1-1-1-1 sts evenly = 192-208-224-248-272-296 sts. Insert 1 marker at beg of round and 1 marker after 96-104-112-124-136-148 sts (= the sides). Now continue in stockinette st.. REMEMBER THE KNITTING TENSION /GAUGE! When piece measures 6 cm / 2⅜" dec 1 st each side of both markers (= 4 dec), and repeat the dec on every 2 cm / ¾" a total of 10 times = 152-168-184-208-232-256 sts. When piece measures 30 cm / 11¾" inc 1 st each side of both markers, and repeat the inc on every 3-3-3-4-4-4 cm / 1⅛"-1⅛"-1⅛"-1½"-1½"-1½" a total of 4 times = 168-184-200-224-248-272 sts. Continue until piece measures 43-44-45-46-47-48 cm / 17"-17¼"-17¾"-18"-18½"-19". Now bind off 8 sts each side for armhole (= 4 sts each side of marker) = 152-168-184-208-232-256 sts. Put piece aside and knit the sleeves. SLEEVE: Worked in the round on double pointed needles. Cast on 51-54-54-57-60-60 sts on double pointed needles size 3.5 mm / US 4 with Karisma. K 2 rounds and work 4 rounds rib K1/ P2. Change to double pointed needles size 4 mm / US 6 and K 1 round, AT THE SAME TIME dec 1-2-0-1-2-0 sts evenly = 50-52-54-56-58-60 sts. Insert a marker at beg of round = mid under sleeve. Continue in stockinette st. When piece measures 7 cm / 2¾" inc 1 st each side of marker, repeat the inc on every 1.5-1.5-1.5-1-1-1 cm / ⅝"-⅝"-⅝"-⅜"-⅜"-⅜" a total of 14-15-16-17-18-19 times = 78-82-86-90-94-98 sts. When sleeve measures 33-33-32-32-31-31 cm / 13"-13"-12½"-12½"-12¼"-12¼" (less for the larger sizes because of longer sleeve cap and wider shoulder) bind off 4 sts on each side of marker = 70-74-78-82-86-90 sts. Put piece aside and knit the other sleeve. YOKE: Slip sleeves on same circular needle as body piece where bind off for armholes = 292-316-340-372-404-436 sts. K 1 round, AT THE SAME TIME adjust no of sts to 289-323-340-374-408-442 sts. Insert a marker mid front (38-42-46-52-58-64 sts in from each sleeve) and work round to this marker – this is now beg of round. Work 0-1-0-1-2-3 cm / 0"-⅜"-0-⅜"-¾"-1⅛" stockinette st, and then work M.1 (= 17-19-20-22-24-26 repeats across the round), see diagram for your size = 119-133-140-154-168-182 sts on needle. Continue up to arrow in diagram. Now slip 1 repeat (= 7 sts) each side of marker mid front on a stitch holder for neck (= 14 sts on stitch holder). Continue back and forth on needle in M.1 as before. AT THE SAME TIME, slip sts on stitch holder each side towards mid front on every other row as follows: 2 sts 3-3-4-4-4-4 times = 26-26-30-30-30-30 sts on stitch holder. M.1 has now been completed = 76-88-90-102-114-126 sts on needle. Slip all sts from stitch holder back on needle = a total of 104-116-122-134-146-158 sts on needle. Change to circular needle size 3.5 mm / US 4. K 1 round, AT THE SAME TIME dec 2-11-14-23-32-41 sts evenly = 102-105-108-111-114-117 sts. P 1 round, K 1 round and P 1 round, and work 4 rounds rib K1/ P2. Bind off loosely with K over K and P over P. ASSEMBLY: Sew openings under sleeves. |
|||||||||||||||||||||||||
Diagram explanations |
|||||||||||||||||||||||||
|
|||||||||||||||||||||||||
 |
|||||||||||||||||||||||||
 |
|||||||||||||||||||||||||
Have you finished this pattern?Tag your pictures with #dropspattern #hardangersweater or submit them to the #dropsfan gallery. Do you need help with this pattern?You'll find 22 tutorial videos, a Comments/Questions area and more by visiting the pattern on garnstudio.com. © 1982-2026 DROPS Design A/S. We reserve all rights. This document, including all its sub-sections, has copyrights. Read more about what you can do with our patterns at the bottom of each pattern on our site. |
|||||||||||||||||||||||||


With over 40 years in knitting and crochet design, DROPS Design offers one of the most extensive collections of free patterns on the internet - translated to 17 languages. As of today we count 324 catalogs and 12290 patterns - 12280 of which are translated into English (US/in).
We work hard to bring you the best knitting and crochet have to offer, inspiration and advice as well as great quality yarns at incredible prices! Would you like to use our patterns for other than personal use? You can read what you are allowed to do in the Copyright text at the bottom of all our patterns. Happy crafting!
Post a comment to pattern DROPS 114-2
We would love to hear what you have to say about this pattern!
If you want to leave a question, please make sure you select the correct category in the form below, to speed up the answering process. Required fields are marked *.