
Popular categories
Looking for a yarn?


Comments / Questions (94)
![]() Reyna Rosa Aurora wrote:
Reyna Rosa Aurora wrote:
Este chal lo hice copiado de una revista pero no me salio como la foto, porque no explica igual que aqui y dice que se inicie on un punto y al final las tiras no me salieron rectas
13.03.2026 - 02:21
![]() Laura wrote:
Laura wrote:
Er staat nergens in het patroon wat ge moet doen met de omslagen...breien zodat ge steken meer hebt of samen breien met een steek
25.02.2026 - 21:22DROPS Design answered:
Dag Laura,
Op de volgende toer haak je de omslagen recht zodat er gaatjes ontstaan.
26.02.2026 - 20:39
![]() Laura wrote:
Laura wrote:
Ik had M3 6toeren gebreid maar heb teveel steken tussen de 3xxx en de omslagen....moet ik de omslagen breien in de volgende toer of niet
25.02.2026 - 21:17DROPS Design answered:
Dag Laura,
In de derde toer van M.3 brei je de kruisjes averecht samen, waardoor je in totaal 4 steken mindert per herhaling in de breedte. Verder maak je in totaal 6 omslagen, dus 6 meerderingen. Als je dat tegen elkaar wegstreept komen er dus 2 steken bij per herhaling in de breedte van het telpatroon.
26.02.2026 - 20:41
![]() Laura Venturini wrote:
Laura Venturini wrote:
Waarom kan ik niet verder in M3 na het eerste deel...
25.02.2026 - 16:11DROPS Design answered:
Dag Laura,
Helaas begrijp ik je vraag niet goed. Je breit M.3 boven de 17 steken van M.2
25.02.2026 - 18:17
![]() Heike wrote:
Heike wrote:
... oder ist es so, dass erst 2 Mal, dann 4 Mal, das erst 6 Mal wiederholt wird, die Korrektur also schon im Ausdruck durchgeführt wurde?
15.11.2025 - 19:22DROPS Design answered:
Liebe Heike, die Korrektur ist in der Anleitung enthalten, Sie müssen sie nicht noch zusätzlich berücksichtigen. Die Korrektur wird deshalb angezeigt, falls Sie eine pdf-Version oder einen Ausdruck nutzen, der zu einem früheren Zeitpunkt ausgedruckt wurde und den Fehler noch enthält. Viel Spaß beim Stricken!
17.11.2025 - 22:21
![]() Heike wrote:
Heike wrote:
Liebes DROPS-Team, verstehe ich das richtig, dass gemäß der Korrektur nicht 4 Mal sondern 6 Mal wiederholt werden soll? Vielen Dank im Voraus, schöne Grüße Heike
15.11.2025 - 19:01
![]() Hansi Koekkoek wrote:
Hansi Koekkoek wrote:
P.S. op 19-01-2019 werd door u gezegd dat de 2xx in M3 recht gebreid moeten worden. Dit is niet gecorrigeerd in het patroon.
30.09.2023 - 22:25
![]() Hansi Koekkoek wrote:
Hansi Koekkoek wrote:
Klopt het dat de 1e naald van M.4 aan de verkeerde kant wordt gebreid? Moeten de 2 xx in M.3 recht of averecht worden gebreid?
30.09.2023 - 20:46DROPS Design answered:
Dag Hansi,
De eerste naald van M.4 wordt inderdaad aan de verkeerde gebreid. De kruisjes in M.4 brei je 2 averecht samen. De naalden met kruisjes zitten steeds op de goede kant.
03.10.2023 - 06:15
![]() Deepa wrote:
Deepa wrote:
In M4 pattern, after the first row of making 6 'holes', there are now 2 stitches between each hole ( a new one created by the previous yarn over stitch). For the holes to line up, should I do yarn over after 2 stitches and keep increasing the stitches between each yarn over in subsequent rows?
23.10.2022 - 01:39DROPS Design answered:
Dear Deepa, M4 is worked over M3. All of the yarn overs are aligned since they are worked in the middle of the repeat. The number of stitches in the M4 remains the same because you decrease 3 stitches on each side (p2tog 3 times on each side) and work 6 yarn overs in the middle. Between each yarn over you only have 1 stitch; there are only 2 stitches before the first yarn over and after the last yarn over. Happy knitting!
24.10.2022 - 00:05
![]() Majbritt Mortensen wrote:
Majbritt Mortensen wrote:
Jeg er lige gået igang med M2. Starter med 3 ret og slå om som er kanten. Efterhånden som man tager ud og der bliver flere masker før rapporten M2 - skal man så danne en “Strib” der ligner M1? Eller rettere sagt forsøge at gentage M2 eller skal det bare være glat strik... håber I forstår mit spørgsmål. Det er lidt svært at forklarer...
14.04.2020 - 23:11DROPS Design answered:
Hej Majbritt, de nye masker strikkes i glatstrik til der er nok masker for at strikke en hel rapport :)
29.04.2020 - 09:27
|
||||||||||||||||||||||
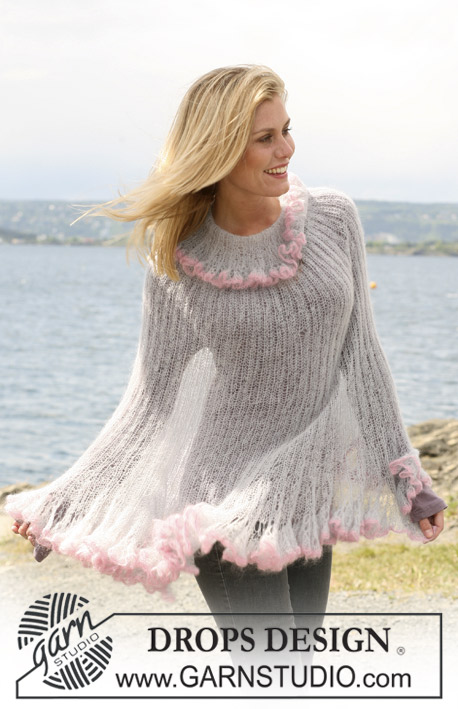
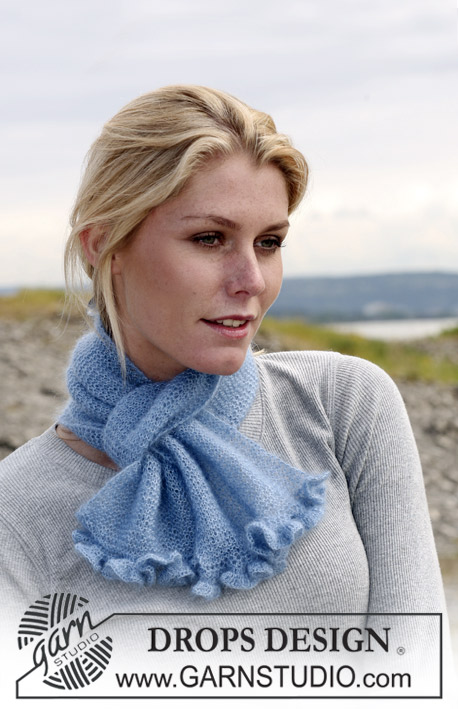
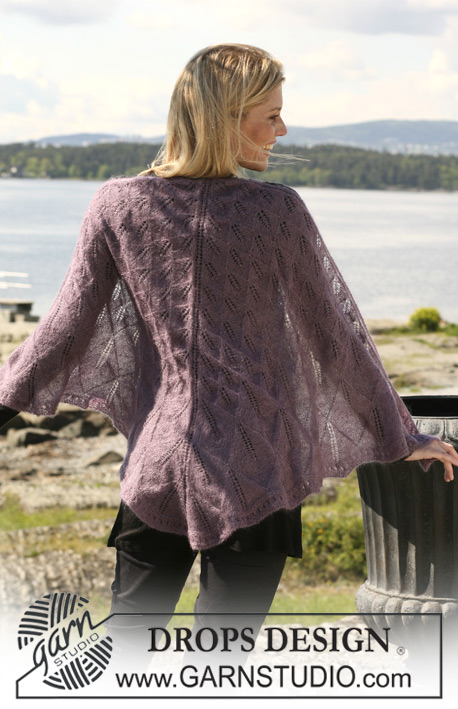
Wisteria |
||||||||||||||||||||||
|
|
||||||||||||||||||||||
Knitted DROPS shawl with lace pattern in ”Kid-Silk”.
DROPS 108-47 |
||||||||||||||||||||||
|
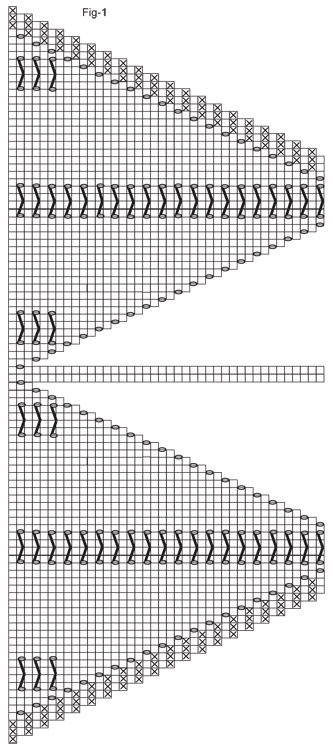
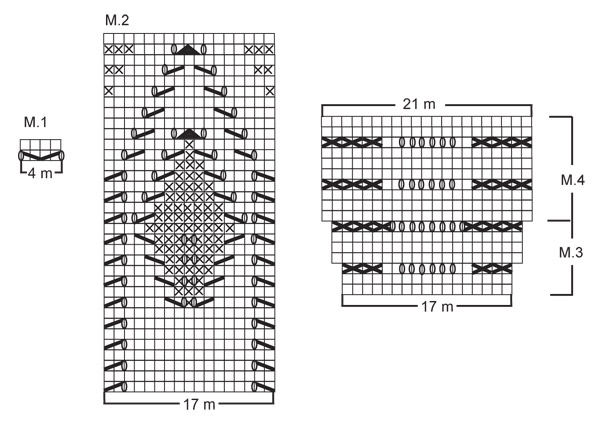
Pattern: See diagram M.1 to M.4. Diagram shows the pattern from the RS. Fig-1 shows how to work the beg of shawl. Garter st, back and forth on needle: K all rows. Increasing tip: Make all inc from RS. Inc 4 sts on every other row throughout as follows: Inc 1 st at beg of row: 3 garter sts, 1 YO. P YO on return row. Inc 2 sts in the middle of piece: 1 YO, 2 stockinette sts (= middle sts), 1 YO. P YO on return row. Inc 1 st at the end of row: 1 YO, 3 garter sts. P YO on return row. SHAWL: Worked back and forth on circular needle (to fit in all sts). Beg at neck mid back. Note! Always start a new ball of yarn at beg of row and not in the middle of piece. Cast on 10 sts on circular needle size 3 mm [US 2or3] with Kid-Silk. Insert 1 Marking Thread after the 5th st (marks the middle of shawl). Work first row as follows (= RS): 3 garter sts, 1 YO, 4 garter sts, 1 YO, 3 garter sts = 12 sts. Now continue in stockinette st with 3 garter sts each side, at the same time inc 4 sts on every other row - see Increasing tip. Remember the knitting gauge! Continue like this until there are 20 sts on row. Now continue as follows from RS: 3 garter sts, 1 YO, K1, M.1, K1, 1 YO, K2 (= middle sts), 1 YO, K1, M.1 and finish with K1, 1 YO, 3 garter sts. Continue with inc at sides and mid back – see Fig 1. After 17 repeats of M.1 (= 88 sts) work next row as follows from RS: 3 garter sts, 1 YO, K1, * M.1, K13 *, repeat from *-* a total of 2 times, M.1, K1, 1 YO, K2 (= middle sts), 1 YO, 1K, * M.1, K13 *, repeat from *-* a total of 2 times, M.1,K1, 1 YO, 3 garter sts. Work 17 vertical repeats of M.1 like this (= 6 repeats across the row) = 156 sts. Now work next row as follows from RS: 3 garter sts, 1 YO, K1, * M.1, K13 *, repeat from *-* a total of 4 times, M.1, K1, 1 YO, K2 (= middle sts), 1 YO, K1, * M.1, K13 *, repeat from *-* a total of 4 times, M.1, K1, 1 YO, 3 garter sts. Work 17 vertical repeats of M.1 like this (= 10 repeats across the row) = 224 sts. Now work next row as follows from RS: 3 garter sts, 1 YO, K1, * M.1, K13 *, repeat from *-* a total of 6 times, M.1, K1, 1 YO, K2 (= middle sts), 1 YO, K1 * M.1, K13 *, repeat from *-* a total of 6 times, M.1, K1, 1 YO, 3 garter sts. Work 15 vertical repeats of M.1 like this (= 14 repeats across the row) = 284 sts. Now work next row as follows from RS: 3 garter sts, 1 YO, K1, M.2 on the next 136 sts, K1, 1 YO, K2 (= middle sts), 1 YO, K1, M.2 on the next 136 sts, K1, 1 YO, 3 garter sts. Work 1 vertical repeat of M.2 = 352 sts. Now work next row as follows from RS: 3 garter sts, 1 YO, K1, M.3 on the next 170 sts, K1, 1 YO, K2 (= middle sts), 1 YO, K1, M.3 on the next 170 sts, K1, 1 YO, 3 garter sts. Work 1 vertical repeat of M.3, and now continue in M.4. Work inc sts not fitting into pattern in stockinette st until there are enough new sts for a full repeat. Continue in M.4 and with inc at sides and in the middle until the wavy pattern measures approx 18 cm [7"]. Bind off loosely. |
||||||||||||||||||||||
Diagram explanations |
||||||||||||||||||||||
|
||||||||||||||||||||||
 |
||||||||||||||||||||||
 |
||||||||||||||||||||||
Have you finished this pattern?Tag your pictures with #dropspattern or submit them to the #dropsfan gallery. Do you need help with this pattern?You'll find 11 tutorial videos, a Comments/Questions area and more by visiting the pattern on garnstudio.com. © 1982-2026 DROPS Design A/S. We reserve all rights. This document, including all its sub-sections, has copyrights. Read more about what you can do with our patterns at the bottom of each pattern on our site. |
||||||||||||||||||||||


With over 40 years in knitting and crochet design, DROPS Design offers one of the most extensive collections of free patterns on the internet - translated to 17 languages. As of today we count 325 catalogs and 12298 patterns - 12288 of which are translated into English (US/in).
We work hard to bring you the best knitting and crochet have to offer, inspiration and advice as well as great quality yarns at incredible prices! Would you like to use our patterns for other than personal use? You can read what you are allowed to do in the Copyright text at the bottom of all our patterns. Happy crafting!
Post a comment to pattern DROPS 108-47
We would love to hear what you have to say about this pattern!
If you want to leave a question, please make sure you select the correct category in the form below, to speed up the answering process. Required fields are marked *.