
Popular categories
Looking for a yarn?


Comments / Questions (70)
![]() Daniele wrote:
Daniele wrote:
Bjr dans le diagramme M2 7e rang il est dit de tricoter au rang suivant le premier jete a l envers mais le rang suivant est indique à tricoter à l endroit ! Doit on alors le tricoter à l endroit sauf le jeter (à l envers) ou tout a l endroit sans tenir compte de la remarque du 7e rang ? Merci pour votre aide
13.05.2013 - 21:10DROPS Design answered:
Bonjour Danielle, au rang 6, vous faites 2 jetés = 1 double jeté, au rang 7, vous tricotez le 1er de ces 2 jetés à l'envers et lâchez le 2ème jeté, ainsi la maille sera allongée. Ceci est à répéter pour chaque jeté. Bon tricot !
14.05.2013 - 08:00
![]() Linda Scheideman wrote:
Linda Scheideman wrote:
Thank you!! When I printed the pattern, the dimensions were not on it(but they are now) Thanks!
22.02.2013 - 03:07
![]() Linda Scheideman wrote:
Linda Scheideman wrote:
How am I to figure the size I need? I am new to DROPS patterns. Thank you I am trying the 101-23
21.02.2013 - 07:55DROPS Design answered:
At the top of the pattern we often put in bust measurements and length. If not you can look at the bottom of the pattern. Here you find the measurements of the garment (in cm's). You can compare these to your own and chose your size
21.02.2013 - 10:01
![]() LACURE wrote:
LACURE wrote:
Je ne comprends pas la ligne :Tricoter 1 rang*3m end, 3m env*et tricoter 1 motif vertical de M2 qui se fait sur 12 rangs? merci
15.05.2012 - 17:28DROPS Design answered:
Bonjour Lacure, vous tricotez 1 tour en côtes 3 m end/3 m env puis 1 fois M2 en hauteur sur toutes les mailles. Bon tricot !
16.05.2012 - 08:44
![]() Tandi wrote:
Tandi wrote:
On the M.2 and M.1 pattern diagrams how are they worked? Is it a stitch repeat meaning you knit the first row, purl the next row, k next row, p next row, k 2 rows and work your way up the rows or is it worked in a different way? Thanks.
05.04.2012 - 21:04DROPS Design answered:
The chart shows one repeat, and it's showing every row and every stitch in pattern seen from RS. Start at the bottom right corner, and work your way up in the chart row by row.
10.04.2012 - 01:21
![]() Andrea wrote:
Andrea wrote:
Hallo, Wie muss beim Vorder-Rückenteil nach M2 gestrickt werden? 1 Reihe rechts und dann eine Reihe links? Es steht leider nur 1R. und danach li über alle Maschen stricken. Danke für die Rückmeldung
26.03.2012 - 21:18DROPS Design answered:
Nach M2 strickt man 1 Runde re. (= glatt rechts). Weiter strickt man li. (= glatt links).
27.03.2012 - 09:11
![]() Marie Danneels wrote:
Marie Danneels wrote:
Een heel mooi ontwerp. Heb het reeds volledig uitgerekend om te breien op 2 naalden. Nu nog de wol. Bedankt Drops !
24.03.2012 - 18:27
![]() DROPS Design NL wrote:
DROPS Design NL wrote:
Hoi Wilma. Ik heb nu overlegt met onze Designteam. Het patroon klopt. De boord moet 7 r/3 av zijn. Veel breiplezier verder. Gr. Tine
20.04.2009 - 11:36
![]() DROPS Design NL wrote:
DROPS Design NL wrote:
Hoi Wilma. Volgens het originele patroon moet het 7 r/3 av zijn, en ik heb ook de grote foto in het boekje bekeken. Hier lijkt het ook een boord van 7 r/3 av te zijn. Voor de zekerheid heb ik uw vraag doorgestuurd aan onze Designteam. Zodra ik een antwoord heb, dan zal ik het hier publiceren. Gr. Tine
06.04.2009 - 10:30
![]() Wilma wrote:
Wilma wrote:
Bij patroon staat dat je boordsteek 7r/3av moet breien .maar het moet zijn 3av/7r want ook golfpatroon begin je met 3 av , dit vermeld ik omdat de fout mij overkwam en dat is vervelend
05.04.2009 - 21:15
|
|||||||||||||
White Lily#whitelilytop |
|||||||||||||
 |
 |
||||||||||||
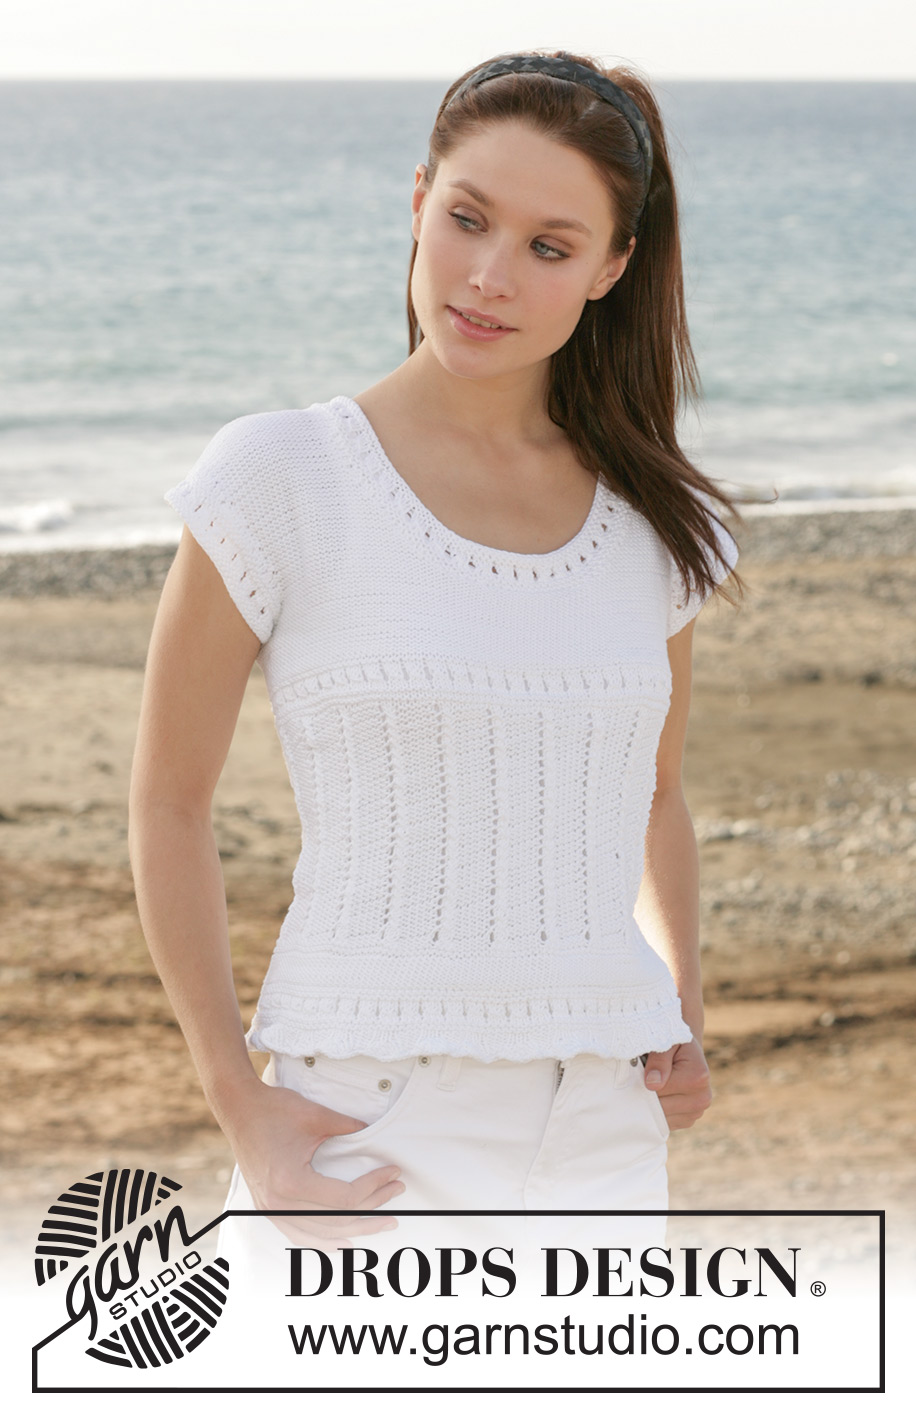
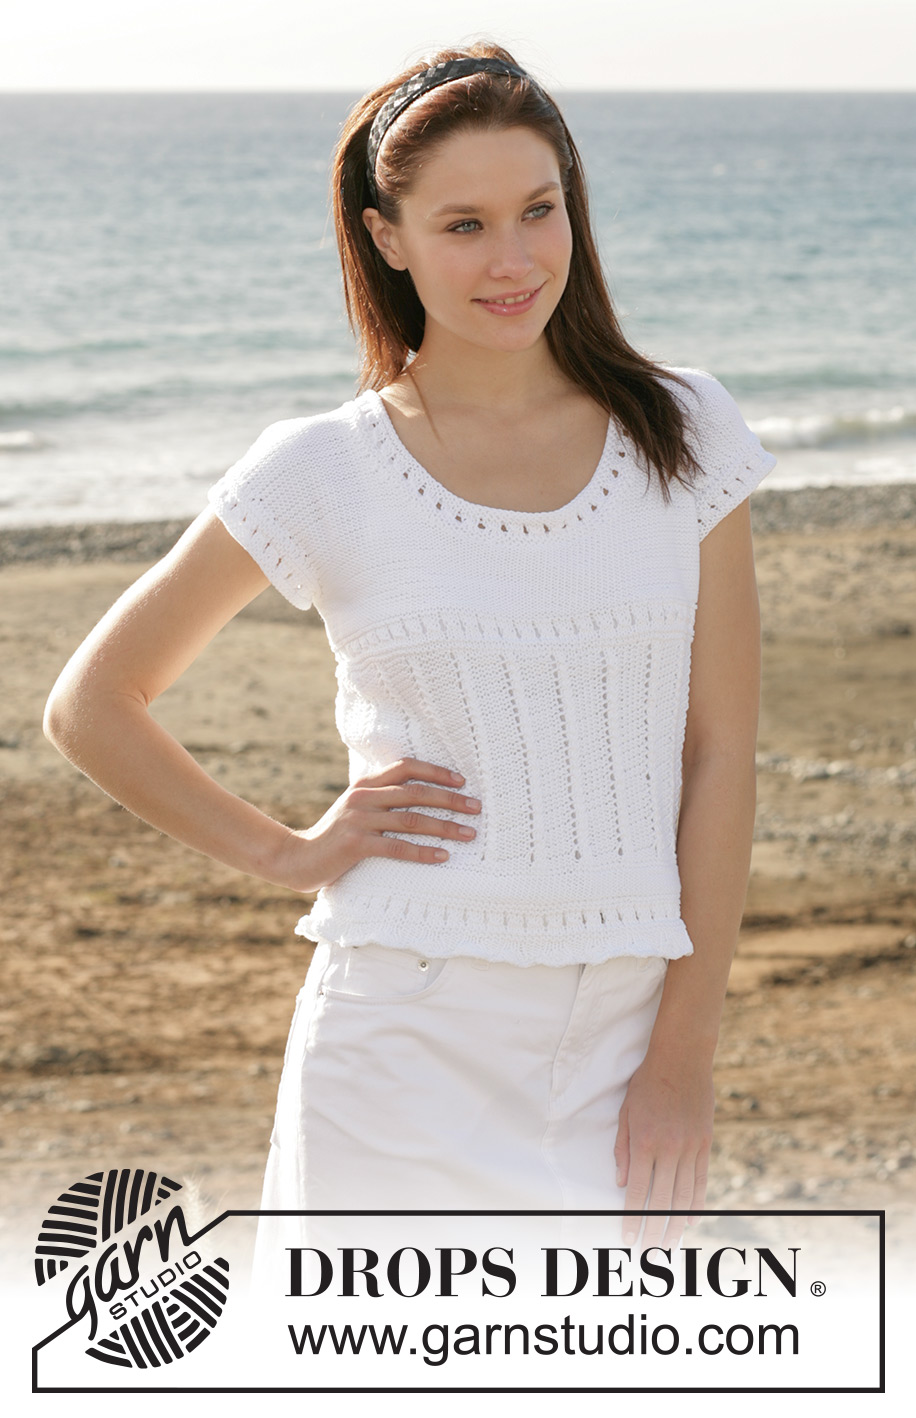
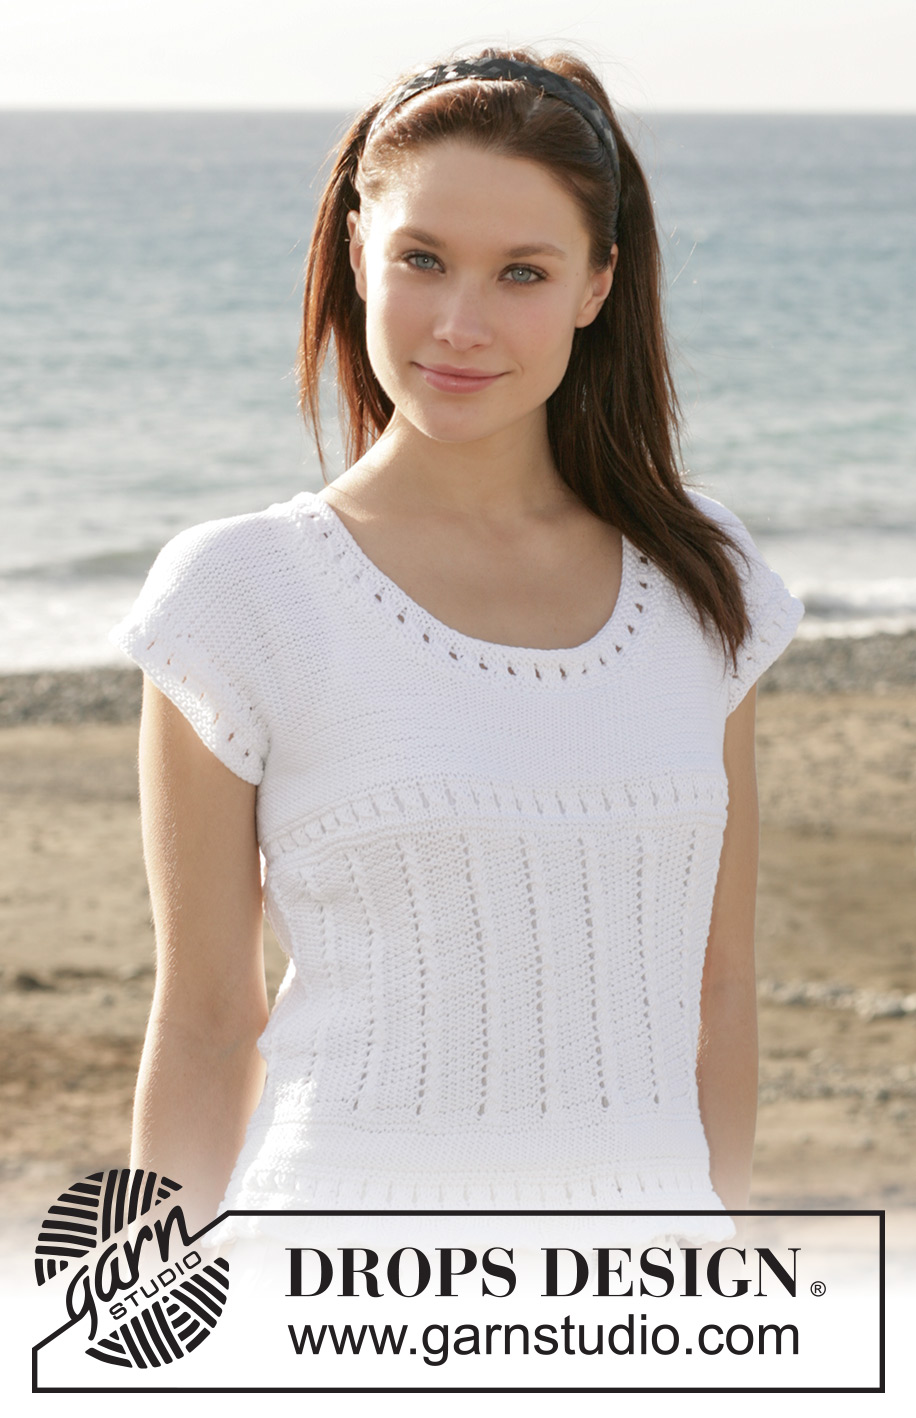
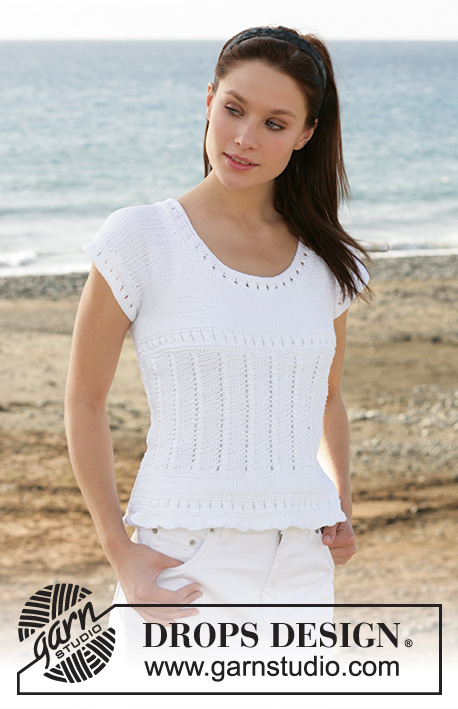
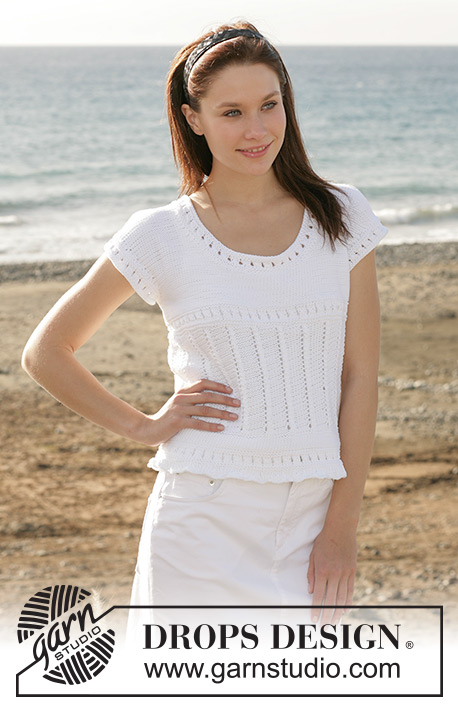
DROPS top with lace pattern in “Muskat”.
DROPS 101-23 |
|||||||||||||
|
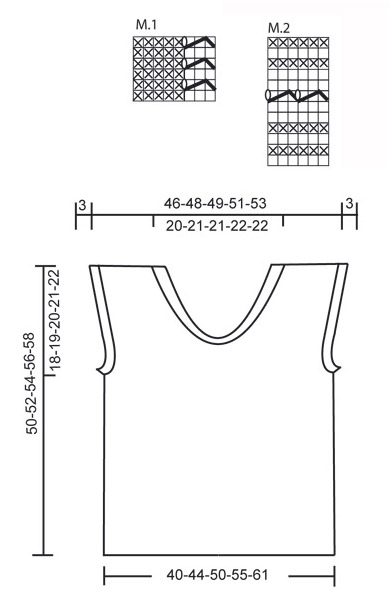
Knitting gauge: 21 sts x 28 rows on needles size 4 mm / US 6 in stockinette sts = 10 x 10 cm / 4" x 4". Garter st, in the round: K 1 round, P 1 round Pattern: See diagrams M.1 and M.2. The diagram is seen from the RS. Wavy border: 1st round: * K2, slip 1 st as if to knit, K2 tog, psso, K2, P3*, repeat from *-* 2nd round: K over K and P over P 3rd round: *K1, slip 1 st as if to knit, K2 tog, psso, K1, P3*, repeat from *-* 4th row: K over K and P over P (= K3/P3) Back and front piece: Worked in the round on circular needle. Cast on 280-310-350-390-430 sts on circular needle size 4 mm / US 6 and work 2 rounds in Rib, K7/P3. Continue with wavy border – see explanation above. After the border there are 168-186-210-234-258 sts on needle. Work 1 round with K3/P3 and then continue with 1 vertical repeat of diagram M.2. Then K 1 round and then continue in reverse stockinette st (purl all sts) until piece measures 9 cm / 3½". Now work 4 rounds in garter st, at the same time adjusting no of sts to 168-184-208-232-256 on the first round. Continue with M.1. When piece measures 25-26-27-28-29 cm / 9¾"-10¼"-10½"-11"-11½" work 1 repeat of M.2- at the same time adjusting no of sts back to 168-186-210-234-258 on the first round. After M.2 finish the piece in reverse stockinette st (P all sts). When piece measures 32-33-34-35-36 cm / 12½"-13"-13½"-13¾"-14¼" work next round as follows: 82-90-101-112-123 sts (= front piece), bind off 2-3-4-5-6 sts for armhole, 82-90-101-112-123 sts (= back piece), bind off 2-3-4-5-6 sts for armhole. Now complete each piece separately. Back piece: = 82-90-101-112-123 sts. Continue in reverse stockinette st, at the same time dec to shape the armhole on every other row: 1 st 1-2-4-6-8 times = 80-86-93-100-107 sts. When piece measures 37-40-42-45-48 cm / 14½"-15¾"-16½"-17¾"-19" inc for wide shoulders each side as follows: 1 st on every 4th row a total of 8-7-5-4-2 times = 96-100-103-108-111 sts. When piece measures 48-50-52-54-56 cm / 19"-19¾"-20½"-21¼"-22" bind off the middle 38-40-41-42-43 sts for neck and work each side separately. Continue and dec to shape the neckline on every other row: 1 st 2 times = 27-28-29-31-32 sts left on shoulder. Bind off when piece measures 50-52-54-56-58 cm / 19¾"-20½"-21¼"-22"-22¾". Front piece: = 82-90-101-112-123 sts. Continue in reverse stockinette st and dec for armhole and inc for wide shoulder as described for back piece. At the same time when piece measures 37-38-39-40-41 cm / 14½"-15"-15¼"-15¾"-16⅛" put the middle 18-20-21-22-23 sts on a holder for neck and work each side separately. Continue and dec to shape the neckline on every other row: 2 sts 2 times and 1 st 8 times = 27-28-29-31-32 sts left on shoulder. Bind off when piece measures 50-52-54-56-58 cm / 19¾"-20½"-21¼"-22"-22¾". Assembly: Sew shoulder seams. Neck border: Beg mid back and pick up approx 114 to 132 sts (divisible by 6) on double pointed needles size 4 mm / US 6 around the neck (including sts on stitch holder). Work 1 vertical repeat of M.2 and then bind off. Armhole border: Pick up approx 78 to 96 sts (divisible by 6) on double pointed needles size 4 mm / US 6 around the armhole. Work 1 vertical repeat of M.2 and then bind off. Repeat around the other armhole. |
|||||||||||||
Diagram explanations |
|||||||||||||
|
|||||||||||||
 |
|||||||||||||
Have you finished this pattern?Tag your pictures with #dropspattern #whitelilytop or submit them to the #dropsfan gallery. Do you need help with this pattern?You'll find 21 tutorial videos, a Comments/Questions area and more by visiting the pattern on garnstudio.com. © 1982-2026 DROPS Design A/S. We reserve all rights. This document, including all its sub-sections, has copyrights. Read more about what you can do with our patterns at the bottom of each pattern on our site. |
|||||||||||||


With over 40 years in knitting and crochet design, DROPS Design offers one of the most extensive collections of free patterns on the internet - translated to 17 languages. As of today we count 324 catalogs and 12290 patterns - 12280 of which are translated into English (US/in).
We work hard to bring you the best knitting and crochet have to offer, inspiration and advice as well as great quality yarns at incredible prices! Would you like to use our patterns for other than personal use? You can read what you are allowed to do in the Copyright text at the bottom of all our patterns. Happy crafting!
Post a comment to pattern DROPS 101-23
We would love to hear what you have to say about this pattern!
If you want to leave a question, please make sure you select the correct category in the form below, to speed up the answering process. Required fields are marked *.