
Popular categories
Looking for a yarn?


Comments / Questions (16)
![]() DROPS Design wrote:
DROPS Design wrote:
Etter 18 cm økes det 1 m i høyre side og felle 1 m i venstre side på hver 2.p totalt 6 ganger = 12 rader = 3,5 cm (totalt 11,5 cm). Da blir det 1,5 cm til mitten av luen.
19.01.2012 - 10:08
![]() Alejandra Leon wrote:
Alejandra Leon wrote:
Jag förstår inte riktigt denna del av beskrivningen: "Sedan fortsätts det att öka i vänster sida tills arb mäter 18 cm. Nu ökas det 1 m i höger sida på vartannat v och avm 1 m i vänster sida på vartannat v totalt 6 ggr. Fortsätt med avm i vänster sida tills arb mäter 23 cm = mitten på mössan." Hur ska jag ska kunna avmaska tills arbetet mäter 23 cm när det innan dess mätte 18 cm och man skulle öka 1 m och avm 1 m?
18.01.2012 - 14:04Jolanda wrote:
De stekenverhouding klopt wel: op de band in tricotsteek, maar de muts wordt alleen recht gebreid, en dat trekt meer in. Het is een fantastische muts. Gewoon super, hoe zo'n platte lap een heerlijke muts met oorflappen wordt!
23.11.2009 - 10:40
![]() DROPS Design NL wrote:
DROPS Design NL wrote:
Daarbij geven wij ook aan dat u altijd een proeflapje moet breien. Iedereen breit verschillend, maar voor dit patroon moet u altijd uitkomen op 17 st x 33 nld = 10 x 10 cm. Dat kan dan voor sommige breisters bijvoorbeeld 6 mm of 4,5 mm zijn. Ik hoop dat ik u hier voldoende uitleg heb gegeven ;o). Gr. Tine
22.09.2008 - 09:18
![]() DROPS Design NL wrote:
DROPS Design NL wrote:
Hoi Wilma. Volgens de Designafdeling is dit patroon correct. Elk patroon heeft afhankelijk van de model/motief enz. een eigen steekverhouding. Wat op de wikkel staat is - zoals bij alle andere garens een standaardsteekverhouding - maar die geldt natuurlijk niet altijd bij alle patronen.
22.09.2008 - 09:18
![]() Wilma wrote:
Wilma wrote:
De stekenverhouding klopt niet; in de breibeschrijving staat dat 17 steken en 33 naalden 10 x 10 cm is, terwijl op de wikkel van de wol staat dat 17 steken en 22 naalden 10 x 10 cm is. De wikkel komt beter overeen met de werkelijkheid. Ik vraag me nu af of de rest van het patroon wel goed is.
21.09.2008 - 16:47
|
|
DROPS 93-16 |
|
|
|
|
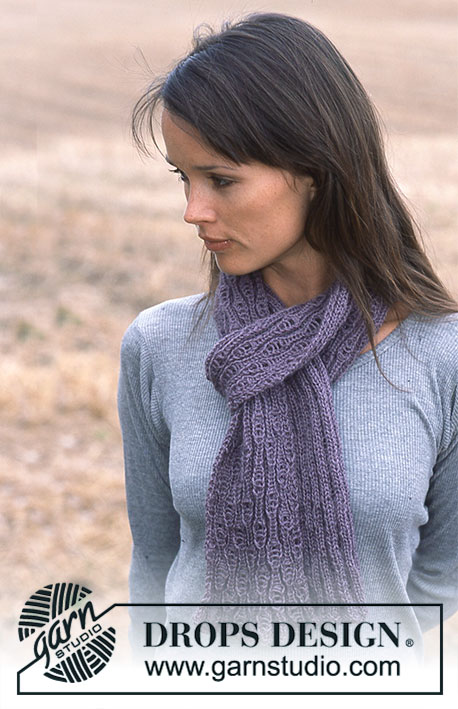
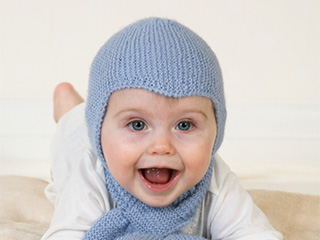
Skating hat and scarf with crochet rosettes in Alaska and Snow
DROPS 93-16 |
|
|
Gauge: 17 sts x 33 rows in garter st = 10 x 10 cm. HAT Cast on 31 sts with Alaska and knit 6 rows garter st. Then continue with garter st, at the same time inc 1 st at right side and dec 1 st at left side as follows: Row 1 (= right side): K 2, yo (= 1 inc), knit to last 4 sts and knit K 2 tog, K 2. Row 2 (= wrong side): K across row to yo, twist and K the yo, K 2. Repeat these 2 rows a total of 11 times (11 incs and 11 decs). Continue to dec at left side until the piece measures 9 cm (but do not inc at right side). Then dec 1 st at right side and inc 1 st at left side as follows: Row 1 (right side): K 1, sl 1, K 1, psso, knit to last 2 sts, yo, K 2. Row 2 (= wrong side): K 2, twist and knit the yo, knit across row. Repeat these 2 rows a total of 11 times. Continue to inc at left side until piece measures 18 cm. Now inc 1 st at right side and dec 1 st at left side every other row a total of 6 times. Continue to dec at left side until piece measures 23 cm = center of hat. Put a marker at each side of work. Now knit other side of hat, reversing all shaping. Bind off when the piece measures 46 cm. Assembly: Front = this side of hat has 3 whole points, and back = this side of hat has 2 whole points and 2 half points. Sew hat as follows: sew hat back by first sewing one half point to the first side of the first whole point. Then sew the other side of that whole point to the first side of the other whole point, then the other side of that whole point to the other half point. Then sew hat together at center back. Crocheted flower: Crochet with Snow as follows: Ch 4 and join into a ring with 1 sl st in 1st ch. Round 1: Crochet 7 sc in ring and finish with 1 sl st in sc at start of row. Round 2: * ch 3, 1 sl st in 2nd ch crocheted, 1 sc in the next st *, repeat * - * a total of 7 times and finish with 1 sl st at start of row. Round 3: 1 sc on back side of first sc from previous row, * ch 3, 1 sc in 2nd ch, 1 st in 1st ch crocheted, 1 sc on back side of the next sc from previous row *, repeat * - * around row and finish with ch 3, 1 sc in 2nd ch, 1 st in 1st ch crocheted, 1 sl st in sc at start of row. Crochet a 2nd flower and sew one to each earflap on hat. ____________________________________________________________ SCARF: Sizes: one-size Materials: DROPS ALASKA from Garnstudio 100 gr nr 05, charcoal grey and use: DROPS SNOW from Garnstudio small amount nr 09, dusty pink for crocheted blossom. DROPS 4.5 mm [US 7] and 5 mm [US 8] needles, or size needed to obtain correct gauge. Gauge: 17 sts x 33 rows on larger needles in garter st = 10 x 10 cm. Rib: * K 1, P 1 *, repeat * - *. SCARF Cast on 3 sts on larger needles with Alaska and knit garter st, increasing at each side as follows: Right side: knit 2 sts in first st. Left side: knit 2 sts in next to last st. Inc every other row 8 times = 19 sts. Then knit 10 cm garter st. Change to smaller needles and knit rib for 6 cm, put sts on st holder. Pick up 19 sts on smaller needles in the last garter st row and knit rib for 5 cm. Now knit sts from needles together with sts from st holder on larger needles by knitting 1st st from st holder together with 1st st from needle, then 2nd st with 2nd st, across row. You have two layers of rib. There are now 19 sts on the needle – measure the work from here. Continue in garter st. When the piece measures 40 cm change to smaller needles and knit rib for 6 cm. Change to larger needles and knit garter st for 10 cm more. Then dec every other row as follows: Right side: K 2 tog. Left side: slip 1 st as if to knit, K 1, psso. When 3 sts remain bind off all sts. Crocheted flower: Crochet 1 flower with Snow – see pattern under hat. Sew blossom in transition between garter st and rib on the side with the two layers of rib. Thread other end of scarf through the two layers when worn. |
|
Have you finished this pattern?Tag your pictures with #dropspattern or submit them to the #dropsfan gallery. Do you need help with this pattern?You'll find 20 tutorial videos, a Comments/Questions area and more by visiting the pattern on garnstudio.com. © 1982-2026 DROPS Design A/S. We reserve all rights. This document, including all its sub-sections, has copyrights. Read more about what you can do with our patterns at the bottom of each pattern on our site. |


With over 40 years in knitting and crochet design, DROPS Design offers one of the most extensive collections of free patterns on the internet - translated to 17 languages. As of today we count 325 catalogs and 12298 patterns - 12288 of which are translated into English (US/in).
We work hard to bring you the best knitting and crochet have to offer, inspiration and advice as well as great quality yarns at incredible prices! Would you like to use our patterns for other than personal use? You can read what you are allowed to do in the Copyright text at the bottom of all our patterns. Happy crafting!
Post a comment to pattern DROPS 93-16
We would love to hear what you have to say about this pattern!
If you want to leave a question, please make sure you select the correct category in the form below, to speed up the answering process. Required fields are marked *.