
Popular categories
Looking for a yarn?


Comments / Questions (25)
![]() Marga wrote:
Marga wrote:
Las explicaciones no se entienden demasiado bien. Sobre todo a la hora de hacer las uniones, imposible de entender. No sé si podré terminarlo.
14.04.2024 - 21:10
![]() Jenny wrote:
Jenny wrote:
Hi, I’m writing to ask about the instructions for the back, where you say increase 5 stitches in from the edge on A3. Does this mean after completing A2 and the remaining 6 trebles on the shoulder strap please? Also, it states 2 rows of A3, do I do A3 along the whole of the 43 chain stitches or just the first few as per the diagram? Do I do A3 then for all of the remaining rows on the back. Thank you
27.03.2024 - 21:02DROPS Design answered:
Dear Jenny, you increase 1 stitch on each side, working the 5th stitch from the side edge of the piece as follows: 2 treble crochet in 1 treble crochet. So you would be increasing in the last A.2 treble crochet at the beginning of the row and the first A.2 treble crochet at the end of the row. A.3 is worked over the new cast on stitches, so you repeat A.3 over all of the new chain stitches. Once you have finished working A.3 you only work A.2 and the treble crochets. Happy crochetting!
01.04.2024 - 00:25
![]() Jenny wrote:
Jenny wrote:
Hi, I’m writing to ask about the instructions for the back, where you say increase 5 stitches in from the edge on A3. Does this mean after completing A2 and the remaining 6 trebles on the shoulder strap please? Also, it states 2 rows of A3, do I do A3 along the whole of the 43 chain stitches or just the first few as per the diagram? Do I do A3 then for all of the remaining rows on the back. Thank you
27.03.2024 - 21:01DROPS Design answered:
Dear Jenny, you increase 1 stitch on each side, working the 5th stitch from the side edge of the piece as follows: 2 treble crochet in 1 treble crochet. So you would be increasing in the last A.2 treble crochet at the beginning of the row and the first A.2 treble crochet at the end of the row. A.3 is worked over the new cast on stitches, so you repeat A.3 over all of the new chain stitches. Once you have finished working A.3 you only work A.2 and the treble crochets. Happy crochetting!
01.04.2024 - 00:25
![]() Conny wrote:
Conny wrote:
Aan het einde van het lijf A6. Als je 3 stokjes in dezelfde steek haakt, krijg je steeds meer steken. Slechts één keer moet je ook minderen door 3 stokjes samen te haken. Je krijgt dus steeds meer steken en gezien de foto is dat niet de bedoeling. Hoe moet dat?
21.12.2023 - 22:14DROPS Design answered:
Dag Conny,
Ja, dat is verwarrend, waarschijnlijk moet deze ene steek in dat geval gewoon een stokje zijn.
14.01.2024 - 19:04
![]() Brigitte Le Gac wrote:
Brigitte Le Gac wrote:
Bonjour je ne comprends pas l étape de l assemblage du dos et des devants a propos des 8 maille en l air pourrais ton m éclairer par avance merci
12.09.2023 - 21:20DROPS Design answered:
Bonjour Mme Le Gac, les 8 mailles en l'air en taille S sont crochetés à la transition entre le devant gauche et le dos (pour le côté = sous le bras) et à la transition entre le dos et le devant droit (pour le côté = sous le bras); ce sont les mailles des emmanchures. Bon crochet!
13.09.2023 - 08:26
![]() Justyna wrote:
Justyna wrote:
Nie rozumiem w jaki sposób połączyć przody z tyłem. Robię 8 o łańcuszka potem w moim przypadku 12 o lewego przodu i dalej kompletnie nie wiem jak ruszyć.
08.09.2023 - 20:51DROPS Design answered:
Witaj Justyno, przerabiasz teraz na prawej stronie robótki: bierzesz lewy przód i przerabiasz zgodnie z opisem na początku części TYŁ & PRZODY, dalej przerabiasz 12 oł (podkrój rękawa), bierzesz tył i łączysz z przodem w jedną część przerabiając 1 słupek w każdy słupek/każde oczko łańcuszka tyłu (czyli wykonujesz narzut i wbijasz szydełko w pierwszy sł tyłu i przerabiasz słupek, itd.), przerabiasz 12 oł na podkrój rękawa i łączysz z prawym przodem przerabiając 1 słupek w każdy słupek/każde oczko łańcuszka prawego przodu, przerobić 8 oczek łańcuszka na końcu rzędu. Pozdrawiamy!
12.09.2023 - 08:55
![]() Evelyn wrote:
Evelyn wrote:
Ich habe eine Bitte ich weiss grad nicht weiter bei diesem Top.Ich habe auf beiden Seiten 20 Maschen für die Ärmel mit Luftmaschen gehäkelt .Muss ich diese getzt auch mit Stäbchen bis zu einer Länge von 22cm behandeln oder nicht?
25.07.2023 - 14:02DROPS Design answered:
Liebe Evelyn, beim Rumpfteil häkeln Sie: (von der Vorderseite gesehen): linkes Vorderteil, die 20 Luftmaschen, Rückenteil, 20 Luftmaschen, rechtes Vorderteil. Dann bei der 2. Reihe häkeln Sie 1 Reihe Stäbchen und dann häkeln Sie Stäbchen mit A.4 und A.5 beidseitig. Viel Spaß beim häkeln!
27.07.2023 - 14:03
![]() Irene Santos wrote:
Irene Santos wrote:
Muchas gracias por la respuesta. ¿Y en el caso de los delanteros? Una vez tejidos los 7cm del principio, comienzan las 11 filas de aumentos. ¿Habría que hacer también dos filas antes de comenzar los aumentos? ¿Como serían estas dos filas? Muchas gracias.
17.07.2023 - 15:00DROPS Design answered:
Hola Irene, sí, la espalda y los delanteros se trabajan de la misma manera. Lo único a tener en cuenta en los delanteros es que la sisa se trabaja solo a un lado (de cada delantero) y en el otro lado de los delanteros se trabaja el escote.
20.07.2023 - 14:32
![]() Irene Santos wrote:
Irene Santos wrote:
No me cuadran las medidas de la talla S del patrón con la muestra. Según la muestra de tensión que indican, 13 filas son 10 cm. Sin embargo, al tejer la espalda (y también los delanteros), una vez tejidos los 7 cm del inicio, se sigue con 11 filas de aumentos, de tal forma que al final la labor mide 17 cm. Es decir, las 11 filas de aumentos medirían 10 cm, pero según la muestra de tensión se necesitarían 13 filas para llegar a los 10 cm. ¿Es posible que falten dos filas de aumentos?
13.07.2023 - 00:00DROPS Design answered:
Hola Irene, primero tejes 7cm. Después trabajas 1 fila para unir los tirantes, 1 fila con A.2 y después comienzas con 11 filas de aumentos. Por lo tanto, son 13 filas y miden 10 cm.
17.07.2023 - 14:42
![]() Marita wrote:
Marita wrote:
Skal diagram 6 ses som at der er omgange med udtagelser, hhv omg 3,7,9 og 12? Jeg synes godt nok der er mange masker lige pludselig. Jeg læser altså, 3 stangmasker i samme stangmaske, som en udtagelse, er det forkert?
04.07.2023 - 14:12DROPS Design answered:
Hej Marita, nej du tager ikke ud på række 3,7,9,12, når du hækler 3 stangmasker+1lm i hver 4.maske, så har du samme antal masker som tidligere :)
05.07.2023 - 08:00
|
||||||||||||||||
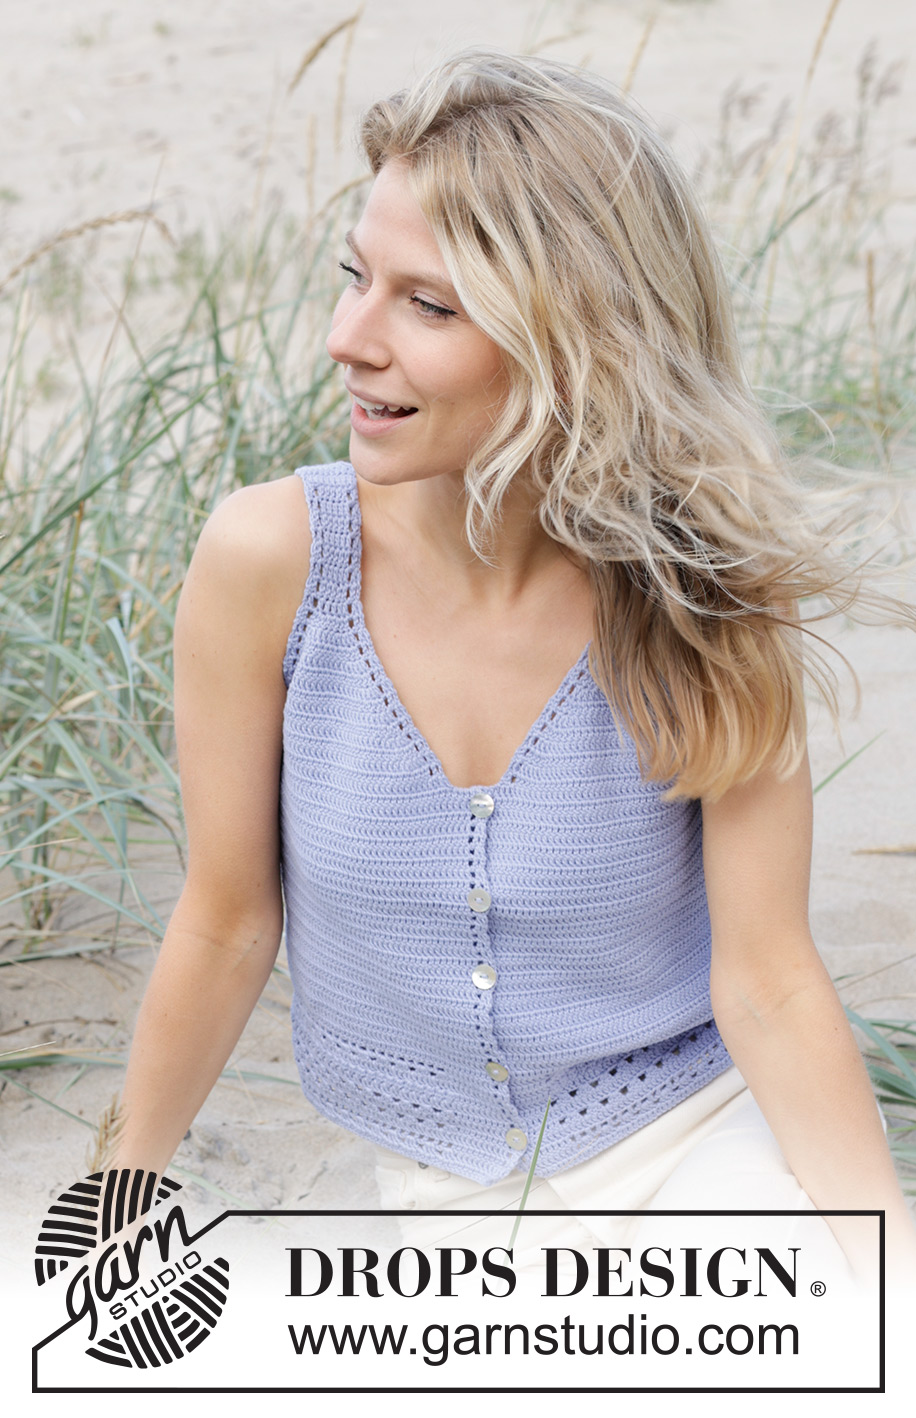
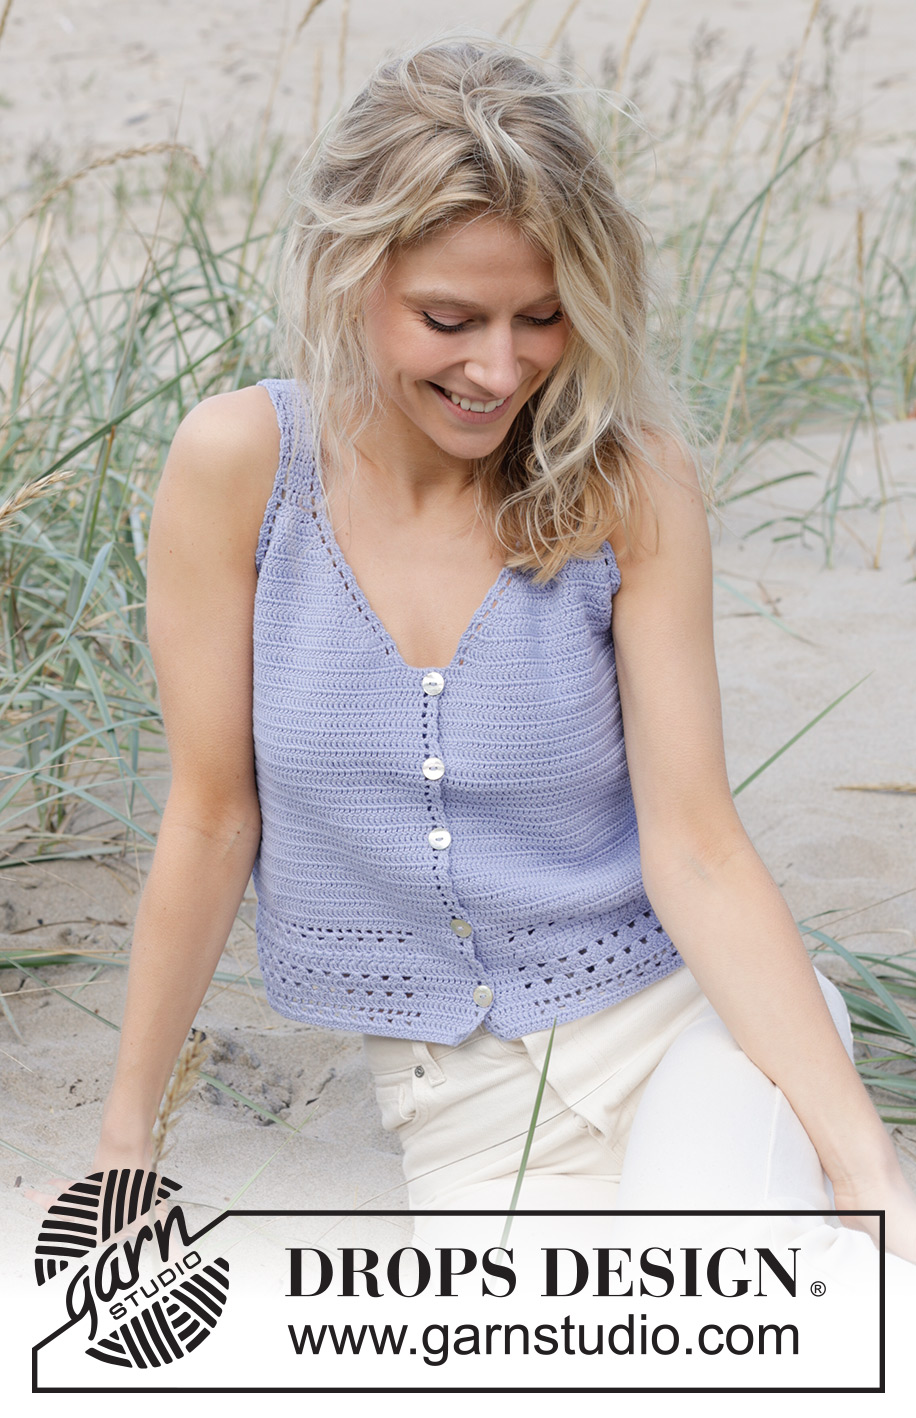
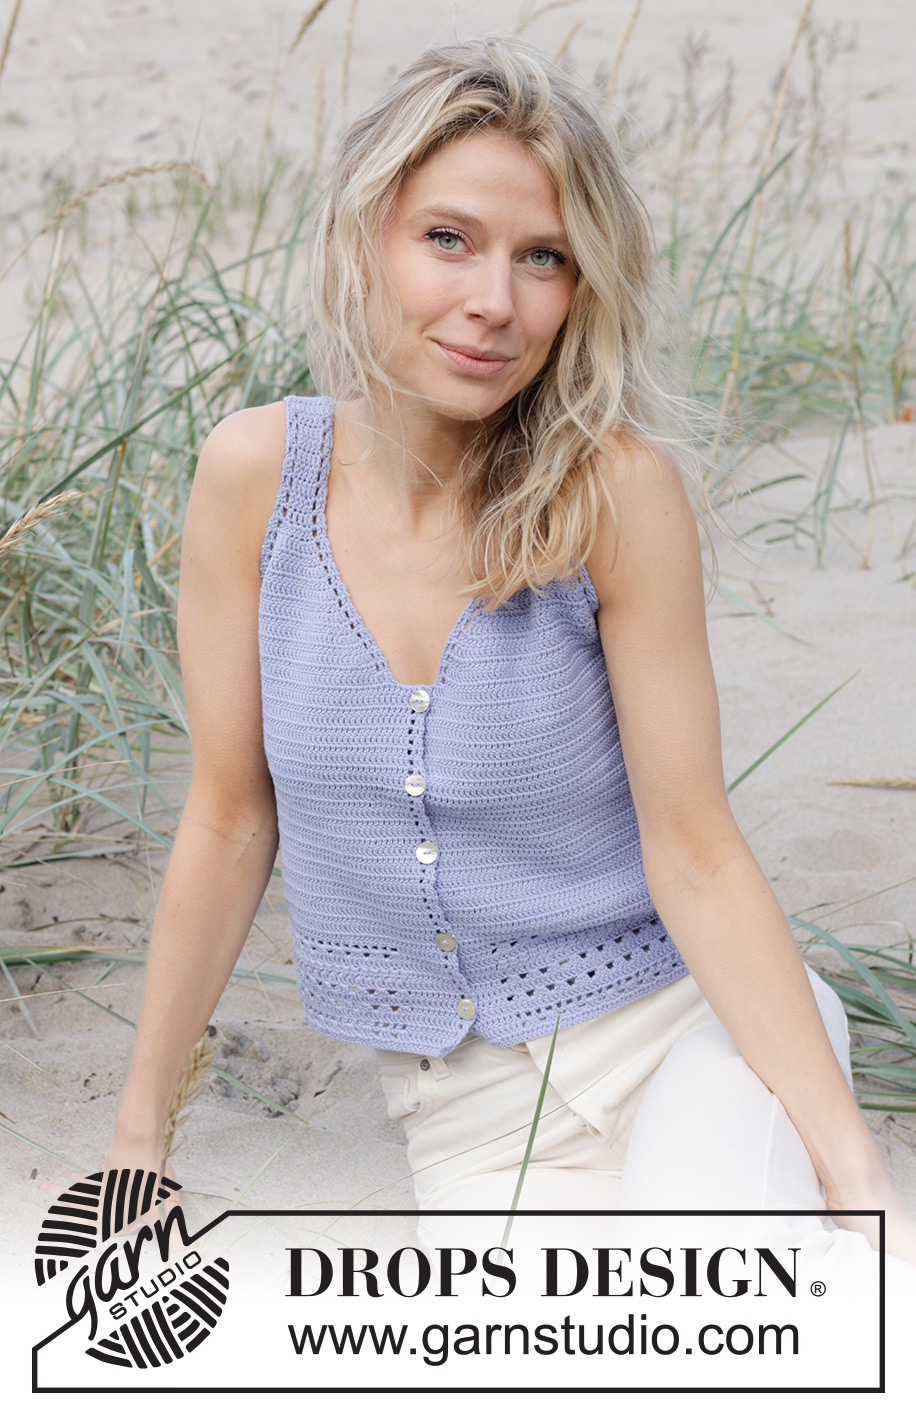
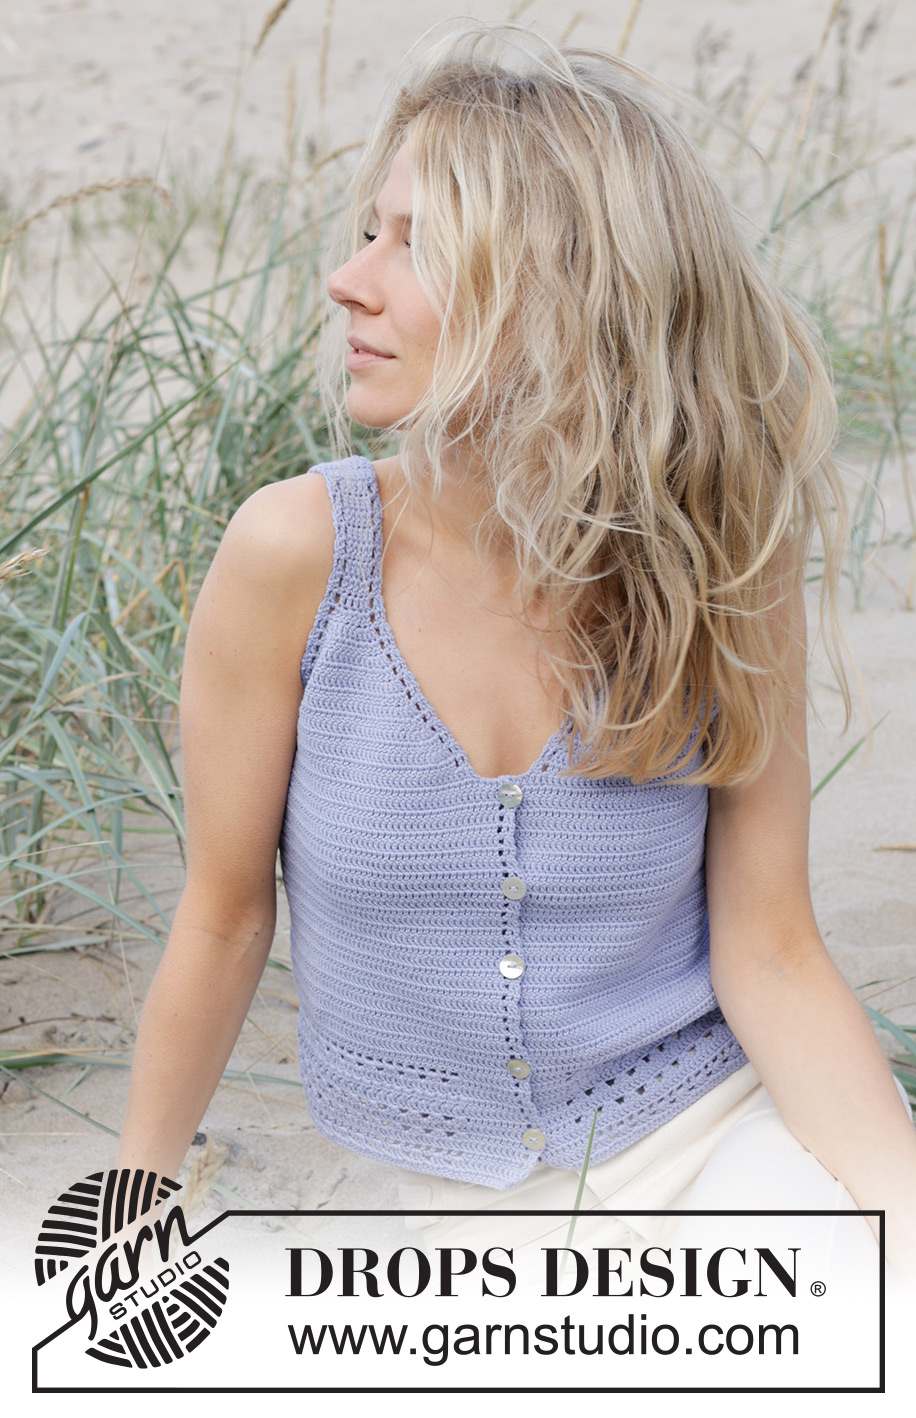
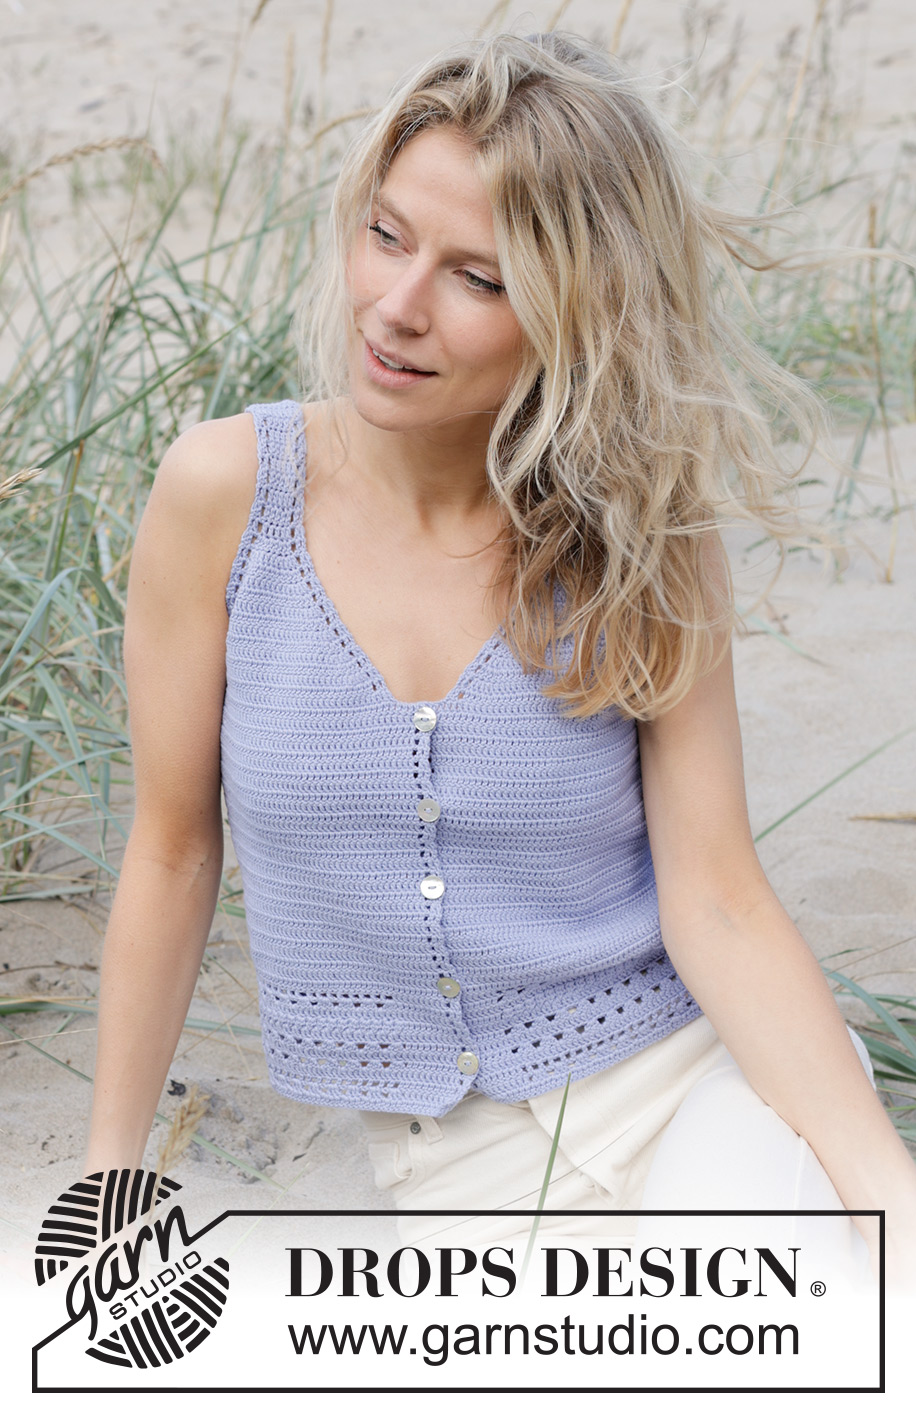
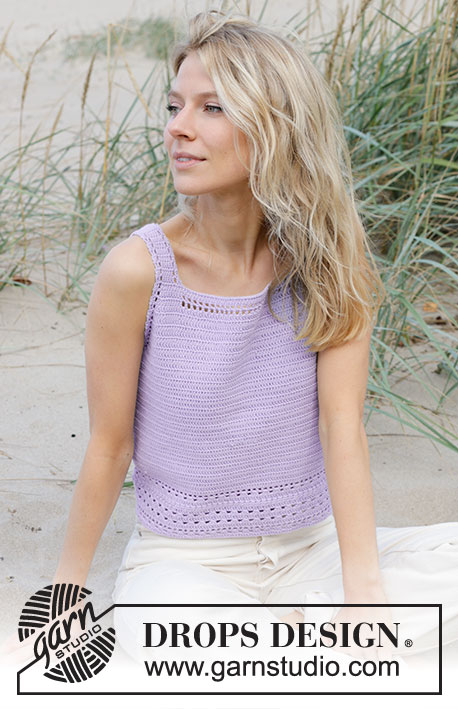
Scent of Lilac Vest#scentoflilacvest |
||||||||||||||||
 |
 |
|||||||||||||||
Crocheted top in DROPS Safran. The piece is worked top down with lace pattern. Sizes S - XXXL.
DROPS 241-28 |
||||||||||||||||
|
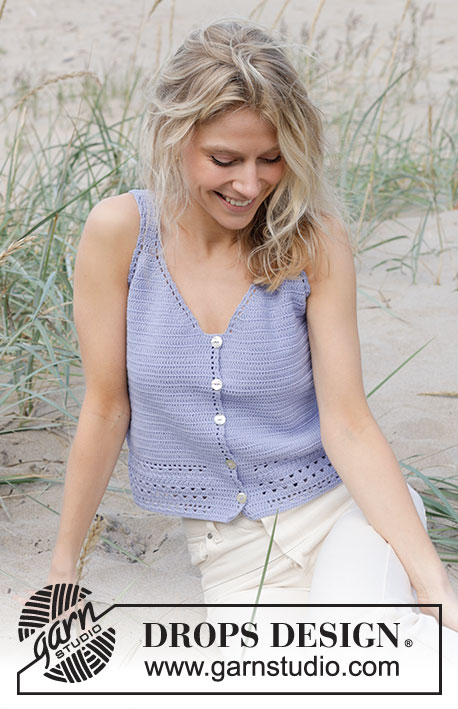
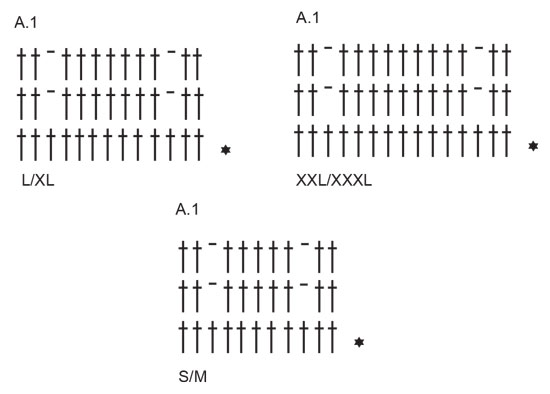
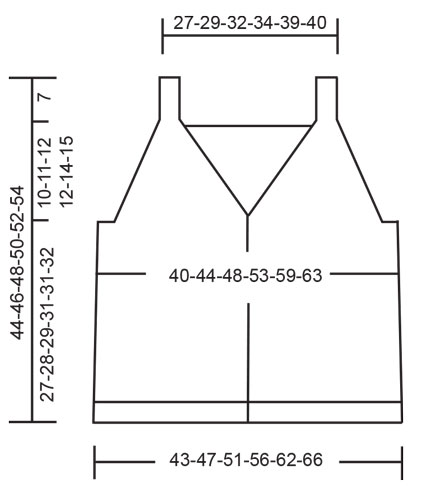
------------------------------------------------------- EXPLANATIONS FOR THE PATTERN: ------------------------------------------------------- CROCHET INFORMATION: At the beginning of each row of double crochets work 3 chain stitches which replace the first double crochet. CHAIN STITCH: If you work outermost on the hook the chain stitch will often be too tight; 1 chain stitch should be as long as 1 double crochet is wide. PATTERN: See diagrams A.1 to A.6. Choose diagram for your size in A.1. ------------------------------------------------------- START THE PIECE HERE: ------------------------------------------------------- TOP - SHORT OVERVIEW OF THE PIECE: The front and back pieces are begun separately, back and forth and top down, then joined and finished back and forth from mid-front. BACK PIECE: Work 13-13-15-15-17-17 CHAIN STITCHES – read description above, with hook size 3 MM = US C and DROPS Safran. Work 1 double crochet in the 4th chain stitch from the hook (2 double crochets) – read CROCHET INFORMATION, 1 double crochet in each of the next 9-9-11-11-13-13 chain stitches = 11-11-13-13-15-15 stitches. Continue with A.1, repeating the 2 top rows until the piece measures 7 cm = 2¾". Lay the piece to one side and work the second strap in the same way. Now work over both straps as follows: 1 double crochet in each of the 11-11-13-13-15-15 stitches from the first strap, work 43-47-51-55-63-67 chain stitches, 1 double crochet in each of the 11-11-13-13-15-15 stitches on the second strap = 65-69-77-81-93-97 stitches. On the next row work as follows: A.2 over the first 5 stitches, 1 double crochet in each double crochet/chain stitch until there are 5 stitches left, work A.2. Read the next section before continuing as you will work pattern as well as increasing for the armholes: On the next 2 rows work A.3 over the new stitches on the neck, A.2 over the 5 outermost stitches and 1 double crochet in each of the remaining stitches. When A.3 is finished, continue with 1 double crochet in each stitch and A.2 on each side. AT THE SAME TIME on the first row in A.3, increase 1 double crochet on each side by working 2 double crochets in 1 stitch (increase in the 5th stitch from the edge on both sides). Increase every row 11-12-13-14-16-17 times. After the increases there are 87-93-103-109-125-131 stitches and the piece measures approx. 17-18-19-19-21-22 cm = 6¾"-7"-7½"-7½"-8¼"-8¾". Finish with a row from the wrong side. Cut the strand. Lay the piece to one side and work the front pieces. RIGHT FRONT PIECE: Work 13-13-15-15-17-17 chain stitches with hook size 3 MM = US C and DROPS Safran. Work 1 double crochet in the 4th chain stitch from the hook (2 double crochets), 1 double crochet in each of the next 9-9-11-11-13-13 chain stitches = 11-11-13-13-15-15 stitches. Continue with A.1 for 7 cm = 2¾". Now increase in each side (differently at the beginning and end of the row). Continue with double crochets and A.2 over the outermost 5 stitches on each side and increase as follows: Increase 1 double crochet towards the side and 2 double crochets towards mid-front (increase every row in the 5th stitch from the side and the 5th and 6th stitch from the edge mid-front by working 2 double crochets in these stitches). Increase11-12-13-14-16-17 times (3 stitches increased each row). After all the increases there are 44-47-52-55-63-66 stitches and the piece measures approx 17-18-19-19-21-22 cm = 6¾"-7"-7½"-7½"-8¼"-8¾". Finish after a row from the wrong side. LEFT FRONT PIECE: Work 13-13-15-15-17-17 chain stitches with hook size 3 MM = US C and DROPS Safran. Work 1 double crochet in the 4th chain stitch from the hook (2 double crochets), 1 double crochet in each of the next 9-9-11-11-13-13 chain stitches = 11-11-13-13-15-15 stitches. Continue with A.1 for 7 cm = 2¾". Now increase in each side (differently at the beginning and end of the row). Continue with double crochets and A.2 over the outermost 5 stitches on each side and increase as follows: Increase 2 double crochets towards mid-front and 1 double crochet towards the side (increase every row in the 5th and 6th stitch from the edge mid-front and the 5th stitch from the side by working 2 double crochets in these stitches). Increase11-12-13-14-16-17 times (3 stitches increased each row). After all the increases there are 44-47-52-55-63-66 stitches and the piece measures approx 17-18-19-19-21-22 cm = 6¾"-7"-7½"-7½"-8¼"-8¾". Finish after a row from the wrong side, working 8 chain stitches at the end of the row. Now join the pieces. BODY: Work 1 double crochet in the 4th chain stitch from the hook (2 double crochets), 1 double crochet in each of the 4 chain stitches, 1 double crochet in each double crochet/chain stitch on the left front piece, work 8-12-12-18-16-20 chain stitches, 1 double crochet in each double crochet/chain stitch on the back piece, work 8-12-12-18-16-20 chain stitches, 1 double crochet in each double crochet/chain stitch on the right front piece, work 8 chain stitches at the end of the row. Turn and work 1 double crochet in the 4th chain stitch from the hook (2 double crochets), 1 double crochet in each of the 4 chain stitches, 1 double crochet in each double crochet/chain stitch to the end of the row = 203-223-243-267-295-315 stitches. Continue with A.4 over the right band, A.5 over the left band and 1 double crochet in each of the other stitches until the piece measures 18-19-20-21-22-23 cm = 7"-7½"-8"-8¼"-8¾"-9" from the join. Work 1 row and increase 14 double crochets evenly spaced (do not increase over A.4/ A.5) = 217-237-257-281-309-329 stitches. Work as follows from the right side: A.5, A.6 until there are 12 stitches left, work the first stitch in A.6, then A.4. When A.6 is finished, cut the strand. The top measures approx. 44-46-48-50-52-54 cm = 17¼"-18"-19"-19¾"-20½"-21¼" from the shoulder. ASSEMBLY: Sew the shoulder seams. Sew the buttons onto the left band; the top button 1 cm = ⅜" below the top edge, the bottom button 4 cm = 1½" up from the bottom edge, with the other 3-3-3-4-4-4 buttons evenly spaced between them. The buttons are buttoned through holes in the right band. |
||||||||||||||||
Diagram explanations |
||||||||||||||||
|
||||||||||||||||
 |
||||||||||||||||
 |
||||||||||||||||
 |
||||||||||||||||
Have you finished this pattern?Tag your pictures with #dropspattern #scentoflilacvest or submit them to the #dropsfan gallery. Do you need help with this pattern?You'll find 6 tutorial videos, a Comments/Questions area and more by visiting the pattern on garnstudio.com. © 1982-2026 DROPS Design A/S. We reserve all rights. This document, including all its sub-sections, has copyrights. Read more about what you can do with our patterns at the bottom of each pattern on our site. |
||||||||||||||||


With over 40 years in knitting and crochet design, DROPS Design offers one of the most extensive collections of free patterns on the internet - translated to 17 languages. As of today we count 324 catalogs and 12290 patterns - 12280 of which are translated into English (US/in).
We work hard to bring you the best knitting and crochet have to offer, inspiration and advice as well as great quality yarns at incredible prices! Would you like to use our patterns for other than personal use? You can read what you are allowed to do in the Copyright text at the bottom of all our patterns. Happy crafting!
Post a comment to pattern DROPS 241-28
We would love to hear what you have to say about this pattern!
If you want to leave a question, please make sure you select the correct category in the form below, to speed up the answering process. Required fields are marked *.