
Popular categories
Looking for a yarn?




























Comments / Questions (8)
 Cécile wrote:
Après avoir fait les augmentations du devant du chausson, il faut commencer les côtes. Vous dites tricoter trois mi Jersey et 12 mai suivantes en côte à partir. D’où faut-il commencer ces trois mail Jersey du marqueur de début de tour du premier marqueur d’augmentation ? Merci de votre retour
02.09.2026 - 13:34DROPS Design answered:
Bonjour Cécile, vous tricotez ce tour en commençant par le début du tour, c'est le même début qu'auparavant, vous aurez ainsi les mailles du dessus du pied en côtes et les autres mailles en jersey. Bon tricot!
03.09.2026 - 18:09
Brugere wrote:
Bonjour, Je ne comprends pas pourquoi il faut couper le fil après les 24 mailles? LES 6 dernières mailles avant l ouverture du dessus de pied ont en fait quoi? Pour l arrière du chausson vous dites commencer sur l envers faut il retourner l ouvrage completement? Pour avoir le point mousse face à nous ?? Je ne comprends pas vraiment. Merci pour votre aide . Cordialement
16.02.2022 - 10:33DROPS Design answered:
Bonjour Mme Brugere, on termine le dernier tour par les 24 mailles jersey pour terminer le tour comme avant. Ensuite vous coupez le fil et vous tricotez la suite du chausson en rangs (= allers et retours) en commençant sur l'envers et en tricotant la 1ère maille à droite des mailles rabattues (vu sur l'endroit). Bon tricot!
16.02.2022 - 11:31
Michèle PREVOST wrote:
Je propose Chaleur discrète
08.08.2021 - 02:42
 Alexandra Janse wrote:
À pas de souris
05.08.2021 - 09:45
 Avely wrote:
Snowflake walk
04.08.2021 - 10:05
 Helen wrote:
Nice simple design.
04.08.2021 - 06:55
Erna wrote:
Sense & sensibility
04.08.2021 - 02:36
 Yvonne Faasen wrote:
Nice and cosy
03.08.2021 - 16:06
|
|
Grandma's Softies#grandmassoftiesslippers |
|
 |
 |
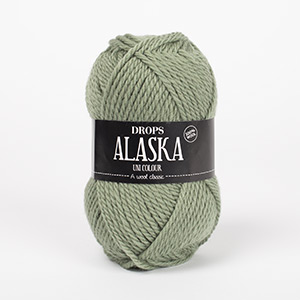
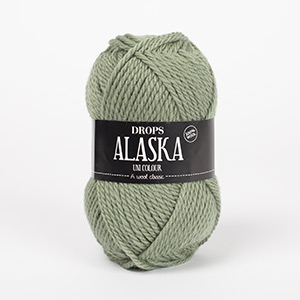
Knitted slippers in DROPS Alaska. The piece is worked in stockinette stitch with ribbed edges. Sizes 35 – 43 = US 4 1/2 – 12 1/2.
DROPS 227-58 |
|
|
------------------------------------------------------- EXPLANATIONS FOR THE PATTERN: ------------------------------------------------------- RIDGE/GARTER STITCH (worked back and forth): Knit all rows. 1 ridge = knit 2 rows. INCREASE TIP: Increase by making 1 yarn over. On the next round/row, work the yarn over twisted to avoid a hole. DECREASE TIP: Start 2 stitches before the marker-stitch, knit 2 together, knit 1 (= marker-stitch), slip 1 stitch as if to knit, knit 1 and pass the slipped stitch over the knitted stitch (= 2 stitches decreased). ------------------------------------------------------- START THE PIECE HERE: ------------------------------------------------------- SLIPPER – SHORT OVERVIEW OF THE PIECE: The piece is worked in the round with double pointed needles, from the toe to the top of the foot, then worked back and forth on circular needle to mid-back of heel. The slipper is sewn together at the back of the heel and at the toe. FRONT OF SLIPPER: Cast on 22 stitches with double pointed needles size 3.5 MM = US 4 and DROPS Alaska. Work 1 round of stockinette stitch. Insert 1 marker in the first stitch and 1 marker in the 12th stitch on the round (= sides). Continue with stockinette stitch in the round. AT THE SAME TIME on the first round increase 1 stitch on each side of both marker-stitches – read INCREASE TIP (= 4 stitches increased). Increase like this every 2nd round a total of 4-5-6 times = 38-42-46 stitches. REMEMBER THE KNITTING GAUGE! When the piece measures 10-10-11 cm = 4"-4"-4⅜", work rib on top of the foot on the next round as follows: Work 3 stitches in stockinette stitch, * purl 1 knit 1 *, work from *-* over the next 12-14-16 stitches, purl 1 and work 22-24-26 stitches in stockinette stitch. Continue working like this until the piece measures 14-14-15 cm = 5½"-5½"-6" from the cast-on edge. You can try the slipper on and work to desired length. Now bind off stitches for the opening on the next round as follows: Work 3 stitches in stockinette stitch, purl 1, knit 1, 1 stitch in GARTER STITCH – read description above, bind off the next 7-9-11 stitches (bind off with knit over knit and purl over purl), 1 stitch in garter stitch, knit 1, purl 1 and 22-24-26 stitches in stockinette stitch. Cut and fasten the strand. The slipper is finished back and forth as described below. BACK OF SLIPPER: There are 31-33-35 stitches on needle. Start from the wrong side and work stockinette stitch back and forth with 1 edge stitch in garter stitch, purl 1, knit 1 on each side (seen from the wrong side). When you have worked 3 rows, work the next row from the right side where you increase 1 stitch on the inside of the 4 outermost stitches on each side – remember INCREASE TIP (= 2 stitches increased). Increase like this every 4th row (every 2nd row from the right side) a total of 4-5-6 times on each side = 39-43-47 stitches. Work until the piece measures 20-22-25 cm = 8"-8¾"-9¾" from the cast-on edge. There is approx. 2 cm = ¾" left to finished length. You can try the slipper on and work to desired length. Insert 1 marker in the middle stitch on the row –19-21-23 stitches on each side of the marker-stitch. On the next row from the right side decrease 1 stitch on each side of the marker-stitch – read DECREASE TIP. Decrease like this every 2nd row a total of 3 times = 33-37-41 stitches. Bind off with knit from the right side, leaving a strand length of approx. 20 cm = 8" to be used when assembling. Work the other slipper in the same way. ASSEMBLY: Fold the bind-off edge double and sew the slipper together mid-back – sew in the outermost loop of the stitches so the seam is flat. Sew the hole in the toe together using grafting stitches – sew the 11 stitches on top of the foot together with the 11 stitches underneath the foot. |
|
Have you finished this pattern?Tag your pictures with #dropspattern #grandmassoftiesslippers or submit them to the #dropsfan gallery. Do you need help with this pattern?You'll find 9 tutorial videos, a Comments/Questions area and more by visiting the pattern on garnstudio.com. © 1982-2026 DROPS Design A/S. We reserve all rights. This document, including all its sub-sections, has copyrights. Read more about what you can do with our patterns at the bottom of each pattern on our site. |
|






With over 40 years in knitting and crochet design, DROPS Design offers one of the most extensive collections of free patterns on the internet - translated to 17 languages. As of today we count 333 catalogs and 12532 patterns - 12522 of which are translated into English (US/in).
We work hard to bring you the best knitting and crochet have to offer, inspiration and advice as well as great quality yarns at incredible prices! Would you like to use our patterns for other than personal use? You can read what you are allowed to do in the Copyright text at the bottom of all our patterns. Happy crafting!
Post a comment to pattern DROPS 227-58
We would love to hear what you have to say about this pattern!
If you want to leave a question, please make sure you select the correct category in the form below, to speed up the answering process. Required fields are marked *.