
Looking for a yarn?


Comments / Questions (44)
![]() J Dennis wrote:
J Dennis wrote:
Thanks so much for your quick response. I meant to ask if the first row of the pattern A is a wrong side row, so that you are doing the cables on the right side?
03.01.2025 - 02:31DROPS Design answered:
Hi J Dennis, Again, as you are working in the round, all rows in the diagram are worked from the right side and all cabling will also be from the right side. Happy knitting!
03.01.2025 - 08:21
![]() J Dennis wrote:
J Dennis wrote:
Is the A section supposed to start on the wrong side? Also, what is the purpose of having 4 knits in a row in just one section of the ribbing? Is it really necessary?
02.01.2025 - 04:08DROPS Design answered:
Hi J Dennis, You are working in the round (so always from the right side), and read each row in the diagram from right to left, starting with the bottom row. The 4 knitted stitches are mid-front as part of the pattern but, if you prefer, the rib can be a regular knit 2, purl 2 all the way round. Happy New Year!
02.01.2025 - 12:43
![]() Alie wrote:
Alie wrote:
Wat betekent iedere andere naald? is dat elke naald of om de naald Alvast bedankt.
16.11.2024 - 15:28DROPS Design answered:
Dag Alie,
Met iedere andere naald wordt om de naald bedoeld, dus de ene naald wel en de andere naald niet.
16.11.2024 - 17:54
![]() Denise wrote:
Denise wrote:
Bonjour je suis rendu a faire le raglan. On doit faire 23 diminution au 2 tour c'est a dire 46 rangs au total. Comment on peut diminuer 23 fois avec 15 mailles de chaque cote de A1? Merci
01.04.2024 - 20:06DROPS Design answered:
Bonjour Denise, augmentez pour le raglan comme indiqué sous RAGLAN au début des explications, autrement dit le motif A.1 va progressivement diminuer d'1 maille au début et d'1 m à la fin tous les 2 tours. Tricotez les mailles comme elles se présentent quand vous n'avez plus suffisamment de mailles pour tricoter une torsade complète à cause des diminutions. Bon tricot!
02.04.2024 - 15:43
![]() Rebecca wrote:
Rebecca wrote:
Hallo, Ich verstehe nicht ganz genau wie ich das nun abketten soll. "Die Arbeit wird nun in Hin- und Rück-Reihen ab dem vorderen Rand weitergestrickt – GLEICHZEITIG am Anfang jeder Reihe, d.h. beidseitig, wie folgt für den Halsausschnitt abketten: 2 Maschen je 2 x und 1 Masche je 2 x." Was genau ist mit 2 maschen je 2 x und 1 masche je 2 x gemeint?
15.02.2024 - 10:35DROPS Design answered:
Liebe Rebecca, wenn die mittleren Maschen für den Halsausschnitt stillgelegt wurden, strickt man die Passe weiter in Hin- und Rückreihen, die Raglanabnahmen wie zuvor stricken, aber gleichzeitig, wird man ab Hals (Hinreihen ab rechtes Vorderteil/Rückreihen ab links Vorderteil) stricken und Maschen für den Hals so abketten: 2 Maschen am Anfang der 4 nächsten Reihen (2 M x 2 M beiseitig) dann 1 Masche am Anfang der 4 nächsten Reihen (1 Maschen 2 Mal beidseitig). Viel Spaß beim stricken!
15.02.2024 - 15:23
![]() Hilary K wrote:
Hilary K wrote:
Hello, I’m having difficulty reading the cable for this pattern, as the different sections (e.g A.1e, A.1d, etc) all have a different number of rows, so finding my place is confusing! Do you have any tips or advice on how to keep track of where I am in the various sections? Thank you!
13.01.2024 - 13:36DROPS Design answered:
Dear Hillary, you could use markers of different colours to show when a new repeat of each chart starts, so that you can at least count how many rows you have worked in each repeat of each chart and remember which row you need to work now. You could also keep count by making a table in your computer or in paper of which row of each chart to work in each row of the pattern. Happy knitting!
14.01.2024 - 20:05
![]() Jelly Zwaan wrote:
Jelly Zwaan wrote:
Goedenavond, ik heb een vraag over patroon 37. Omdat de verschillende teltekeningen allemaal in een andere toer eindigen, weet ik niet zo goed hoe ik het kan volgen. Weet u hoe ik dit het handigst kan aanpakken? Ik raak erdoor van in de war. Alvast erg bedankt, met vriendelijke groeten Jelly
21.08.2023 - 21:06DROPS Design answered:
Dag Jelly,
Je zou het telpatroon een aantal keren uit kunnen printen en dan de verschillende telpatronen in de hoogte aan elkaar plakken. Op die manier kun je beter zien wat je moet doen.
22.08.2023 - 20:11
![]() Lyna Madec wrote:
Lyna Madec wrote:
Bonjour j'ai un soucis de compréhension du diagramme A1d et A1b s'arrête au 12e rang A1e et A1a s'arrête au 14e rang et A1c continue jusqu'au 22e rang comment dois je tricoter à partir du 12e rang sans les explications? est ce que par exemple pour A1a je dois revenir au 1er rang après le 14e rang? je vous remercie pour la vitesse de réponse de ma 1ere question
19.01.2023 - 10:28DROPS Design answered:
Bonjour Mme Madec, lorsqu'un des diagrammes est terminé en hauteur, reprenez-le au 1er rang, mais continuez les autres comme avant et continuez ainsi, autrement dit, les diagrammes se répètent sur un nombre différent de mailles, mais les torsades doivent bien être tricotés au bon rythme indiqué par chacun des diagrammes. Bon tricot!
19.01.2023 - 11:13
![]() Lyna Madec wrote:
Lyna Madec wrote:
Bonjour ce modèle a été corrigé et je ne comprend pas où ce fait la correction merci
16.01.2023 - 14:43DROPS Design answered:
Bonjour Mme Madec, cette correction ne s'applique que si vous avez imprimé les explications avant cette date, sinon, tout est juste ainsi, vous pouvez imprimer le modèle. Bon tricot!
16.01.2023 - 16:43
![]() Myriam DEVAUCHELLE wrote:
Myriam DEVAUCHELLE wrote:
Finalement, je pense avoir compris que le début du rang se trouve de chaque côté de A1c (les 17 mailles sur l'arrêt de mailles), et donc je rabats de chaque côté de cet arrêt de mailles pour l'encolure. comment fait t' on pour rabattre proprement: 2 fois 2 mailles ensemble ou tricoter 2 mailles et passer la première sur la 2°, et recommencer une fois pour diminuer de 2 mailles. Comme on tricote en aller retour, comment fait t'on le retour avec le dessin? encore merci d'avance
04.12.2022 - 16:49DROPS Design answered:
Bonjour Mme Devauchelle, vous devez simplement rabattre les mailles de l'encolure, autrement dit, coupez le fil et reprenez le rang à partir de l'encolure, et rabattez les 2 premières mailles (tricotez 2 mailles comme elles se présentent, passez la 1ère de ces 2 mailles par-dessus la 2ème etc;). veillez à bien reprendre du bon côté pour que les torsades soient toujours sur l'endroit et continuez les diagrammes comme avant en tricotant les mailles comme indiqué (à l'endroit ou à l'envers sur l'envers). Bon tricot!
06.12.2022 - 10:12
|
|||||||||||||||||||||||||
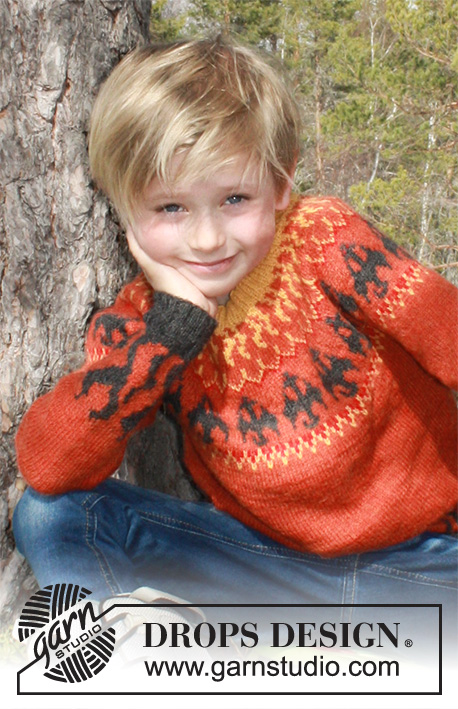
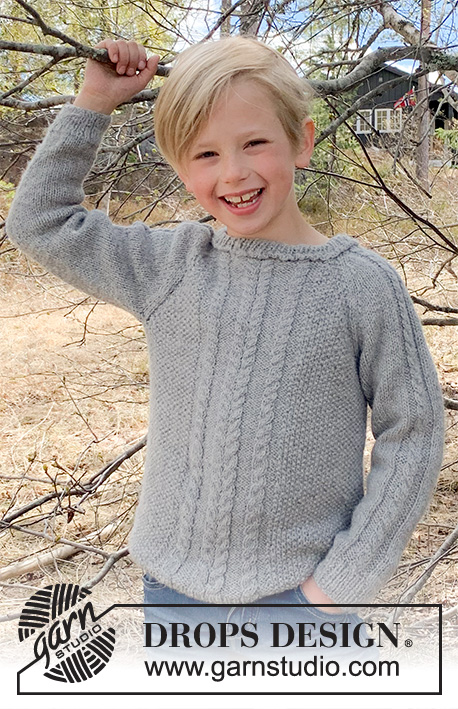
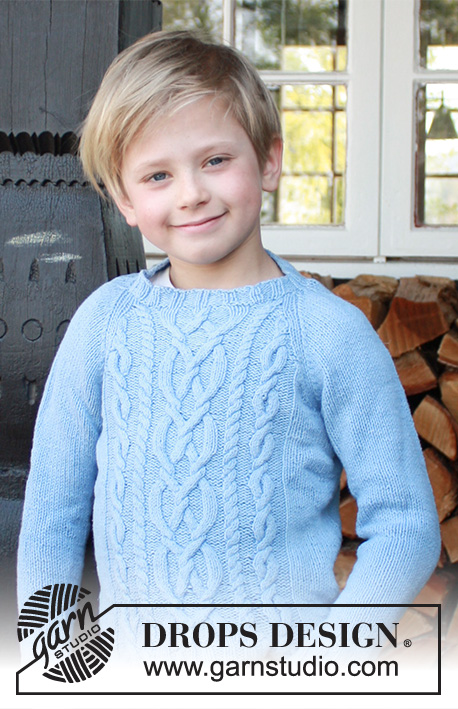
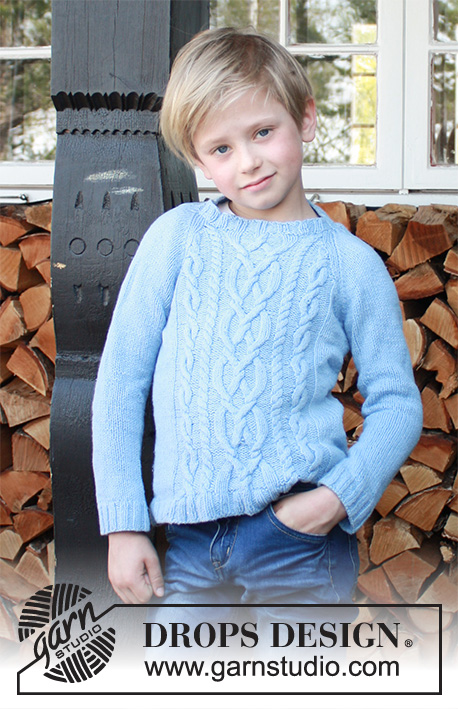
Winter Clouds#wintercloudssweater |
|||||||||||||||||||||||||
 |
 |
||||||||||||||||||||||||
Knitted sweater for kids with raglan and cables in DROPS Karisma or DROPS Lima. Size 5-14 years
DROPS Children 37-12 |
|||||||||||||||||||||||||
|
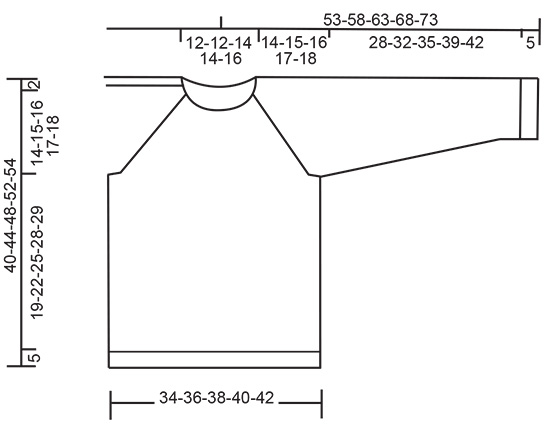
---------------------------------------------------------- EXPLANATION FOR THE PATTERN: ---------------------------------------------------------- PATTERN: See diagram A.1. The diagram shows the pattern seen from right side. INCREASE TIP (applies to sleeve): Increase stitches on each side of 2 stitches on the underside of sleeve. Increase by making 1 yarn over on each side of the 2 middle stitches. On next round work yarn overs twisted to avoid holes. RAGLAN: Decrease on each side of all 4 markers(= 8 decreases per round). Work until 3 stitches remain before marker and knit 2 together, knit 2 (marker is between these 2 stitches), slip 1 stitch knitwise, knit 1, pass slipped stitch over stitch worked. ---------------------------------------------------------- START THE PIECE HERE: ---------------------------------------------------------- SWEATER - SHORT OVERVIEW OF THE PIECE: Body is worked in the round on circular needle up to armhole. Work sleeves in the round on double pointed needles. Slip the parts together and work yoke in the round from here. After decrease for neck work back and forth. Work neck edge in the round on a short circular needle or double pointed needles. BODY: Cast on 158-166-174-182-190 stitches on circular needle size 3 mm = US 2,5 with Karisma or Lima. Knit 1 round, then work rib as follows: * Purl 2, knit 2 *, work from *-* over 20 stitches, knit 2, then work from *-* the rest of round (there are 4 knit stitches mid front, i.e. this round does not begin in the side). When piece measures 5 cm = 2", switch to circular needle size 4 mm = US 6. Work next round as follows: Purl 2, knit 1, 1 yarn over, knit 1, purl 2 in each of the next 2 stitches (= 4 purl stitches), knit 1, 1 yarn over, knit 1, purl 2, knit 2 in each of the next 2 stitches (= 4 knit stitches), purl 2, knit 1, 1 yarn over, knit 1, purl 2 in each of the next 2 stitches (= 4 purl stitches), knit 1, 1 yarn over, knit 2 (= mid front), 1 yarn over, knit 1, purl 2 stitches in each of the next 2 stitches (= 4 purl stitches), knit 1, 1 yarn over, knit 1, purl 2, knit 2 in each of the next 2 stitches (= 4 knit stitches), purl 2, knit 1, 1 yarn over, knit 1, purl 2 stitches in each of the next 2 stitches (= 4 purl stitches), knit 1, 1 yarn over, knit 1, purl 2. Work the rest of round as follows in the different sizes: SIZE 5/6 years: Knit 1, * knit 2 together, knit 4, knit 2 together, knit 5 *, work from *-* the rest of round. SIZE 7/8 years: * Knit 2 together, knit 5 *, work from *-* the rest of round. SIZE 9/10 years: Knit 8, * knit 2 together, knit 5 *, work from *-* the rest of round. SIZE 11/12 years: Knit 7, * knit 2 together, knit 5, knit 2 together, knit 6 *, work from *-* the rest of round. SIZE 13/14 years: Knit 6, * knit 2 together, knit 6 *, work from *-* the rest of round. ALL SIZES: There are now 160-168-176-184-192 stitches. Continue as follows: Work A.1 over the first 60 stitches (i.e. A.1a over the first 14 stitches, A.1b over the next 4 stitches, A.1c over the next 24 stitches, A.1d over the next 4 stitches and A.1e over the last 14 stitches), work in stockinette stitch over the remaining stitches on round. Count 14-16-18-20-22 stitches outwards from each side of A.1 and insert 1 marker (these marks the sides), there are 72-76-80-84-88 stitches between markers on back piece. REMEMBER THE KNITTING GAUGE! When piece measures 24-27-30-33-34 cm = 9½"-10⅝"-11¾"-13"-13 13/8", bind off 6 stitches in each side for armholes (i.e. 3 stitches on each side of each marker) = 148-156-164-172-180 stitches on needle. Put piece aside and work the sleeves. SLEEVE: Cast on 40-44-44-48-48 stitches on double pointed needles size 3 mm = US 2,5 with Karisma or Lima. Knit 1 round, continue with rib with knit 2 and purl 2 for 5 cm = 2". Insert 1 marker between the first 2 stitches = mid under sleeve). Switch to double pointed needles size 4 mm = US 6 and work in stockinette stitch. When sleeve measures 8-8-9-9-10 cm = 3⅛"-3⅛"-3½"-3½"-4", increase 1 stitch on each side of the 2 stitches under sleeve – read INCREASE TIP in explanation above. Repeat increase every 3-3½-3-3½-3 cm = 1⅛"-1¼"-1⅛"-1¼"-1⅛" a total of 7-7-9-9-11 times = 54-58-62-66-70 stitches. When piece measures 33-37-40-44-47 cm = 13"-14½"-15¾"-17¼"-18½", bind off 6 stitches under sleeve (i.e. 3 stitches on each side of marker) = 48-52-56-60-64 stitches. Put piece aside and knit another sleeve the same way. YOKE: Slip sleeves on to same circular needle as body, slip them on where armholes were bind off = 244-260-276-292-308 stitches. Insert 1 marker in all transitions between sleeves and body = 4 markers. NOTE! Begin neck decrease before all decreases for raglan are done, READ THE ENTIRE SECTION BEFORE CONTINUING! Continue with pattern A.1 and stockinette stitch as before but work 1 stitch in stockinette stitch on each side of each marker onwards. On 2nd round begin decreases for RAGLAN – see explanation above! Repeat decreases every other round 19-21-23-24-26 times in total. When piece measures approx. 35-39-43-47-49 cm = 13¾"-15¼"-17"-18½"-19¼" (adjust so that so that you are on a round with 6 knit stitches mid front in pattern), work the middle 14 stitches at the front together 2 by 2 = 7 stitches (the middle 6 stitches are knitted together 2 by 2 and the 4 stitches on each side are purled together 2 by 2). On next round, slip the middle 17 stitches at the front on 1 stitch holder for neck (= entire A.1c). Continue piece back and forth from mid front until finished measurements - AT THE SAME TIME bind off for neck at the beginning of every row in each side: 2 stitches 2 times and 1 stitch 2 times. After all decreases for raglan and bind offs for neck, there are 56-56-56-64-64 stitches on needle. NECK: Switch to double pointed needles or a short circular needle size 3 mm = US 2,5, pick up approx. 29 to 35 stitches at the front of neck (including stitches from stitch holder) = approx. 85 to 99 stitches on needle. Knit 1 round while at the same time adjusting number of stitches so that there are 8 stitches over each sleeve, 24-28-28-32-32 on the over back piece and 35-35-35-43-43 stitches over front piece (do not increase or decrease over the middle 17 stitches) = 75-79-79-91-91 stitches on round. Work rib in the round as follows: Continue the 2 stitches from the raglan line as knit 2, then purl 2, knit 2 and purl 2 over each sleeve, work stitches on back piece into purl 2/knit 2, on the front piece work the 17 stitches in the middle as follows: Purl 2, knit 3, purl 2, knit 3, purl 2, knit 3, purl 2, work the remaining stitches on each side into knit 2 / purl 2. When neck edge measures 2-2-2-2-3 cm = ¾"-¾"-¾"-¾"-1⅛", bind off with knit over knit and purl over purl. ASSEMBLY: Sew the openings under the sleeves tog. |
|||||||||||||||||||||||||
Diagram explanations |
|||||||||||||||||||||||||
|
|||||||||||||||||||||||||

|
|||||||||||||||||||||||||
|
|||||||||||||||||||||||||
Have you finished this pattern?Tag your pictures with #dropspattern #wintercloudssweater or submit them to the #dropsfan gallery. Do you need help with this pattern?You'll find 22 tutorial videos, a Comments/Questions area and more by visiting the pattern on garnstudio.com. © 1982-2025 DROPS Design A/S. We reserve all rights. This document, including all its sub-sections, has copyrights. Read more about what you can do with our patterns at the bottom of each pattern on our site. |
|||||||||||||||||||||||||


With over 40 years in knitting and crochet design, DROPS Design offers one of the most extensive collections of free patterns on the internet - translated to 17 languages. As of today we count 314 catalogs and 11822 patterns - 11812 of which are translated into English (US/in).
We work hard to bring you the best knitting and crochet have to offer, inspiration and advice as well as great quality yarns at incredible prices! Would you like to use our patterns for other than personal use? You can read what you are allowed to do in the Copyright text at the bottom of all our patterns. Happy crafting!
Post a comment to pattern DROPS Children 37-12
We would love to hear what you have to say about this pattern!
If you want to leave a question, please make sure you select the correct category in the form below, to speed up the answering process. Required fields are marked *.