
Looking for a yarn?


Comments / Questions (35)
![]() Manuela wrote:
Manuela wrote:
Quando chego à 6.ª carreira, em A.2, não sei continuar depois dos 2 pontos correntes e 1 ponto baixo (na parte da rede depois da pétala). Ou seja, faço 1 ponto baixo e 4 pontos corrente alternadamente e, no fim, 1 ponto baixo e 5 pontos corrente? Penso que não estou a interpretar bem esta parte. Será que me podem ajudar, por favor? Têm algum vídeo que mostre a diminuição das pétalas e início da rede?Obrigada
04.04.2024 - 20:54
![]() DUPIRE-LE LÉANNEC wrote:
DUPIRE-LE LÉANNEC wrote:
Bonjour, Sur le 1er rang d’arceaux, on en a 30. Et sur les suivants, on y en a t’il 30 aussi ? Car au 2ème rang je me retrouve avec 29 arceaux. Merci d’avance
27.07.2023 - 15:12DROPS Design answered:
Bonjour Mme Dupire-Le Léannec, vous devez toujours bien avoir 30 arceaux tout le tour; le dernier arceau doit être celui crocheté autour de l'arceau où vous avez mis le marqueur au début du tour. Bon crochet!
27.07.2023 - 16:32
![]() Raffaella wrote:
Raffaella wrote:
Grazie !!! Facilissima da fare, velocissima e bellissima. Ne farò tante di colori diversi e anche multicolore per finire avanzi di filato
24.06.2022 - 21:39
![]() Marie-France Leroux wrote:
Marie-France Leroux wrote:
Bonjour . Travailler le rond en spirale cela est-il possible
09.09.2021 - 06:35DROPS Design answered:
Bonjour Mme Leroux, probablement, mais pensez à faire les ajustements nécessaires (le nombre de mailles en l'air des arceaux augmente puis rétrécit en fonction des tours). Bon crochet!
09.09.2021 - 09:02
![]() Silvia wrote:
Silvia wrote:
Buonasera! Per quanto riguarda il bordo al punto 4, bisogna tornare indietro dopo aver lavorato le seconde 25 maglie basse? Grazie infinite
04.08.2021 - 19:31DROPS Design answered:
Buonasera Silvia, il lavoro è in tondo, quindi alla fine del giro 4 inizia il giro 5. Buon lavoro!
06.08.2021 - 19:12
![]() Hanne Mau wrote:
Hanne Mau wrote:
Anja Jervin hej du skal ud ligesom i 6 tabellen når man tager ud for man jo flere m mellem udtagninger 1 omg 6m 2 omg 12 m 3 omg 18 m 4 omg 24 m 5 omg 30 m 6 omg 36 m 7 omg 42 m 8 omg 48 m 9 omg 54 m 10 omg 60 m
12.05.2020 - 13:16
![]() Iarger wrote:
Iarger wrote:
Combien de pelotes de coton drops faut il ? Je n ai pas vu si c était indiqué. Merci
13.04.2020 - 09:15DROPS Design answered:
Bonjour Mme Larger, il faudra 3 pelotes de DROPS Muskat pour réaliser ce sac, les quantités sont toujours indiquées au poids au début des explications. Bon crochet!
14.04.2020 - 12:30
![]() Anja Jervin wrote:
Anja Jervin wrote:
Jeg er nybegynder og forstår ikke sætningen under omgang 5-10 står der "der hækles 1 maske mere før hver udtagning på hver omgang" kan I oversætte?
26.03.2020 - 19:39DROPS Design answered:
Hei Anja. I 3.omgang heklet du 1 fastmaske før du i neste maske hekler 2 fastmasker (øker). I 4. omgang hekler du 1 fastmaske i hver av de 2 neste fastmaskene før du i neste maske hekler 2 fastmasker (øker). I 5. omgang hekler du 1 fastmaske i hver av de 3 neste fastmaskene før du i neste maske hekler 2 fastmasker (øker). I 6. omgang hekler du 1 fastmaske i hver av de 4 neste fastmaskene før du i neste maske hekler 2 fastmasker (øker). Osv osv, altså du hekler 1 maske mer før du hekler 2 masker i 1 maske (øker). God Fornøyelse!
30.03.2020 - 14:29
![]() Kathy Almonte wrote:
Kathy Almonte wrote:
When we start the edge, do you do as on the bottom ie; chain one for first stitch .?
13.06.2019 - 21:24DROPS Design answered:
Dear Mrs Almonte, you should replace 1st hdc with 1 chain and 1st dc with 1 ch (see CROCHET INFO). Happy crocheting!
14.06.2019 - 07:21
![]() Veronica Bellotti wrote:
Veronica Bellotti wrote:
Cosa vuol dire GIRI 5-10: Continuare a lavorare e aumentare in questo modo, lavorare 1 maglia in più prima di ogni aumento su ogni giro ? grazie
11.06.2019 - 12:47DROPS Design answered:
Buongiorno Veronica. P.es al giro 5, lavora 1 m.bassa in ognuna delle prime 3 maglie, 2 maglie basse nella maglia successiva e così su tutto il giro. Al giro 6, lavora 1 m bassa in ognuna delle prime 4 maglie, 2 maglie basse nella maglia successiva e così su tutto il giro. Ad ogni giro lavora 1 maglia in più prima di lavorare 2 maglie nella stessa maglia. Buon lavoro!
11.06.2019 - 12:55
|
|
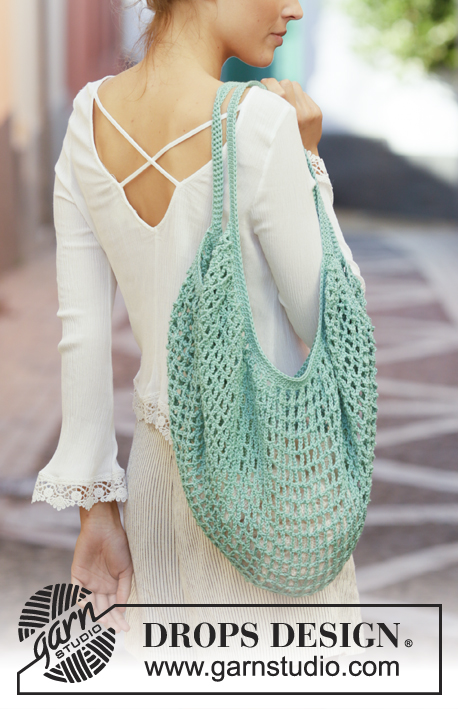
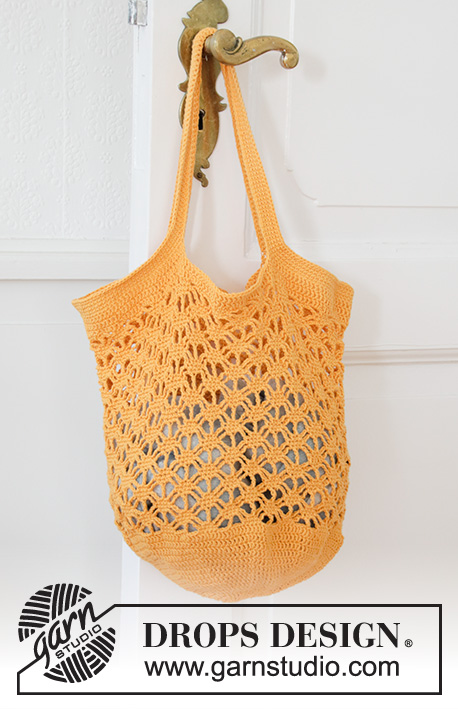
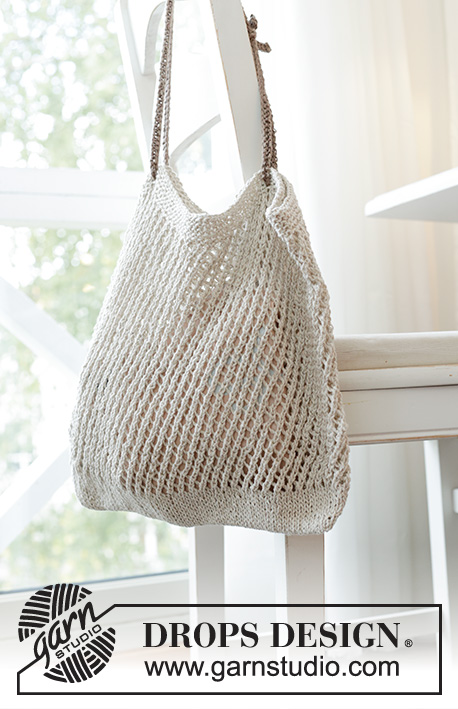
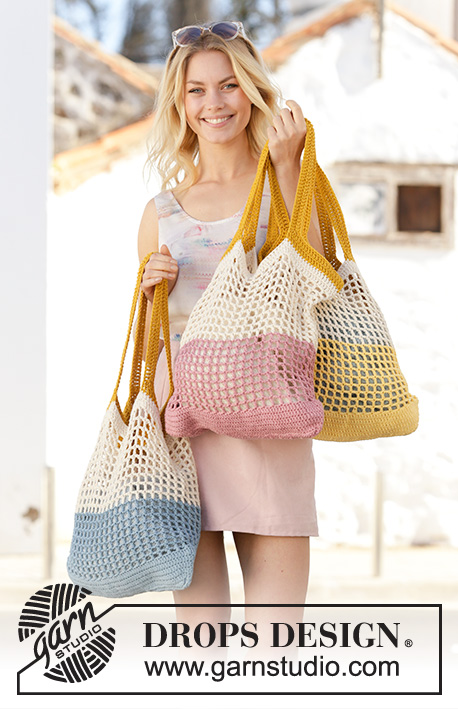
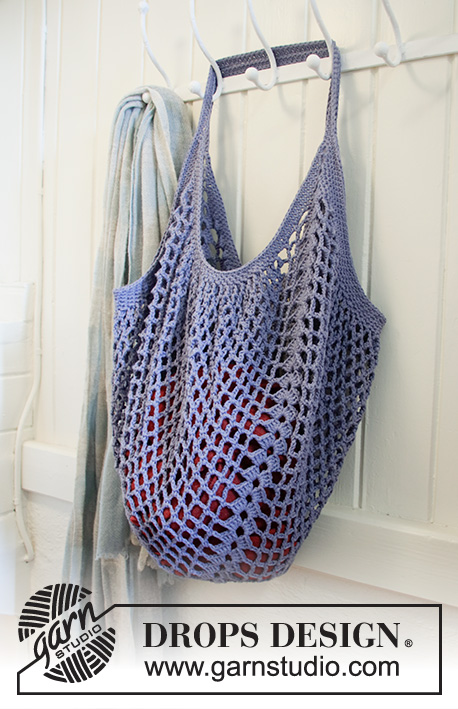
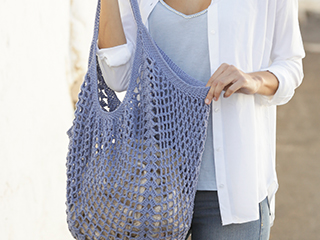
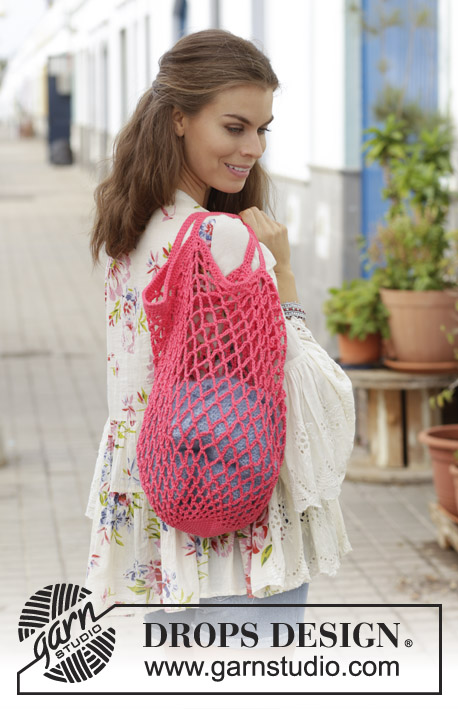
Sugar Mesh#sugarmeshbag |
|
 |
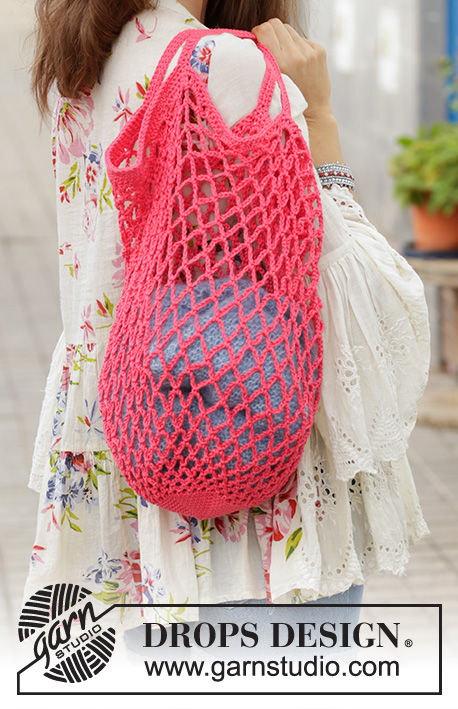 |
Crocheted shopping net/tote bag with chain-spaces. Piece is crocheted bottom up in DROPS Muskat.
DROPS 187-17 |
|
|
INFORMATION FOR PATTERN: CROCHET INFO (applies to bottom and edge): Replace first single crochet with 1 chain stitch and finish round with 1 slip stitch in 1st chain stitch. Replace first half double crochet with 2 chain stitches and finish round with 1 slip stitch in 2nd chain stitch. ---------------------------------------------------------- SHOPPING NET: Begin shopping net with a circle with single crochets in the base, then work chain-spaces to form the net. Then work an edge with a handle in each side. BASE: Work 4 chain stitches with hook size 3.5 mm/E/4 and Muskat, form a ring with 1 slip stitch in first chain stitch. READ CROCHET INFO. ROUND 1: Work 6 single crochets in ring. ROUND 2: Work 2 single crochets in every single crochet = 12 stitches. ROUND 3: Work * 1 single crochet in first stitch, 2 single crochets in next stitch *, repeat from *-* the entire round = 18 stitches. ROUND 4: Work * 1 single crochet in each of the first 2 stitches, 2 single crochets in next stitch *, repeat from *-* the entire round = 24 stitches. ROUNDS 5-10: Continue to work and increase this way, work 1 stitch more before every increase on every round. After ROUND 10 there are 60 stitches on round and circle measures approx. 10 cm / 4" in diameter. NET: Now work chain-spaces to form the net. Work as follows: ROUND 1: Work 2 chain stitches, * skip 1 single crochet, 1 single crochet in next stitch, 2 chain stitches *, repeat from *-* the entire round, finish with 1 slip stitch around the first 2 chain stitches on round = 30 chain-spaces. ROUND 2: Work 3 chain stitches, insert a marker in these 3 chain stitches (= 1st chain-space). This is done to make it easier to see where 1st chain-space is when continuing. Then work * 1 single crochet around next chain-space, 3 chain stitches *, repeat from *-* until 1st chain-space and finish with 1 slip stitch around this chain-space. ROUND 3: Work 4 chain stitches, move the marker to these chain stitches (= 1st chain-space). Then work * 1 single crochet around next chain-space, 4 chain stitches *, repeat from *-* until 1st chain-space and finish with 1 slip stitch around this chain-space. ROUND 4: Work 5 chain stitches, move the marker to these chain stitches (= 1st chain-space). Then work * 1 single crochet around next chain-space, 5 chain stitches *, repeat from *-* until 1st chain-space and finish with 1 slip stitch around this chain-space. ROUND 5: Work 6 chain stitches, move the marker to these chain stitches (= 1st chain-space). Then work * 1 single crochet around next chain-space, 6 chain stitches *, repeat from *-* until 1st chain-space and finish with 1 slip stitch around this chain-space. ROUND 6: Work 7 chain stitches, move the marker to these chain stitches (= 1st chain-space). Then work * 1 single crochet around next chain-space, 7 chain stitches *, repeat from *-* until 1st chain-space and finish with 1 slip stitch around this chain-space. ROUND 7: Work 8 chain stitches, move the marker to these chain stitches (= 1st chain-space). Then work * 1 single crochet around next chain-space, 8 chain stitches *, repeat from *-* until 1st chain-space and finish with 1 slip stitch around this chain-space. ROUNDS 8-16: Work as ROUND 7 (all chain-spaces have 8 chain stitches). ROUNDS 17-18: Work as ROUND 6 (all chain-spaces have 7 chain stitches). ROUNDS 19-20: Work as ROUND 5 (all chain-spaces have 6 chain stitches). ROUNDS 21-22: Work as ROUND 4 (all chain-spaces have 5 chain stitches) but finish ROUND 22 with 1 slip stitch in 1st chain stitch at beginning of round. EDGE WITH HANDLE: ROUND 1: Work 5 half double crochets around every chain-space from previous round = 150 half double crochets. ROUND 2: Work 1 single crochet in every half double crochet = 150 single crochets. ROUND 3: Work 1 single crochet in each of the first 25 single crochets, work 75 chain stitches (= handle), skip 25 single crochets, work 1 single crochet in each of the next 50 single crochets, work 75 chain stitches (= handle) and skip 25 single crochets, work 1 single crochet in each of the next 25 single crochets. ROUND 4: Work 1 single crochet in each of the first 25 single crochets, work 1 single crochet in each of the next 75 chain stitches, 1 single crochet in each of the next 50 single crochets, 1 single crochet in each of the next 75 chain stitches, 1 single crochet in each of the last 25 single crochets. ROUND 5: Work 1 slip stitch in each of the first 25 single crochets, 1 single crochet in each of the next 75 single crochets (= handle), 1 slip stitch in each of the next 50 single crochets, 1 single crochet in each of the next 75 single crochets (= handle), 1 slip stitch in each of the last 25 single crochets. Fasten off. |
|
Have you finished this pattern?Tag your pictures with #dropspattern #sugarmeshbag or submit them to the #dropsfan gallery. Do you need help with this pattern?You'll find 8 tutorial videos, a Comments/Questions area and more by visiting the pattern on garnstudio.com. © 1982-2025 DROPS Design A/S. We reserve all rights. This document, including all its sub-sections, has copyrights. Read more about what you can do with our patterns at the bottom of each pattern on our site. |
|


With over 40 years in knitting and crochet design, DROPS Design offers one of the most extensive collections of free patterns on the internet - translated to 17 languages. As of today we count 314 catalogs and 11821 patterns - 11811 of which are translated into English (US/in).
We work hard to bring you the best knitting and crochet have to offer, inspiration and advice as well as great quality yarns at incredible prices! Would you like to use our patterns for other than personal use? You can read what you are allowed to do in the Copyright text at the bottom of all our patterns. Happy crafting!
Post a comment to pattern DROPS 187-17
We would love to hear what you have to say about this pattern!
If you want to leave a question, please make sure you select the correct category in the form below, to speed up the answering process. Required fields are marked *.