
Looking for a yarn?


Comments / Questions (111)
![]() Nicole wrote:
Nicole wrote:
Hallo liebes Drops-Team, ich bin jetzt gerade mit den 19 Zunahmen bei Gr. M der Passe fertig, aber das geht mit dem Muster nicht auf. Jeweils rechts und links von der A3 befinden dich jeweils 3 re Maschen. Macht insgesamt je 5 rechte Maschen. Müßte ich da nicht noch 2 Runden zunehmen damit es mit dem Muster (3re, 2 li) passt? Aber dann wird es ja zu weit. Danke vorab und viele Grüße.
22.06.2025 - 21:35DROPS Design answered:
Liebe Nicole, stricken Sie die Maschen im Muster weiter (auch wenn es nicht aufgeht) bis die Passe 22 cm misst, dann stricken Sie Glattrechts weiter (schon bei der Aufteilung). Viel Spaß beim Stricken!
23.06.2025 - 07:59
![]() Pernilla Lindh wrote:
Pernilla Lindh wrote:
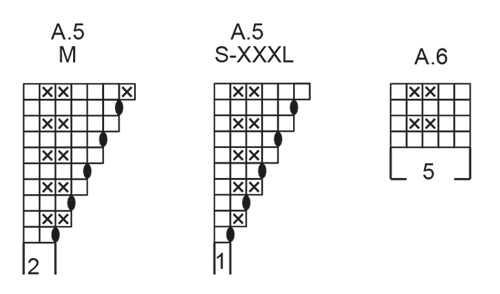
Hi! How do I knit A.5 in size small in row 12 and row 14?
18.05.2025 - 19:35DROPS Design answered:
Dear Mrs Lindh, when A.5 has been worked once in height, just continue increasing as before and work the increased stitches so that the pattern will enlarge in width: after the last row in a.5 you have to work the next 2 increases in garter stitch, then the next 3 increased sts in stocking stitch and continue like this so that the pattern will not break but will be always wider. Happy knitting!
19.05.2025 - 08:41
![]() Pernilla wrote:
Pernilla wrote:
Jag stickar storlek small. Jag har stickat 10 varv av mönstret. Varv 11 stickade jag samtliga maskor räta och gjorde omslag i slutet på A2, i vardera ände av av A4 samt i början på A5. Hur fortsätter jag A2 på varv 12? Ska jag sticka rät, avig, avig, rät, rät, rät, rät (sista räta maskan = omslaget)? Hur stickas A2 på varv 14? Ska jag sticka varv 14 rät, avig, avig, rät, rät, rät, rät, avig?
15.05.2025 - 22:47DROPS Design answered:
Hej Pernilla, du börjar sticka nederst i diagrammerna, och du ökar redan på första varvet med omslag enligt diagrammerna. Du fortsätter med att sticka de nya maskorna in i mönstret, dvs du skall alltid ha 3 rm på varje sida om de 2 am på mönstervarvet :)
21.05.2025 - 13:40
![]() Valérie Chauvet wrote:
Valérie Chauvet wrote:
Bonjour, merci pour ce très joli modèle. Est-il possible (existe t il des explications pour ce modèle en aiguilles droites ? Bien à vous Valérie Chauvet
10.03.2025 - 10:11
![]() Valérie Chauvet wrote:
Valérie Chauvet wrote:
Bonjour, merci pour ce très joli modèle. Est-il possible (existe t il des explications pour ce modèle en aiguilles droites ? Bien à vous Valérie Chauvet
10.03.2025 - 10:11DROPS Design answered:
Bonjour Mme Chauvet, ce modèle existe uniquement en version en rond, mais cette leçon pourra éventuellement vous aider à adapter les explications si nécessaire. Bon tricot!
10.03.2025 - 13:00
![]() Claire wrote:
Claire wrote:
Je fais le pull grandeur M. Je dois débuter l’empiècement. J’ai donc 4 mailles. Sauf que j’ai de la difficulté à comprendre à quel endroit je dois mettre les marqueurs. Aussi cela donne combien de mailles par marqueur? Par curiosité, j’ai quand même commencé à tricoter l’empiècement et je comprends bien les graphiques et augmentations. C’est mon premier pull que je tricote
25.02.2025 - 14:52DROPS Design answered:
Bonjour claire, on ne place pas de marqueur dans ce modèle, mais si vous voulez en mettre, vous pouvez en mettre un de part et d'autre de chaque A.3 = mailles des raglans - et vous pouvez aussi en mettre un entre chaque diagramme pour mieux les suivre. Bon tricot!
25.02.2025 - 16:50
![]() Ann Lavinder wrote:
Ann Lavinder wrote:
Jag har en fråga om mönster rapport A2 i storlek M, på första varvet ska ett omslag göras och på nästa varv ska en ökning göras + att omslaget ska stickas vridet ska den stickas avigt vriden? Blir det då 3 aviga maskor stickade på det varvet?
17.02.2025 - 16:01DROPS Design answered:
Hej Ann, førsta varvet stickas A.2: rm rm omslag, Nästa varv stickas A.2: rm am, am (inga ökningar på varv 2). Tredje varvet i A.2: rm, rm, rm, 1omslag osv :)
18.02.2025 - 14:00
![]() Jolle wrote:
Jolle wrote:
Hallo! \r\nIch verstehe nicht was \"Hälfte des Rückenteils\" bedeutet. Was heißt das genau in Maschenzahlen bei Größe L? Irgendwie werde ich da nicht so richtig schlau draus und finde es super verwirrend geschrieben. \r\nLiebe Grüße
24.01.2025 - 20:15
![]() Jeannie Embree wrote:
Jeannie Embree wrote:
I have completed the ribbing for the neck and made the increases for size large. The next round is confusing for me. In part it says work A5, A 6 over 11 stitches. A5 and A6 add up to 8 stitches so what do I do? If I follow the charts as stated it does not incorporate all 108 stitches. Please explain for me, much appreciated.
02.01.2025 - 00:14DROPS Design answered:
Dear Mrs Embree, when you have to work 11 sts in A.6 this means you will repeat the 5 sts in A.6 a total of 2 times in width then work the first stitch A.6, so that pattern A.6 will be symmetrical. So that you will work: A.1 over 5 sts, A.2 (= 3 sts in L), A.3 (16 sts), A.4 (5 sts), A.3 (16 sts), A.5 (3 sts in L), A.6 over 11 sts, A.2 (3 sts in L), A.3 (16 sts), A.4 (5 sts), A.3 (16 sts),A.5 (3 sts), A.6 over 6 sts = 5+3+16+5+16+3+11+3+16+5+16+3+6=108 sts. Happy knitting!
03.01.2025 - 15:20
![]() Marianne Vrieze wrote:
Marianne Vrieze wrote:
Wordt deze trui met verkorte toeren gebreid?
27.12.2024 - 20:25DROPS Design answered:
Dag Marianne,
Nee, er zitten geen verkorte toeren in deze trui.
01.01.2025 - 17:07
|
||||||||||
Winter Owl Sweater#winterowlsweater |
||||||||||
 |
 |
|||||||||
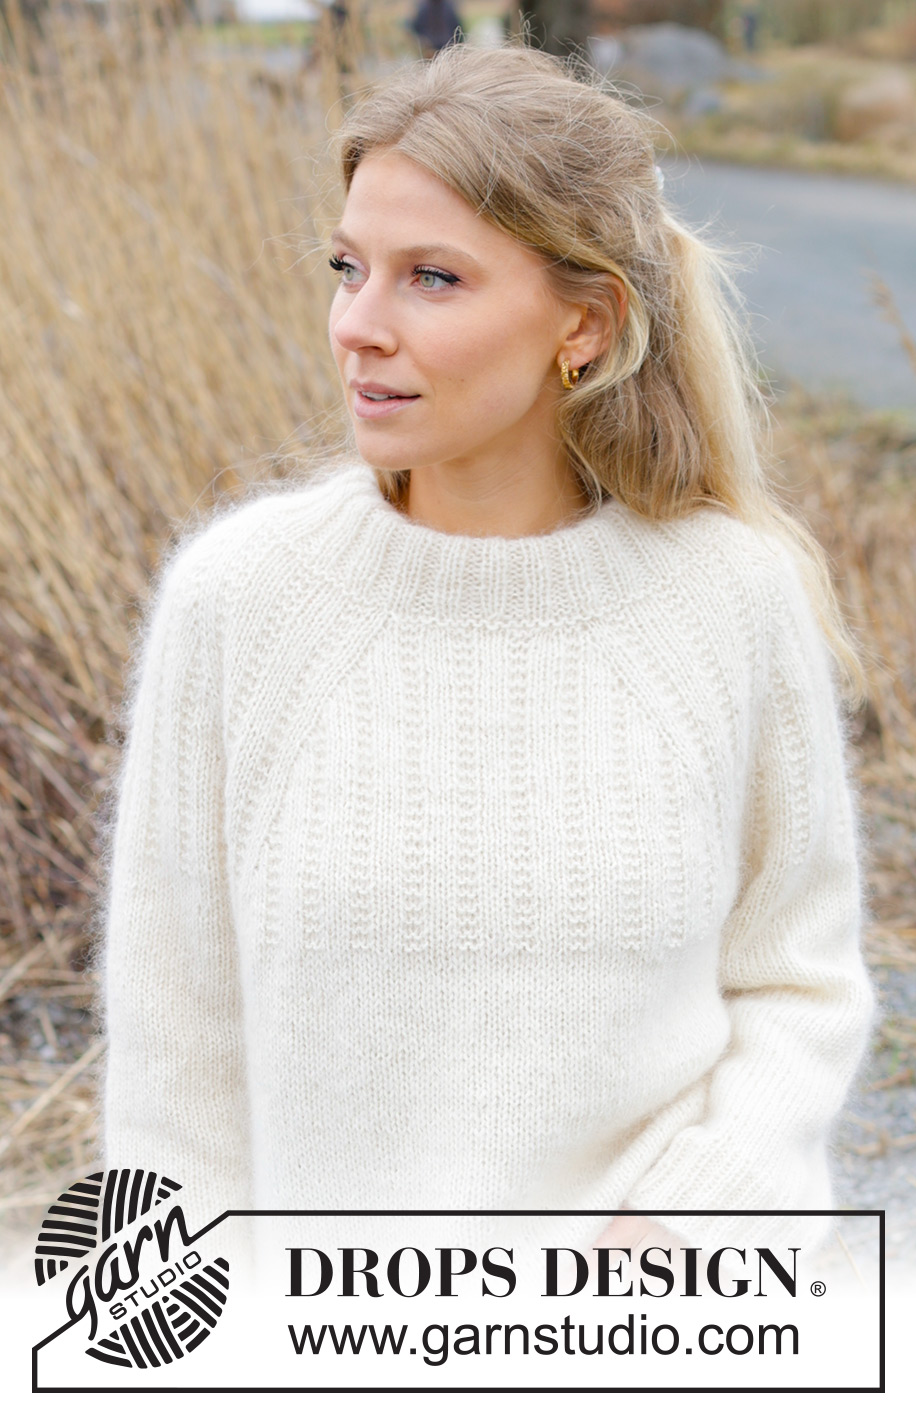
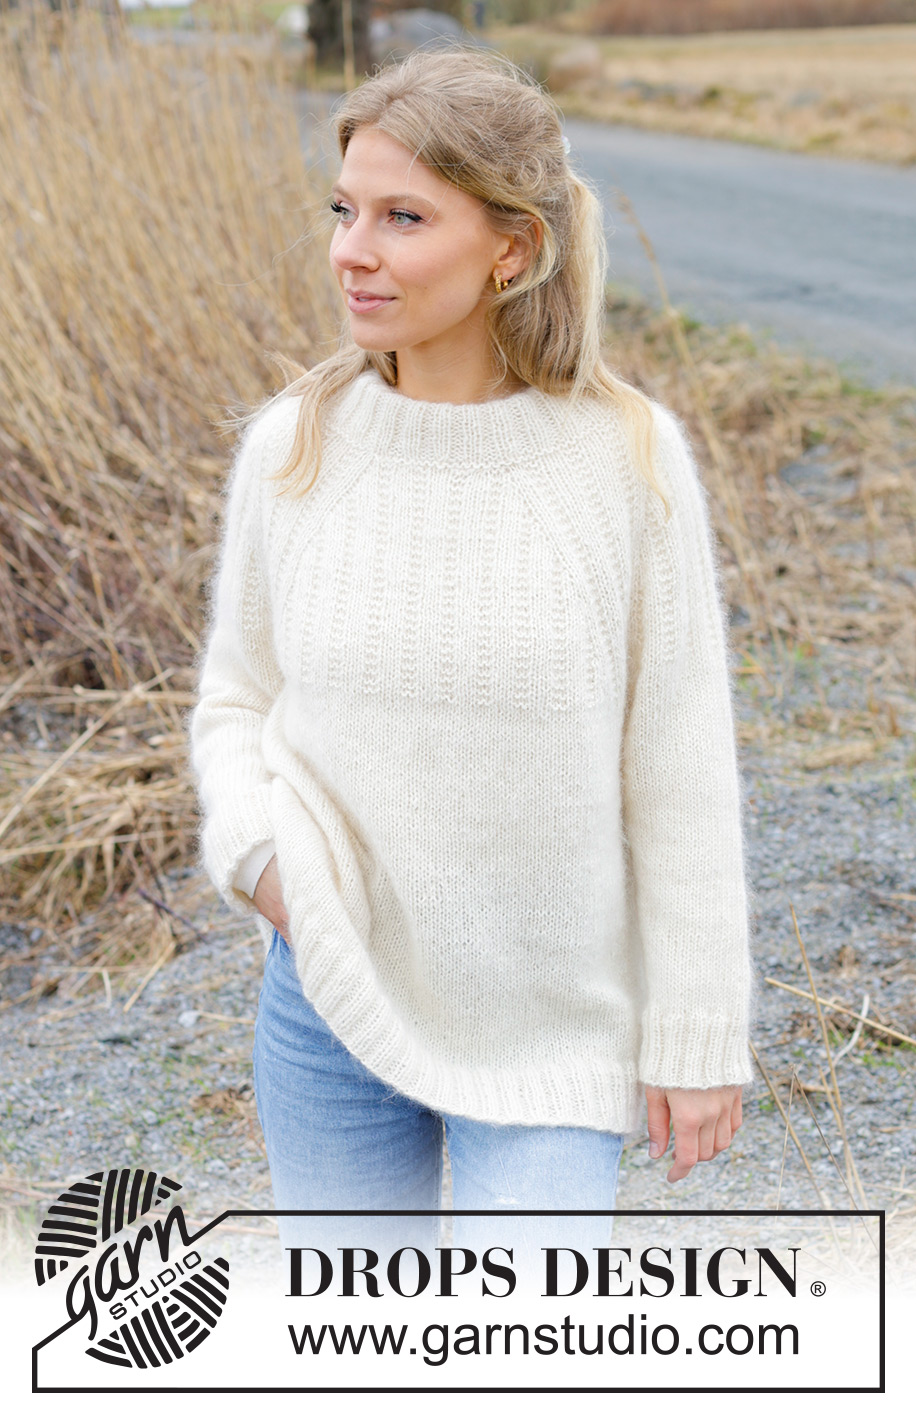
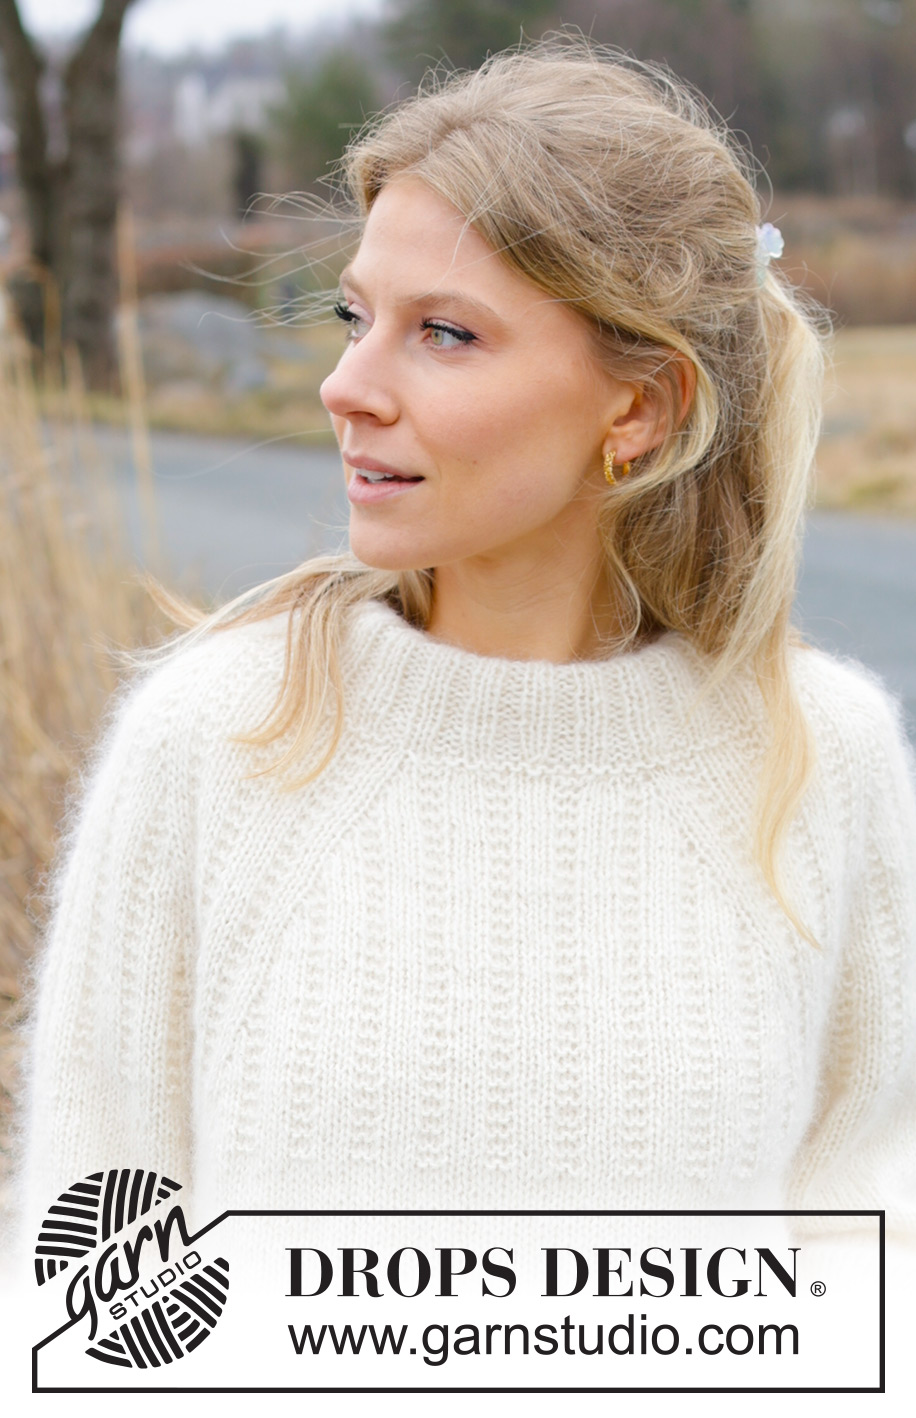
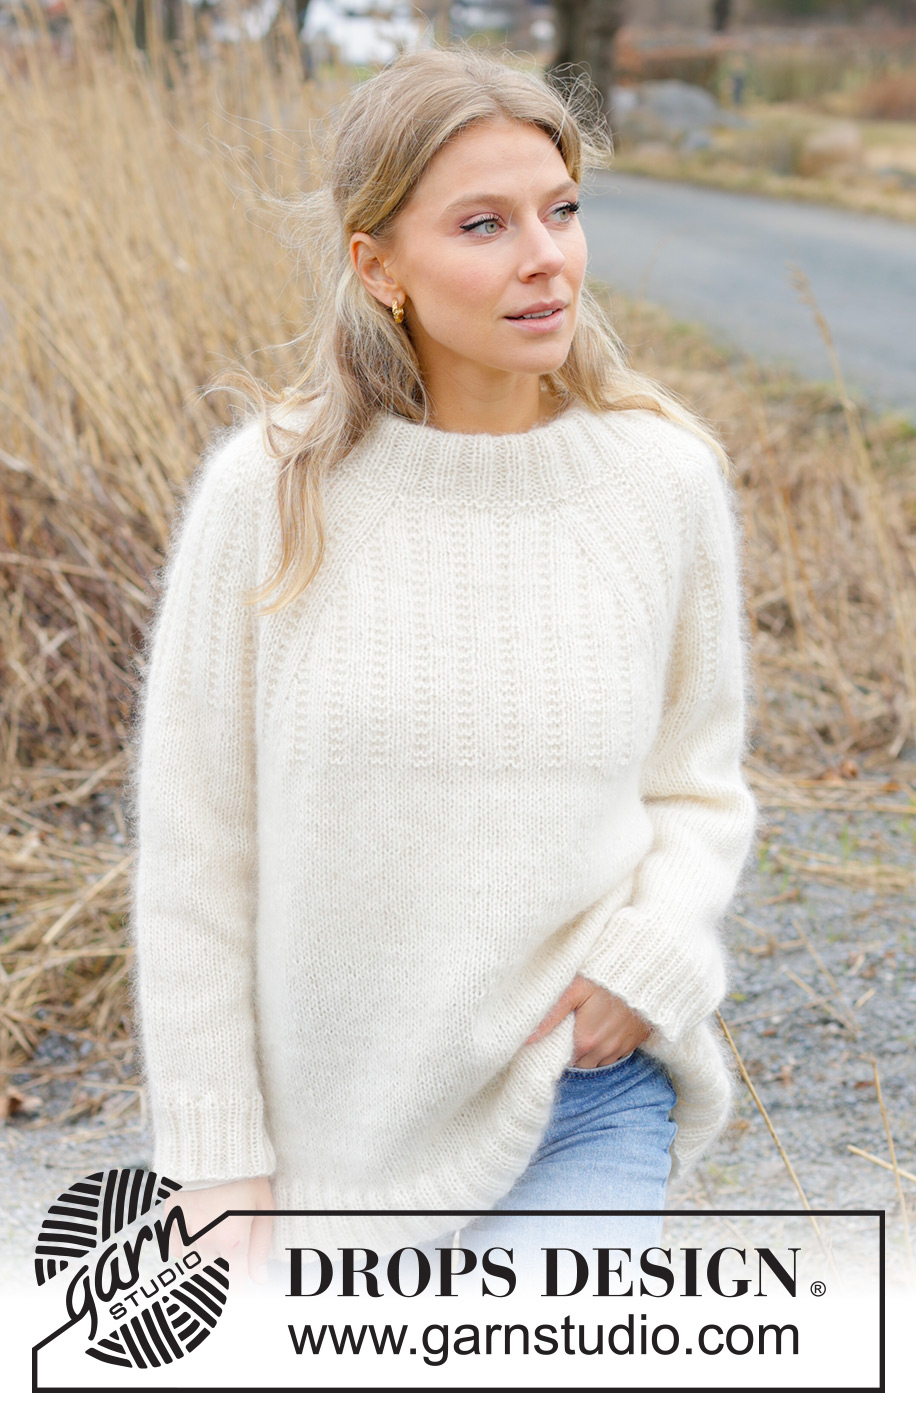
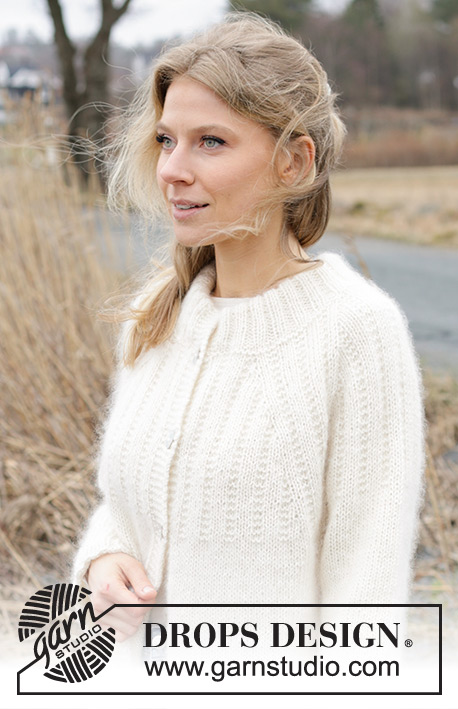
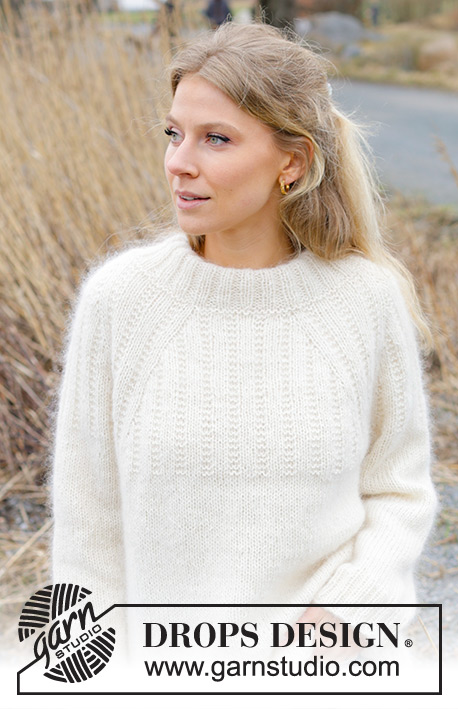
Knitted sweater in DROPS Nord and DROPS Kid-Silk. The piece is worked top down with double neck, raglan and relief-pattern. Sizes S - XXXL.
DROPS 243-1 |
||||||||||
|
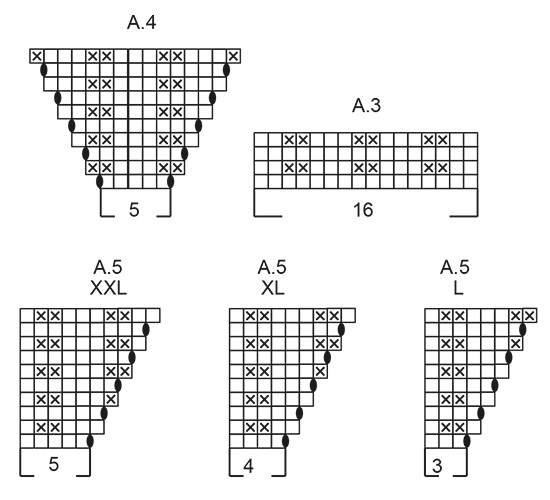
------------------------------------------------------- EXPLANATIONS FOR THE PATTERN: ------------------------------------------------------- PATTERN: See diagrams A.1 to A.6. Choose diagram for your size (applies to A.2 and A.5). DECREASE TIP (for sleeves): Decrease 1 stitch on either side of the marker-thread as follows: Work until there are 3 stitches left before the marker-thread, knit 2 together, knit 2 (marker-thread sits between these 2 stitches), slip 1 stitch knit-wise, knit 1 and pass the slipped stitch over the knitted stitch (2 stitches decreased). ------------------------------------------------------- START THE PIECE HERE: ------------------------------------------------------- SWEATER – SHORT OVERVIEW OF THE PIECE: The neck and yoke are worked in the round with circular needle, from mid back and top down. The yoke is divided for body and sleeves and the body is continued in the round with circular needle. The sleeves are worked in the round with short circular needle/double pointed needles. DOUBLE NECK: Cast on 76-80-84-88-92-96 stitches with 1 strand DROPS Nord and 2 strands DROPS Kid-Silk using short circular needles size 4.5 and 5.5 MM = US 9 held together. Remove the needle size 5.5 MM = US 9 keeping stitches on the needle size 4.5 MM = US 7 (this gives you an elastic cast-on edge). Work rib in the round (knit 2, purl 2) for 10 cm = 4". Fold the neck double to the inside and work 1 more round of rib, working every 4th stitch together with its corresponding stitch on the cast-on edge. Knit 1 round and increase 24 stitches evenly spaced = 100-104-108-112-116-120 stitches. Purl 1 round. Insert 1 marker; the yoke is measured from here. YOKE: Change to short circular needle size 5.5 MM = US 9 and work pattern as follows (the start of the round is on the back piece): Work A.1 over 5-5-5-5-5-10 stitches, A.2 (approx. half the back piece) A.3, A.4, A.3 (sleeve), A.5, A.6 over 11-11-11-11-11-21 stitches, A.2 (front piece), A.3, A.4, A.3 (sleeve), A.5, A.6 over 6-6-6-6-6-11 stitches (rest of back piece). Continue this pattern and increase as shown in A.2, A.4 and A.5 (i.e., increase towards each repeat of A.3 and 8 increases every 2nd round). The increased stitches are worked twisted into the pattern – no hole. REMEMBER THE KNITTING GAUGE! Diagrams A.1, A.3 and A.6 are repeated in height. When diagrams A.2, A.4 and A.5 are finished 1 time in height, continue the increases as before and work the stitches twisted as before until you have increased a total of 17-19-23-25-27-30 times (including the increases in A.2, A.4 and A.5) = 236-256-292-312-332-360 stitches. Continue the pattern without further increases until the yoke measures 20-22-23-25-27-30 cm = 8"-8¾"-9"-9¾"-10⅝"-11¾" from the marker. Now divide for the body and sleeves as follows: Knit 37-39-44-48-51-57 (approx. half back piece), place the next 43-49-57-59-63-65 stitches on a thread), cast on 8-10-10-10-10-8 stitches in side under the sleeve, knit 75-79-89-97-103-115 (front piece), place the next 43-49-57-59-63-65 stitches on a thread), cast on 8-10-10-10-10-8 stitches in side under the sleeve, knit the last 38-40-45-49-52-58 stitches (rest of back piece). Finish the body and sleeves separately. BODY: = 166-178-198-214-226-246 stitches. Continue with stockinette stitch in the round for a further 33-33-34-34-34-33 cm = 13"-13"-13⅜"-13⅜"-13⅜"-13". Knit 1 round and increase 26-26-30-30-34-34 stitches evenly spaced = 192-204-228-244-260-280 stitches. Change to circular needle size 4.5 MM = US 7. Work rib (knit 2, purl 2) for 6 cm = 2⅜". Bind off with knit over knit and purl over purl. The piece measures approx. 63-65-67-69-71-73 cm = 24¾"-25½"-26⅜"-27⅛"-28"-28¾" from the shoulder. SLEEVES: Place the 43-49-57-59-63-65 stitches from the thread on the one side of the piece on short circular needle/double pointed needles size 5.5 MM = US 9 and knit up 1 stitch in each of the new stitches cast on under the sleeve = 51-59-67-69-73-73 stitches. Insert a marker-thread in the middle of the new stitches under the sleeve. Continue stockinette stitch in the round. When the sleeve measures 3-3-3-2-2-2 cm = 1⅛"-1⅛"-1⅛"-¾"-¾"-¾", decrease 1 stitch on each side of the marker-thread – read DECREASE TIP. Decrease like this every 6-4-2½-2½-2-1½ cm = 2⅜"-1½"-1"-1"-¾"-½" a total of 5-7-11-11-13-12 times = 41-45-45-47-47-49 stitches. When the sleeve measures 33-32-31-29-28-25 cm = 13"-12½"-12¼"-11⅜"-11"-9¾", knit 1 round and increase 7-7-7-9-9-11 stitches evenly spaced = 48-52-52-56-56-60 stitches. Change to double pointed needles size 4.5 MM = US 7 and work rib (knit 2, purl 2) for 6 cm = 2⅜". Bind off. Sleeve measures approx. 39-38-37-35-34-33 cm = 15¼"-15"-14½"-13¾"-13⅜"-13" from the division. Work the other sleeve in the same way. |
||||||||||
Diagram explanations |
||||||||||
|
||||||||||

|
||||||||||
|
||||||||||
|
||||||||||

|
||||||||||
Have you finished this pattern?Tag your pictures with #dropspattern #winterowlsweater or submit them to the #dropsfan gallery. Do you need help with this pattern?You'll find 26 tutorial videos, a Comments/Questions area and more by visiting the pattern on garnstudio.com. © 1982-2025 DROPS Design A/S. We reserve all rights. This document, including all its sub-sections, has copyrights. Read more about what you can do with our patterns at the bottom of each pattern on our site. |
||||||||||


With over 40 years in knitting and crochet design, DROPS Design offers one of the most extensive collections of free patterns on the internet - translated to 17 languages. As of today we count 314 catalogs and 11822 patterns - 11812 of which are translated into English (US/in).
We work hard to bring you the best knitting and crochet have to offer, inspiration and advice as well as great quality yarns at incredible prices! Would you like to use our patterns for other than personal use? You can read what you are allowed to do in the Copyright text at the bottom of all our patterns. Happy crafting!
Post a comment to pattern DROPS 243-1
We would love to hear what you have to say about this pattern!
If you want to leave a question, please make sure you select the correct category in the form below, to speed up the answering process. Required fields are marked *.