
Looking for a yarn?


Comments / Questions (15)
![]() Marie wrote:
Marie wrote:
Bonjour, j'aimerais faire ce modèle dans la couleur douce orchidée de Drops air. Quel fil utiliser en association, cette couleur n'existe pas en kid silk? Merci beaucoup
04.09.2024 - 10:47DROPS Design answered:
Bonjour Marie, pour toute aide au choix d'une couleur, merci de bien vouloir contacter votre magasin DROPS qui saura vous conseiller, même par mail ou téléphone. Bon tricot!
05.09.2024 - 08:39
![]() Caro wrote:
Caro wrote:
Für die doppelte Halsblende (Gr. XL): man hat 80M auf der Nadel und soll nach 9M 1. Markierer, nach 19M 2. Markierer, wieder 19M 3. Markierer und wieder 19M 4. Markierer. Dann sollen laut Anleitung noch 10M bis Runde zuende übrig sein, aber es sind 14M. 9+19+19+19+10 = 76M 9+19+19+19+14 = 80M Ich bin verwirrt! Alles danach macht auch keinen Sinn mehr. Wenn ich dann 4M abnehme, komm ich auf 76M insgesamt, was je 19M zw jedem Markierer macht und nicht mal 17M und mal 19M! Bitte Hilfe!
20.04.2024 - 17:46DROPS Design answered:
Libe Caro, die 4 Markieren sollen je in einer Masche und nicht zwischen Maschen eingesetzt werden, so haben Sie: 9+1+19+1+19+1+19+1+10=80 Maschen. Viel Spaß beim Stricken!
22.04.2024 - 07:54
![]() Pille wrote:
Pille wrote:
Hello I am wondering if the amount of kid silk needed for the project is correct. If I need 300g of Air (sizeM) it will be 6 skeins (50g) x150m= 900m total. The instructions says, that I need 200g of Kid-Silk, it would be 8skeins(25g)x 210m=1680m. Something must be wrong with amount request?!
28.02.2024 - 21:55DROPS Design answered:
Dear Mrs Pille, but you work here with 2 strands Kid-Silk, so 200 g = 1680 m Kid-Silk / 2 strands = 840 m, which is matching the meterage in Air. Happy knitting!
29.02.2024 - 08:16
![]() Céline wrote:
Céline wrote:
Rectification : cela cree une côte *au milieu du Dos * (pas du devant)
29.01.2024 - 12:51
![]() Céline wrote:
Céline wrote:
Bonjour, j’ai la même question qu’Hannah car le problème n’est pas résolu. Je suis en train de tricoter le début de l’empiècement, j’ai 96 mailles. Je termine mon tour par une maille envers, et pour respecter le point de riz, je dois commencer le tour suivant aussi par une maille envers... cela va donc créer une côte en plein milieu du devant... Où est l’erreur...? Merci 👍
29.01.2024 - 12:43DROPS Design answered:
Bonjour Céline, les mailles des raglans vont toujours être tricotées à l'endroit, autrement dit, vous allez tricoter alternativement 1 m end, 1 m env sur les mailles du dos, 1 maille endroit tous les tours pour le raglan, le point de riz sur les manches, 1 maille endroit tous les rangs pour le raglan, le point de riz sur le devant, 1 maille endroit tous les tours pour le raglan, le point de riz sur la manche, 1 maille endroit pour le raglan, et le point de riz sur le reste du dos; au tour suivant, tricotez les mailles point de riz comme avant (les mailles endroit à l'envers et les mailles envers à l'endroit et tricotez les mailles des raglans à l'endroit. Bon tricot!
30.01.2024 - 07:31
![]() Sara wrote:
Sara wrote:
Se è corretta la vostra risposta a Michel del 04/12/2023, allora c'è un errore sullo collo per la taglia M. Come fanno ad esserci 68 maglie se 7+17+19+17+8 = 68 più le 4 maglie per il raglan fa 72!
18.01.2024 - 15:20DROPS Design answered:
Buonasera Sara, grazie per la segnalazione: abbiamo corretto il numero di maglie per il davanti. Buon lavoro!
17.03.2024 - 18:03
![]() Sissel Bergtun wrote:
Sissel Bergtun wrote:
Hvor viser mønster A1 som det vises til?
18.01.2024 - 07:51DROPS Design answered:
Hei Sissel. Hele genseren strikkes i A.1 (perlestrikk), bortsett fra halskanten, vrangbordene og raglanlinjen. mvh DROPS Design
18.01.2024 - 10:24
![]() MICHEL wrote:
MICHEL wrote:
Il y a une erreur dans le patron du pull 243-3 Taille S Avec 68 mailles au départ pour le col comment peut-on avoir 64 mailles avant les diminutions ? 7+17+15+17+8 = 64 mailles ?
04.12.2023 - 15:33DROPS Design answered:
Bonjour Michel, notez que les marqueurs des raglans se mettent dans une maille (et pas entre 2 mailles), ainsi vous avez bien vos 64 mailles décrites + 4 mailles (chacune avec un marqueur) = 68 mailles. Bon tricot!
04.12.2023 - 16:17
![]() Hanna wrote:
Hanna wrote:
Hei, Ohjevideolla neuvotaan tekemään helmineuletta suljettuna neuleena parittomalla määrällä silmukoita. Ohjeessa kuitenkin on parillinen määrä kun jatketaan kauluksen ja lisäysten jälkeen. Miten helmineuleen saa mennään oikein?
11.11.2023 - 12:53DROPS Design answered:
Kun työssä on parillinen määrä silmukoita, helmineule neulotaan siten, että neulotaan vuorotellen 1 silmukka oikein ja 1 silmukka nurin. Seuraavalla kerroksella oikeat silmukat neulotaan nurin ja nurjat silmukat neulotaan oikein.
14.11.2023 - 18:04
![]() Sue wrote:
Sue wrote:
Guten Tag Der Bund am Hals wird doppelt gestrickt. Wird dies direkt am Anfang als Doppeltes Bündchen gestrickt (doppelte Maschenanzahl und nur jede 2. Masche wird gestrickt?) oder wird er ‚normal‘ gestrickt und dann am Ende eingeschlagen und festgenäht? Freundliche Grüsse
22.10.2023 - 20:43DROPS Design answered:
Liebe Sue, in diesem Modell wird der Hals am Ende umgeschlagen und festgenäht (siehe FERTIGSTELLEN, aber gerne können Sie auch nach den 11 oder 13 cm Bündchen eine Runde stricken und gleichzeitig die Maschen von der Anschlagskante zusammenstricken so brauchen Sie später keine Naht. Viel Spaß beim stricken!
23.10.2023 - 10:11
|
|||||||
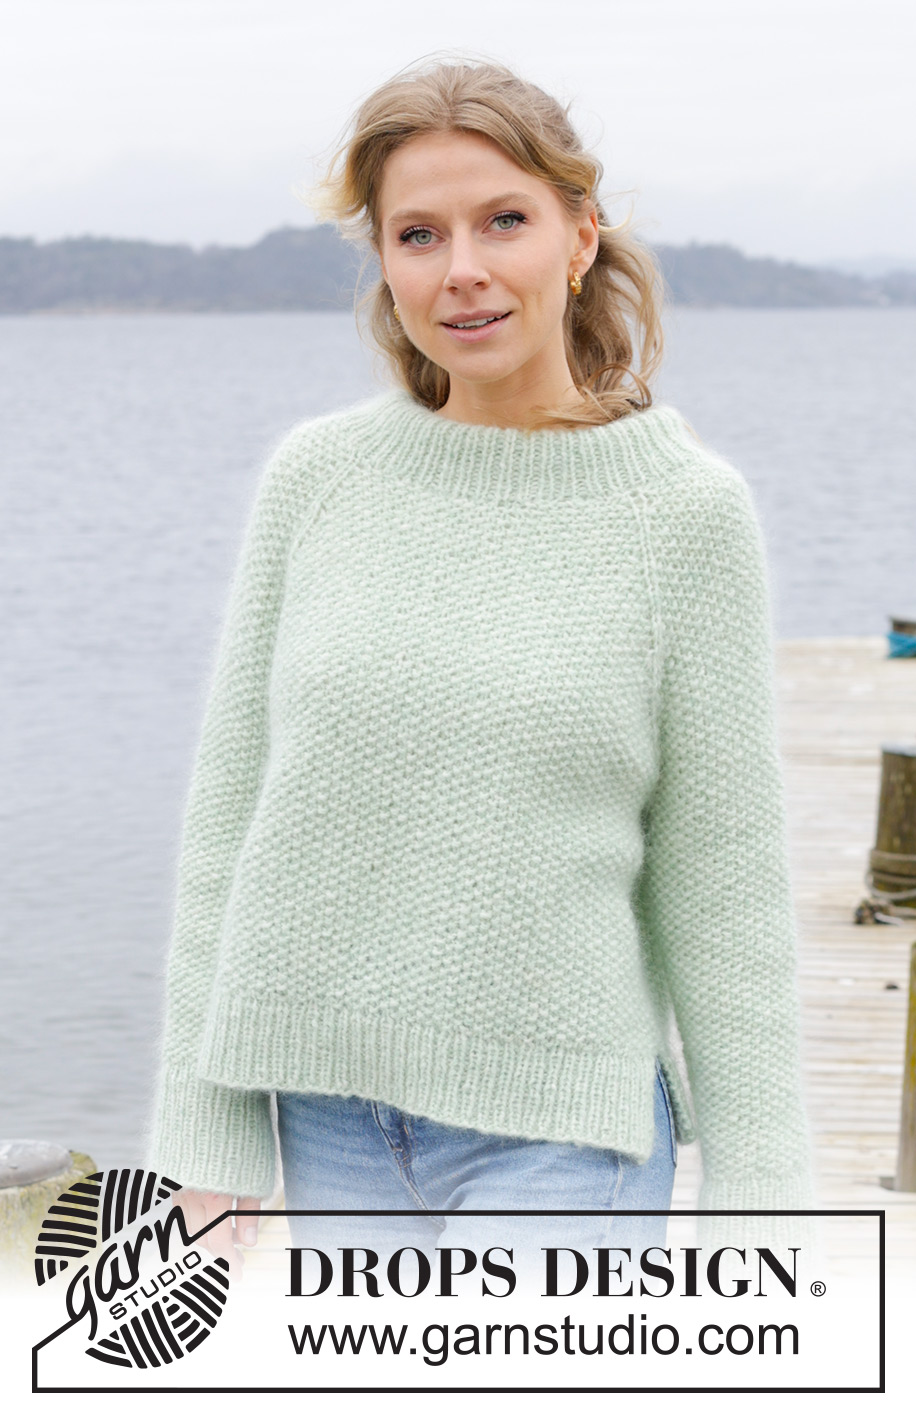
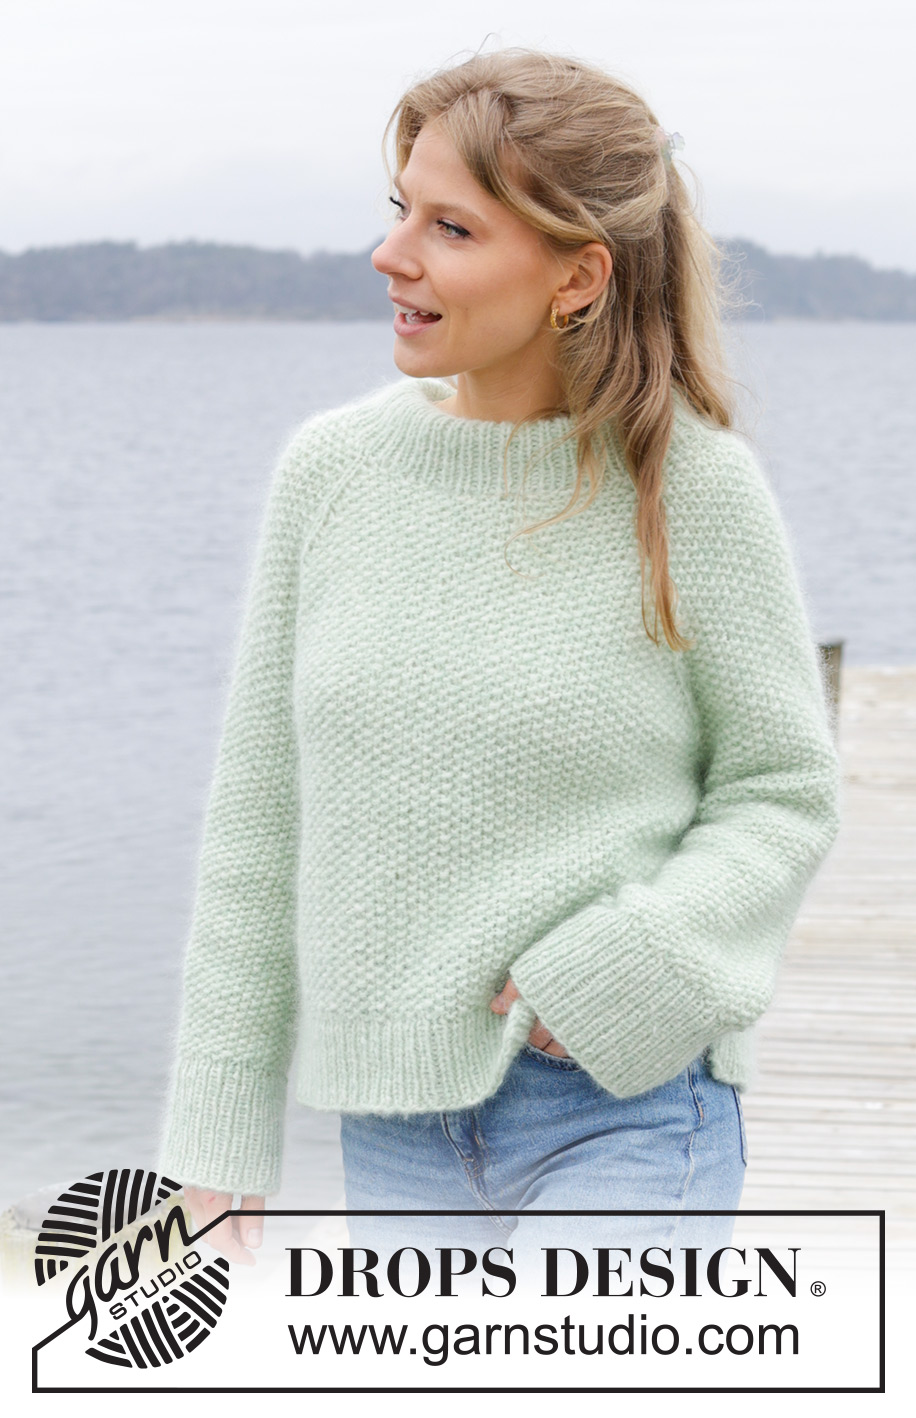
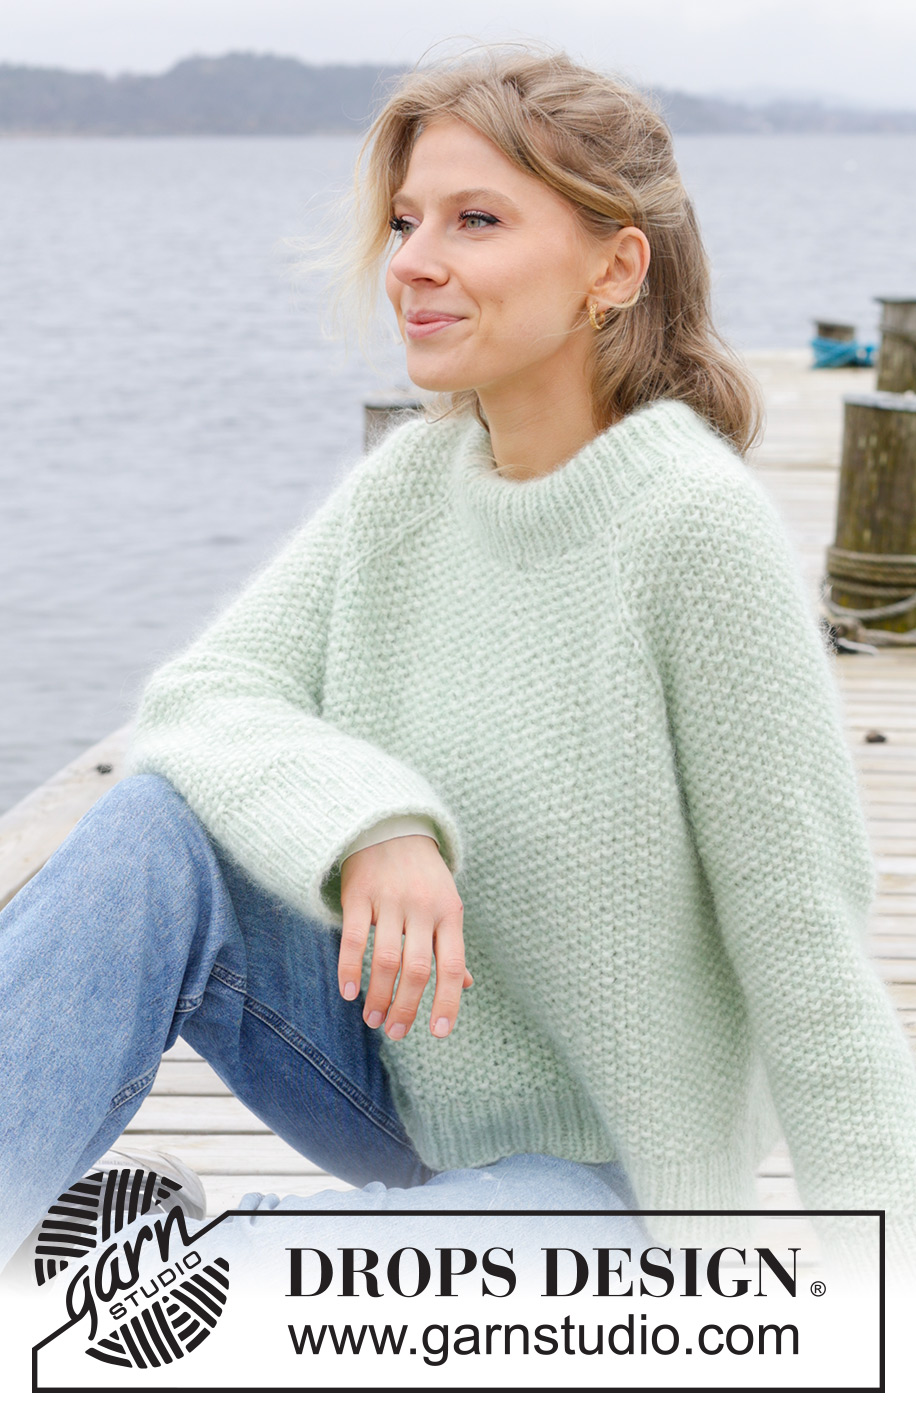
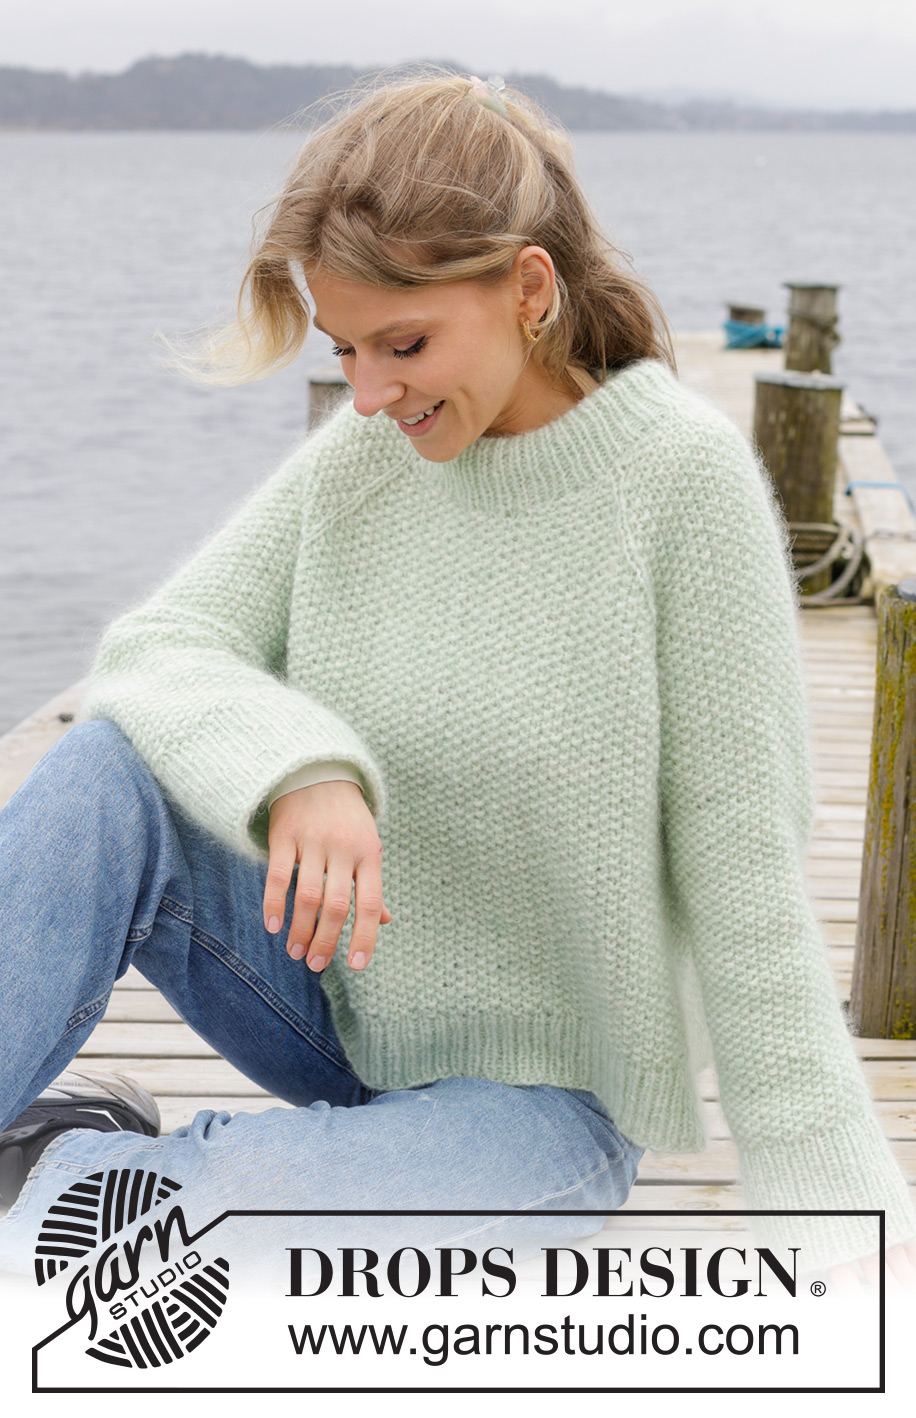
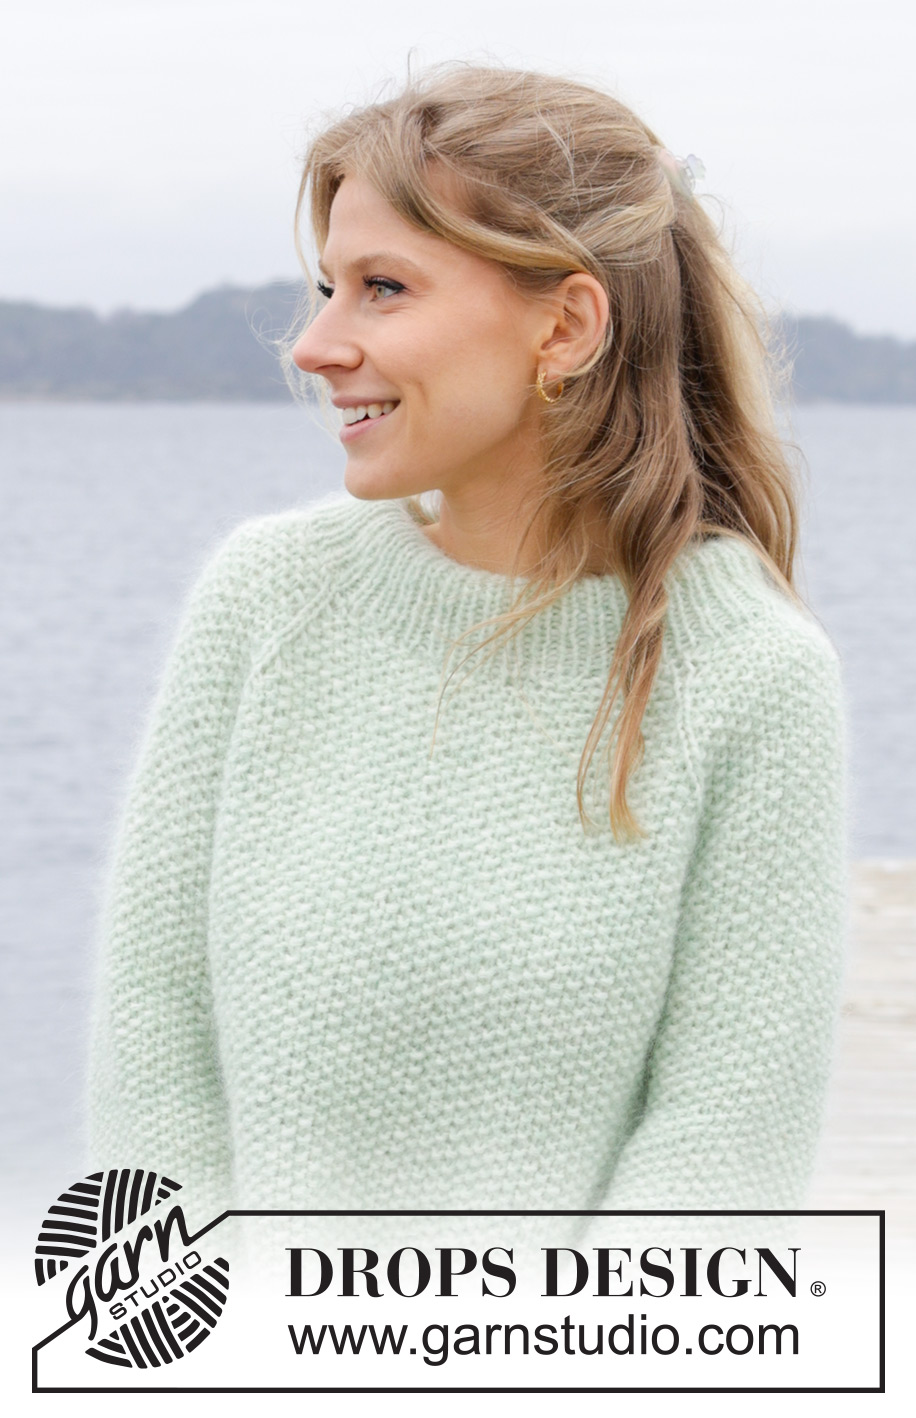
Green Whisper#greenwhispersweater |
|||||||
 |
 |
||||||
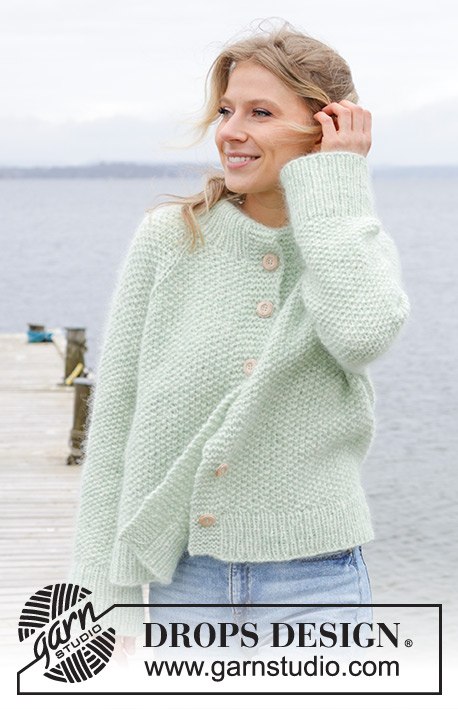
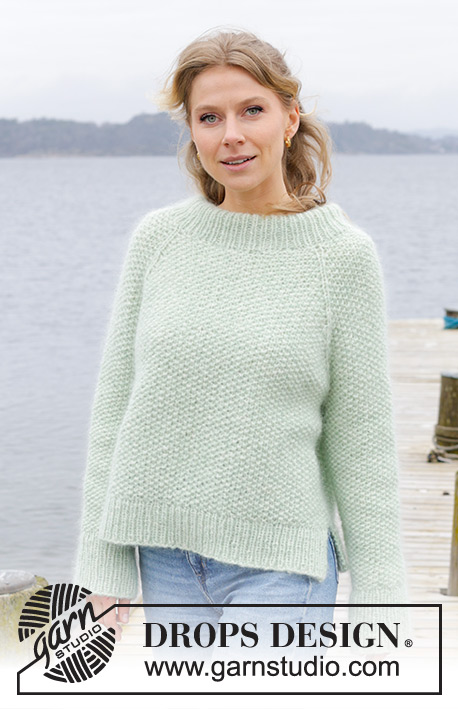
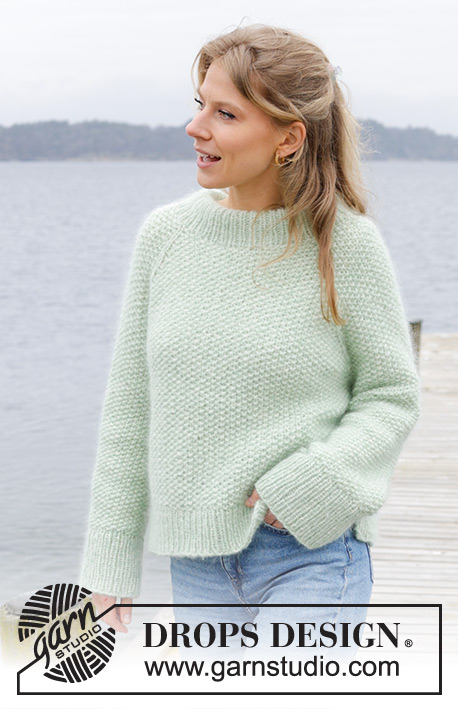
Knitted sweater in DROPS Air and DROPS Kid-Silk. The piece is worked top down with moss stitch, double neck, raglan and split in sides. Sizes S - XXXL.
DROPS 243-3 |
|||||||
|
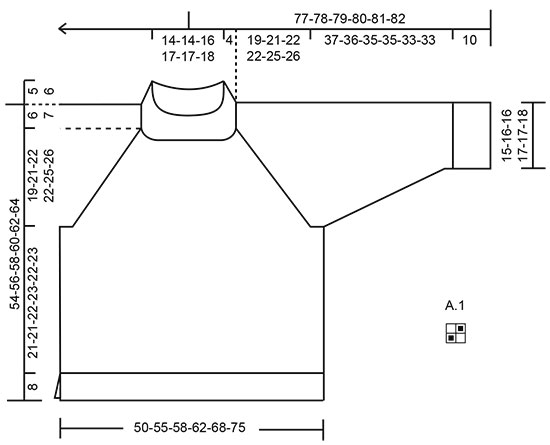
------------------------------------------------------- EXPLANATIONS FOR THE PATTERN: ------------------------------------------------------- GARTER STITCH (worked back and forth): Knit all rows. 1 ridge = knit 2 rows. PATTERN: See diagram A.1. The diagram shows all rows in the pattern from the right side. . RAGLAN: All increases are worked from the right side! Increase 1 stitch before/after the 4 marker-stitches – hereafter called raglan-stitches. The raglan-stitches are knitted from the right side/purled from the wrong side. Increase 1 stitch by making 1 yarn over which is worked as follows on the next row/round (subsequently worked into A.1): FROM THE WRONG SIDE: BEFORE raglan-stitches: Purl twisted if the stitch before is knitted, knit twisted if the stitch before is purled – no hole. AFTER raglan-stitches: Slip the yarn over knit-wise, insert the left needle and replace it reversed (twisted), purl if the next stitch is knitted, knit if the next stitch is purled – no hole. FROM THE RIGHT SIDE: BEFORE raglan-stitches: Slip the yarn over knit-wise, insert the left needle and replace it reversed (twisted), knit if the stitch before is purled, purl if the stitch before is knitted – no hole. AFTER raglan-stitches: Knit twisted if the next stitch is purled, purl twisted if the next stitch is knitted – no hole. INCREASE TIP (evenly spaced): Increase 1 stitch by making 1 yarn over which is worked twisted on the next row/round to avoid a hole. DECREASE TIP (for sleeves): Decrease 1 stitch alternately before and after the marker by knitting/purling 2 stitches together (depending on the pattern). ------------------------------------------------------- START THE PIECE HERE: ------------------------------------------------------- SWEATER – SHORT OVERVIEW OF THE PIECE: The neck is worked in the round with circular needle, from mid back and top down. A neckline is worked with short rows, back and forth with circular needle; then the yoke continued in the round with circular needle from mid back. The yoke is divided for body and sleeves and the body is continued in the round to the split, then front piece and back piece are worked separately back and forth to the finished measurements. The sleeves are worked with short circular needle/double pointed needles, top down. DOUBLE NECK: Cast on 68-68-72-80-80-84 stitches with short circular needle size 7 MM = US 10.75, 1 strand DROPS Air and 2 strands DROPS Kid-Silk (3 strands). Change to short circular needle size 5.5 MM = US 9 and work rib in the round (knit 1, purl 1) for 11-11-11-13-13-13 cm = 4⅜"-4⅜"-4⅜"-5⅛"-5⅛"-5⅛". Insert 4 markers without working the stitches and insert each marker in a purled stitch, which become raglan-stitches and are always knitted (seen from the right side). Count 7-7-9-9-9-11 stitches (approx. half back piece), insert marker-1 in the next stitch, count 17-17-15-19-19-17 stitches (sleeve), insert marker-2 in the next stitch, count 15-15-19-19-19-23 stitches (front piece), insert marker-3 in the next stitch, count 17-17-15-19-19-17 stitches (sleeve), insert marker-4 in the next stitch. There are 8-8-10-10-10-12 stitches after the last marker (approx. half back piece). Knit 1 round and decrease 4-4-0-4-4-0 stitches evenly as follows: Work past marker-1, decrease 2-2-0-2-2-0 stitches evenly between markers 1 and 2 (do not decrease the raglan-stitches), work past marker-3, decrease 2-2-0-2-2-0 stitches evenly between markers 3 and 4, work to end of round = 64-64-72-76-76-84 stitches. There are 15-15-15-17-17-17 stitches between markers 1 and 2 and markers 3 and 4 (sleeves) and 15-15-19-19-19-23 stitches between markers 2 and 3 (front piece) and markers 4 and 1. Cut the strands. NECKLINE: Change to circular needle size 7 MM = US 10.75 and work short rows AT THE SAME TIME as you increase for raglan as described below. REMEMBER THE KNITTING GAUGE. ROW 1 (right side): Start 2 stitches before raglan-stitch-3 (i.e., front left of neck when the garment is worn). Work A.1 (remember the 4 raglan-stitches are knitted from the right side/purled from the wrong side) and increase for RAGLAN on each side of all 4 raglan-stitches – read description above, until you have worked 2 stitches past raglan-stitch-2 (front right of neck = 8 increased stitches for raglan). Turn, tighten the strand. ROW 2 (wrong side): Work A.1 (yarn overs worked as described under RAGLAN), until you have worked 2 stitches past the start of the short rows by marker-3. Turn, tighten the strand. ROW 3 (right side): Work A.1 and increase for raglan on each side of all 4 raglan-stitches, until you have worked 2 stitches past where you turned last time by marker-2 (8 increased stitches). Turn, tighten the strand. ROW 4 (wrong side): Work A.1 until you have worked 2 stitches past where you turned last time by marker-3. Turn, tighten the strand. ROW 5 (right side): Work A.1 and increase for raglan on each side of all 4 raglan-stitches, until you have worked 2 stitches past where you turned last time by marker-2 (8 increased stitches). Turn, tighten the strand. ROW 6 (wrong side): Work A.1 until you have worked 2 stitches past where you turned last time by marker-3. Cut the strands. The short rows are finished and you have increased 3 times for raglan on each side of all 4 raglan-stitches = 88-88-96-100-100-108 stitches. YOKE: Start mid-back again and continue A.1 in the round (raglan-stitches are knitted every round). Continue to increase for raglan as follows: Increase every 2nd round but every 2nd increase is only on the body (i.e., increase on the front/back pieces every 2nd round and on the sleeves every 4th round – alternately 4 and 8 increased stitches). Increase 12-14-18-18-20-20 times on the front/back pieces and 6-7-9-9-10-10 times on the sleeves = 160-172-204-208-220-228 stitches. The sleeve increases are finished. Continue to increase on the front/back pieces 3-4-0-1-2-3 more times = 172-188-204-212-228-240 stitches. All increases are now finished. Continue working without further increases until the yoke measures 19-21-22-22-25-26 cm = 7½"-8¼"-8¾"-8¾"-9¾"-10¼", measured after the rib and down mid-back. Divide for the body and sleeves as follows: Work the first 26-29-31-32-35-38 stitches (half back piece), place the next 33-35-39-41-43-43 stitches on 1 thread for the sleeve, cast on 7-7-7-9-11-13 stitches (in side under sleeve), work 53-59-63-65-71-77 stitches (front piece), place the next 33-35-39-41-43-43 stitches on 1 thread for the sleeve, cast on 7-7-7-9-11-13 stitches (in side under sleeve), work the last 27-30-32-33-36-39 stitches (half back piece). The body and sleeves are finished separately. The piece is now measured from here! BODY: = 120-132-140-148-164-180 stitches. Insert 1 marker in the middle of the 7-7-7-9-11-13 stitches cast on under each sleeve. Allow them to follow you work onwards – they are used when dividing for the split in each side. Continue A.1 in the round over all stitches. When the body measures 21-21-22-23-22-23 cm = 8¼"-8¼"-8¾"-9"-8¾"-9" from the division, divide at both markers and finish each piece separately. One marker-stitch belongs to the front piece, the other to the back piece. BACK PIECE: = 60-66-70-74-82-90 stitches. Knit 1 row from the right side and increase 17-19-19-23-23-25 stitches evenly spaced – read INCREASE TIP = 77-85-89-97-105-115 stitches. Change to circular needle size 5.5 MM = US 9 and work as follows from the wrong side: 1 GARTER STITCH – read description above, * purl 1, knit 1 *, work from *-* until there are 2 stitches left, purl 1 and 1 garter stitch. Continue this rib back and forth for 8 cm = 3⅛". Bind off. You can use Italian bind-off – see video under Tips and Help on our web site. FRONT PIECE: = 60-66-70-74-82-90 stitches. Work in the same way as the back piece. SLEEVES: Place the 33-35-39-41-43-43 stitches from the thread on the one side of the piece on short circular needle/double pointed needles size 7 MM = US 10.75 and knit up 1 stitch in each of the 7-7-7-9-11-13 stitches cast on under the sleeve = 40-42-46-50-54-56 stitches. Insert a marker in the middle of the new stitches under the sleeve. Start at the marker and continue A.1 in the round over all stitches. When the sleeve measures 4-4-4-4-3-3 cm = 1½"-1½"-1½"-1½"-1⅛"-1⅛" from the division, decrease 1 stitch before the marker – read DECREASE TIP. When the sleeve measures 12-12-8-7-5-5 cm = 4¾"-4¾"-3⅛"-2¾"-2"-2", decrease 1 stitch after the marker – remember DECREASE TIP. Decrease like this, alternately before and after the marker every 8-8-4-3-2-2 cm = 3⅛"-3⅛"-1½"-1⅛"-¾"-¾" a total of 4-4-8-10-14-14 times (2-2-4-5-7-7 times before the marker and 2-2-4-5-7-7 times after the marker) = 36-38-38-40-40-42 stitches. Continue working until the sleeve measures 37-36-35-35-33-33 cm = 14½"-14¼"-13¾"-13¾"-13"-13" from the division. Knit 1 round and increase 14-14-16-16-18-18 stitches evenly spaced = 50-52-54-56-58-60 stitches. Change to double pointed needles size 5.5 MM = US 9 and work rib (knit 1, purl 1) for 10 cm = 4". Bind off. You can use Italian bind-off. The sleeve measures approx. 47-46-45-45-43-43 cm = 18½"-18"-17¾"-17¾"-17"-17". Work the other sleeve in the same way. ASSEMBLY: Fold the neck double to the inside and sew down. To avoid the neck being tight and rolling outwards, it is important that the seam is elastic. |
|||||||
Diagram explanations |
|||||||
|
|||||||
|
|||||||
Have you finished this pattern?Tag your pictures with #dropspattern #greenwhispersweater or submit them to the #dropsfan gallery. Do you need help with this pattern?You'll find 36 tutorial videos, a Comments/Questions area and more by visiting the pattern on garnstudio.com. © 1982-2025 DROPS Design A/S. We reserve all rights. This document, including all its sub-sections, has copyrights. Read more about what you can do with our patterns at the bottom of each pattern on our site. |
|||||||


With over 40 years in knitting and crochet design, DROPS Design offers one of the most extensive collections of free patterns on the internet - translated to 17 languages. As of today we count 314 catalogs and 11822 patterns - 11812 of which are translated into English (US/in).
We work hard to bring you the best knitting and crochet have to offer, inspiration and advice as well as great quality yarns at incredible prices! Would you like to use our patterns for other than personal use? You can read what you are allowed to do in the Copyright text at the bottom of all our patterns. Happy crafting!
Post a comment to pattern DROPS 243-3
We would love to hear what you have to say about this pattern!
If you want to leave a question, please make sure you select the correct category in the form below, to speed up the answering process. Required fields are marked *.