
Looking for a yarn?


Comments / Questions (39)
![]() Susan Joan Gibb wrote:
Susan Joan Gibb wrote:
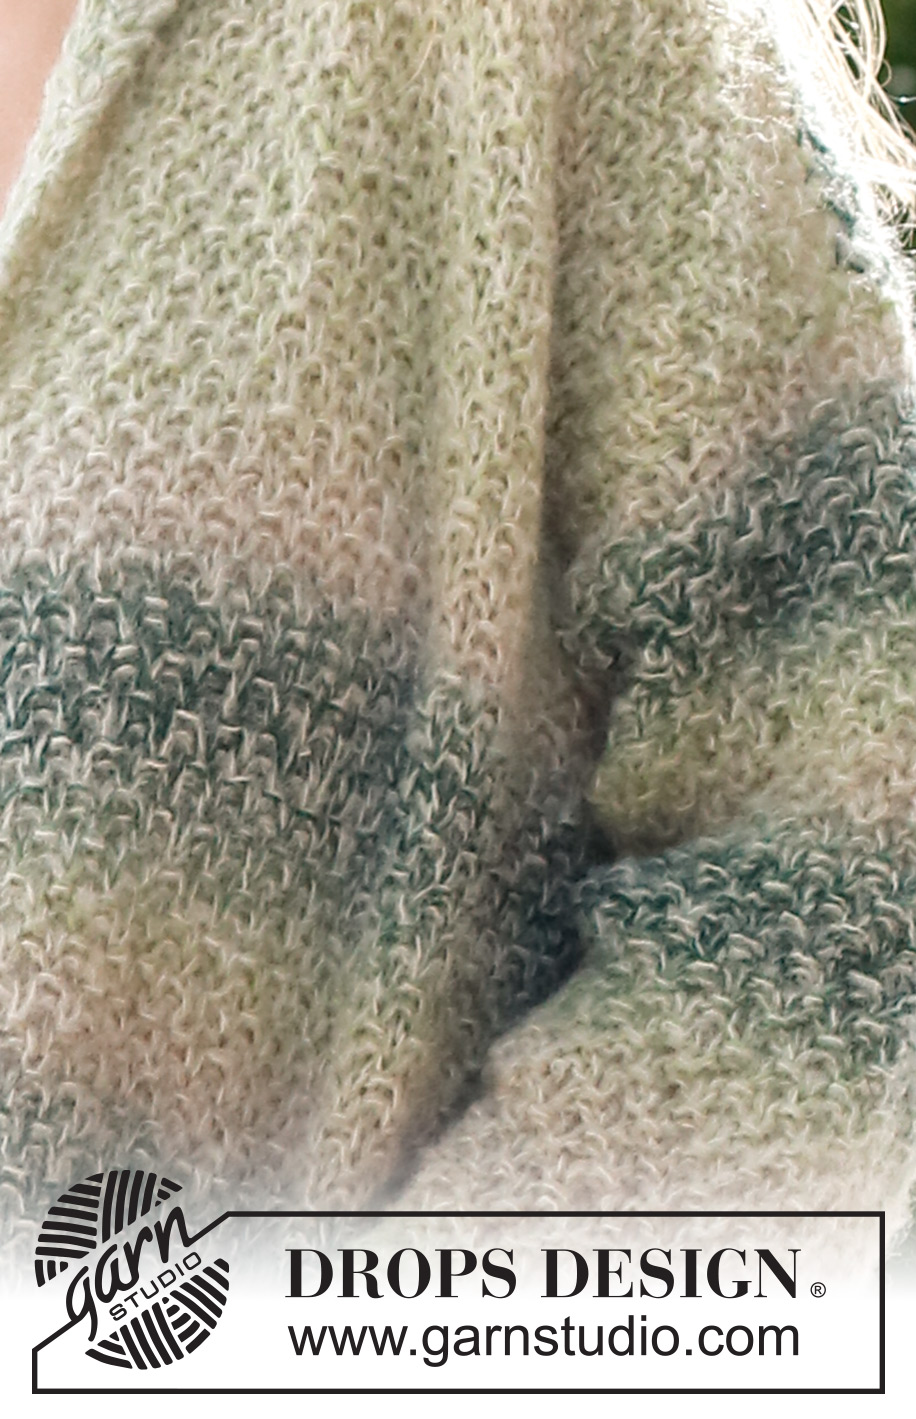
The directions do not indicate how to achieve the stripe pattern of blue/green and the off-white areas. Where do the changes occcur? Thank you.
12.02.2025 - 15:19DROPS Design answered:
Dear Mrs Gibb, stripes were automatically worked through the yarn Delight - as this yarn is now discontinued, you can use the yarn converter to see alternatives and new amount of yarn, to keep same kind of effect, try Fabel. Happy knitting!
12.02.2025 - 16:20
![]() Birgit wrote:
Birgit wrote:
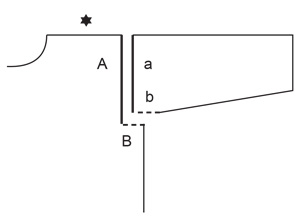
Ich habe eine Frage zum Kragen. Ich verstehe zur Zeit noch nicht, wie die im Modell gezeichnete Schräge in der Mitte entsteht. Wie strickt man weiter, wenn die 8 cm an der schmalsten Kragenstelle erreicht wurden? Ich danke schon jetzt für die Hilfe.
20.12.2024 - 23:04DROPS Design answered:
Liebe Birgit, nach 8 cm ketten Sie die Maschen ab; die andere Seite vom Schalkragen wird genauso gestrickt dann beide Seiten zusammengenäht und endlich am Halsausschnitt angenäht. In diesem Video zeigen wir, wie man so einen Schlakragen (im Video ohne verkürzten Reihen) strickt. Viel Spaß beim Stricken!
02.01.2025 - 09:31
![]() Belinda wrote:
Belinda wrote:
De wol drops delight voor dit patroon is niet meer verkrijgbaar. Welk garen is gelijkaardig en hoeveel heb ik dan nodig voor een maat large.
24.10.2024 - 13:18DROPS Design answered:
Dag Belinda,
Je kunt ieder garen gebruiken in garengroep A. Om de hoeveelheid te weten kun je de garenvervanger gebruiken. Hiervan staat een link vlak onder de lijst met materialen bij het patroon. Helaas is er niet een garen met vergelijkbare kleurovergangen erin.
24.10.2024 - 21:15
![]() Birgit wrote:
Birgit wrote:
Ich verstehe noch nicht ganz einen Punkt. Es steht in der Anleitung, dass man z.B. 119 Maschen Rippenmuster strickt, 12 cm. Dann steht, in der Hinreihe rechts stricken und dabei 41 Maschen abnehmen. Das verstehe ich nicht, denn der Schnitt sieht gerade aus und das ist ja fast 1/3 der ausgenommenen Maschen. Können Sie mir bitte helfen beim Verständnis?\r\nVielen Dank.
22.10.2024 - 12:39DROPS Design answered:
Liebe Birgit, man braucht für die gleiche Breite mehr Maschen für Bündchen mit der Nadeln Nr 5 als fürs Glattrechts mit der Nadelnd Nr7, deshalb muss man nach Bündchen abnehmen - da die untere Kante soll die Arbeit nicht in der Breite zusammenziehen. Viel Spaß beim Stricken!
22.10.2024 - 13:49
![]() Eva Ljung wrote:
Eva Ljung wrote:
Jag undrar angående mönstret varven visas från rätsidan hur stickar man de aviga varven? Med vänlig hälsning, Eva Ljung
08.07.2024 - 10:18DROPS Design answered:
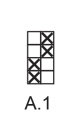
Hei Eva. Ta en titt på Diagramteksten (over målskissen). Den blanke ruten i mønstret strikkes slik fra vrangen: avigmaska från avigsidan. Ruten med kryss strikkes slik fra vrangen: rätmaska från avigsidan. mvh DROPS Design
09.07.2024 - 13:11
![]() Eva Ljung wrote:
Eva Ljung wrote:
Hur många nystan av Drops Air ? (Bytt mot Brushed Alpaca Silk) Hur många nystan av Kid Silk?( Bytt mot Delight) Storlek M Med vänlig hälsning, Eva Ljung
01.07.2024 - 12:22DROPS Design answered:
Hei Eva. Bruk vår Garnkalkulator, du finner den til høyre for bildet (PC) eller under bildet (Mobil). Klikk på: – Bruk vår garnkalkulator her. Så regner den det for deg. mvh DROPS Design
01.07.2024 - 14:08
![]() Belinda wrote:
Belinda wrote:
Drops delight 08 groen/beige zou niet meer te krijgen zijn. Als vervanging krijg je flora, safran en nog andere. Dit zijn echter enkele kleuren en geen mix van groen/beige. Welke neem ik best ter vervang?
26.05.2024 - 12:52DROPS Design answered:
Dag Belinda,
Er is helaas niet echt een één op één vervanging hiervoor die de kleurovergang goed nabootst met groen/beige, je zult dus duidelijkere strepen krijgen met een vervangend garen in 1 kleur. In plaats van Flora zou je ook Alpaca kunnen kiezen. Deze heeft meer keuze in groentinten. Safran is een katoengaren en dus minder geschikt als vervanging.
05.06.2024 - 20:16
![]() Heike Radacher wrote:
Heike Radacher wrote:
Kann es stimmen dass man nach dem Bündchen im Rückenteil 37 Maschen abnehmen soll?
18.04.2024 - 19:29DROPS Design answered:
Liebe Frau Radacher, ja genau, für die gleiche Breite braucht man mehr Maschen für Bündchen mit den kleineren Nadeln als für das Muster mit den grösseren Nadeln, deshalb muss man abnehmen. Viel Spaß beim Stricken!
19.04.2024 - 08:36
![]() Agnieszka wrote:
Agnieszka wrote:
Cześć. Mam pytanie. Jak zrobić tył swetra, żeby pasy kolorów były takie jak z przodu swetra. Bo rozumiem że dwie części przodu i oba rękawy zacząć nowym motkiem wełny Drops Delight. Proszę o podpowiedź. Pozdrawiam serdecznie Agnieszka
01.02.2024 - 10:33DROPS Design answered:
Witaj Agnieszko, kiedy rzędy są krótsze, jak tu na przodach, pasy będą szersze. Jak zaczniesz robić tył, pasy będą węższe. Aby miały taką samą szerokość jak te na przodach, musisz posiłkować się nowym motkiem włóczki Delight. Pozdrawiamy!
03.02.2024 - 08:08
![]() Anke Hoffmann wrote:
Anke Hoffmann wrote:
Wieviel Wolle benötige ich für die Jacke in Größe M?
27.01.2024 - 18:47
|
||||||||||
Forest Whispers#forestwhisperssweater |
||||||||||
 |
 |
|||||||||
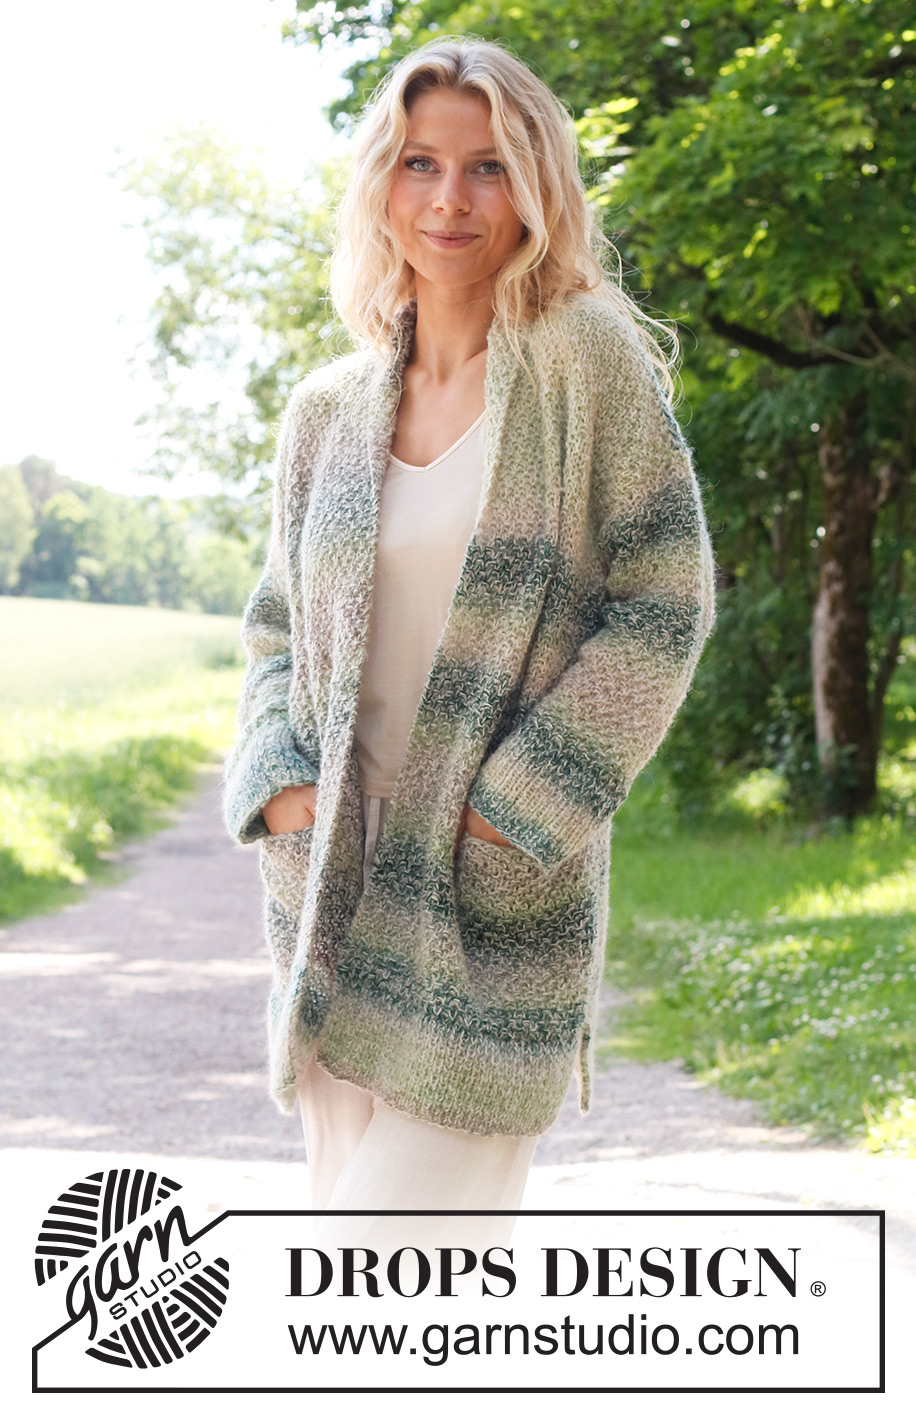
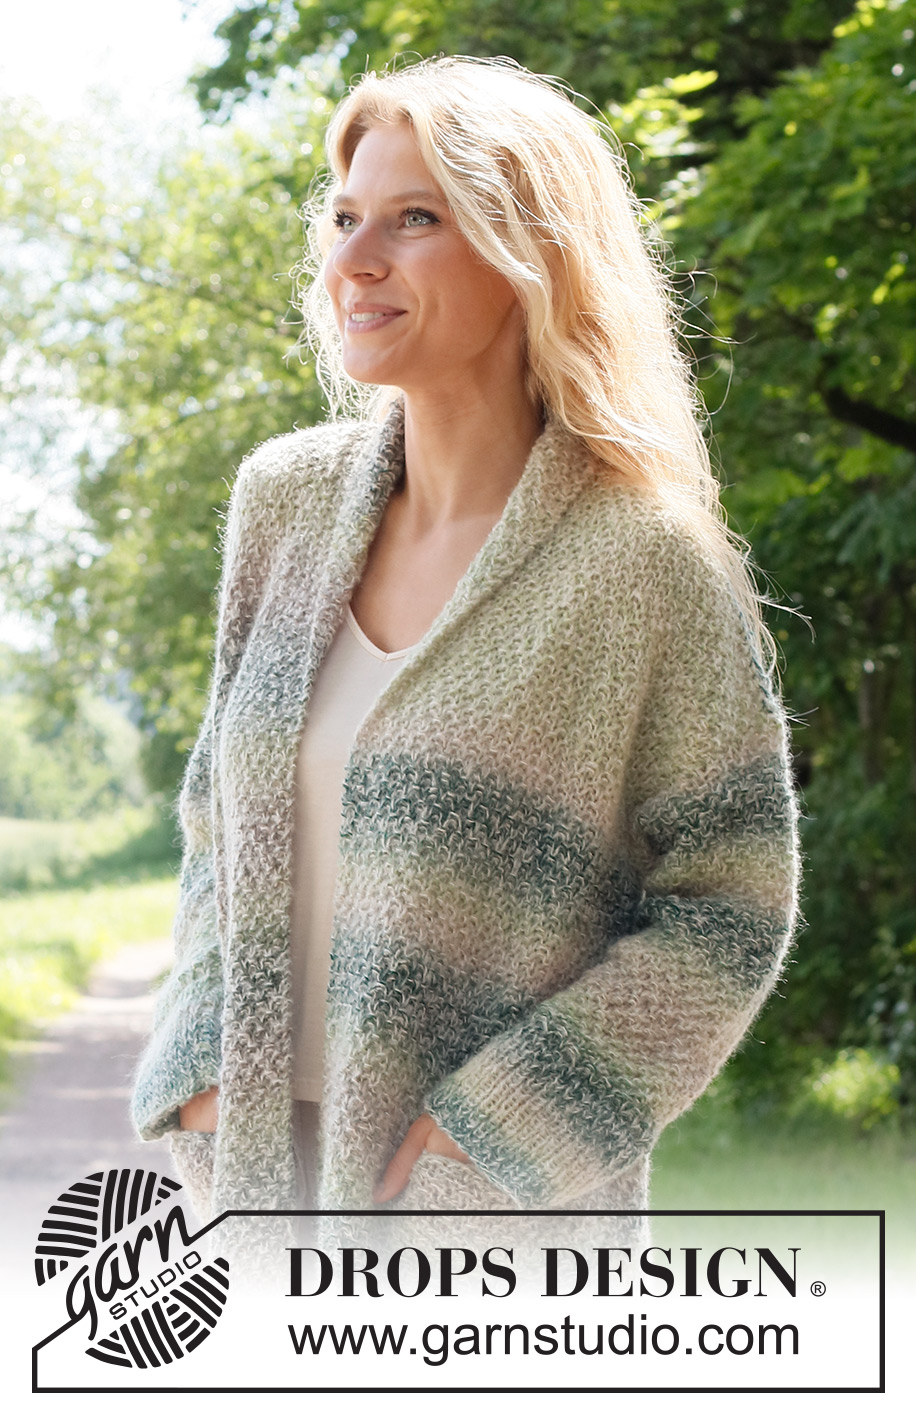
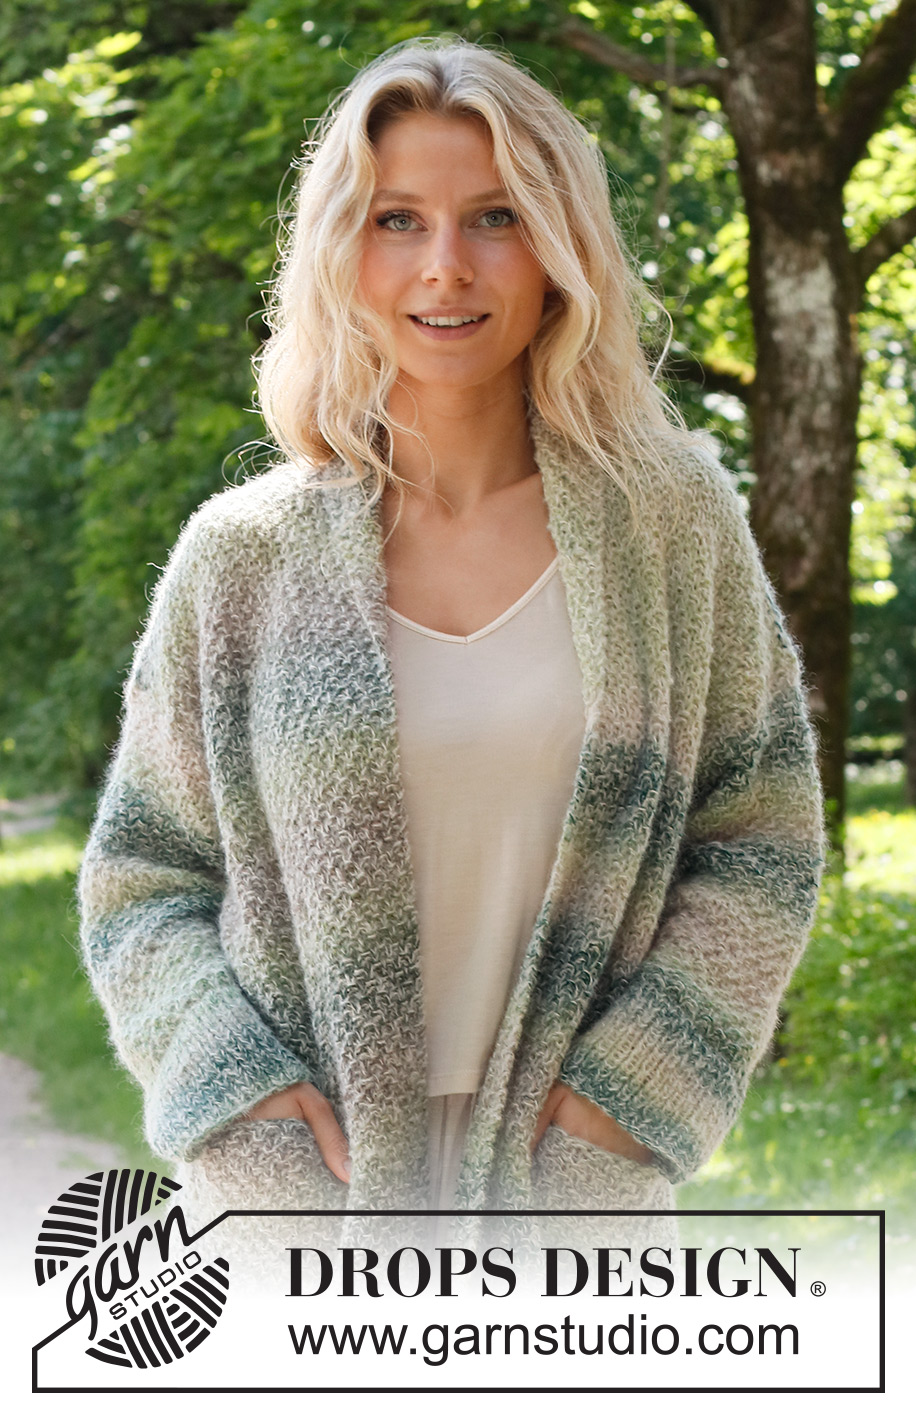
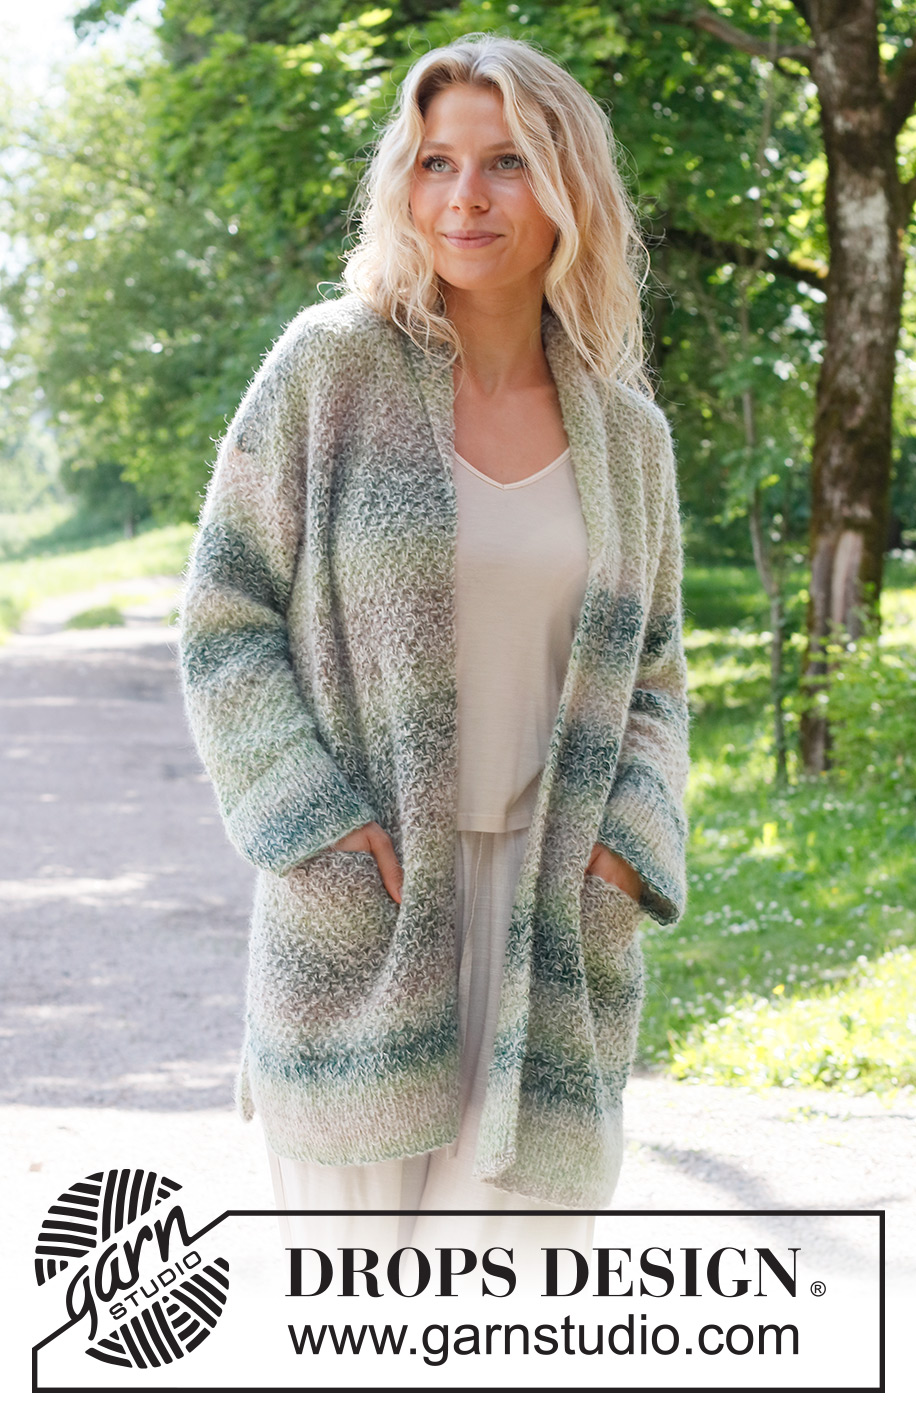
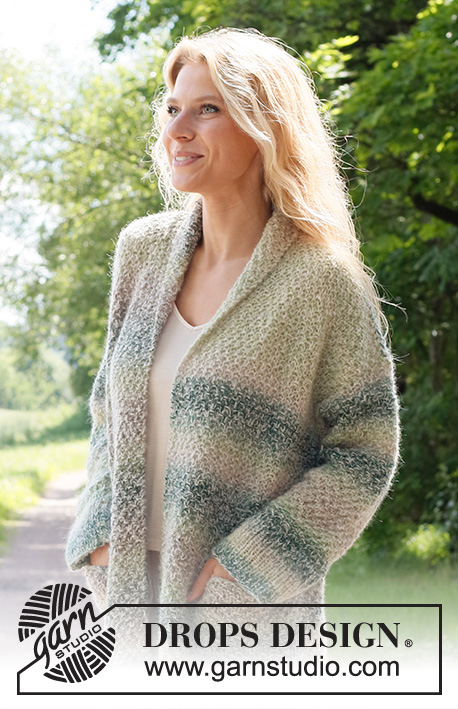
Knitted jacket in DROPS Delight and DROPS Brushed Alpaca Silk. The piece is worked bottom up with moss stitch, shawl collar, pockets and split in the sides. Sizes S - XXXL.
DROPS 230-45 |
||||||||||
|
------------------------------------------------------- EXPLANATIONS FOR THE PATTERN: ------------------------------------------------------- RIDGE/GARTER STITCH (worked back and forth): Knit all rows. 1 ridge = knit 2 rows. PATTERN: See diagram A.1. The diagram shows all rows in the pattern from the right side. DECREASE TIP (evenly spaced): To work out how to decrease evenly, count the total number of stitches on needle (e.g. 103 stitches) minus the edge stitches (e.g. 2 stitches) and divide the remaining stitches by the number of decreases to be made (e.g. 37) = 2.7. In this example decrease by knitting approx.. every 2nd and every 3rd stitch together. INCREASE TIP (sleeves): Increase 1 stitch inside the 1 edge stitch on each side by making 1 yarn over. On the next row work the yarn overs twisted to avoid holes. Then work the new stitches into A.1. KNITTING TIP: So the pattern fits, there is 1 more stitch between the pocket and the side on the left front piece than on the right front piece. BINDING-OFF TIP: To avoid the bind-off edge being tight you can bind off with a larger size needle. If the edge is still tight, make 1 yarn over after approx. each 4th stitch at the same time as binding off; the yarn overs are bind off as normal stitches. ------------------------------------------------------- START THE PIECE HERE: ------------------------------------------------------- JACKET – SHORT OVERVIEW OF THE PIECE: The piece is worked in sections, back and forth, then sewn together. BACK PIECE: Cast on 103-109-119-129-141-153 stitches (including 1 edge stitch on each side) with circular needle size 5 MM = US 8 and 1 strand of each quality (= 2 strands). Work the first row from the right side as follows: 1 edge stitch in GARTER STITCH – read description above, * knit 1, purl 1 *, work from *-* until there are 2 stitches left, knit 1 and 1 edge stitch in garter stitch. Continue this rib for 12 cm = 4¾". Knit 1 row from the right side where you decrease 37-39-41-45-49-53 stitches evenly spaced – read DECREASE TIP, cast on 1 stitch at the end of the row (= edge stitch). Change to circular needle size 7 MM = US 10.75. Work 1 edge stitch in garter stitch, purl to the end of the row and then cast on 1 stitch (= edge stitch) = 68-72-80-86-94-102 stitches. Continue with A.1 and 1 edge stitch in garter stitch on each side. REMEMBER THE KNITTING GAUGE! When the piece measures 50-51-52-53-54-55 cm = 19¾"-20"-20½"-21"-21¼"-21⅝", bind off 2-2-4-5-6-8 stitches at the beginning of the next 2 rows = 64-68-72-76-82-86 stitches. Continue A.1 with 1 edge stitch in garter stitch on each side. When the piece measures 68-70-72-74-76-78 cm = 26¾"-27½"-28⅜"-29⅛"-29½"-30¾", bind off the middle 10-10-10-12-12-12 stitches for the neck and finish each shoulder separately. Then bind off 1 stitch on the next row from the neck = 26-28-30-31-34-36 stitches on the shoulder. Bind off when the piece measures 70-72-74-76-78-80 cm = 27½"-28⅜"-29⅛"-29½"-30¾"-31½" – read BINDING-OFF TIP. Work the other shoulder in the same way. POCKETS: Cast on 24 stitches with circular needle size 7 MM = US 10.75 and 1 strand of each quality (= 2 strands). Work stockinette stitch with 1 edge stitch in garter stitch on each side. When the pocket measures 7 cm = 2¾", continue with A.1 and 1 edge stitch in garter stitch on each side. When the pocket measures 16 cm = 6¼", bind off 1 stitch at the beginning of the next 2 rows = 22 stitches – adjust so the last row worked is the first row in A.1 (this is important so the pattern matches the jacket). Place the stitches on an extra needle. Work 3 more pocket-pieces in the same way = 4 pockets-pieces. RIGHT FRONT PIECE: Cast on 73-77-81-91-97-103 stitches (including 1 edge stitch on each side) with circular needle size 5 MM = US 8 and 1 strand of each quality (= 2 strands). Work the next row from the right side: 1 edge stitch in garter stitch,* knit 1, purl 1* work from *-* until there are 2 stitches left, knit 1 and 1 edge stitch in garter stitch. Continue this rib for 12 cm = 4¾". Knit 1 row from the right side where you decrease 27-29-29-35-37-39 stitches evenly spaced and cast on 1 stitch at the end of the row (= edge stitch). Change to circular needle size 7 MM = US 10.75. Work 1 edge stitch in garter stitch and purl to the end of the row = 47-49-53-57-61-65 stitches. Work A.1 with 1 edge stitch in garter stitch on each side. When the piece measures 31 cm = 12¼" – adjust so the next row to be worked is the first row in A.1 (to match the pocket), work the next row from the right side as follows: Work the first 23-25-27-27-29-31 stitches, insert a marker, work the next 22 stitches, insert a marker (= 1 marker on each side of the pocket opening), work the last 2-2-4-8-10-12 stitches. Work back from the wrong side as follows: Work to the first marker. Work each stitch on one pocket-piece together with each stitch on the front piece, at the same time as you bind off as follows (make sure the inner pocket is wrong side to wrong side on the front piece and the pattern matches in A.1): Work the first stitch on the pocket-piece together with the first stitch on the opening and cast this stitch off. Repeat across the pocket, working together the stitches and then casting them off. Now work to the end of the row. Remove the markers. Turn and work as far as the pocket, work the 22 stitches on a second pocket-piece from the right side, then work to the end of the row = 47-49-53-57-61-65 stitches. There are now 2 pocket-pieces on the front piece which will be sewn together later. Continue A.1 with 1 edge stitch in garter stitch on each side until the piece measures 50-51-52-53-54-55 cm = 19¾"-20"-20½"-21"-21¼"-21⅝". Now bind off 2-2-4-5-6-8 stitches at the beginning of the next row from the wrong side = 45-47-49-52-55-57 stitches. Continue A.1 with 1 edge stitch in garter stitch on each side. When the piece measures 70-72-74-76-78-80 cm = 27½"-28⅜"-29⅛"-29½"-30¾"-31½", bind off the first 26-28-30-31-34-36 stitches on the next row from the wrong side for the shoulder. Work the last 19-19-19-21-21-21 stitches as follows for the collar: ROW 1 (right side): Work the first 11-11-11-13-13-13 stitches as before, knit the last 8 stitches. ROW 2 (wrong side): Knit the first 8 stitches, work the last 11-11-11-13-13-13 stitches as before. ROW 3: Work the first 11-11-11-13-13-13 stitches as before, turn. ROW 4: Work as before over the 11-11-11-13-13-13 stitches. Repeat rows 1 to 4 until the collar measures 7-7-7-8-8-8 cm = 2¾"-2¾"-2¾"-3⅛"-3⅛"-3⅛" at the shortest point (towards the shoulder). Bind off – remember BINDING-OFF TIP. LEFT FRONT PIECE: Cast on 73-77-81-91-97-103 stitches (including 1 edge stitch on each side) with circular needle size 5 MM = US 8 and 1 strand of each quality (= 2 strands). Work the next row from the right side: 1 edge stitch in garter stitch,* knit 1, purl 1* work from *-* until there are 2 stitches left, knit 1 and 1 edge stitch in garter stitch. Continue this rib for 12 cm = 4¾". Knit 1 row from the right side where you decrease 27-29-29-35-37-39 stitches evenly spaced and cast on 1 stitch at the end of the row (= edge stitch). Change to circular needle size 7 MM = US 10.75. Purl to the end of the row and work 1 edge stitch in garter stitch (= edge stitch) = 47-49-53-57-61-65 stitches. Work A.1 with 1 edge stitch in garter stitch on each side. When the piece measures 31 cm = 12¼" – adjust so the next row to be worked is the first row in A.1 (to match the pocket), work the next row from the right side as follows: Work the first 3-3-5-9-11-13 stitches – read KNITTING TIP, insert a marker, work the next 22 stitches, insert a marker (= 1 marker on each side of the pocket opening), work the last 22-24-26-26-28-29 stitches. Work back from the wrong side as follows: Work to the first marker. Work each stitch on the pocket-piece together with each stitch on the front piece, at the same time as you bind off as follows (make sure the pocket-piece is wrong side to wrong side on the front piece and the pattern matches in A.1): Work the first stitch on the pocket-piece together with the first stitch on the opening and cast this stitch off. Repeat across the pocket, working together the stitches and then casting them off. Now work to the end of the row. Remove the markers. Turn and work as far as the pocket, work the 22 stitches on a second pocket-piece from the right side, then work to the end of the row = 47-49-53-57-61-65 stitches. There are now 2 pocket-pieces on the front piece which will be sewn together later. Continue A.1 with 1 edge stitch in garter stitch on each side until the piece measures 50-51-52-53-54-55 cm = 19¾"-20"-20½"-21"-21¼"-21⅝". Now bind off 2-2-4-5-6-8 stitches at the beginning of the next row from the right side = 45-47-49-52-55-57 stitches. Continue A.1 with 1 edge stitch in garter stitch on each side. When the piece measures 70-72-74-76-78-80 cm = 27½"-28⅜"-29⅛"-29½"-30¾"-31½", bind off the first 26-28-30-31-34-36 stitches on the next row from the right side for the shoulder. Work the last 19-19-19-21-21-21 stitches as follows for the collar: ROW 1 (wrong side): Work the first 11-11-11-13-13-13 stitches as before, knit the last 8 stitches. ROW 2 (right side): Knit the first 8 stitches, work the last 11-11-11-13-13-13 stitches as before. ROW 3: Work the first 11-11-11-13-13-13 stitches as before, turn. ROW 4: Work as before over the 11-11-11-13-13-13 stitches. Repeat rows 1 to 4 until the collar measures 7-7-7-8-8-8 cm = 2¾"-2¾"-2¾"-3⅛"-3⅛"-3⅛" at the shortest point (towards the shoulder). Bind off – remember BINDING-OFF TIP. SLEEVES: Cast on 54-58-58-60-60-64 stitches (including 1 edge stitch on each side) with circular needle size 5 MM = US 8 and 1 strand of each quality (= 2 strands). Work the next row from the right side: 1 edge stitch in garter stitch,* knit 1, purl 1* work from *-* until there is 1 stitch left, 1 edge stitch in garter stitch. Continue this rib for 10 cm = 4". Knit 1 row where you decrease 16-18-18-18-18-20 stitches evenly spaced = 38-40-40-42-42-44 stitches. Change to circular needle size 7 MM = US 10.75. Purl 1 row with 1 edge stitch in garter stitch on each side. Now work A.1 with 1 edge stitch in garter stitch on each side. When the sleeve measures 12 cm = 4¾", increase 1 stitch inside the 1 edge stitch on each side – read INCREASE TIP. Increase like this every 4½-4½-3-3-2½-2 cm = 1⅝"-1⅝"-1⅛"-1⅛"-1"-¾" a total of 7-7-9-9-10-11 times = 52-54-58-60-62-66 stitches. Continue working until the sleeve measures 44-44-42-41-39-37 cm = 17¼"-17¼"-16½"-16⅛"-15¼"-14½". Insert 1 marker in each side – mark the bottom of the armhole. Continue working until the sleeve measures 46-46-45-45-43-43 cm = 18"-18"-17¾"-17¾"-17"-17". Bind off - remember BINDING-OFF TIP. Work the other sleeve in the same way. ASSEMBLY: Sew the shoulder seams inside the bind-off edge – make sure the seam is not tight. Sew the sleeve seams, leaving a split of 2-2-3-4-4-6 cm = ¾"-¾"-1⅛"-1½"-1½"-2⅜" at the top. Sew the split to the bottom of the armhole. Then sew the sleeve to the body – see illustration. Sew the side seams inside the 1 edge stitch down to the top of the rib (= 12 cm = 4¾" split left on each side). Sew the collar together mid-back and then sew the collar to the neck-line. Lay the pocket-pieces together and sew around the edges. |
||||||||||
Diagram explanations |
||||||||||
|
||||||||||
|
||||||||||

|
||||||||||
|
||||||||||
Have you finished this pattern?Tag your pictures with #dropspattern #forestwhisperssweater or submit them to the #dropsfan gallery. Do you need help with this pattern?You'll find 26 tutorial videos, a Comments/Questions area and more by visiting the pattern on garnstudio.com. © 1982-2025 DROPS Design A/S. We reserve all rights. This document, including all its sub-sections, has copyrights. Read more about what you can do with our patterns at the bottom of each pattern on our site. |
||||||||||


With over 40 years in knitting and crochet design, DROPS Design offers one of the most extensive collections of free patterns on the internet - translated to 17 languages. As of today we count 314 catalogs and 11821 patterns - 11811 of which are translated into English (US/in).
We work hard to bring you the best knitting and crochet have to offer, inspiration and advice as well as great quality yarns at incredible prices! Would you like to use our patterns for other than personal use? You can read what you are allowed to do in the Copyright text at the bottom of all our patterns. Happy crafting!
Post a comment to pattern DROPS 230-45
We would love to hear what you have to say about this pattern!
If you want to leave a question, please make sure you select the correct category in the form below, to speed up the answering process. Required fields are marked *.