
Looking for a yarn?


Comments / Questions (68)
![]() Siw wrote:
Siw wrote:
Första varvet för raglanökning, sedan då? varv 2?"Fortsätt med slätstickning, 5 framkantmaskor i rätstickning och A1, och öka på varje sida av A1 på varje varv från rätsidan totalt 13 ggr", förklara gärna hur varv 2 ska stickas? Har stickat många tröjor tidigare, men denna beskrivningen förstår jag inte?
08.06.2025 - 19:14
![]() Linda wrote:
Linda wrote:
Hej! Jag stickar cardiganen i storleken 1/3 mån och har gjort økningar 13 ggr men arbetet mæter inte 10 cm utan endast 7,5, kænner mig osæker kring hur jag ska fortsætta. Ska jag bara fortsætta sticka utan några økningar tills jag når de 10 cm som står i mønstret? Tack på førhand!
06.05.2025 - 23:54DROPS Design answered:
Hei Linda. Stemmer strikkefastheten din i høyden? Du kan evnt fortsette til det oppgitte mål. mvh DROPS Design
12.05.2025 - 09:43
![]() NAROME wrote:
NAROME wrote:
CUANTOS CM DEBE MEDIR LA SISA SEGUN TALLAS
18.04.2025 - 12:16DROPS Design answered:
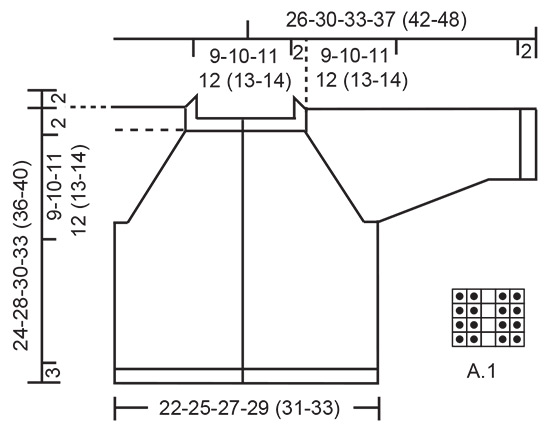
Hola Narome, la sisa, medida recto desde el centro del delantero (no en diagonal), mide: 9-10-11-12-13-14 cm, según la talla, como se indica en el esquema de medidas debajo.
20.04.2025 - 23:18
![]() Emanuelea wrote:
Emanuelea wrote:
Lo sprone è corto. per allungarlo si può senza fare ancora aumenti?
12.03.2025 - 17:14DROPS Design answered:
Buonasera Emanuela, può procedere con la lavorazione fino alla lunghezza desiderata. Buon lavoro!
18.03.2025 - 22:01
![]() Manu wrote:
Manu wrote:
Se mancano dei cm .x arrivare alla misura dello sprone posso continuare lo stesso senza aumenti? O devo continuare ad aumentare ai lati di A1?
12.03.2025 - 06:50DROPS Design answered:
Buonasera Manu, può procedere fino alla lunghezza desiderata. Buon lavoro!
18.03.2025 - 22:01
![]() Tracie wrote:
Tracie wrote:
Hi Dream in blue cardigan 42-6 I’m making the second size with 69 stitches but don’t seem to be able to get the stitch count right when I start the yoke. The pattern (excluding the yarn overs) reads Band 5, 6, A1 (6), 6, A1, 15, A1, 6, A1, 6, 5 = 73 sts not 69. P,ease can you tell me where I’ve gone wrong. Thank you
07.03.2025 - 19:06DROPS Design answered:
Dear Tracie, 5 band stitches + 6 knit stitches, A.1 (= 5 stitches), 6 knit stitches, A.1 (= 5 stitches), 15 knit stitches, A.1 (= 5 stitches), 6 knit stitches, A.1 (= 5 stitches), 6 knit stitches and 5 band stitches. So A.1 is 5 stitches, not 6, and the total is 69 stitches. Happy knitting!
09.03.2025 - 17:30
![]() Jane wrote:
Jane wrote:
Hej Angende knapphål står det såhär: Maska av så här från rätsidan när det återstår 3 maskor på varvet Men om knapphålet sitter på vänster sida måste väl avmaskningen ske på de första 5 maskorna på det räta varvet? Hälsningar Jane
01.03.2025 - 06:37DROPS Design answered:
Hej Jane, knaphullet sidder på højre forstykke (når man har tøjet på) :)
06.03.2025 - 13:51
![]() Jane wrote:
Jane wrote:
Hej Angende knapphål står det såhär: Maska av så här från rätsidan när det återstår 3 maskor på varvet Men om knapphålet sitter på vänster sida måste väl avmaskningen ske på de första 5 maskorna på det räta varvet? Hälsningar Jane
01.03.2025 - 06:36
![]() Patty wrote:
Patty wrote:
Unclear on the yarn over and A.1 insruction on the Yoke part of pattern 42-6. Is there a video?
25.02.2025 - 23:59DROPS Design answered:
Dear Patty, A.1 is worked as follows from RS: P2, K1, P2 and as follows from WS: K2, P1, K2. Increase for raglan on each side of these 5 stitches to increase at the end of left front piece, at the beg + at the end of each sleeves + back piece and at the beg of right front piece. Happy knitting!
26.02.2025 - 11:29
![]() Barbara Beck wrote:
Barbara Beck wrote:
Ich stricke die Größe 12/18 Monate
20.02.2025 - 15:31DROPS Design answered:
Liebe Frau Beck, so haben sie: 5 Blenden-Maschen, 8 Maschen rechts, (1 Umschlag), A.1 =5 M, (1 Umschlag), 6 Maschen rechts, (1 Umschlag), A.1 = 5 M, (1 Umschlag), 19 Maschen rechts, (1 Umschlag), A.1 = 5 M, (1 Umschlag), 6 Maschen rechts, (1 Umschlag), A.1 = 5 M, (1 Umschlag), 8 Maschen rechts, 5 Blenden-Maschen=5+8+5+6+5+19+5+6+5+8+5=77 Maschen (+8 Umschläge nach der 1. Reihe). Viel Spaß beim Stricken!
21.02.2025 - 09:53
|
|||||||
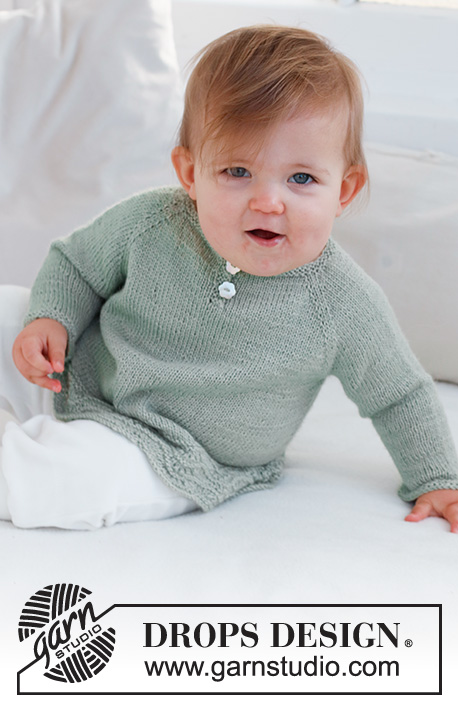
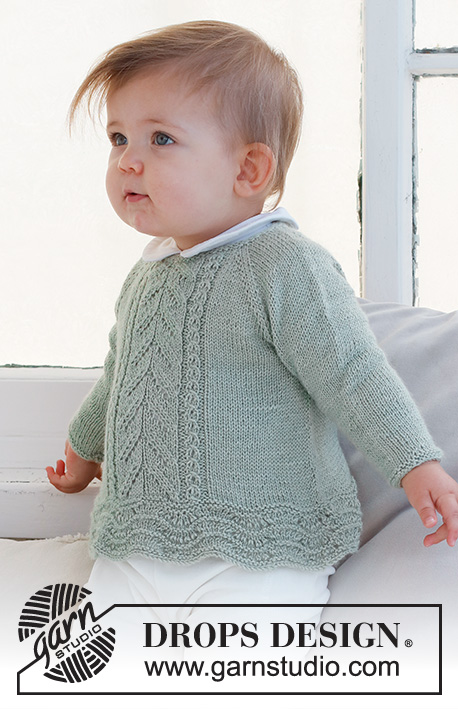
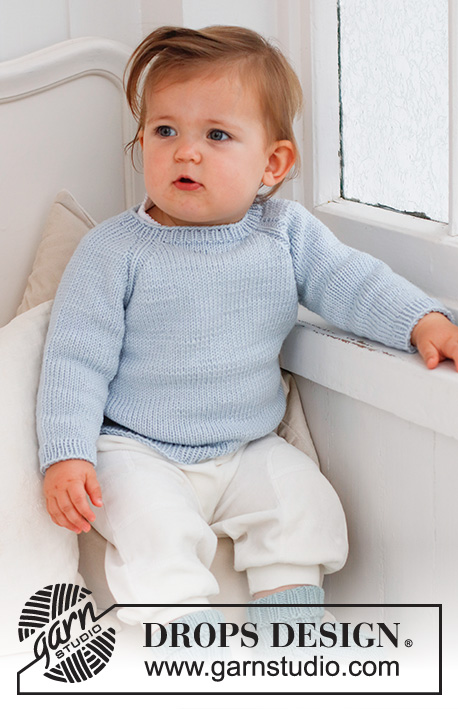
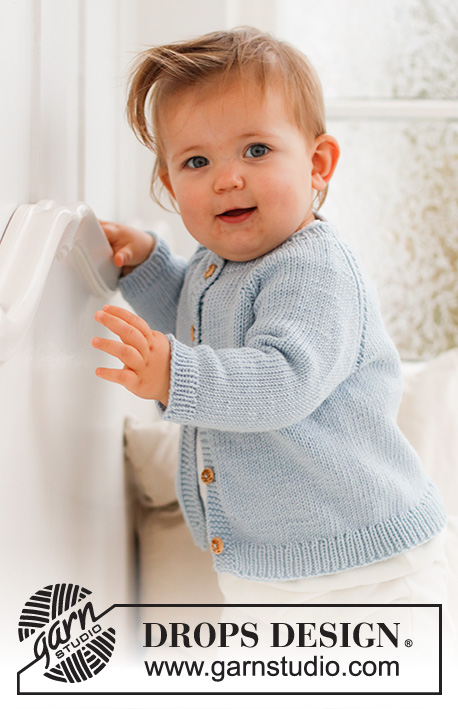
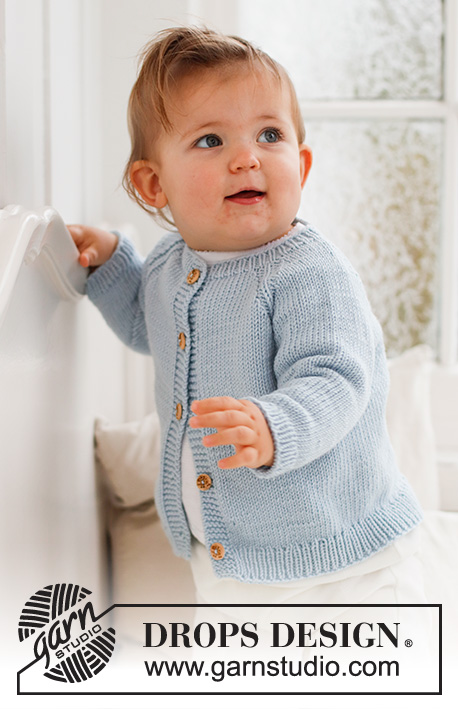
Dream in Blue Cardigan#dreaminbluecardigan |
|||||||
 |
 |
||||||
Knitted jacket for babies and children in DROPS Merino Extra Fine. The piece is worked top down with raglan. Sizes 0 - 4 years.
DROPS Baby 42-6 |
|||||||
|
------------------------------------------------------- EXPLANATIONS FOR THE PATTERN: ------------------------------------------------------- RIDGE/GARTER STITCH (worked back and forth): Knit all rows. 1 ridge = knit 2 rows. PATTERN: See diagram A.1. The diagram shows all rows in the pattern from the right side. DECREASE TIP (sleeves): Decrease 1 stitch on either side of the marker as follows: Work until there are 3 stitches left before the marker, knit 2 together, knit 2 (marker sits between these 2 stitches), slip 1 stitch as if to knit, knit 1 and pass the slipped stitch over the knitted stitch. BUTTONHOLES: Work buttonholes on the right band (when the garment is worn). Work from the right side when there are 3 stitches left on the row as follows: Make 1 yarn over, knit 2 together and knit 1. On the next row, knit the yarn over to leave a hole. The first buttonhole is worked when the rib on the neck measures 1½-2 cm = ½"-¾". Then work the other 4-4-4-4 (5-5) buttonholes with approx. 5-6-6½-7 (6½-7) cm = 2"-2⅜"-2½"-2¾" (2½"-2¾") between each one. ------------------------------------------------------- START THE PIECE HERE: ------------------------------------------------------- JACKET – SHORT OVERVIEW OF THE PIECE: The neck and yoke are worked back and forth with circular needle. The yoke is divided for the body and sleeves and the body continued back and forth. The sleeves are worked in the round with double pointed needles. NECK: Cast on 65-69-73-77 (81-87) stitches with circular needle size 3 MM = US 2.5 and DROPS Merino Extra Fine. Purl 1 row from the wrong side with 5 band stitches in GARTER STITCH – read description above, on each side. Then work rib as follows: 5 band stitches in garter stitch, * knit 1, purl 1 *, work from *-* until there are 6 stitches left, knit 1 and 5 band stitches in garter stitch. Remember the BUTTONHOLES – read description above. When the rib measures 2 cm = ¾", change to circular needle size 4 MM = US 6. Insert 1 marker after the band at the beginning of the row; the yoke is measured from this marker! YOKE: Work the next row from the right side as follows: 5 band stitches in garter stitch, knit 5-6-7-8 (8-10), 1 yarn over, A.1, 1 yarn over, knit 6-6-6-6 (8-8), 1 yarn over, A.1, 1 yarn over, knit 13-15-17-19 (19-21), 1 yarn over, A.1, 1 yarn over, knit 6-6-6-6 (8-8), 1 yarn over, A.1, 1 yarn over, knit 5-6-7-8 (8-10) and 5 band stitches in garter stitch. You have increased 8 stitches for raglan. The yarn overs are purled twisted on the next row and continued in stockinette stitch. Continue the pattern and increase on each side of A.1 on each row from the right side a total of 11-13-14-15 (17-18) times = 153-173-185-197 (217-231) stitches. REMEMBER THE KNITTING GAUGE! When the piece measures 9-10-11-12 (13-14) cm = 3½"-4"-4⅜"-4¾" (5⅛"-5½") from the marker, divide the yoke for the body and sleeves as follows: 5 band stitches in garter stitch, work 19-22-24-26 (29-32) stitches in stockinette stitch, place the next 32-36-38-40 (44-46) stitches on a thread for the sleeve, cast on 6-6-8-8 (6-6) stitches, work 41-47-51-55 (61-65) stitches in stockinette stitch, place the next 32-36-38-40 (44-46) stitches on a thread for the sleeve, cast on 6-6-8-8 (6-6) stitches, work 19-22-24-26 (29-32) stitches in stockinette stitch and 5 band stitches in garter stitch. BODY: = 101-113-125-133 (141-151) stitches. Continue back and forth with stockinette stitch and 5 band stitches in garter stitch on each side until the body measures 10-13-14-16 (18-21) cm = 4"-5⅛"-5½"-6¼" (7"-8¼") from the division. Now increase 10-12-14-14 (16-16) stitches evenly spaced on the next row from the right side (do not increase over the bands) = 111-125-139-147 (157-167) stitches. Change to circular needle size 3 MM = US 2.5 and work rib, starting from the wrong side as follows: 5 band stitches in garter stitch, * purl 1, knit 1 *, work from *-* until there are 6 stitches left, purl 1 and 5 band stitches in garter stitch. Bind off when the rib measures 3 cm = 1⅛". The jacket measures approx. 24-28-30-33 (36-40) cm = 9½"-11"-11¾"-13" (14¼"-15¾") from the shoulder down. SLEEVES: Place the 32-36-38-40 (44-46) stitches from the thread on the one side of the piece on double pointed needles size 4 MM = US 6 and knit up 1 stitch in each of the 6-6-8-8 (6-6) stitches cast on under the sleeve = 38-42-46-48 (50-52) stitches. Insert a marker in the middle of the new stitches under the sleeve (= mid-under sleeve). Start at the marker and work stockinette stitch in the round. When the sleeve measures 2 cm = ¾" from the division, decrease 1 stitch on each side of the marker - read DECREASE TIP! Decrease like this every 3-3-2-2½ (3-4) cm = 1⅛"-1⅛"-¾"-1" (1⅛"-1½") a total of 2-3-5-5 (5-5) times = 34-36-36-38 (40-42) stitches. When the sleeve measures 8-11-12-15 (18-23) cm = 3⅛"-4⅜"-4¾"-6" (7"-9"), increase 4-4-4-4 (4-6) stitches evenly spaced = 38-40-40-42 (44-48) stitches. Change to double pointed needles size 3 MM = US 2.5 and work rib (knit 1, purl 1) for 2 cm = ¾". Bind off. The sleeve measures approx. 10-13-14-17 (20-25) cm = 4"-5⅛"-5½"-6¾" (8"-9¾"). Work the other sleeve in the same way. |
|||||||
Diagram explanations |
|||||||
|
|||||||
|
|||||||
Have you finished this pattern?Tag your pictures with #dropspattern #dreaminbluecardigan or submit them to the #dropsfan gallery. Do you need help with this pattern?You'll find 27 tutorial videos, a Comments/Questions area and more by visiting the pattern on garnstudio.com. © 1982-2025 DROPS Design A/S. We reserve all rights. This document, including all its sub-sections, has copyrights. Read more about what you can do with our patterns at the bottom of each pattern on our site. |
|||||||


With over 40 years in knitting and crochet design, DROPS Design offers one of the most extensive collections of free patterns on the internet - translated to 17 languages. As of today we count 314 catalogs and 11822 patterns - 11812 of which are translated into English (US/in).
We work hard to bring you the best knitting and crochet have to offer, inspiration and advice as well as great quality yarns at incredible prices! Would you like to use our patterns for other than personal use? You can read what you are allowed to do in the Copyright text at the bottom of all our patterns. Happy crafting!
Post a comment to pattern DROPS Baby 42-6
We would love to hear what you have to say about this pattern!
If you want to leave a question, please make sure you select the correct category in the form below, to speed up the answering process. Required fields are marked *.