
Popular categories
Looking for a yarn?


Comments / Questions (22)
![]() Leila Carlyle wrote:
Leila Carlyle wrote:
Lovely looking cardigan, thanks. I'm don't really understand A.3. Two increases and two decreases in every second row? So does that mean that I stop doing the raglan increases and basically knit the garment straight (so that the increases and decreases are just to keep the pattern of holes going?) It seemed to me unusual not to keep the raglan going all the way to the sleeve, or have I misunderstood something? Many thanks
10.05.2022 - 17:57DROPS Design answered:
Dear Mrs Carlyle, when all increases are done, you don't get the correct length on yoke, so that you will continue working without increasing but still keeping the hole patterns at each raglan line, reason why you work A.3, creating the same lace pattern as in A.2 before, but without increasing stitches. Happy knitting!
11.05.2022 - 08:09
![]() Christine wrote:
Christine wrote:
Hallo,ich bin gerade dabei, die Passe mit dem Diagramm A1 zu beginnen. Wie verfährt man das Diagramm A1 dann ab der dritten Reihe? Die 7 Maschen sind ja nun um 2 Maschen zugenommen. Wie versetze ich die Löcher? Mfg Christine
02.03.2020 - 20:53DROPS Design answered:
Liebe Christine, die 3 mittleren Maschen in A.1 müssen immer die 3 selben Maschen sein, dh die Umschläge von der 1. Reihe in A.1 werden immer beidseitig von den 3 mittleren Maschen gestrickt. Viel Spaß beim stricken!
03.03.2020 - 09:42
![]() Zabeth wrote:
Zabeth wrote:
Pour votre adresse Drops workshop, la page n'est pas disponible!
17.06.2019 - 09:54DROPS Design answered:
Bonjour Zabeth, juste une erreur de codage dans le lien, vous trouverez le groupe DROPS Workshop ici. Merci!
17.06.2019 - 12:28
![]() Zabeth wrote:
Zabeth wrote:
Y-a-t il un galerie sur votre site où mettre des photos de nos réalisations?
14.06.2019 - 17:20DROPS Design answered:
Bonjour Zabeth, si vous avez un blog, vous pouvez nous envoyez le lien via ce formulaire, vous pouvez également nous taguer avec #dropsfan sur les réseaux sociaux, et rejoignez notre groupe DROPS Workshop. Bon tricot!
17.06.2019 - 06:49
![]() AGUDO PARMAIN LYDIA wrote:
AGUDO PARMAIN LYDIA wrote:
Re bonjour ! j'ai trouvé l'erreur, je n'avais pas marqué le moment où il me fallait changer de point endroit et envers ! donc je continue......
09.06.2019 - 16:25
![]() AGUDO PARMAIN LYDIA wrote:
AGUDO PARMAIN LYDIA wrote:
Bonjour, je pense avoir suivi toutes les explications pour relever les mailles pour reprendre les manches avec les aiguilles doubles pointes. Mais je suis très surprise car en tricotant toujours du point mousse à tous les rangs j'ai du jersey sur l'endroit du travail. C'est magique mais ce n'est pas le résultat que j'espérais.... merci de m'indiquer où j'ai manqué qqchose. A très bientôt. Lydia
09.06.2019 - 14:09DROPS Design answered:
Bonjour Mme Agudo Parmain, pour tricoter du point mousse en rond, on doit alterner *1 tour en mailles endroit et 1 tour en mailles envers* - voir vidéo, autrement dit, comme expliqué au début des explications sous POINT MOUSSE (en rond – pour les manches). Bon tricot!
11.06.2019 - 11:10
![]() Zabeth wrote:
Zabeth wrote:
Merci, c'est bien ce que j'avais compris.
27.05.2019 - 13:38
![]() Zabeth wrote:
Zabeth wrote:
Pour A2, sur le 1er rg on fait 2 m endroit, 2 m ensembles, 1 jeté, 3 m endroit, 1 jeté 1 surjet simple, en fait il n'y a pas d'augmentations sur ce rang? Elles se font sur le 3 ième rg c'est bien ça? Je ne comprends pas à quoi sert le 1er rg?
27.05.2019 - 09:03DROPS Design answered:
Bonjour Zabeth, dans A.2 on augmente tous les 4 rangs (= à chaque fois que l'on tricote le rang 3 de A.2), mais pour conserver les jours tous les 2 rangs comme avant, on tricote le 1er rang comme indiqué (= 2 diminutions, 2 jetés = on a toujours 1 jour comme avant de part et d'autre des 3 m du milieu). Bon tricot!
27.05.2019 - 11:56
![]() Zabeth wrote:
Zabeth wrote:
C'est nettement plus clair comme ça. Je vous remercie.
23.05.2019 - 10:24
![]() Zabeth wrote:
Zabeth wrote:
Les premières augmentations A1, ça représente à la fin : 24 m pour le devant gauche,(A1=33m+15m+A1=33 manche gauche), 38 m dos, (A1=33m+15+A1=33m manche droite), 24 m devant droit=248m. A1 c'était : 1er rg 2m 1 jeté, 3m, 1 jeté, 2m, bien sûr ces 7 mailles ce sont agrandies jusqu'à 33 m à la fin des augmentations. Donc au milieu les 3 m on pris de l'ampleur, c'est bien comme ça qu'il fallait comprendre!
22.05.2019 - 18:48DROPS Design answered:
Bonjour Zabeth, les jetés de A.1 sont les augmentations pour le raglan, la 2ème fois que vous répétez A.1, vous aurez: 25 m pour le devant, A.1 (= 7 m + 2 jetés), 17 m pour la manche, A.1 (= 7 M + 2 jetés), 40 m pour le dos, etc... les 3 m du milieu de A.1 et les 2 jetés doivent être toujours alignés. Bon tricot!
23.05.2019 - 09:11
|
||||||||||||||||
Cecina#cecinacardigan |
||||||||||||||||
 |
 |
|||||||||||||||
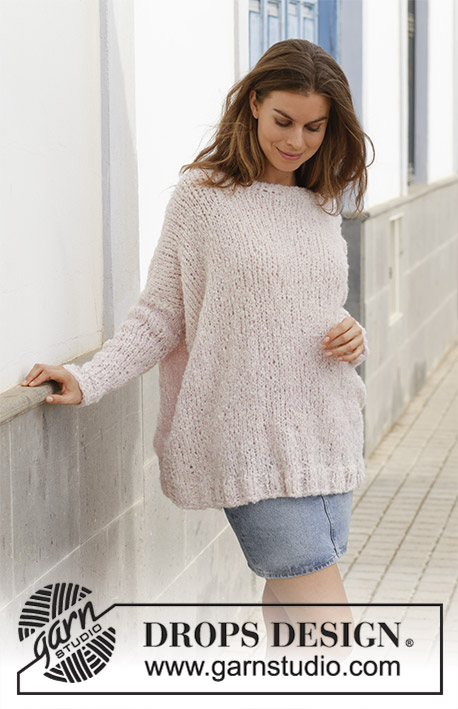
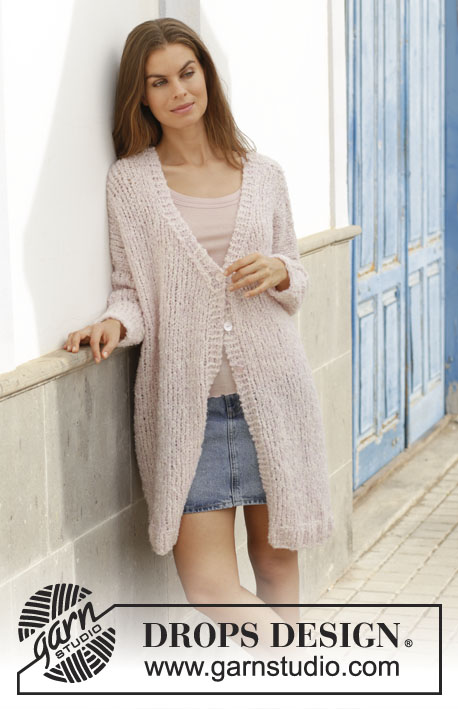
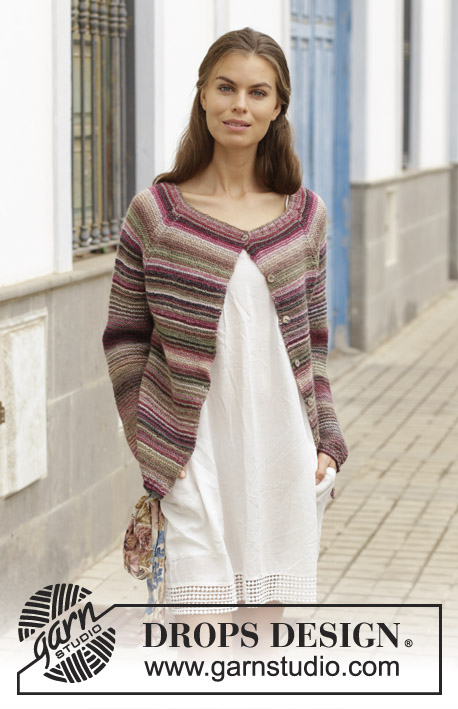
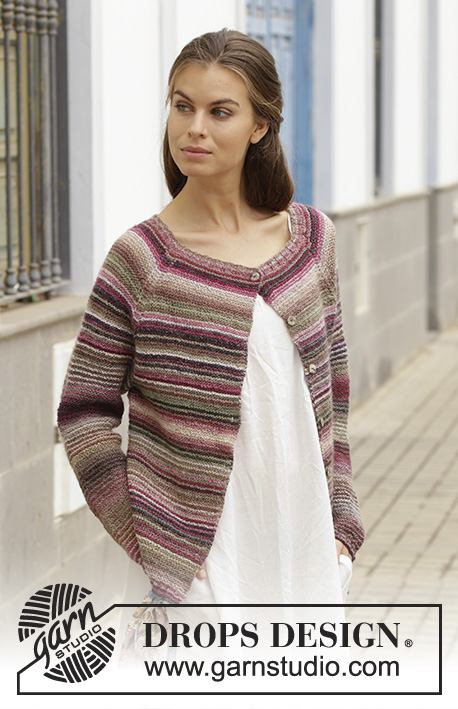
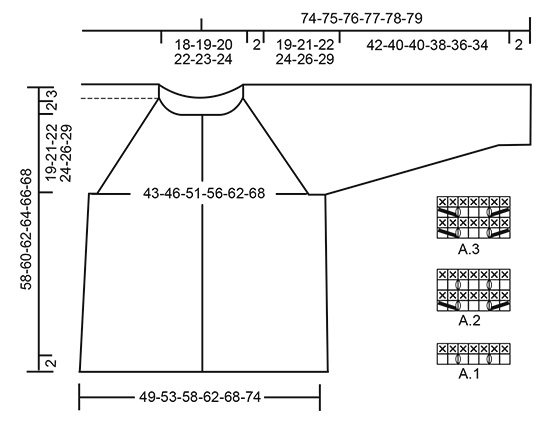
Knitted jacket with garter stitch and raglan, worked top down. Sizes S - XXXL. The piece is worked in DROPS Delight.
DROPS 188-25 |
||||||||||||||||
|
INFORMATION FOR THE PATTERN: RIDGE/GARTER STITCH (worked back and forth): 1 ridge = Knit 2 rows. RIDGE/GARTER STITCH (worked in the round – for sleeves): 1 ridge = 2 rounds. Knit 1 round and purl 1 round. PATTERN: See diagrams A.1 to A.3. The diagrams show all the rows in the pattern seen from the right side. STRIPES: To make the garment more stripy, work with 2 alternate balls of the same colour; adjust the balls so that you start with 2 different colours. * Work 2 rows with the first ball, then work 2 rows with the other *, work from *-*. The first row with a new ball is worked from the right side. The strands are carried forward as you work. INCREASE TIP (for sides of body): All increases are made from the right side! Work until there is 1 stitch left before the marker, make 1 yarn over, knit 2 stitches (the marker sits in the middle of these 2 stitches), make 1 yarn over (= 2 stitches increased). Repeat at both markers (= a total of 4 stitches increased). On the next row (wrong side) knit the yarn overs twisted to avoid holes. DECREASE TIP (for sleeves): Decrease on each side of the marker thread as follows: Start 4 stitches before the marker thread, knit 2 stitches together, knit 4 (the marker thread sits in the middle of these 4 stitches), slip 1 stitch as if to knit, knit 1, pass the slipped stitch over the knitted stitch (= 2 stitches decreased). BUTTONHOLES: Work buttonholes on the right band (when the garment is worn). Work from the right side until there are 3 stitches left on the row, then make 1 yarn over, knit the next 2 stitches together and knit the last stitch. On the next row knit the yarn over to leave a hole. The first buttonhole is worked when the rib in the neck measures approx. 1½ cm. Then work the other 7 buttonholes with approx. 7-7½-8-8-8½-8½ cm between each. ---------------------------------------------------------- JACKET: The yoke and body are worked back and forth on circular needle, top down. The sleeves are worked in the round with double pointed needles. YOKE: Cast on 132-136-144-148-156-160 stitches with circular needle size 3 mm and Delight. Work 5 band stitches in GARTER STITCH – see description above, work rib (= knit 2 /purl 2) until there are 7 stitches left, finish with knit 2 and 5 band stitches in garter stitch. Work STRIPES – see description above, to finished length. Remember BUTTONHOLES – see description above. When the rib measures 2 cm, change to circular needle size 4 mm. Work as follows from the right side: Work 5 band stitches in garter stitch, 16-17-19-20-22-23 stitches in garter stitch (= left front piece), A.1 (= 7 stitches), 15 stitches in garter stitch, A.1 over 7 stitches (= left sleeve), 32-34-38-40-44-46 stitches in garter stitch (= back piece), A.1 over 7 stitches, 15 stitches in garter stitch, A.1 over 7 stitches (= right sleeve), 16-17-19-20-22-23 stitches in garter stitch, 5 band stitches in garter stitch (= right front piece). REMEMBER THE KNITTING TENSION! The increased stitches in A.1 are worked in garter stitch, increase 2 stitches in each A.1 on each row from the right side (= a total of 8 stitches increased every 2nd row). Work A.1 a total of 4-8-13-13-16-19 times in height = 164-200-248-252-284-312 stitches. Then work A.2 over A.1. Increase 2 stitches in each A.2 every 4th row (= a total of 8 stitches increased every 4th row). Work A.2 a total of 15-14-13-16-16-16 times = 284-312-352-380-412-440 stitches. Then work A.3 over A.2, the remaining stitches are worked in garter stitch. When the piece measures 21-23-24-26-28-31 cm from the cast-on edge, divide the piece as follows from the right side: Work 43-46-52-57-63-69 stitches in garter stitch (= left front piece), place the next 60-68-76-80-84-86 stitches on a thread for sleeve (= left sleeve), cast on 12 new stitches under the sleeve, 77-83-95-105-117-129 stitches in garter stitch (= back piece), place the next 60-68-76-80-84-86 stitches on a thread for sleeve (= right sleeve), cast on 12 new stitches under the sleeve and finish with 44-47-53-58-64-70 stitches in garter stitch. BODY: = 188-200-224-244-268-292 stitches. Insert 1 marker thread in the piece. THE PIECE IS NOW MEASURED FROM HERE! Insert 1 marker 49-52-58-63-69-75 stitches in from each side of the piece (= front pieces = 90-96-108-118-130-142 stitches on back piece). Allow the markers to follow your work onwards. Continue with garter stitch and stripes. When the piece measures 2 cm, increase 1 stitch on each side of each marker (= 4 stitches increased) – read INCREASE TIP. Increase like this every 4½-3-4-5-5-4 cm a total of 6-8-7-6-6-7 times = 212-232-252-268-292-320 stitches. When the piece measures 32-32-33-33-33-32 cm increase 28-32-36-36-40-44 stitches evenly on next row (do not increase over the bands) = 240-264-288-304-332-364 stitches. Change to circular needle size 3 mm and work rib (the first row is worked from the wrong side) as follows: Work 5 band stitches in garter stitch, work rib (= purl 2 / knit 2) until there are 7 stitches left, purl 2 and finish with 5 band stitches in garter stitch. Cast off with knit when the rib measures 2 cm (the piece measures a total of 55-57-59-61-63-65 cm from the neck edge). Make sure you cast off loosely; you can use a needle 1 size larger if necessary. SLEEVE: Place the 60-68-76-80-84-86 stitches from the thread on the one side of the piece onto double pointed needles size 4 mm and knit up 1 stitch in each of the 12 stitches cast on under the sleeve = 72-80-88-92-96-98 stitches. Insert 1 marker thread in the piece, THE PIECE IS NOW MEASURED FROM HERE! The piece is worked in the round. Insert 1 marker in the middle of the 12 stitches knitted up under the sleeve. Leave the marker thread where it is; the marker follows your work onwards! Work GARTER STITCH – see description above, and stripes. When the piece measures 2 cm decrease 1 stitch on each side of the marker – read DECREASE TIP. Decrease like this every 1 cm 0-7-11-14-17-17 times, then every 3 cm a total of 13-9-8-6-4-4 times = 46-48-50-52-54-56 stitches. When the piece measures 42-40-40-38-36-34 cm from the marker thread, increase 2-0-2-0-2-0 stitches evenly on round = 48-48-52-52-56-56 stitches. Change to double pointed needles size 3 mm and work rib (= knit 2 / purl 2). . When the rib measures 2 cm (the piece measures a total of 65-65-66-66-66-67 cm from the neck edge) cast off with knit. Make sure you cast off loosely; you can use a needle 1 size larger if necessary. Work the other sleeve in the same way. ASSEMBLY: Sew the buttons onto the left band. |
||||||||||||||||
Diagram explanations |
||||||||||||||||
|
||||||||||||||||
 |
||||||||||||||||
Have you finished this pattern?Tag your pictures with #dropspattern #cecinacardigan or submit them to the #dropsfan gallery. Do you need help with this pattern?You'll find 29 tutorial videos, a Comments/Questions area and more by visiting the pattern on garnstudio.com. © 1982-2026 DROPS Design A/S. We reserve all rights. This document, including all its sub-sections, has copyrights. Read more about what you can do with our patterns at the bottom of each pattern on our site. |
||||||||||||||||


With over 40 years in knitting and crochet design, DROPS Design offers one of the most extensive collections of free patterns on the internet - translated to 17 languages. As of today we count 324 catalogues and 12290 patterns translated into English (UK/cm). 12290
We work hard to bring you the best knitting and crochet have to offer, inspiration and advice as well as great quality yarns at incredible prices! Would you like to use our patterns for other than personal use? You can read what you are allowed to do in the Copyright text at the bottom of all our patterns. Happy crafting!
Post a comment to pattern DROPS 188-25
We would love to hear what you have to say about this pattern!
If you want to leave a question, please make sure you select the correct category in the form below, to speed up the answering process. Required fields are marked *.