
Popular categories
Looking for a yarn?


Comments / Questions (85)
![]() Birgit wrote:
Birgit wrote:
Hallo. In der Skizze steht, dass der Saum 51 cm (Größe S) weit ist, man schlägt aber 222Maschen an, wobei 18 Maschen = 10cm sein sollen. Das ergibt allerdings eine Breite von 61 cm. Sind die 51cm dann ein Druckfehler? Ich komm nicht ganz genau auf Maschenprobe und bin daher darauf angewiesen es um zu rechnen - dafür muß ich allerdings sicher sein, dass die Angaben in der Skizze stimmen ;) Schon mal Danke im Vorraus.
20.09.2020 - 11:54DROPS Design answered:
Liebe Birgit, am Anfang braucht man viel mehr Maschen als für die Maschenprobe, denn mann Bündchen strickt - sollte Ihre Maschenprobe stimmen, dann werden die Maßnahmen in der Skizze stimmen. Mehr über Maschenprobe lesen Sie hier. Viel Spaß beim stricken!
21.09.2020 - 13:53
![]() Shirley wrote:
Shirley wrote:
I want to have a turtle neck attached, and wish it to be more relaxed. Not tight around the neck. Can you help?
01.07.2020 - 14:11DROPS Design answered:
Dear Shirley, it would be easier to find a similar pattern with same tension you are working to adapt this pattern, we are unfortunately not able to adapt every pattern to every single request, but your DROPS store might be able to assist you - even per mail or telephone. Happy knitting!
01.07.2020 - 15:38
![]() Eerka wrote:
Eerka wrote:
Ik probeer het patroon te volgen voor het breien van het voorpand. Ik brei op 2 naalden en niet met een rondbreinaald. Kunt u voor mij uitschrijven hoe ik de tweede averechte naald moet breien? De eerste naald kom ik nog zelf aan uit. Maar de tweede niet. Al verschillende pogingen gewaagd. Ik weet niet of ik steken moet meerderen en welke ik samen moet breien. Ik heb 120 steken op mijn naald staan voor maat XXL. Alvast hartelijk dank.
12.01.2020 - 20:40
![]() Eerka wrote:
Eerka wrote:
Ik probeer het patroon te volgen voor het breien van het voorpand. Ik brei op 2 naalden en niet met een rondbreinaald. Kunt u voor mij uitschrijven hoe ik de tweede averechte naald moet breien? De eerste naald kom ik nog zelf aan uit. Maar de tweede niet. Al verschillende pogingen gewaagd. Ik weet niet of ik steken moet meerderen en welke ik samen moet breien. Ik heb 120 steken op mijn naald staan voor maat XXL. Alvast hartelijk dank.
12.01.2020 - 20:40DROPS Design answered:
Dag Eerka,
De symbolen met een leeg vierkantje brei je dus averecht op de verkeerde kant en de symbolen met een liggend streepje brei je recht op de verkeerde kant. Alle naalden op de verkeerde kant zijn steeds even naalden en daar heb je geen andere symbolen in staan (behalve het zwarte hokje, maar dit is geen steek, dus die kun je overslaan/uit de teltekening knippen)
17.01.2020 - 18:03
![]() Ingarita Berggren wrote:
Ingarita Berggren wrote:
Hej igen Måste vara trögfattad Du skriver att a1 ska stickas 2rm2avm osv men när jag tittar på a1så ser det ju ut som det är 7 avm på rad Kan du förklara lite mera tror du Har stickat ganska mycket men detta får jag inte ihop🙈🙈🙈mvh ingarita
24.10.2019 - 16:55DROPS Design answered:
Hej. Du upprepar de 2 första varven i A.1-A.3 tills arbetet mäter 8 cm (=resårkanten längst ner). Efter det så stickar du de 2 sista varen i diagrammen enligt som det står i mönstret (de aviga maskorna i A.1 blir då början på de aviga partierna på varje sida av mönsterdelarna fram och bak som du ser på bilden). Lycka till!
25.10.2019 - 10:20
![]() Ingarita Berggren wrote:
Ingarita Berggren wrote:
Menar när det står att man ska sticka rm på avigsidan och am på rätsidan när man stickar runt
23.10.2019 - 16:55DROPS Design answered:
Hej igen, sålänge du stickar runt, läser du diagramsymbolerna från rätsidan. Dvs A1= 2am,2rm,2am,2rm,2am, sedan A2=2rm,2am,2rm,3am,2rm,2am,2rm. sedan A.3 ..... Lycka till :)
24.10.2019 - 14:53
![]() Ingarita Berggren wrote:
Ingarita Berggren wrote:
Hej Jag får inte ihop detta mönster Ska det inte stickas resår först och hur stickar man EM på avigsidan när man bara stickar runt Mvh ingarita Berggren
23.10.2019 - 11:47DROPS Design answered:
Hej. Om du stickar som det står i mönstret från början dvs diagram A.1-A.3 så blir det resårstickning (det är för att det ska passa ihop med diagrammen över sen). Jag förstår inte riktigt vad du menar när du skriver sticka EM på avigsidan.. Mvh DROPS Design
23.10.2019 - 13:36
![]() Anne Schoemaker wrote:
Anne Schoemaker wrote:
Hallo, ik ben nu klaar met de boord in maat S. Het werk meet nu 9 cm maar ik heb al bijna 2 bollen op! Ik heb 14 bollen besteld (volgens beschrijving) maar ik vrees dat ik nooit uit ga komen hiermee. Klopt het aantal bollen dat beschreven is wel??
23.10.2019 - 11:30DROPS Design answered:
Dag Anne,
Het aantal bollen dat je nodig hebt zou moeten kloppen. Er zijn ook geen opmerkingen hierover binnen gekomen bij mijn weten. De boord neemt natuurlijk altijd wat meer garen, als je met het patroon begint loopt het wat meer uit.
23.10.2019 - 20:20
![]() Chris De Bie wrote:
Chris De Bie wrote:
Vind het patroon heel mooi, maar ik zou hem liever met 2 breinaalden maken ipv rondbreinaald hebben jullie daar geen beschrijving van? Groetjes Chris
16.09.2019 - 21:00DROPS Design answered:
Dag Chris,
Dit patroon is inderdaad wel geschikt om met rechte naalden te breien. We hebben een instructie gemaakt hoe je een patroon aanpast om met rechte naalden te kunnen breien. Deze vind je hier
17.09.2019 - 08:02
![]() Stefanie wrote:
Stefanie wrote:
Darf ich noch fragen, von wo bis wo der Rumpfteil verläuft? Werde nicht ganz schlau daraus, wie das alles zusammengehört. Lg und nochmals danke
30.08.2019 - 10:33DROPS Design answered:
Liebe Stephanie, der Rumpfteil wird in Runden ab untere Kante bis zum Armlöcher gestrickt, dann werden Vorder- und Rückenteil einzeln in Hin- und Rückreihen gestrickt. Viel Spaß beim stricken!
30.08.2019 - 12:31
|
||||||||||||||||||||||||||||
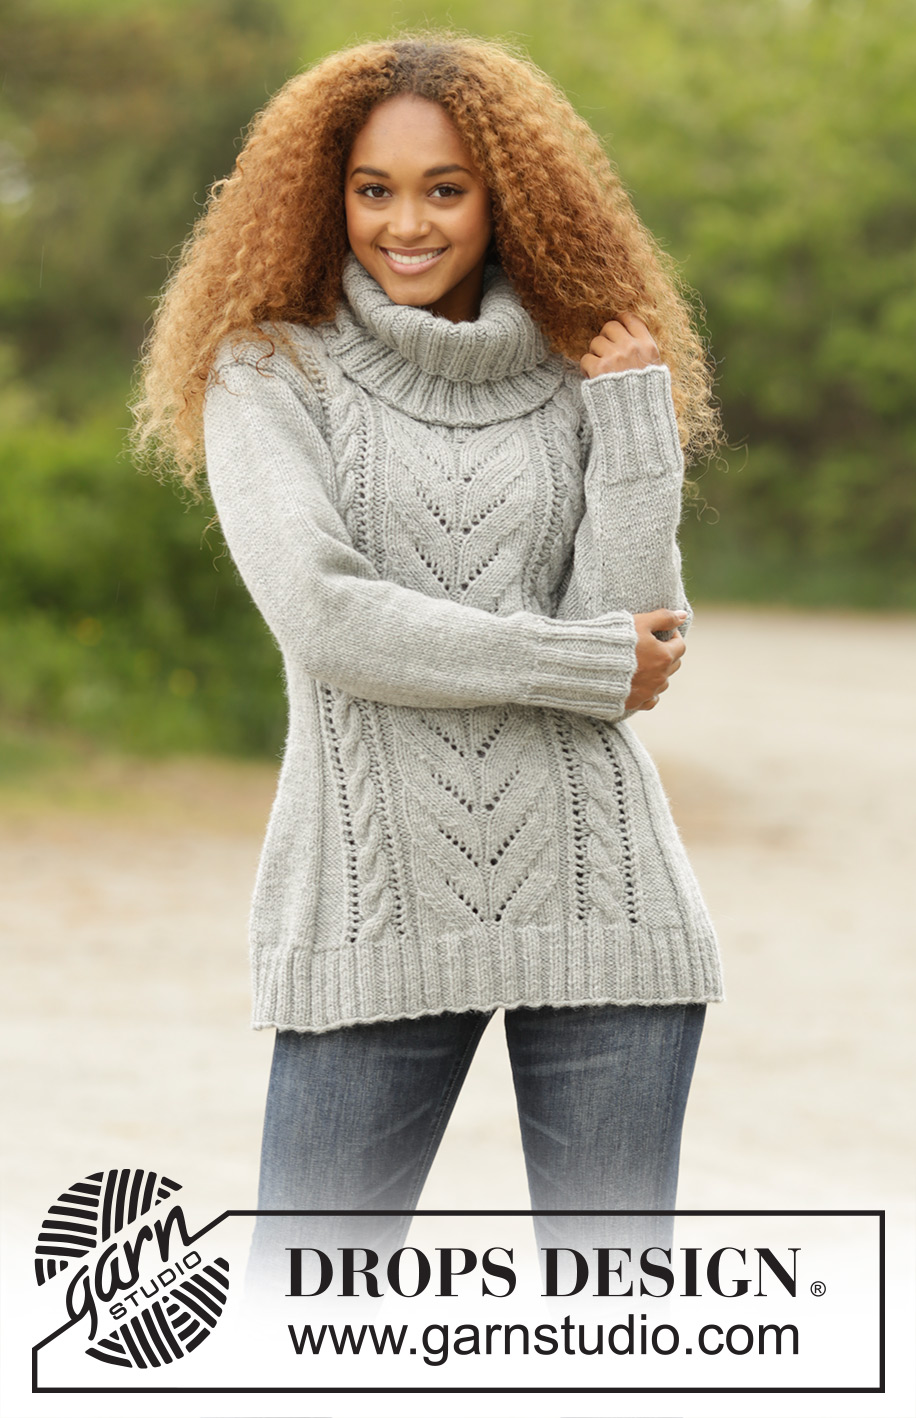
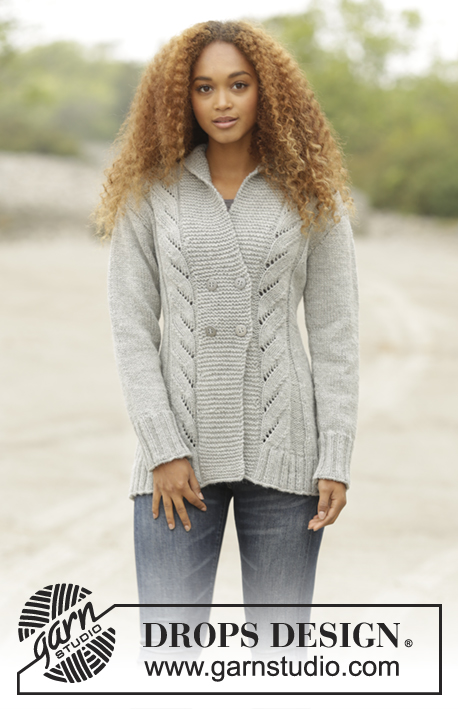
Snow Tracks#snowtrackssweater |
||||||||||||||||||||||||||||
 |
 |
|||||||||||||||||||||||||||
Knitted DROPS jumper with cables and detachable collar in ”Nepal”. Size: S - XXXL.
DROPS 171-20 |
||||||||||||||||||||||||||||
|
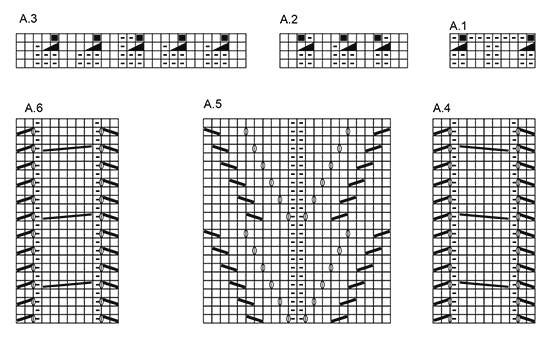
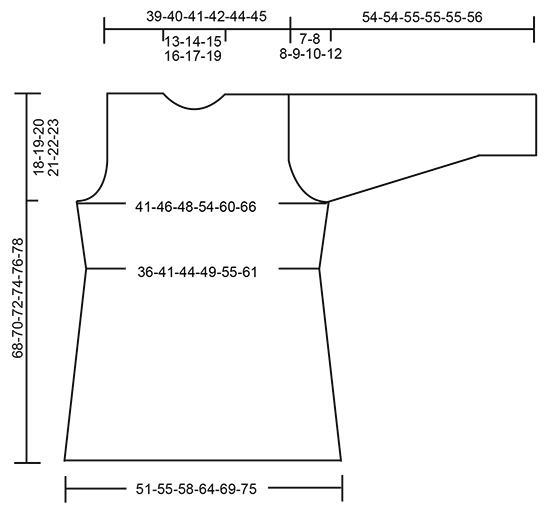
PATTERN: See diagrams A.1 to A.6. DECREASE TIP: Dec 1 st in each side of section in stocking st as follows: K 1, slip next st as if to K, K 1, psso, work until 3 sts remain, K 2 tog, K 1. INCREASE TIP: Inc with 1 YO inside first and last st in stocking st, work the inc sts twisted on next round to avoid holes. GARTER ST (worked in the round): 1 ridge = 2 rounds. * K 1 round and P 1 round *, repeat from *-*. ---------------------------------------------------------- JUMPER: Worked in the round on circular needle. BODY: Cast on 222-238-254-286-302-318 sts on circular needle size 4.5 mm with Nepal. K 1 round, then work as follows: * P 1, rib K 2/P 2 over the first 12-16-20-28-32-36 sts, K 2, A.1 (= 10 sts) A.2 (= 15 sts), P 2, A.3 (= 27 sts), P 2, A.2, A.1, K 2, rib P 2/K 2 over the next 12-16-20-28-32-36 sts, P 1 *, repeat from *-* 1 more time. REMEMBER THE KNITTING TENSION Repeat the first 2 rounds in A.1 - A.3 until piece measures 8 cm, then work the last 2 rounds in A.1 - A.3, AT THE SAME TIME dec 10-10-14-20-18-16 sts evenly over the 30-38-46-62-70-78 sts rib in each side = 172-188-196-216-236-256 sts. Switch to circular needle size 5 mm. Then work as follows: * K 10-14-16-21-26-31, P 8, A.4 (= 12 sts), P 2, A.5 (= 22 sts), P 2, A.6 (= 12 m), P 8, K 10-14-16-21-26-31 *, repeat from *-* 1 more time. When piece measures 10 cm, dec 1 st in every P section with P 8 and dec 1 st in each side of section in stocking st - READ DECREASE TIP (= 8 sts dec), dec the same way every 4 cm, 6 times in total, dec alternately on right and left side of P sections = 124-140-148-168-188-208 sts. When piece measures 34 cm, inc 1 st in every P section with a dec, and 1 st in every section in stocking st (= 8 sts inc) - READ INCREASE TIP, repeat inc when piece measures 46-47-48-49-50-51 cm = 140-156-164-184-204-224 sts. When piece measures 50-51-52-53-54-55 cm, work as follows from RS: Cast off the first 2-3-3-3-3-3 sts, work the next 66-72-76-86-96-106 sts as before, cast off the next 4-6-6-6-6-6 sts, work the next 66-72-76-86-96-106 sts as before and cast off the last 2-3-3-3-3-3 sts. Each part is worked separately back and forth on circular needle. BACK PIECE: = 66-72-76-86-96-106 sts. Continue pattern as before, AT THE SAME TIME continue to cast off in each side for armholes on every other row: Cast off 2 sts 0-1-1-2-3-4 times and 1 st 0-0-1-3-5-7 times = 66-68-70-72-74-76 sts. Continue the pattern as before. When piece measures 66-68-70-72-74-76 cm, cast off the middle 24-26-28-30-32-34 sts for neck and finish each shoulder separately. On next row cast off 1 st towards the neck = 20 sts remain on each shoulder. Cast off when piece measures 68-70-72-74-76-78 cm. FRONT PIECE: = 66-72-76-86-96-106 sts. Continue pattern as before and cast off for armholes as on back piece = 66-68-70-72-74-76 sts. Continue the pattern like this. When piece measures 60-62-64-66-68-70 cm, slip the middle 18-20-22-24-26-28 sts on a stitch holder for neck and finish each shoulder separately. Then cast off on every row towards neck, 2 sts 1 time, 1 st 2 times = 20 sts remain on shoulder. Work sts that do not fit the pattern in stocking st. Cast off when piece measures 68-70-72-74-76-78 cm. SLEEVE: Worked in the round on double pointed needles. Cast on 45-45-50-50-50-50 sts on double pointed needles size 4.5 mm with Nepal. K 1 round, then work rib = K 2/P 3. When rib measures 10 cm, K 1 round while dec 11-9-12-10-10-8 sts evenly = 34-36-38-40-40-42 sts. Switch to double pointed needles size 5 mm and continue in stocking st. Insert 1 marker at the beg of round. When piece measures 11 cm, inc 1 st on each side of marker, inc every 4-3½-3-2½-2-1½ cm a total of 9-10-11-13-15-17 times = 52-56-60-66-70-76 sts. When piece measures 47-47-47-46-45-44 cm (NOTE! Shorter measurements in the larger sizes because of broader shoulders), cast off 6 sts mid under sleeve (= 3 sts on each side of marker), now finish piece back and forth on needle. Cast off for sleeve cap at beg of every row in each side as follows: 2 sts 3 times and 1 st 0-1-1-2-3-5 times, cast off 2 sts in each side of piece until piece measures 53-53-54-54-54-55 cm, cast off 3 sts in each side and cast off the remaining sts. Piece measures 54-54-55-55-55-56 cm in total. NECK EDGE: Pick up approx. 64 to 86 sts around the neck (incl sts on stitch holder) on a short circular needle size 5 mm with Nepal. Work 2 ridges in GARTER ST – see explanation above, then cast off. DETACHABLE COLLAR: Cast on 108 sts on a short circular needle size 4.5 mm with grey. K 1 round, then work rib = K 2/P 2. Work rib for 25 cm, then cast off with K over K and P over P. ASSEMBLY: Sew shoulder seams and sew in sleeves. |
||||||||||||||||||||||||||||
Diagram explanations |
||||||||||||||||||||||||||||
|
||||||||||||||||||||||||||||
 |
||||||||||||||||||||||||||||
 |
||||||||||||||||||||||||||||
Have you finished this pattern?Tag your pictures with #dropspattern #snowtrackssweater or submit them to the #dropsfan gallery. Do you need help with this pattern?You'll find 27 tutorial videos, a Comments/Questions area and more by visiting the pattern on garnstudio.com. © 1982-2026 DROPS Design A/S. We reserve all rights. This document, including all its sub-sections, has copyrights. Read more about what you can do with our patterns at the bottom of each pattern on our site. |
||||||||||||||||||||||||||||


With over 40 years in knitting and crochet design, DROPS Design offers one of the most extensive collections of free patterns on the internet - translated to 17 languages. As of today we count 324 catalogues and 12291 patterns translated into English (UK/cm). 12291
We work hard to bring you the best knitting and crochet have to offer, inspiration and advice as well as great quality yarns at incredible prices! Would you like to use our patterns for other than personal use? You can read what you are allowed to do in the Copyright text at the bottom of all our patterns. Happy crafting!
Post a comment to pattern DROPS 171-20
We would love to hear what you have to say about this pattern!
If you want to leave a question, please make sure you select the correct category in the form below, to speed up the answering process. Required fields are marked *.