
Popular categories
Looking for a yarn?


Comments / Questions (102)
![]() Kris wrote:
Kris wrote:
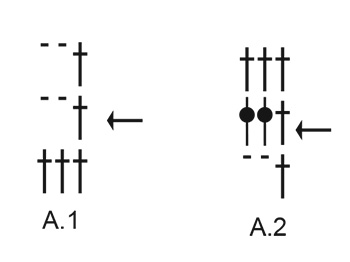
I am new to reading crochet patterns Nd I cannot figure out the A1 diagram. Can you please write out the steps rather than a diagram. I’m done with the base and excited to start the body of the bag.
06.06.2019 - 07:36DROPS Design answered:
Hi Kris, in A.1 diagram you will work as follow: 1 double crochet in the first double crochet, 2 chain stitches, skip 2 double crochets, 1 double crochet in 4-th double crochet, 2 chain stitches, skip 2 double crochets, 1 double crochet in 7-th double crochet, etc. Happy crocheting!
06.06.2019 - 08:25
![]() Julia wrote:
Julia wrote:
Where can I buy the drops Paris yarn for this pattern? I ve looked everywhere ~ onlyavailable in light blue
18.05.2019 - 05:31DROPS Design answered:
Dear Julia, you will find the list of DROPS stores here - select your country if required - and do not hesitate to contact the store for more informations about their stock/restock. Happy knitting!
20.05.2019 - 14:17
![]() Anja wrote:
Anja wrote:
Guten Tag, Bitte mal die Mengenangabe überprüfen. Ich wollte das Netz wie angegeben häkeln. Leider ging mir von Farbe 1 bereits nach 16cm Höhe die Farbe aus. Auch zum zusammenhäkeln der unteren Kante musste ich anderes Garn verwenden. Ob es mir nun reichen wird, Netz 2 und 3 zu häkeln, weiß ich nicht. Habe erstmal Garn nachbestellt um wenigstens bei diese beiden kommenden genug Garn zu haben. Andererseits schnelles angenehmes Projekt.
15.05.2019 - 12:32
![]() Maria Del Carmen wrote:
Maria Del Carmen wrote:
Buenas tardes: le agradeceria la ayuda para confeccionar estas bolsas. Podria explicarme la vuelta 6 a partir de : trabajar A.1 un total de veces ...y "completado el diagrama en vertical repetir la ultima fila del diagrama" y tambien "trabajar A.2 sobre cada repeticion de A-1"
12.05.2019 - 19:34DROPS Design answered:
Hola Maria del Carmen. Quiere decir que desde que completamos A.1 en vertical, solo repetimos la última fila: 1 punto alto , 2 puntos de cadeneta hasta que la labor mida 31 cm. Después continuar con el diagrama A.2 sobre cada repetición de A.1 (es decir, 1 punto alto sobre el punto alto, 2 puntos altos dentro del arco de 2 puntos de cadeneta).
13.06.2019 - 23:39
![]() Dea wrote:
Dea wrote:
Buongiorno, vi è scritto "GIRO 2: lavorare * 1 maglie alte in ognuna delle prime 21 maglie alte, ....." dovrebbe esserci scritto " maglia alta..." inoltre perchè alla fine di questo giro dice che si hanno 130 m. alte? Facendo i calcoli sono molte di più. Ci sono 21 m.a., poi 1 m.a. che si ottiene facendo le 3 m.a. assieme, poi 70 m.a. del manico, poi 1 m.a. delle 3 assieme, poi 21 (qui ne abbiamo 114) poi si fa un'altra ripetizione, quindi alla fine sono 228 m.a. sull'intero giro.
23.04.2019 - 14:17DROPS Design answered:
Buongiorno Dea. Chiederemo una verifica alla casa madre. Buon lavoro!
23.04.2019 - 21:19
![]() Sandra McCarthy wrote:
Sandra McCarthy wrote:
Sandra McCarthy 16.04.2019 - 20:15: Pattern # w-767. I have read the complete pattern. I understand the instructions for the bag. I don't understand the Work A.2 over each repeat of A.1. I did reread the crochet info and am still confused. Also in the diagram what is the arrow saying? Start on the second row (of the diagram) working up and the bottom row (below the arrow) is worked as the third row after the top row.
20.04.2019 - 18:00DROPS Design answered:
Dear Mrs McCarthy, the arrow shows where to start A.2, the row below is showing the previous row, to show where/how to crochet the first row in A.2 = 1 dc in first dc, 2 dc around the 2-chain-space - on row 2 in A.2 work 1 dc in each dc. Happy crocheting!
23.04.2019 - 12:44
![]() Sandra McCarthy wrote:
Sandra McCarthy wrote:
Pattern # w-767. I did not have a crochet hook US 7 (4.5 mm). I used a G hook US 6 (4.25 mm), to work my gauge sample. The 16 double crochet in the width came out exactly at 4" however, the 9 rows of double crochet in height was 5", 7 rows were exactly 4". Since the patter is saying how tall to work the rounds, is this measurement (height) as important as the width? Should I go ahead and make the bag with the G/6 hook or try to find a 7US hook? Thank you for any help and information.
16.04.2019 - 20:32DROPS Design answered:
Dear Sandra, since the piece is not a garment someobody would wear, keeping gage is somewhat less important. When you use a different needle, the resulting fabric might be somewhat denser or looser, you probably will need to crochet more or less rows, and you might need more or less yarn. In this case, you can just change the number of rows to do, and the bag should be fine. Happy Crafting!
16.04.2019 - 23:20
![]() Mila wrote:
Mila wrote:
I don't understand why we have to decrease first round from 142 chain stitches to 114 and after that increase again in each next round. Would appreciate the answer
15.04.2019 - 18:03DROPS Design answered:
Hi Mila! Chain stitches are slightly narrower than other stitches and to avoid working the cast-on edge too tight, we simply chain more stitches to begin with. The stitch count will be adjusted on the following row to fit the pattern and measurement sketch. Happy crocheting!
15.04.2019 - 18:14
![]() Manila wrote:
Manila wrote:
Buongiorno volevo chiedere quanto peso può portare questa borsa senza che le maglie tendano ad allungarsi eccessivamente ? grazie dell'attenzione
12.04.2019 - 16:49DROPS Design answered:
Buongiorno Manila, non abbiamo il peso preciso che può sopportare la borsa, in ogni caso è lavorata in cotone, che non cede come la lana. Noi le consigliamo comunque di non caricarla troppo. Buon lavoro!
12.04.2019 - 22:25
![]() Vida Sue Lindner wrote:
Vida Sue Lindner wrote:
How can I download these patterns to my dropbox files or folders.
02.04.2019 - 03:24DROPS Design answered:
Dear Mrs Lindner, you can only print our patterns, but choosing a virtual printer may let you save it as a .PDF. Happy crocheting!
02.04.2019 - 15:33
|
|||||||||||||
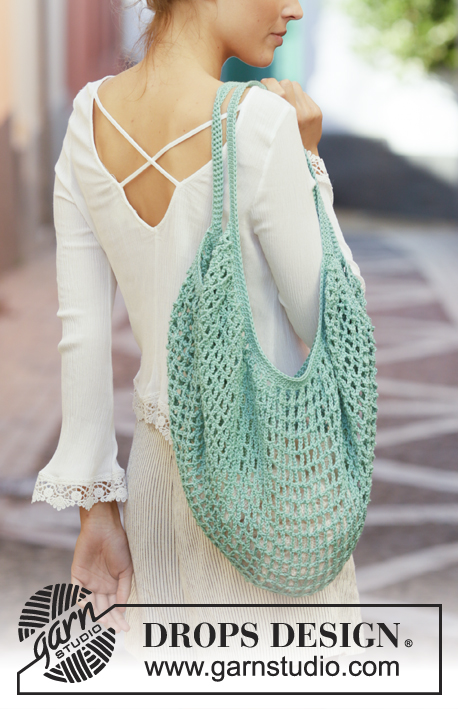
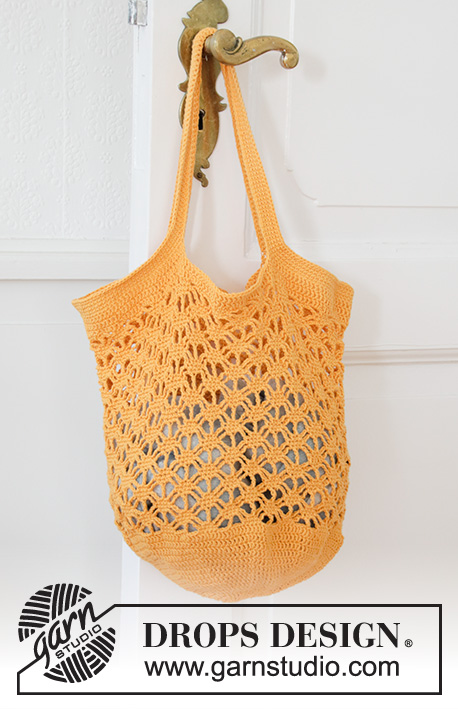
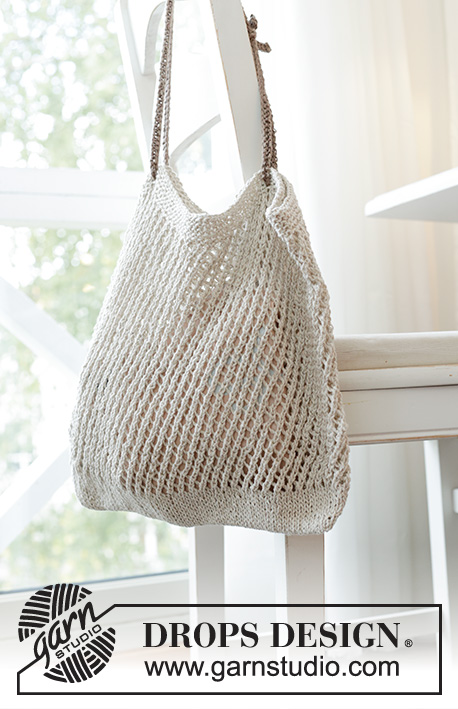
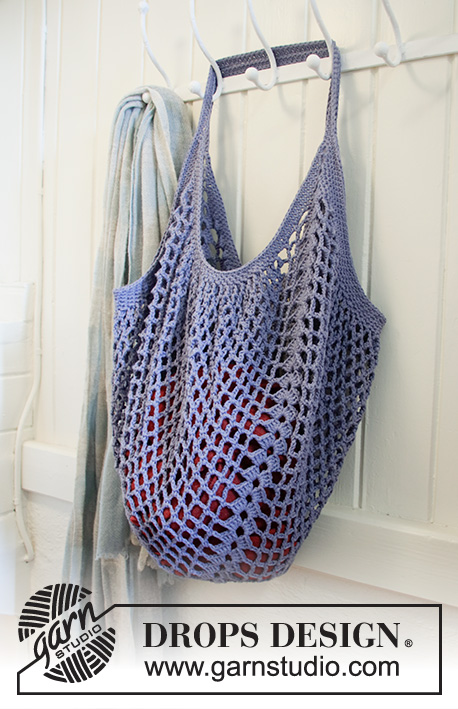
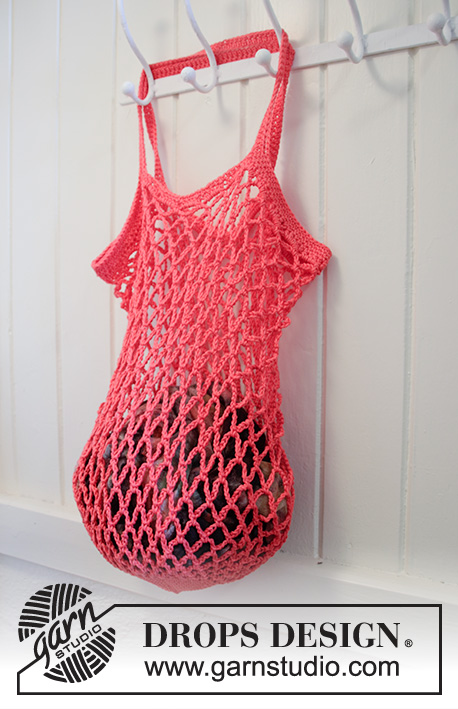
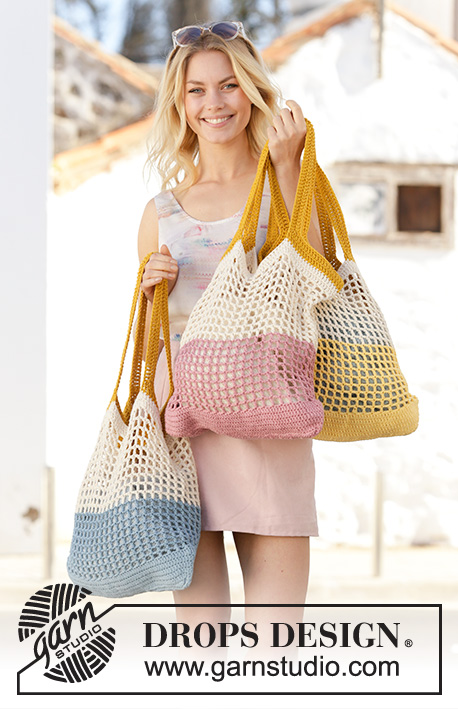
Back to the Beach#backtothebeachbag |
|||||||||||||
 |
 |
||||||||||||
Crocheted bags with stripes in DROPS Paris. The piece is worked in the round, bottom up.
DROPS 200-1 |
|||||||||||||
|
EXPLANATIONS FOR THE PATTERN: ------------------------------------------------------- PATTERN: See diagrams A.1 and A.2. CROCHET INFORMATION: At the beginning of each round of double crochets, replace the first double crochet with 1 chain stitch. The round finishes with 1 slip stitch in the first chain stitch at the beginning of the round. At the beginning of each round of treble crochets, replace the first treble crochet with 3 chain stitches. The round finishes with 1 slip stitch in the 3rd chain stitch at the beginning of the round. CROCHET TIP (for chain stitches): 1 chain stitch is equivalent to 1 treble crochet in width. Make sure the loop made in the chain stitch is pulled some way up the hook so that it is not tight. If the chain stitch is worked too tightly, the pattern will be tight in sections where there are lots of chain stitches. INCREASE TIP-1: Increase 1 treble crochet by working 2 treble crochets in 1 treble crochet. Increase 1 treble crochet in each stitch before and after both marker threads (= 4 treble crochets increased on round). INCREASE TIP-2 (evenly spaced): To work out how to increase evenly count the total number of stitches on the round (e.g. 130 stitches) and divide by the number of increases to be made (e.g. 8) = 16.25. In this example increase by working 2 treble crochets in approx. each 16th stitch. 3 TREBLE CROCHETS TO 1 TREBLE CROCHET: Work 1 treble crochet in first stitch, but wait with the last yarn over and pull through (= 2 loops on hook), work 1 more treble crochet in the same way in each of the next 2 stitches, but pull the last yarn over through all 4 loops on the hook (= 1 stitch) ------------------------------------------------------- START THE PIECE HERE: ------------------------------------------------------- BAG - SHORT OVERVIEW OF THE PIECE: The piece is worked in the round, bottom up. The bottom is crocheted together to finish. BAG: Work 142 chain stitches with hook size 4.5 mm and old pink. Form them into a ring with 1 slip stitch in the first chain stitch on the round. ROUND 1: Work 1 chain stitch (= 1 double crochet) – read CROCHET INFORMATION, work 1 double crochet in the next chain stitch, * skip the next chain stitch, work 1 double crochet in each of the next 4 chain stitches *, work from *-* a total of 28 times = 114 double crochets. Insert a marker thread at the beginning of the round and a marker thread after 57 double crochets (= 57 double crochets left on round). ROUNDS 2-5: Work 1 treble crochet in each double crochet. AT THE SAME TIME on each round increase 1 stitch on each side of both marker threads – read INCREASE TIP-1 = 130 stitches. REMEMBER THE CROCHET TENSION! ROUND 6: Work 1 treble crochet in each treble crochet and increase 8 treble crochets evenly on round – read INCREASE TIP-2 = 138 treble crochets. Now continue as follows – read CROCHET TIP: Work A.1 a total of 46 times on the round. When the diagram has been completed in height repeat the last row in the diagram. When the piece measure 18 cm from the cast-on edge change to off white. Continue working the last round in A.1 until the piece measures 31 cm from the cast on edge. Work A.2 over each repeat of A.1 – remember CROCHET INFORMATION. Change to mustard and work the edge and straps as follows: ROUND 1: Work * 1 treble crochet in each of the first 23 treble crochets, work 72 chain stitches – make sure that the chain stitches are not tight (the row of chain stitches should measure 45 cm), skip 23 treble crochets, work 1 treble crochet in each of the next 23 treble crochets *, work from *-* 1 more time on the round = 2 straps. ROUND 2: Work * 1 treble crochet in each of the first 21 treble crochets, work 3 TREBLE CROCHETS TO 1 TREBLE CROCHET – read description above, work 1 treble crochet in each of the next 70 chain stitches (there is 1 chain stitch left before the next treble crochet on the round), work 3 TREBLE CROCHETS TO 1 TREBLE CROCHET, work 1 treble crochet in each of the next 21 treble crochets *, work from *-* 1 more time on the round = 228 treble crochets. ROUND 3: * Work 1 double crochet in every treble crochet until the 3 treble crochets that were crocheted together into 1 treble crochet before the strap, work 1 chain stitch, skip the treble crochet worked together, work 1 treble crochet in every treble crochet to the 3 treble crochets that were crocheted together into 1 treble crochet on the other side of the strap, work 1 chain stitch and skip the treble crochet worked together *, work from *-* one more time on the round and finish with 1 double crochet in every treble crochet to the end of the round. Cut and fasten the strands. Turn the piece so that right side faces right side and crochet the bottom together along the first row of chain stitches worked. Crochet using the same colour as you have used at the bottom of the bag and work through both layers starting from the marker thread at the beginning of the round as follows: Work 1 double crochet in each chain stitch, but skip the same chain stitches skipped at the start of the piece. Cut and fasten the strand. Work 2 more bags in the same way, but start with light blue or vanilla instead of old pink. |
|||||||||||||
Diagram explanations |
|||||||||||||
|
|||||||||||||
 |
|||||||||||||
Have you finished this pattern?Tag your pictures with #dropspattern #backtothebeachbag or submit them to the #dropsfan gallery. Do you need help with this pattern?You'll find 12 tutorial videos, a Comments/Questions area and more by visiting the pattern on garnstudio.com. © 1982-2026 DROPS Design A/S. We reserve all rights. This document, including all its sub-sections, has copyrights. Read more about what you can do with our patterns at the bottom of each pattern on our site. |
|||||||||||||


With over 40 years in knitting and crochet design, DROPS Design offers one of the most extensive collections of free patterns on the internet - translated to 17 languages. As of today we count 324 catalogues and 12290 patterns translated into English (UK/cm). 12290
We work hard to bring you the best knitting and crochet have to offer, inspiration and advice as well as great quality yarns at incredible prices! Would you like to use our patterns for other than personal use? You can read what you are allowed to do in the Copyright text at the bottom of all our patterns. Happy crafting!
Post a comment to pattern DROPS 200-1
We would love to hear what you have to say about this pattern!
If you want to leave a question, please make sure you select the correct category in the form below, to speed up the answering process. Required fields are marked *.