Comments / Questions (99)
![]() Hanne Sørensen wrote:
Hanne Sørensen wrote:
Hej forstår ikke diagram 1og 2 vil I skrive hvad jeg gør med hver diagram
11.10.2023 - 13:53
![]() Katja Schmidtpott wrote:
Katja Schmidtpott wrote:
Ik vind het resultaat erg leuk. Maar het patroon volgens mij erg ingewikkeld opgeschreven helaas. Ik heb net aardig wat tijd verloren naar het zoeken of ik na iedere toer deze moet laten aansluiten op de vorige door een halve vaste. Want alleen in bij de eerste toer staat dit expliciet geschreven, maar in geen van de andere toeren. Dat brengt mij aan het twijfelen: waarom staat het er niet in. En moet het dan wel of niet? M.vr.gr. Katja Schmidtpott
14.05.2023 - 17:44DROPS Design answered:
Dag Katja,
Bovenaan bij 'informatie voor het haken' staat beschreven dat je de toer eindigt me t1 halve vaste vaste of 3e losse op het begin van de toer.
15.05.2023 - 20:22
![]() Beth wrote:
Beth wrote:
ROUND 1: Work 1 chain stitch (= 1 single crochet) – read CROCHET INFORMATION, work 1 single crochet in the next chain stitch, * skip the next chain stitch, work 1 single crochet in each of the next 4 chain stitches *, I’m curious …in Round 1, why do you skip chain stitches?
02.05.2023 - 00:32DROPS Design answered:
Dear Beth, most of the time the foundation chain is too tight, and tighten then piece, to avoid this, you will here cast on more chain stitches you need single crochets on first row and skip chain stitches evenly to get the correct width. Happy crocheting!
02.05.2023 - 09:52
![]() Helene wrote:
Helene wrote:
Je ne comprends pas le diagramme A2 pouvez vous m aider . Merci
10.04.2023 - 00:42DROPS Design answered:
Bonjour Hélène, le rang avant la flèche représente le dernier rang de A.1, au rang suivant (1er rang de A.2) crochetez: *1 bride dans la bride suivante, 2 brides autour de l'arceau*, répétez de *-*; au 2ème tour, crochetez 1 bride dans chaque bride. Répétez ces 2 tours. Bon crochet!
11.04.2023 - 12:33
![]() Claudia wrote:
Claudia wrote:
Gibt es die Anleitung auch auf Deutsch?
22.10.2022 - 09:57DROPS Design answered:
Liebe Claudia, die Anleitung ist hier: https://www.garnstudio.com/pattern.php?id=8970&cid=9 Viele Spaß zum häkeln.
23.10.2022 - 12:20
![]() Sylvie wrote:
Sylvie wrote:
Bonjour, J'ai un soucis de taille. Je ne suis ni une experte, ni une débutante. En suivant le modèle avec un crochet n°4, j'arrive à une circonférence de 115 au lieu de 84 ... et du coup, je n'ai pas assez de coton pour finir la première partie (première couleur de coton). Faut-il que je prenne encore un crochet plus petit ? C'est la première fois que j'ai ce genre de problème. Merci d'avance pour votre réponse.
20.04.2022 - 09:03DROPS Design answered:
Bonjour Sylvie, ce modèle est calculé sur la base d'un échantillon de 16 brides x 9 rangs = 10 x 10 cm; si vous n'avez pas le même échantillon, les mesures et la quantité nécessaire de coton s'en verront modifiés. Retrouvez plus d'infos ici. Bon crochet!
20.04.2022 - 13:27
![]() Diane wrote:
Diane wrote:
Nun stets die letzte Runde von A.1 häkeln, bis die Arbeit eine Länge von 31 cm ab dem Anschlagrand hat. HIER BIN ICH JETZT Dann A.2 über jeden Rapport A.1 häkeln – HÄKELINFORMATION beachten. Nach diesem Diagramm wellt sich mein Häkelteil am Rand . Habe Muster richtig gehäkelt. Was tun?
28.03.2022 - 11:18DROPS Design answered:
Liebe Diane, beachten Sie, daß die Luftmaschen in A.1 genauso lang als 1 Stäbchen in der Breite sind, sollten sie kleiner sein, dann A.2 breiter als A.1 sein (und beide Muster sollen genauso breit sein, dh 3 Maschen in der Breite, egal ob es Luftmaschen oder Stäbchen ist). Viel spaß beim häkeln!
28.03.2022 - 15:57
![]() Miriam wrote:
Miriam wrote:
Hola! Cuando hay que hacer un aumento antes y después del marcador en la vuelta 57 no tengo problema pero en el primer marcador sí porque el marcador está puesto en el primer punto y cómo hago un aumento antes del marcador si es la vuelta anterior??? Acabo la vuelta con un punto enano y hago 3 cadenetas que hacen del primer punto alto donde está el marcador y en siguiente punto ya hago el aumento pero no sé cómo hacer el aumento antes del marcador al ser la vuelta anterior. Gracias
14.11.2021 - 15:06DROPS Design answered:
Hola Miriam, este aumento se trabaja al final de la vuelta (esa misma vuelta, no la anterior), al lado de este punto de inicio. Está posicionado antes que el punto con el marcapuntos, pero se trabaja después.
14.11.2021 - 18:41
![]() Joke wrote:
Joke wrote:
Ik wil graag dit patroon op papier hebben zou dat kunnen en wat mooie kleuren ik ga de garen bij jullie bestellen kan ik dan ook het patroon van jullie krijgen op papier herl graag
25.07.2021 - 21:52DROPS Design answered:
Dag Joke,
Al onze patronen zijn gratis af te drukken via de knop 'Afdrukken' onder de materialenlijst. Klik op de knop 'Afdrukken' en dan op 'Patroon'. In het pop-up venster dat vervolgens in beeld komt klik je rechts boven op de link 'Het patroon afdrukken'.
19.08.2021 - 14:14
![]() Karola wrote:
Karola wrote:
Dziękuję, miałam problem ze zrozumieniem wzoru, ale już sobie poradziłam- torba niemal ukończona ;) pozdrawiam 😊
17.07.2021 - 09:16
Back to the Beach#backtothebeachbag |
|||||||||||||
 |
 |
||||||||||||
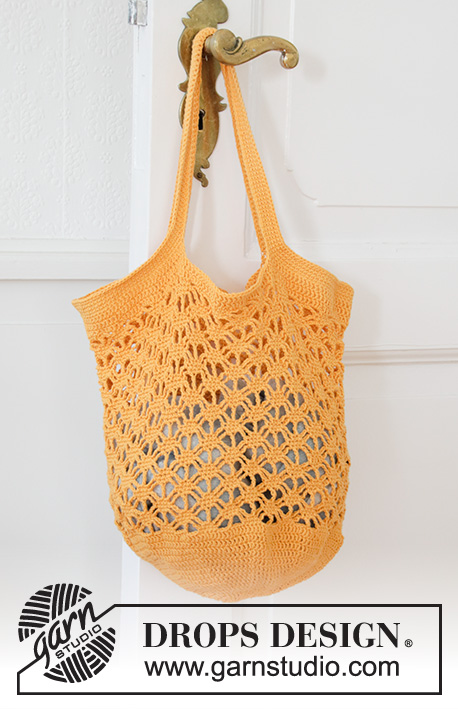
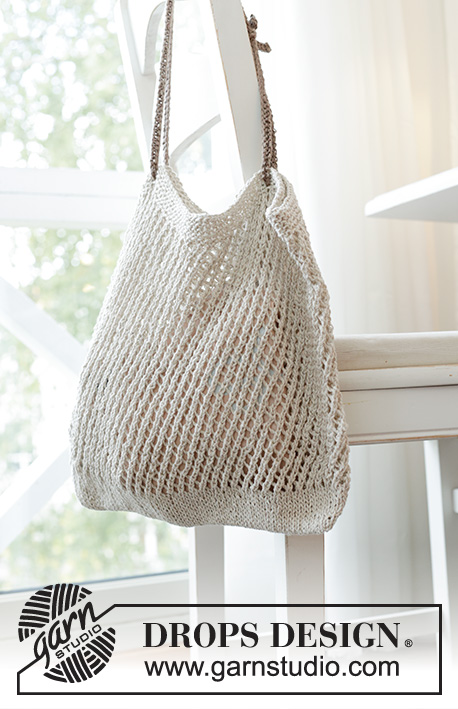
Crocheted bags with stripes in DROPS Paris. The piece is worked in the round, bottom up.
DROPS 200-1 |
|||||||||||||
|
EXPLANATIONS FOR THE PATTERN: ------------------------------------------------------- PATTERN: See diagrams A.1 and A.2. CROCHET INFORMATION: At the beginning of each round of double crochets, replace the first double crochet with 1 chain stitch. The round finishes with 1 slip stitch in the first chain stitch at the beginning of the round. At the beginning of each round of treble crochets, replace the first treble crochet with 3 chain stitches. The round finishes with 1 slip stitch in the 3rd chain stitch at the beginning of the round. CROCHET TIP (for chain stitches): 1 chain stitch is equivalent to 1 treble crochet in width. Make sure the loop made in the chain stitch is pulled some way up the hook so that it is not tight. If the chain stitch is worked too tightly, the pattern will be tight in sections where there are lots of chain stitches. INCREASE TIP-1: Increase 1 treble crochet by working 2 treble crochets in 1 treble crochet. Increase 1 treble crochet in each stitch before and after both marker threads (= 4 treble crochets increased on round). INCREASE TIP-2 (evenly spaced): To work out how to increase evenly count the total number of stitches on the round (e.g. 130 stitches) and divide by the number of increases to be made (e.g. 8) = 16.25. In this example increase by working 2 treble crochets in approx. each 16th stitch. 3 TREBLE CROCHETS TO 1 TREBLE CROCHET: Work 1 treble crochet in first stitch, but wait with the last yarn over and pull through (= 2 loops on hook), work 1 more treble crochet in the same way in each of the next 2 stitches, but pull the last yarn over through all 4 loops on the hook (= 1 stitch) ------------------------------------------------------- START THE PIECE HERE: ------------------------------------------------------- BAG - SHORT OVERVIEW OF THE PIECE: The piece is worked in the round, bottom up. The bottom is crocheted together to finish. BAG: Work 142 chain stitches with hook size 4.5 mm and old pink. Form them into a ring with 1 slip stitch in the first chain stitch on the round. ROUND 1: Work 1 chain stitch (= 1 double crochet) – read CROCHET INFORMATION, work 1 double crochet in the next chain stitch, * skip the next chain stitch, work 1 double crochet in each of the next 4 chain stitches *, work from *-* a total of 28 times = 114 double crochets. Insert a marker thread at the beginning of the round and a marker thread after 57 double crochets (= 57 double crochets left on round). ROUNDS 2-5: Work 1 treble crochet in each double crochet. AT THE SAME TIME on each round increase 1 stitch on each side of both marker threads – read INCREASE TIP-1 = 130 stitches. REMEMBER THE CROCHET TENSION! ROUND 6: Work 1 treble crochet in each treble crochet and increase 8 treble crochets evenly on round – read INCREASE TIP-2 = 138 treble crochets. Now continue as follows – read CROCHET TIP: Work A.1 a total of 46 times on the round. When the diagram has been completed in height repeat the last row in the diagram. When the piece measure 18 cm from the cast-on edge change to off white. Continue working the last round in A.1 until the piece measures 31 cm from the cast on edge. Work A.2 over each repeat of A.1 – remember CROCHET INFORMATION. Change to mustard and work the edge and straps as follows: ROUND 1: Work * 1 treble crochet in each of the first 23 treble crochets, work 72 chain stitches – make sure that the chain stitches are not tight (the row of chain stitches should measure 45 cm), skip 23 treble crochets, work 1 treble crochet in each of the next 23 treble crochets *, work from *-* 1 more time on the round = 2 straps. ROUND 2: Work * 1 treble crochet in each of the first 21 treble crochets, work 3 TREBLE CROCHETS TO 1 TREBLE CROCHET – read description above, work 1 treble crochet in each of the next 70 chain stitches (there is 1 chain stitch left before the next treble crochet on the round), work 3 TREBLE CROCHETS TO 1 TREBLE CROCHET, work 1 treble crochet in each of the next 21 treble crochets *, work from *-* 1 more time on the round = 228 treble crochets. ROUND 3: * Work 1 double crochet in every treble crochet until the 3 treble crochets that were crocheted together into 1 treble crochet before the strap, work 1 chain stitch, skip the treble crochet worked together, work 1 treble crochet in every treble crochet to the 3 treble crochets that were crocheted together into 1 treble crochet on the other side of the strap, work 1 chain stitch and skip the treble crochet worked together *, work from *-* one more time on the round and finish with 1 double crochet in every treble crochet to the end of the round. Cut and fasten the strands. Turn the piece so that right side faces right side and crochet the bottom together along the first row of chain stitches worked. Crochet using the same colour as you have used at the bottom of the bag and work through both layers starting from the marker thread at the beginning of the round as follows: Work 1 double crochet in each chain stitch, but skip the same chain stitches skipped at the start of the piece. Cut and fasten the strand. Work 2 more bags in the same way, but start with light blue or vanilla instead of old pink. |
|||||||||||||
Diagram explanations |
|||||||||||||
|
|||||||||||||
 |
|||||||||||||
Have you finished this pattern?Tag your pictures with #dropspattern #backtothebeachbag or submit them to the #dropsfan gallery. Do you need help with this pattern?You'll find 12 tutorial videos, a Comments/Questions area and more by visiting the pattern on garnstudio.com. © 1982-2025 DROPS Design A/S. We reserve all rights. This document, including all its sub-sections, has copyrights. Read more about what you can do with our patterns at the bottom of each pattern on our site. |
|||||||||||||


Post a comment to pattern DROPS 200-1
We would love to hear what you have to say about this pattern!
If you want to leave a question, please make sure you select the correct category in the form below, to speed up the answering process. Required fields are marked *.