
Popular categories
Looking for a yarn?


Comments / Questions (41)
![]() Barbara wrote:
Barbara wrote:
Ho iniziato a lavorare il davanti sinistro cosa vuol dire : 1 maglia a maglia legaccio, 0-2-3-2-4-6 maglie a maglia rasata, lavorare A.6 fino a quando rimangono 19 maglie, 1 maglia a maglia rasata, A.2a, A.1a, 1 maglia rovescio, 7 maglie per il bordo a maglia legaccio. le 19 maglie che rimangono come vanno lavorate ? non ho capito questo passaggio. grazie in anticipo Barbara
22.05.2026 - 21:11DROPS Design answered:
Buonasera Barbara, quale passaggio non le è chiaro? Le maglie separate dai trattini fanno riferimento alle diverse taglie, deve seguire il numero riportato per la sua taglia. Buon lavoro!
26.05.2026 - 22:35
![]() Kira wrote:
Kira wrote:
Hallo, nachdem ich in A3 abgenommen habe, sind 198 Maschen auf der Nadel, nicht 197, da ja 229-33=196 und das +2 Maschen von den Umschlägen in A1.a =198. Oder denke ich falsch? LG
27.02.2026 - 15:44DROPS Design answered:
Liebe Kira, bei der 1. Reihe nach A1 und A.2 1x in der Höhe gestrickt wurden, wird man 1 Masche (vor den 7 BlendenMaschen) zunehmen, so sind es 230 Maschen - 33 Maschen abgenommen sind 197 Maschen, Viel Spaß beim Stricken!
02.03.2026 - 07:26
![]() Lorena wrote:
Lorena wrote:
Hi! Just a question, is the gauge swatch knitted with 5mm needles?
02.10.2025 - 04:16DROPS Design answered:
Hi Lorena, Yes, the gauge is with size 5 mm needles. Regards, Drops team.
02.10.2025 - 05:49
![]() Hanna wrote:
Hanna wrote:
Hei, olen neulonut A1 ja A2 loppuun. Kun aloitan seuraavan kerroksen eli ensimmäinen rivi piirroksesta A1a neulon ensin ainaoikein 7silmukkaa ja sitten minulla on 1 nurja silmukka vaikka piirroksen mukaan pitäisi olla 2. 🥴
30.08.2025 - 11:54DROPS Design answered:
Hei, oletko tehnyt kavennukset oikeissa kohdissa piirrosten mukaisesti? Piirrosten viimeisellä kerroksella jokaisen mallikerran lopussa kavennetaan 1 silmukka.
05.09.2025 - 18:59
![]() Stine wrote:
Stine wrote:
Hej Jeg er i tvivl hvad i mener med strik A1 og A2. Betyder det at jeg f.eks på retsiden strikker 2 vrang, 2 ret, 4(2+2) vrang, 2 ret og 2 vrang. Og så starter og slutter jeg pinden med 7 masker retstrik.
30.07.2025 - 00:12DROPS Design answered:
Hei Stine. Ja, det stemmer (på de 9. første pinnene). mvh DROPS Design
18.08.2025 - 13:22
![]() Julie G wrote:
Julie G wrote:
Bonjour, je ne suis pas sure de comprendre le nombre de mailles pour les côtés du bas : en regardant le diagramme cela fait des côtés 2/4 , pourtant sur la photo on dirait des côtes 2/2. Merci d’avance. Bonne journée
25.07.2025 - 12:58DROPS Design answered:
Bonjour Julie G, on va tricoter les côtes du bas ainsi: (A.1 = 2 m env, 2 m end, 2 m env puis A.2 = 2 m env, 2 mend, 2 menv), on va ainsi avoir des côtes 2 m env, puis (2 m end, 4 m env) en terminant par 2 m env (les 2 dernières mailles de A.2 - entre les bordures des devants. On diminuera ensuite 1 m envers dans 1 section 2 m env sur 2, puis on tricote les torsades qui vont décaler les motifs. Bon tricot!
25.07.2025 - 16:21
![]() Siri wrote:
Siri wrote:
Hvis man begynner vrangborden og diagrammene A. 1 og A. 2 fra rettsiden vil fellingene på rad 10 være på vrangsiden. Fellingene er beskrevet som "2 vrang sammen" på masker som er vrange fra rett siden, skal man tolke det som at man på vrangsiden strikker rett sammen?
19.05.2025 - 14:30DROPS Design answered:
Hej Siri. Ja det stemmer, på vrangsiden blir det 2 rett sammen. Mvh DROPS Design
21.05.2025 - 13:37
![]() Epie wrote:
Epie wrote:
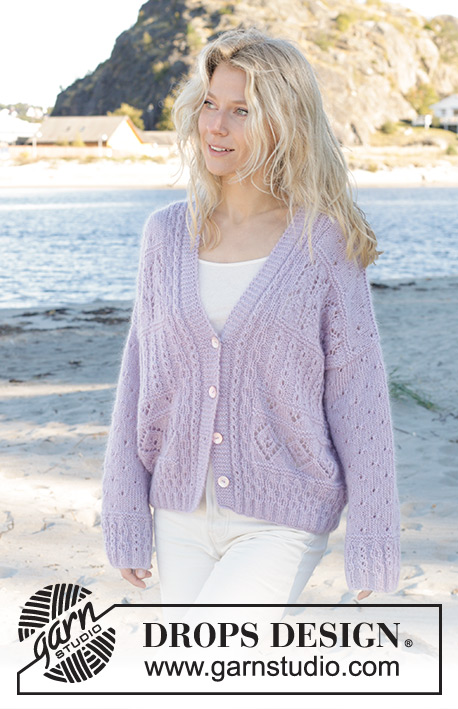
Ik wil graag het patroon breien met de V hals, die ik zie op de foto’s hierboven. dus niet met de sjaalkraag
27.01.2025 - 19:04
![]() Cobi Walter wrote:
Cobi Walter wrote:
Ik brei maat XL
30.09.2024 - 15:45
![]() Cobi Walter wrote:
Cobi Walter wrote:
Is de 10e naald van A1 en A2 op de verkeerde kant van het werk? Is dan de 11e nld met de omslag en de kabelnaald steken op de goede kant? Klopt dan het begin met 2 steken averecht wel ? Ik heb dan 1 st averecht Of
30.09.2024 - 15:36DROPS Design answered:
Dag Cobi,
De even naalden in het telpatroon zijn altijd op de verkeerde kant. Op de 10e naald brei je dus 2 averecht samen en op de 11e naald maak je een omslag tussen de 2 steken recht.
19.10.2024 - 11:54
|
|||||||||||||||||||||||||||||||||||||
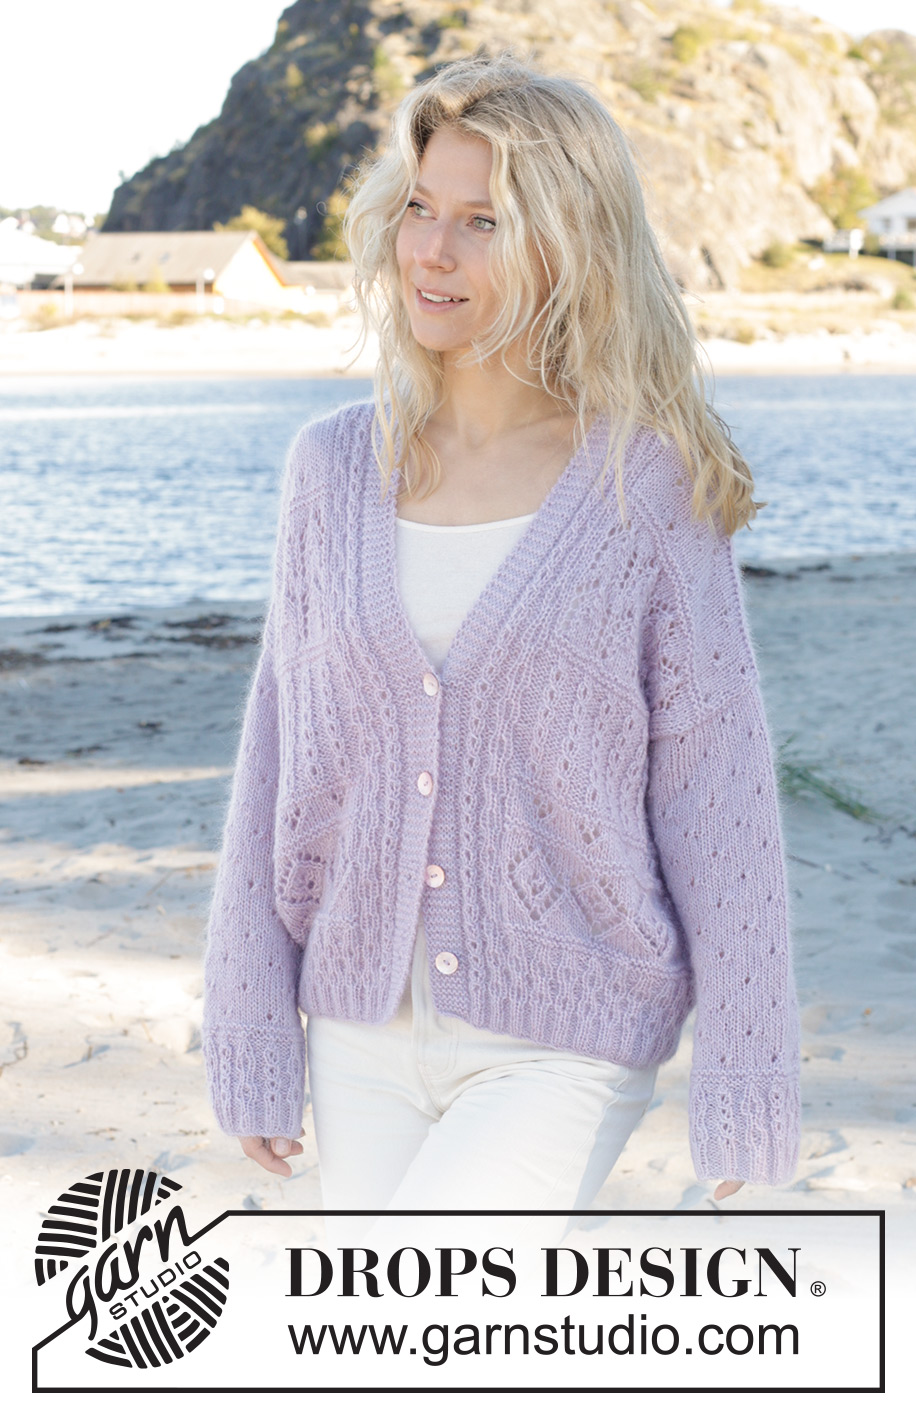
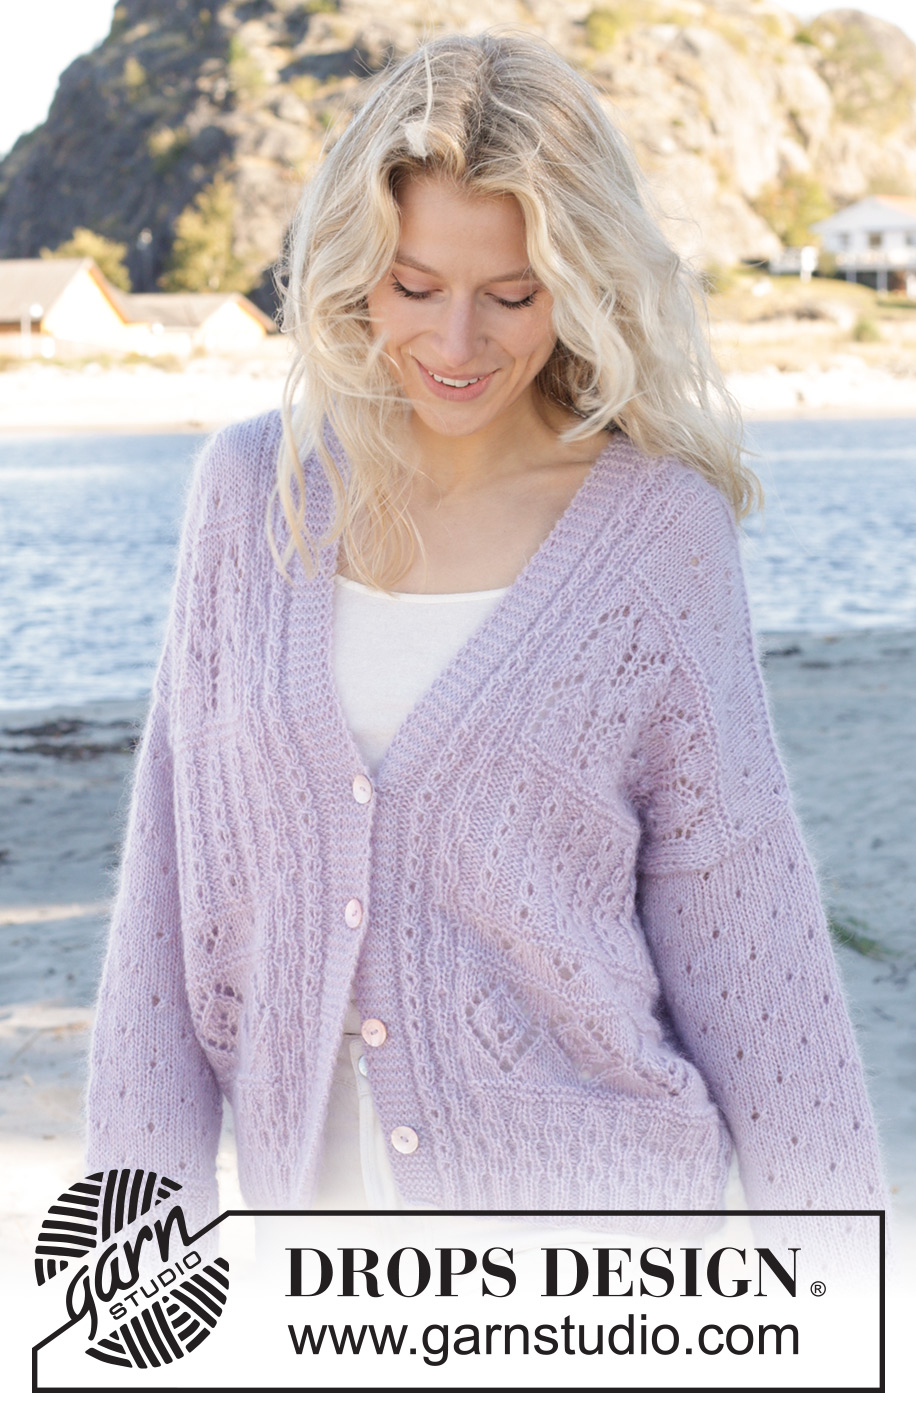
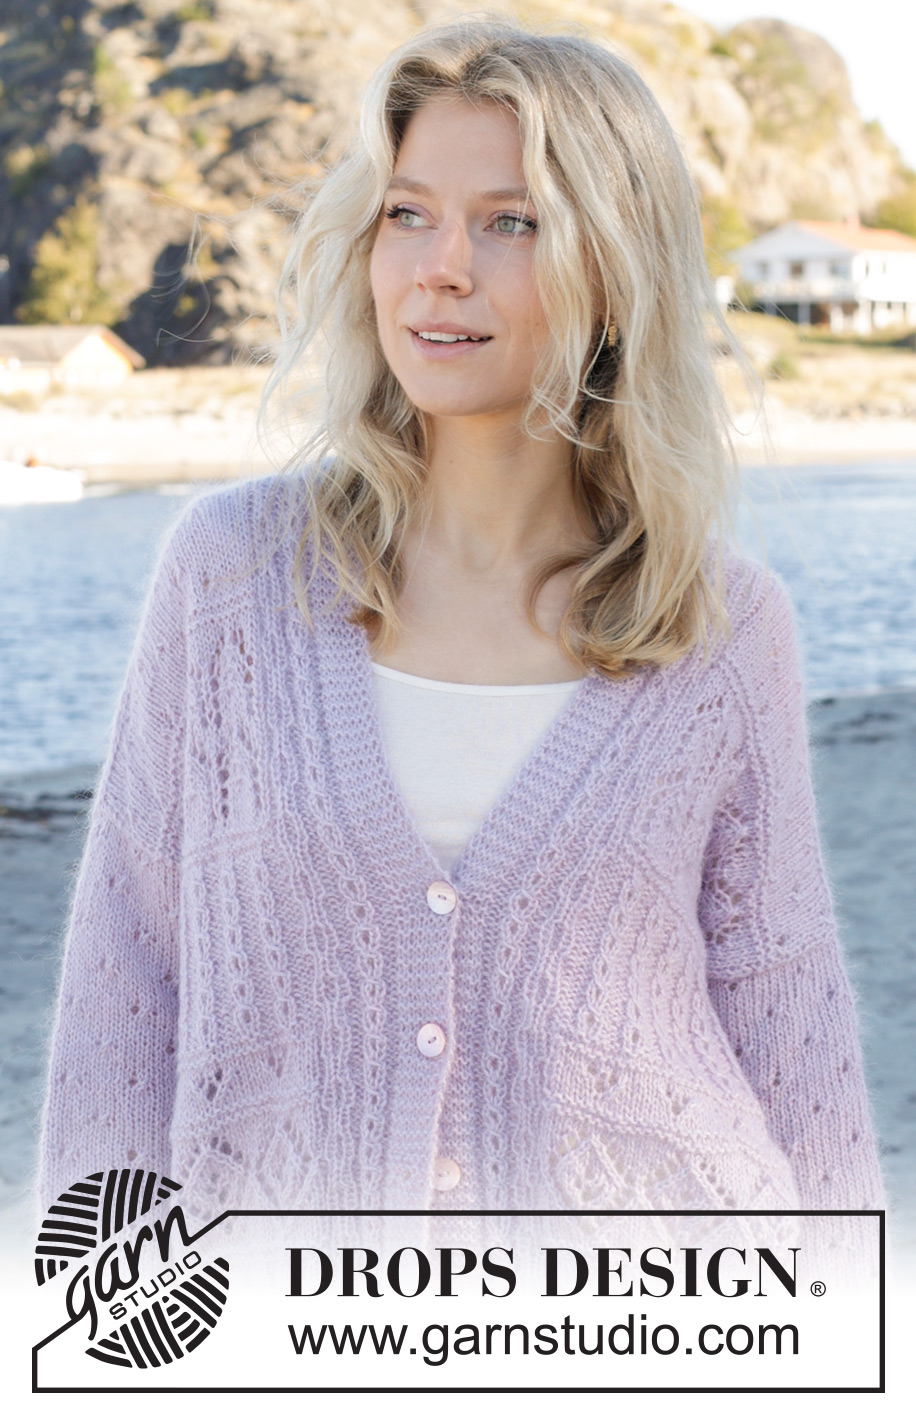
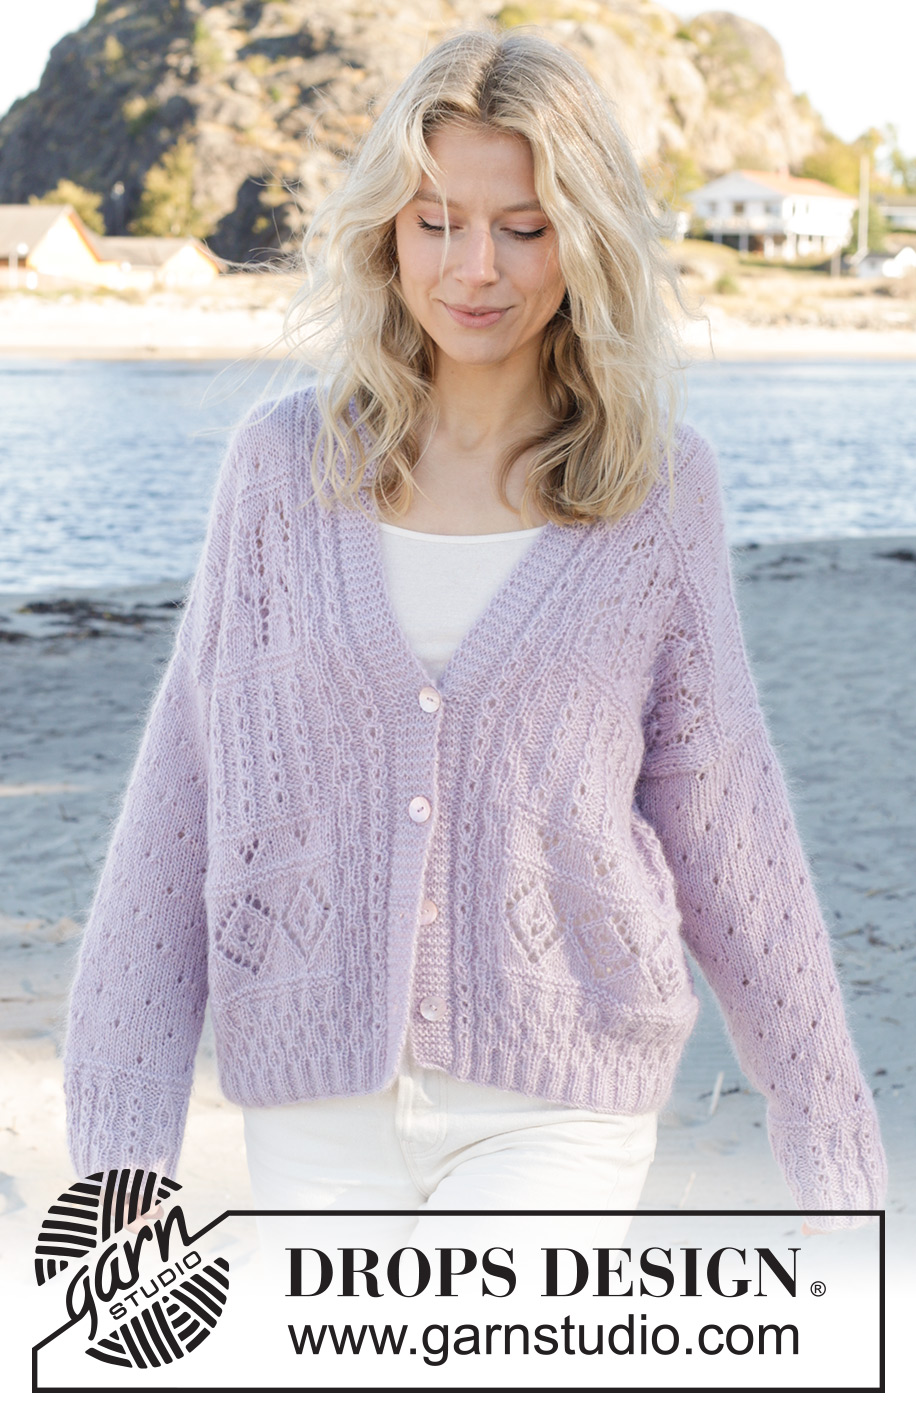
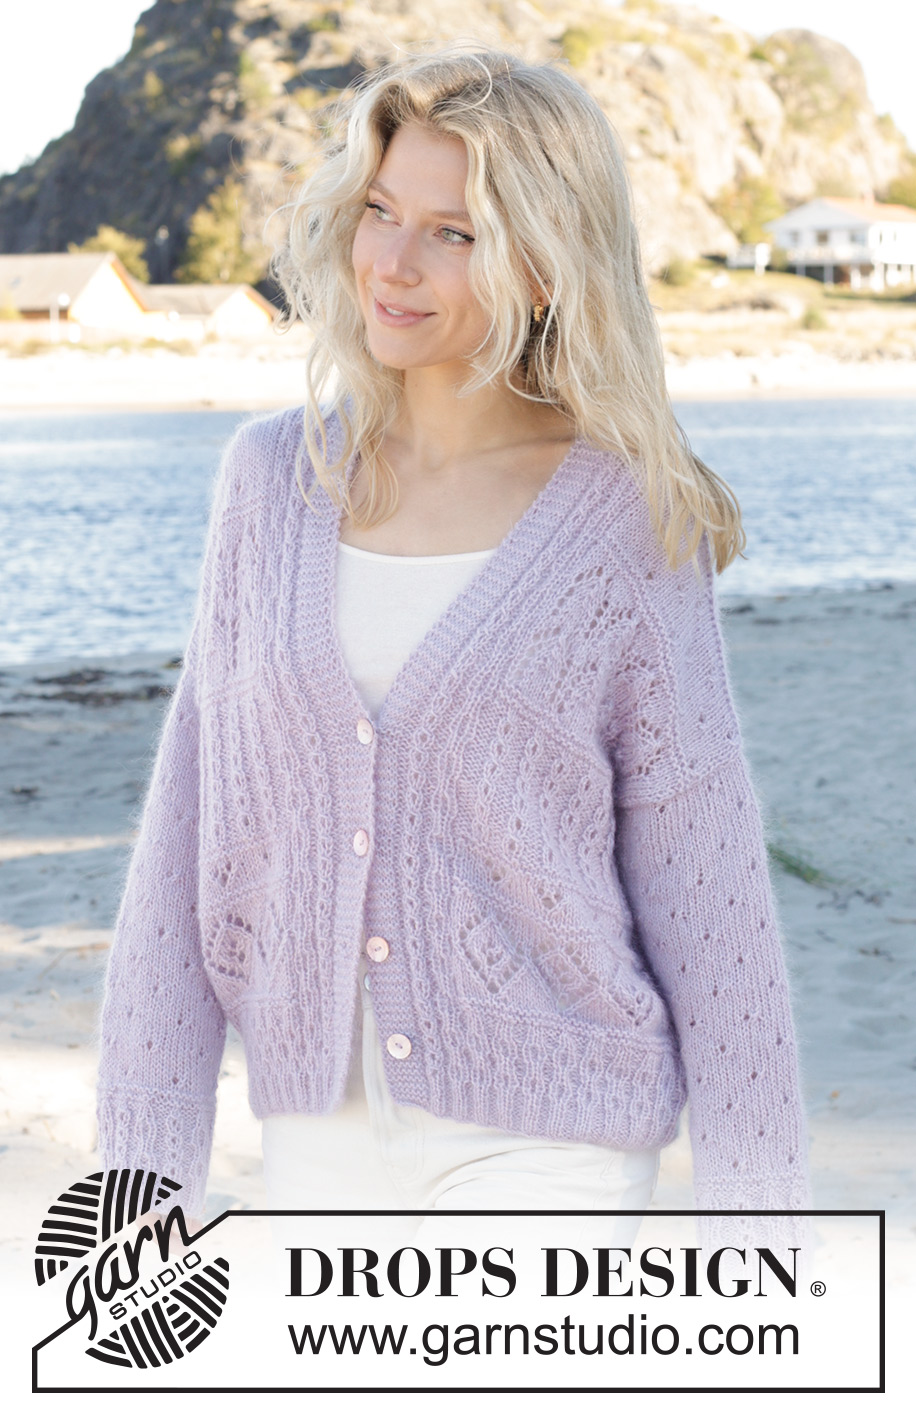
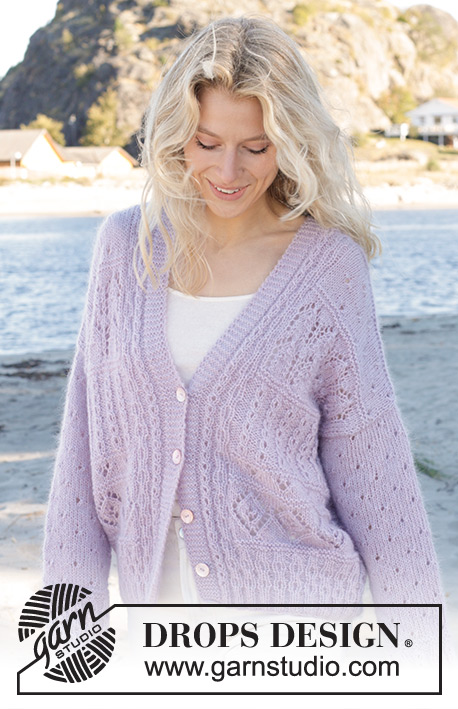
Fabled Harbour Cardigan#fabledharbourcardigan |
|||||||||||||||||||||||||||||||||||||
 |
 |
||||||||||||||||||||||||||||||||||||
Knitted jacket in DROPS Alpaca and DROPS Kid-Silk. Piece is knitted bottom up with lace pattern. Size: S - XXXL
DROPS 241-10 |
|||||||||||||||||||||||||||||||||||||
|
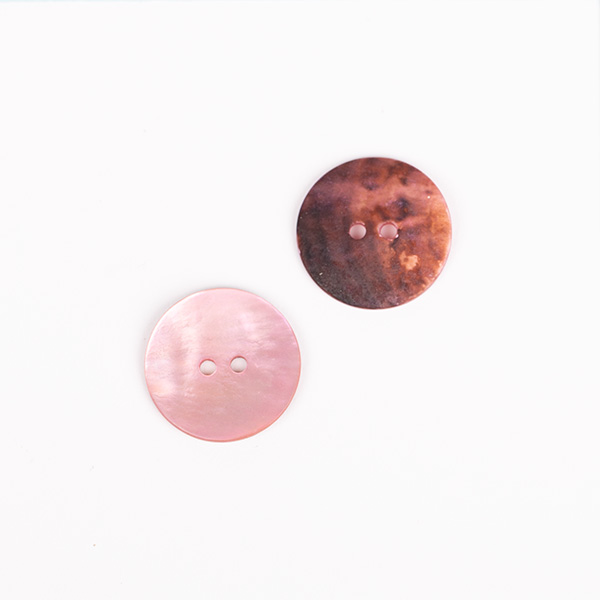
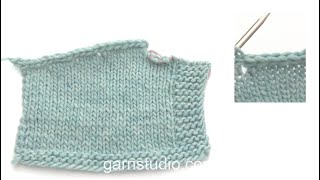
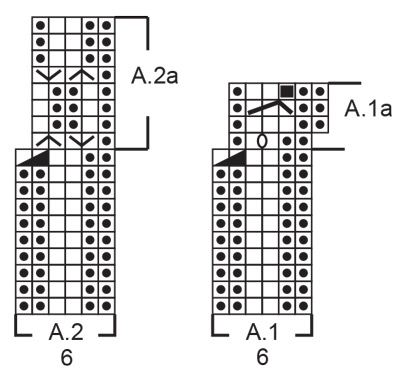
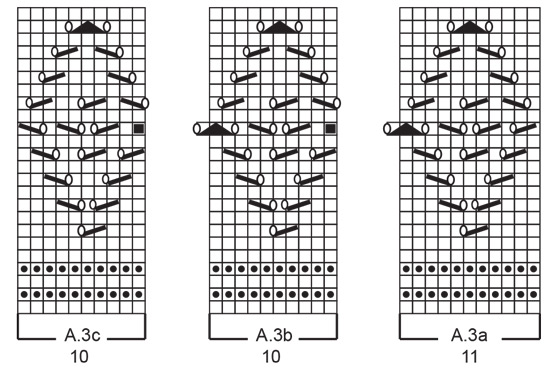
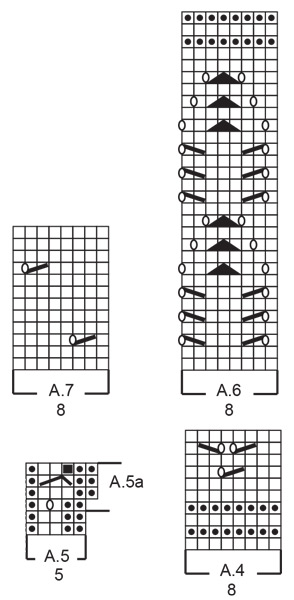
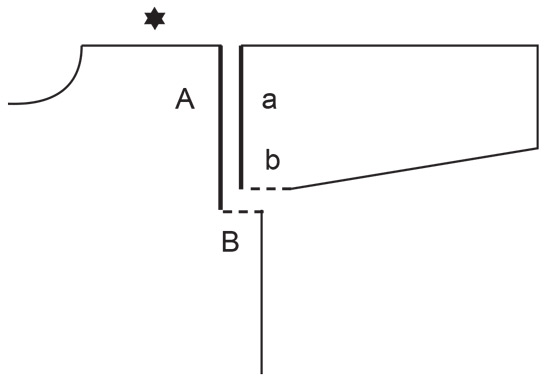
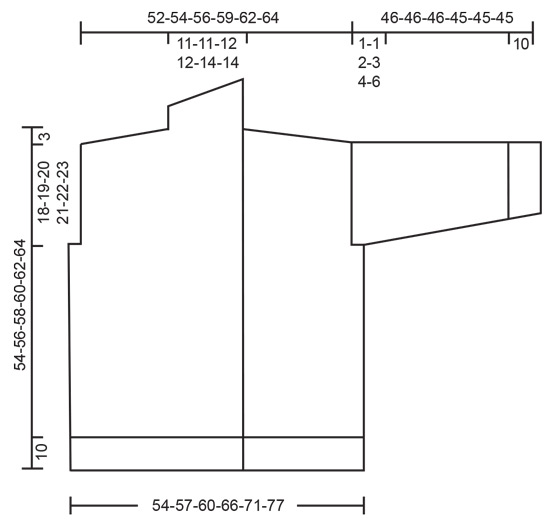
---------------------------------------------------------- EXPLANATION FOR THE PATTERN: ---------------------------------------------------------- GARTER STITCH (back and forth): Knit all rows. 1 ridge vertically = knit 2 rows. GARTER STITCH (worked in the round): 1 ridge vertically = 2 rounds, i.e. knit 1 round and purl 1 round. PATTERN: See diagrams A.1 to A.7. Diagrams show all rows in pattern seen from the right side. When number of stitches is given in pattern, always count A.1a and A.5a as 5 stitches even though number of stitch on some rows in pattern is 6 stitches (because of increase/decrease in pattern). KNIT TOGETHER: FROM RIGHT SIDE: Slip 1 stitch knitwise, knit 1, pass slipped stitch over stitch worked. FROM WRONG SIDE: Purl 2 together. STOCKING STITCH: When working from wrong side, purl and when working from right side, knit. INCREASE TIP (applies to sleeves): Begin 1 stitch before marker, make 1 yarn over, knit 2 (marker thread is between these 2 stitches), make 1 yarn over. On next round knit yarn overs twisted to avoid holes (= 2 stitches increased). BUTTONHOLES (bottom up): Decrease for buttonholes on right band. 1 BUTTONHOLE = knit third and fourth stitch from edge together and make 1 yarn over. On next row knit yarn over to make hole. Decrease for buttonholes when piece measures: S: 6, 14, 22 and 30 cm M: 6, 14, 22 and 30 cm L: 6, 14, 23 and 32 cm XL: 7, 16, 25 and 34 cm XXL: 6, 14, 22, 29 and 36 cm. XXXL: 6, 14, 22, 29 and 36 cm. ---------------------------------------------------------- START THE PIECE HERE: ---------------------------------------------------------- JACKET - SHORT OVERVIEW OF THE PIECE: Work body back and forth on circular needle up to armholes. Divide the body for front pieces and back piece and finish each part separately back and forth. Work sleeves in the round on double pointed needles/short circular needle up to sleeve cap, then work the rest of sleeve back and forth. BODY: Cast on 272-284-296-320-344-368 stitches on circular needle size 4 mm with 1 strand of each quality (2 strands). Purl 1 row from wrong side. Work rib, begin from right side as follows: 7 band stitches in GARTER STITCH - read explanation above, * work A.1, work A.2. *, work from *-* until 7stitches remain, work 7 band stitches in garter stitch. Continue pattern like this - remember BUTTONHOLES - read explanation above. When A.1 and A.2 have been worked 1 time in height, there are 229-239-249-269-289-309 stitches on needle. Work now as follows: 7 band stitches in garter stitch, A.1a, repeat A.2a until 12 stitches remain, work A.1a, increase 1 stitch, 7 band stitches in garter stitch. Continue with 7 band stitches in garter stitch, A.1a, repeat A.2a until 13 stitches remain, work A.1a, purl 1, 7 band stitches in garter stitch. When A.2a has been worked 2 times in total vertically, work pattern and begin from right side as follows: Switch to circular needle size 5 mm. Work 7 band stitches in garter stitch, A.1a, A.2a, purl 1, A.3a, work A.3b until 28 stitches remain AT THE SAME TIME decrease 33 stitches evenly over these stitches, A.3c, A.2a, A.1a, purl 1, 7 band stitches in garter stitch = 197-207-217-237-257-277 stitches. REMEMBER THE KNITTING TENSION! When A.3 has been worked 1 time vertically, piece measures approx. 21 cm. Then work pattern as follows (first row is from right side): 7 band stitches in garter stitch, A.1a, A.2a, purl 1, 0-1-2-0-2-0 stitches in stocking stitch, A.4 until 19-20-21-19-21-19 stitches remain, work 1-2-3-1-3-1 stitch in stocking stitch, A.2a, A.1a, purl 1, 7 band stitches in garter stitch. When A.4 has been worked 1 time vertically, piece measures approx. 25 cm. Work pattern, begin from right side as follows: 7 band stitches in garter stitch, A.1a, A.2a, purl 1, work in garter stitch until 18 stitches remain, work A.2a, A.1a, purl 1, 7 band stitches in garter stitch. Work 2 ridges in total. Work pattern, begin from right side as follows: 7 band stitches in garter stitch, A.1a, A.2a, purl 1, work A.5 until 19 stitches remain, purl 1, work A.2a, A.1a, purl 1, 7 band stitches in garter stitch. Repeat the first 2 rows of A.5 until first row in A.1a should be worked (this is done so that pattern in A.5 is on the same row as in pattern A.1a). Work A.5a over stitches in A.5 and pattern as before until piece measures 33-34-35-36-37-38 cm. Now divide piece for front pieces and back piece on next row from right side: 7 band stitches in garter stitch, A.1a, A.2a, purl 1, knit 34-36-37-44-46-48 (right front piece), then slip them on a thread, cast off 2-4-6-6-12-18 stitches for armhole, knit 89-91-95-101-105-109 (back piece), then slip them on a thread, cast off 2-4-6-6-12-18 stitches for armhole, knit 34-36-37-44-46-48, A.2a, A.1a, purl 1, 7 band stitches in garter stitch (left front piece). Now finish each part separately. LEFT FRONT PIECE: = 52-54-55-62-64-66 stitches. Work first row from wrong side. Knit 3 rows (continue A.1a and A.2a as before). Work pattern, begin from right side as follows: 1 stitch in garter stitch, 0-2-3-2-4-6 stitches in stocking stitch, work A.6 until 19 stitches remain, 1 stitch in stocking stitch, A.2a, A.1a, purl 1, 7 band stitches in garter stitch. When A.6 has been worked 1 time vertically, piece measures approx. 47-48-49-50-51-52 cm. Work pattern, begin from right side as follows: 1 stitch in garter stitch, 0-1-1-1-2-3 stitches in stocking stitch, work A.7 until 19-20-21-20-21-22 stitches remain, 1-2-3-2-3-4 stitches in stocking stitch, A.2a, A.1a, purl 1, 7 band stitches in garter stitch. Continue this pattern until finished measurements. AT THE SAME TIME when piece measures 51-53-55-57-59-61 cm, work diagonal shoulder, begin on next row from the neck as follows: * Work pattern as before until 9-9-9-10-10-11 stitches remain, turn and work back *, work from *-* 3 times in total. I.e. work 9-9-9-10-10-11 stitches less on every turn from the neck. On last row towards the neck work until 17-18-18-22-23-23 stitches remain, slip the last 17-18-18-22-23-23 stitches on a thread for shawl collar and cast on 2 new stitches on needle = 37-38-39-42-43-45 stitches. Now work and cast off with an edge in i-cord over shoulder stitches. Work stitches cast on with shoulder stitches as follows: * Work 1 stitch in STOCKING STITCH – read explanation above, work next stitch together with first/next stitch from shoulder – read KNIT TOGETHER, pass the 2 stitches back on the needle they came from with strand on back side of piece, make sure not to tighten yarn too much *, work from *-* until all stitches from shoulder have been worked together with the 2 new stitches that were cast on. Cast off the 2 stitches. SHAWL COLLAR: Slip the 17-18-18-22-23-23 stitches from stitch holder on circular needle size 5 mm. Work band and pattern A.1a and A.2a as before and in garter stitch over the remaining stitches. At the same time work short rows as follows: ROW 1 (= right side): Work over all stitches, turn and tighten yarn. ROW 2 (= wrong side): Work the first 7 stitches, turn and tighten yarn. ROW 3 (= right side): Work over the 7 stitches, turn and tighten yarn. ROW 4 (= wrong side): Work over all stitches. Work 1st to 4th row until shawl collar measures approx. 7-8-8-9-9-9 cm on the shortest. Work 1 ridge over all stitches. Cast off. RIGHT FRONT PIECE: = 52-54-55-62-64-66 stitches. REMEMBER BUTTONHOLES! Work first row from wrong side. Knit 3 rows (continue A.1a and A.2a as before). Work pattern, begin from right side as follows: 7 band stitches in garter stitch, A.1a, A.2a, purl 1, work A.6 until 2-4-5-4-6-8 stitches remain, 1-3-4-3-5-7 stitches in stocking stitch and 1 stitch in garter stitch. When A.6 has been worked 1 time vertically, piece measures approx. 47-48-49-50-51-52 cm. Work pattern, begin from right side as follows: 7 band stitches in garter stitch, A.1a, A.2a, purl 1, 0-1-2-1-2-3 stitches in stocking stitch, work A.7 until 2-3-3-3-4-5 stitches remain, 1-2-2-2-3-4 stitches in stocking stitch, 1 stitch in garter stitch. Continue this pattern until finished measurements. AT THE SAME TIME when piece measures 51-53-55-57-59-61 cm, work diagonal shoulder, begin on next row from the neck as follows: * Work pattern as before until 9-9-9-10-10-11 stitches remain, turn and work back *, work from *-* 3 times in total. I.e. work 9-9-9-10-10-11 stitches less on every turn from the neck. On last row towards the neck work until 17-18-18-22-23-23 stitches remain, slip the last 17-18-18-22-23-23 stitches on a thread for shawl collar and cast on 2 new stitches on needle = 37-38-39-42-43-45 stitches. Now work and cast off with an edge in i-cord over shoulder stitches. Work stitches cast on with shoulder stitches as follows: Work * 1 stitch in stocking stitch, work next stitch together with first/next stitch from shoulder – remember KNIT TOGETHER, pass the 2 stitches back on needle they came from with strand on back side of piece, make sure not to tighten yarn too much *, work from *-* until all stitches from shoulder have been worked together with the 2 new stitches cast on. Cast off the 2 stitches. SHAWL COLLAR: Slip the 17-18-18-22-23-23 stitches from stitch holder on circular needle size 5 mm. Work band and pattern A.1a and A.2a as before and in garter stitch over the remaining stitches. AT THE SAME TIME work short rows as follows: ROW 1 (= wrong side): Work over all stitches, turn and tighten yarn. ROW 2 (= right side): Work the first 7 stitches, turn and tighten yarn. ROW 3 (= wrong side): Work over the 7 stitches, turn and tighten yarn. ROW 4 (= right side): Work over all stitches. Work 1st to 4th row until shawl collar measures approx. 7-8-8-9-9-9 cm on the shortest. Work 1 ridge over all stitches. Cast off. BACK PIECE: = 89-91-95-101-105-109 stitches. Knit 3 rows (work first row from wrong side). Work pattern, begin from right side as follows: 1 stitch in garter stitch, 3-0-2-1-3-1 in stocking stitch, work A.6 until 5-2-4-3-5-3 stitches remain, 4-1-3-2-4-2 stitches in stocking stitch, 1 stitch in garter stitch. When A.6 has been worked 1 time vertically, piece measures approx. 47-48-49-50-51-52 cm. Work pattern, begin from right side as follows: 1 stitch in garter stitch, 3-0-2-1-3-1 in stocking stitch, work A.7 until 5-2-4-3-5-3 stitches remain, 4-1-3-2-4-2 stitches in stocking stitch, 1 stitch in garter stitch. Continue this pattern until finished measurements. When piece measures 50-52-54-56-58-60 cm, cast off the middle 17-17-19-19-21-21 stitches for neck and finish each shoulder separately (36-37-38-41-42-44 stitches remain on each shoulder). Continue with pattern over stitches that fit the pattern, work the remaining stitches in stocking stitch. On next row from neck cast off 1 stitch at the beginning of row = 35-36-37-40-41-43 stitches. When piece measures 51-53-55-57-59-61 cm, work diagonal shoulder, begin on next row from the neck as follows: * Work pattern as before until 9-9-9-10-10-11 stitches remain, turn and work back *, work from *-* 3 times in total. I.e. work 9-9-9-10-10-11 stitches less on every row from the neck. On last row towards neck, cast on 2 new stitches at the end of row = 37-38-39-42-43-45 stitches. Now work and cast off with an edge in i-cord over shoulder stitches. Work stitches cast on with shoulder stitches as follows: * Work 1 stitch in stocking stitch, work next stitch together with first/next stitch from shoulder - remember KNIT TOGETHER, pass the 2 stitches back on needle they came from with strand on back side of piece, make sure that strand is not too tight *, work from *-* until all stitches from shoulder have been worked together with the 2 new stitches cast on. Cast off the 2 stitches. Work the other shoulder the same way. SLEEVES: Cast on 60-60-60-72-72-72 stitches on double pointed needles size 4 mm with 1 strand of each quality. Knit 1 round. Insert 1 marker at beginning of round. * Work A.1, work A.2 *, work from *-* over all stitches. When A.1 and A.2 have been worked 1 time in height, there are 50-50-50-60-60-60 stitches on needle. Now repeat A.1a and A.2a until A.2a has been worked 2 times in total vertically (= A.1a = 4 times). Work 2 ridges in GARTER STITCH in the round over all stitches - read explanation above. AT THE SAME TIME on first round decrease 2-2-2-4-4-4 stitches evenly = 48-48-48-56-56-56 stitches. Switch to double pointed needles size 5 mm. Work A.7 in the round over all stitches. Repeat A.7 vertically until finished measurements. When piece measures 14-14-13-13-13-12 cm, increase 1 stitch on each side of marker - read INCREASE TIP! Increase like this every 5½-4-3-4½-3-2½ cm 6-8-10-7-9-11 times in total = 60-64-68-70-74-78 stitches. Work the increased stitches in the pattern (switch to a short circular needle when increasing stitches). When sleeve measures 45-45-44-43-41-39 cm, work sleeve cap back and forth (from marker thread mid under sleeve) on circular needle until finished measurements. Cast off when sleeve measures approx. 46-46-46-45-45-45 cm. Work another sleeve the same way. ASSEMBLY: Sew shoulder seams inside 1 stitch on i-cord edge. Sew shawl collar together mid back (make sure that seam is the correct way when garment is worn) Sew shawl collar to neck line in the back of neck. Sew sleeve cap to armhole. Then sew vent at the top of sleeve to bottom of armhole - see chart. Sew the buttons on to left front piece. |
|||||||||||||||||||||||||||||||||||||
Diagram explanations |
|||||||||||||||||||||||||||||||||||||
|
|||||||||||||||||||||||||||||||||||||
 |
|||||||||||||||||||||||||||||||||||||
 |
|||||||||||||||||||||||||||||||||||||
 |
|||||||||||||||||||||||||||||||||||||
 |
|||||||||||||||||||||||||||||||||||||
 |
|||||||||||||||||||||||||||||||||||||
Have you finished this pattern?Tag your pictures with #dropspattern #fabledharbourcardigan or submit them to the #dropsfan gallery. Do you need help with this pattern?You'll find 37 tutorial videos, a Comments/Questions area and more by visiting the pattern on garnstudio.com. © 1982-2026 DROPS Design A/S. We reserve all rights. This document, including all its sub-sections, has copyrights. Read more about what you can do with our patterns at the bottom of each pattern on our site. |
|||||||||||||||||||||||||||||||||||||


With over 40 years in knitting and crochet design, DROPS Design offers one of the most extensive collections of free patterns on the internet - translated to 17 languages. As of today we count 325 catalogues and 12298 patterns translated into English (UK/cm). 12298
We work hard to bring you the best knitting and crochet have to offer, inspiration and advice as well as great quality yarns at incredible prices! Would you like to use our patterns for other than personal use? You can read what you are allowed to do in the Copyright text at the bottom of all our patterns. Happy crafting!
Post a comment to pattern DROPS 241-10
We would love to hear what you have to say about this pattern!
If you want to leave a question, please make sure you select the correct category in the form below, to speed up the answering process. Required fields are marked *.