
Popular categories
Looking for a yarn?


Comments / Questions (11)
![]() Carolyn Frusciante wrote:
Carolyn Frusciante wrote:
The neck was so hard to figure out, but after 5 tries I got it. I made it for my sister. She said it was the prettiest cardigan she ever had. Glad I didn't give up.
28.12.2024 - 01:44
![]() Catherine wrote:
Catherine wrote:
Bonjour ! Comment vriller les mailles ? A 360 ° ou 180°? Avec une aiguille auxiliaire ? Merci !
07.04.2024 - 18:47DROPS Design answered:
Bonjour Catherine, cette vidéo montre comment tricoter la bordure du début. Bon tricot!
08.04.2024 - 08:19
![]() Léone MEUNIER wrote:
Léone MEUNIER wrote:
Bonjour, A la fin du rang de vrilles, il me reste 6 mailles au lieu des 5 que vous indiquez, plus les 5 mailles mousses de bordure. Je crains que cela crée un décalage pour le rang suivant. Je précise que j'ai monté 95 mailles.
21.04.2022 - 17:08DROPS Design answered:
Bonjour Mme Meunier, procédez ainsi: 5 m point mousse, 1 m end, répétez 14 fois la vrille sur 6 mailles (= 14x6= 84 m), il reste 5 mailles, terminez par 5 m point mousse, vous avez ainsi bien: 5+1+84+5=95 mailles. Bon tricot!
22.04.2022 - 07:29
![]() Graziella wrote:
Graziella wrote:
Ok allora devo disfare. Grazie! ;-)
11.04.2022 - 21:29
![]() Graziella wrote:
Graziella wrote:
Buongiorno, scusate ma chiedo ancora aiuto. Sono arrivata alla fine dello sprone e mi accingo a mettere i segnapunti per aumentare il raglan, ma con la taglia M mi trovo 194 maglie. Ho controllato ogni singola losanga e non mi sembra ci siano errori. Prima di disfare tutto vorrei avere una vostra opinione. Grazie!
11.04.2022 - 13:59DROPS Design answered:
Buonasera Graziella, alla fine di A.2 deve avere 196 maglie sul ferro. Buon lavoro!
11.04.2022 - 21:24
![]() Yolanda wrote:
Yolanda wrote:
Es muy lindo tener la explicación, gracias voy a intentar hacerlo
04.04.2022 - 14:48
![]() Marieke wrote:
Marieke wrote:
Klopt de kleur denimblauw? Op de afbeelding linkt het feller, bijvoorbeeld blauw nr 16? Alvast bedankt voor uw reactie
18.03.2022 - 09:35DROPS Design answered:
Dag Marieke,
Dankjewel voor het doorgeven, de kleur klopte inderdaad niet en het is nu aangepast!
29.03.2022 - 10:26
![]() Graziella wrote:
Graziella wrote:
Grazie, ho capito come fare ma secondo me c’è un errore nella spiegazione: “fino a quando rimangono 5 maglie e 5 maglie per il bordo a maglia legaccio”
15.03.2022 - 23:04DROPS Design answered:
Buonasera Graziella, le 5 maglie che rimangono sono quelle per il bordo a maglia legaccio. Buon lavoro!
16.03.2022 - 22:50
![]() Graziella wrote:
Graziella wrote:
Ho 89 maglie corrette. Ma perché 11 maglie? Allora alla fine del ferro del punto arrotolato dovrei avere 6 più 5 maglie del bordo. La spiegazione dice che dovrebbero rimanere 5+5 per il bordo. Vi risulta? Grazie
15.03.2022 - 19:29DROPS Design answered:
Buonasera Graziella, se ha 89 maglie, toglie le 10 maglie (5 a ogni lato) del bordo e 1 maglia diritto, ottiene 78 maglie che diviso 6 fanno 13 ripetizioni di 6 maglie. Buon lavoro!
15.03.2022 - 20:59
![]() Graziella wrote:
Graziella wrote:
Buonasera, mi trovo in difficoltà. Sto facendo il bordo arrotolato. Ho lavorato 5 maglie a legaccio per il bordo, 1 maglia a diritto e poi sequenze di 6 maglie arrotolate. Ma alla fine del ferro mi trovo con 6 e non 5 maglie più le 5 a legaccio. Mi potete essere di aiuto? Grazie
13.03.2022 - 18:35DROPS Design answered:
Buonasera Graziella, è sicura di avere il numero di maglie corretto sui ferri? Quale taglia sta lavorando? Se si sottrae 11 maglie al numero di maglie di ogni taglia si ottiene un multiplo di 6, quindi il conteggio delle maglie è corretto. Buon lavoro!
15.03.2022 - 18:05
|
||||||||||||||||||||||||||||
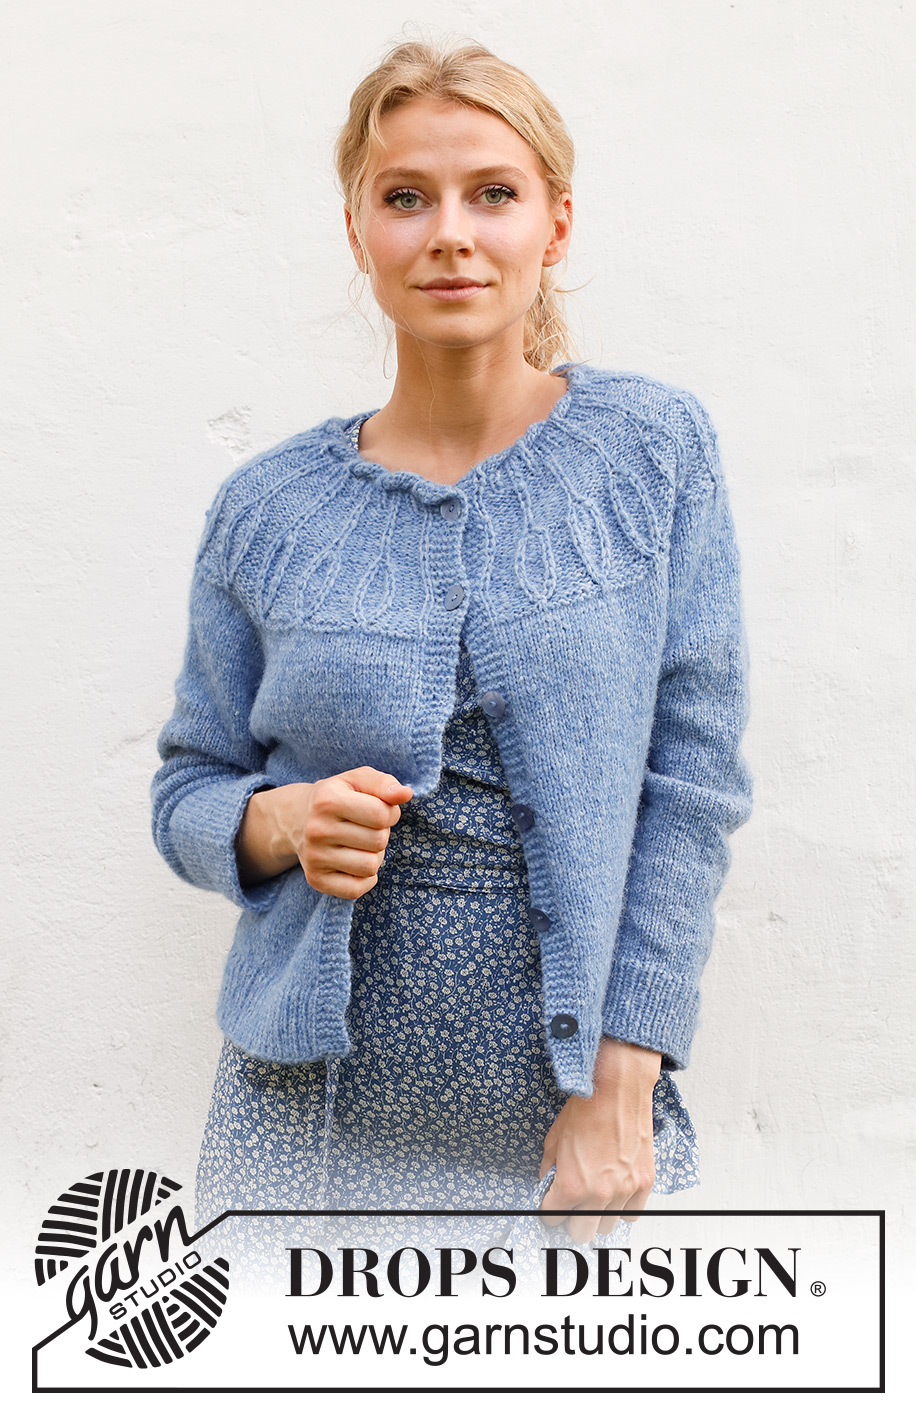
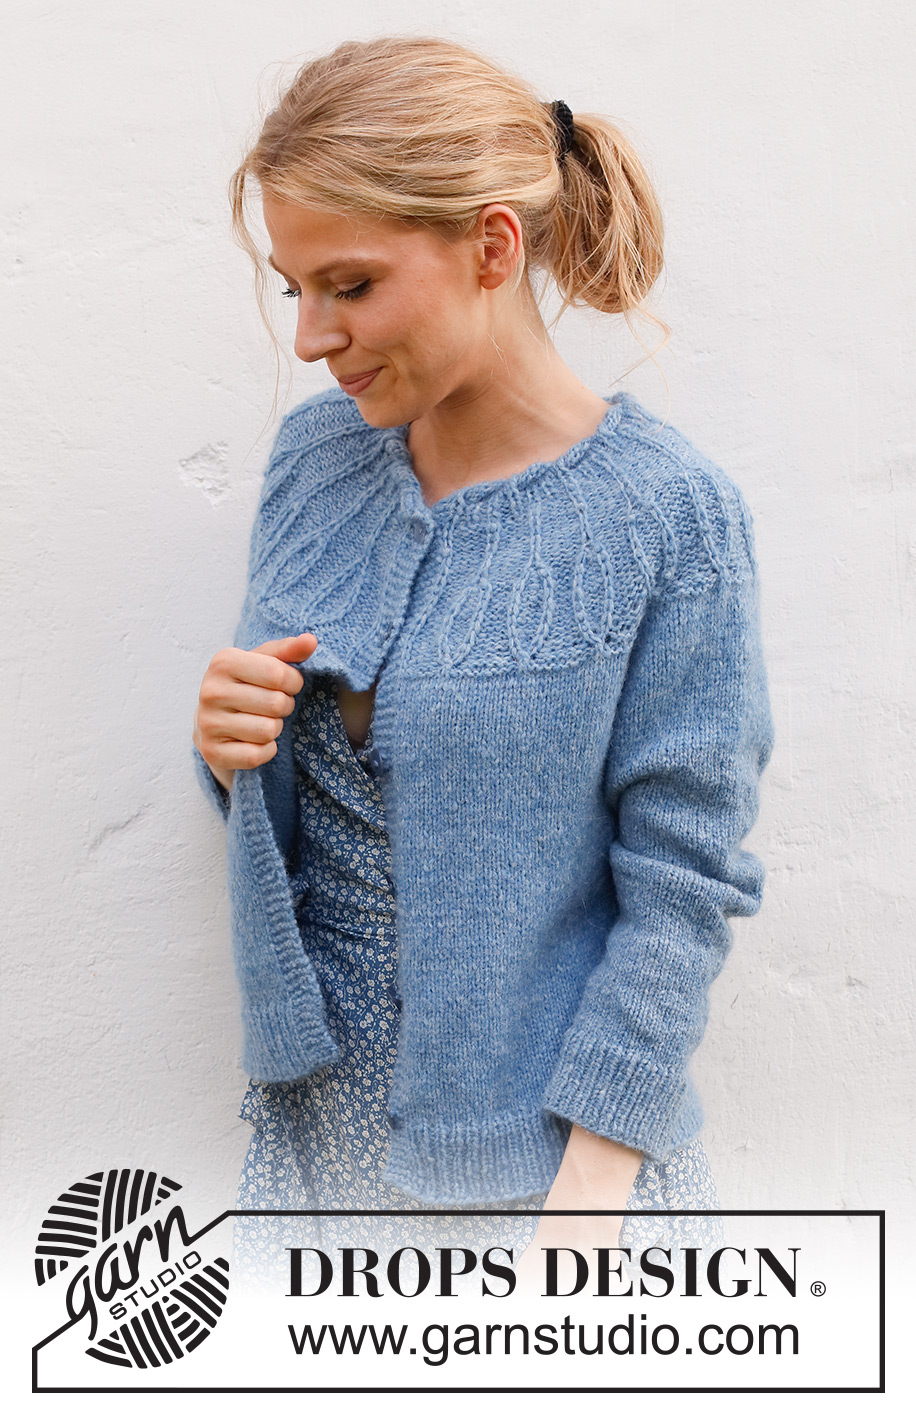
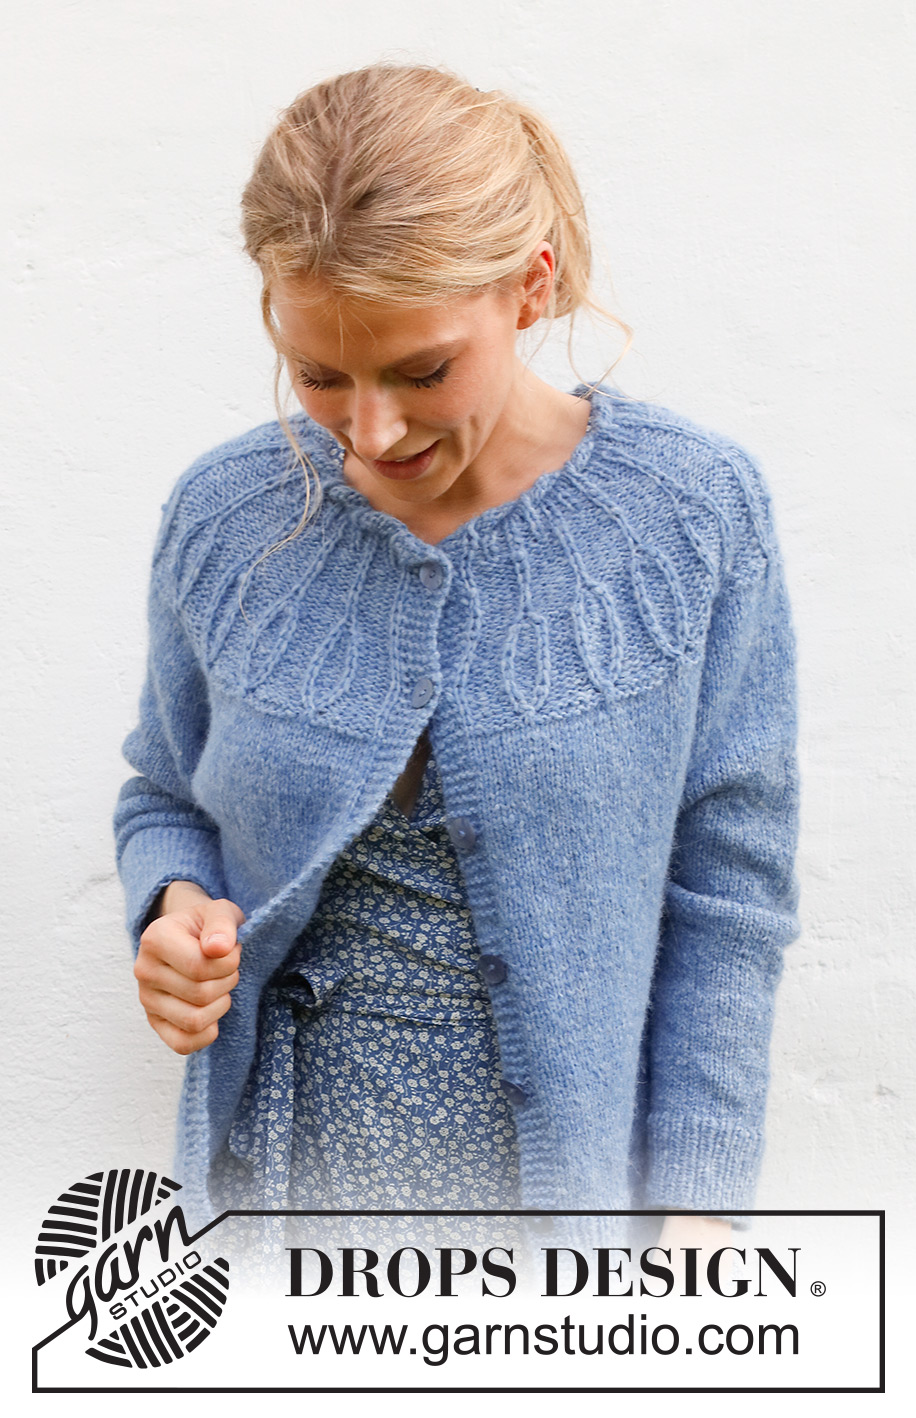
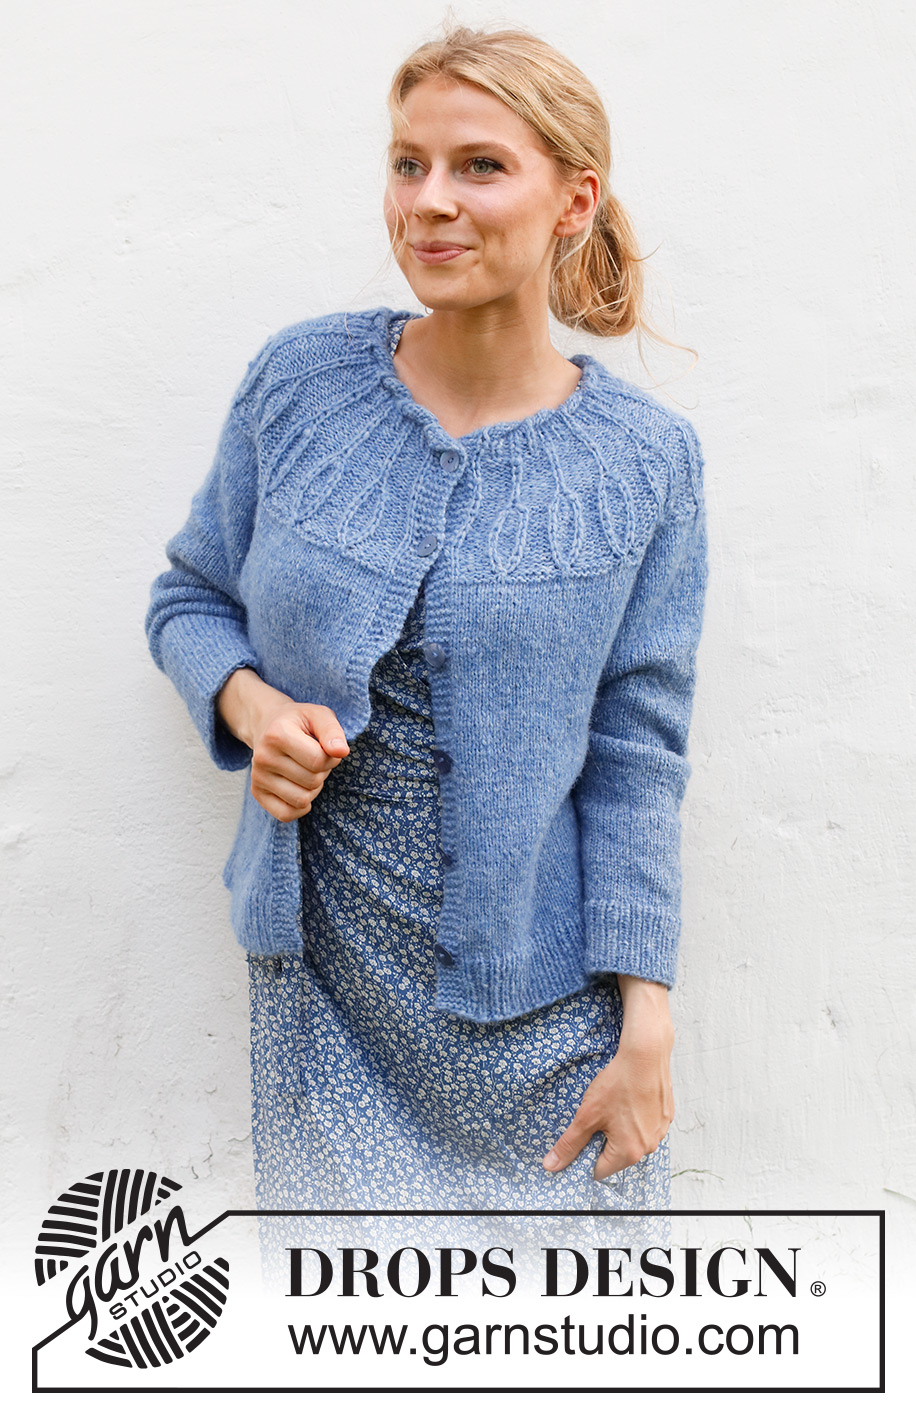
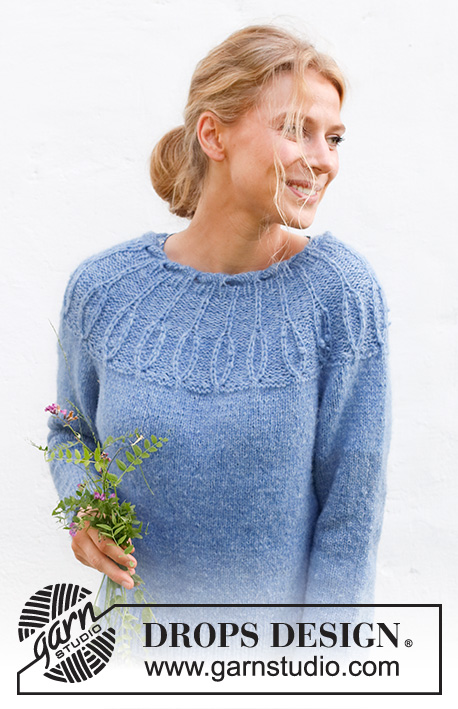
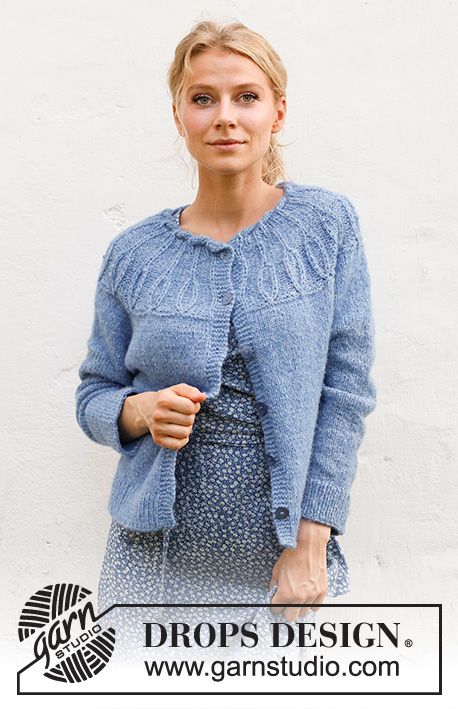
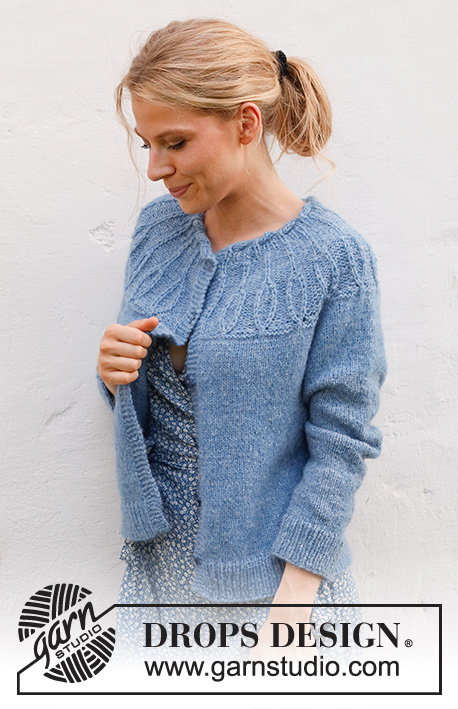
Blue Peacock Cardigan#bluepeacockcardigan |
||||||||||||||||||||||||||||
 |
 |
|||||||||||||||||||||||||||
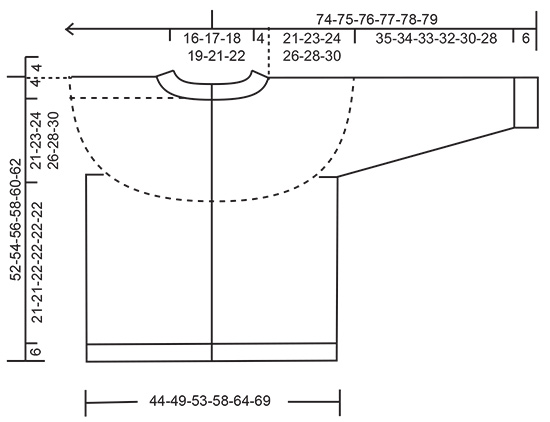
Knitted jacket in DROPS Air. The piece is worked top down with Fisherman’s rib and round yoke. Sizes S - XXXL.
DROPS 230-30 |
||||||||||||||||||||||||||||
|
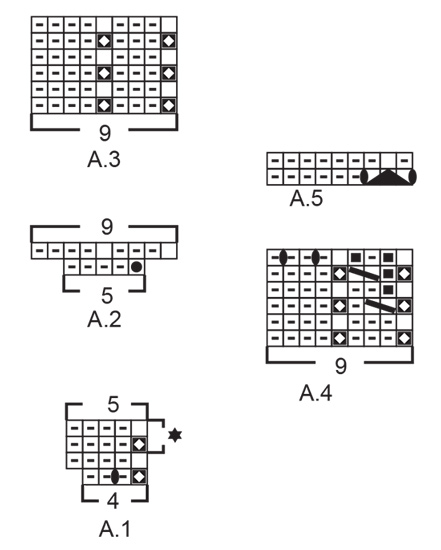
------------------------------------------------------- EXPLANATIONS FOR THE PATTERN: ------------------------------------------------------- RIDGE/GARTER STITCH (worked back and forth): Knit all rows. 1 ridge = knit 2 rows. PATTERN: See diagrams A.1 to A.5. The diagrams show all rows in the pattern from the right side. RAGLAN: Increase 1 stitch on both sides of 2 stitches in each transition between the body and sleeves (= 8 stitches increased on each increase-row). Increase 1 stitch by making 1 yarn over. On the next row (wrong side) purl the yarn overs twisted to avoid holes. Then work the new stitches in stocking stitch. BUTTONHOLES: Work buttonholes on the right band (when the garment is worn). Work from the right side when there are 3 stitches left on the row as follows: Make 1 yarn over, knit 2 together and knit 1. On the next row (wrong side), knit the yarn over to leave a hole. The first buttonhole is worked straight after the rib on the neck. The other 5-5-5-6-6-6 buttonholes are worked with approx. 8½-9-9-8-8½-8½ cm between each one. DECREASE TIP (for sleeves): Decrease 1 stitch on either side of the marker thread as follows: Work until there are 3 stitches left before the marker thread, knit 2 together, knit 2 (marker thread sits between these 2 stitches), slip 1 stitch as if to knit, knit 1 and pass the slipped stitch over the knitted stitch. ------------------------------------------------------- START THE PIECE HERE: ------------------------------------------------------- JACKET – SHORT OVERVIEW OF THE PIECE. The neck and yoke are worked back and forth with circular needle, from mid front and top down. The yoke is divided for body and sleeves and the body continued back and forth with circular needle. The sleeves are worked in the round with double pointed needles/short circular needle. NECK: Cast on 89-95-95-101-107-113 stitches with circular needle size 4 mm and DROPS Air. Knit 1 row from the wrong side. Work 6 rows of stocking stitch with 5 band stitches in GARTER STITCH – read description above on each side. Now work a rolled-edge on the next row from the right side as follows: 5 band stitches in garter stitch, knit 1, * twist the stitches on the right needle 360 degrees as follows: place the yarn in front of piece, insert the right needle down under the piece and up in front, then knit 6, * work from *-* until there are 5 stitches left and 5 band stitches in garter stitch. The next row is worked as follows from the wrong side: 5 band stitches in garter stitch; * purl 1, knit 1 *, work from *-* until there are 6 stitches left, purl 1 and 5 band stitches in garter stitch. Continue this rib for 2 cm. Work the BUTTONHOLE on the right band – read description above. Knit 1 row from the right side where you adjust the number of stitches to 91-95-99-103-107-111 stitches. Purl 1 row from the wrong side. Insert 1 marker after the band at the beginning of the row; the yoke is measured from this marker. YOKE: Change to circular needle size 5 mm and work the first row as follows from the right side: 5 band stitches in garter stitch, work A.1 20-21-22-23-24-25 times, work the first stitch in A.1 (so the pattern is symmetrical) and 5 band stitches in garter stitch. After the first row in A.1 there are 111-116-121-126-131-136 stitches. When A.1 has been completed in height, repeat the 2 rows marked with a star. REMEMBER THE KNITTING TENSION! When the piece measures 6 cm from the marker on the neck, work the next row from the right side as follows: 5 band stitches in garter stitch, continue A.1 over the first 5 stitches, work A.2 19-20-21-22-23-24 times, work the first stitch in A.1 as before and 5 band stitches in garter stitch. When A.2 has been completed in height there are187-196-205-214-223-232 stitches. Work the next row from the right side as follows: 5 band stitches in garter stitch, continue A.1 over the first 5 stitches, work A.3 19-20-21-22-23-24 times, work the first stitch in A.1 and 5 band stitches in garter stitch. Continue this pattern. When the piece measures 10-10-11-11-12-12 cm from the marker, work the next row from the right side as follows: 5 band stitches in garter stitch, continue A.1 over the first 5 stitches, work A.4 19-20-21-22-23-24 times, work the first stitch in A.1 and 5 band stitches in garter stitch. When A.4 has been completed in height, continue as follows: 5 band stitches in garter stitch, continue A.1 over the first 5 stitches, work A.5 19-20-21-22-23-24 times, work the first stitch in A.1 and 5 band stitches in garter stitch. Insert 4 markers without working the stitches and inserting them between 2 stitches: Count 32-35-36-37-40-42 stitches (front piece), insert 1st marker, count 34-34-36-38-36-36 stitches (sleeve), insert 2nd marker, count 55-58-61-64-71-76 stitches (back piece) insert 1 marker, count 34-34-36-38-36-36 stitches (sleeve), insert 3rd marker; there are 32-35-36-37-40-42 stitches left after 4th marker (front piece). Continue with stocking stitch and garter stitch, AT THE SAME TIME increase to RAGLAN – read description above. Increase every 2nd row (each row from the right side) a total of 7-9-10-13-14-15 times = 243-268-285-318-335-352 stitches. Continue working in stocking stitch and garter stitch until the piece measures 21-23-24-26-28-30 cm from the marker on the neck. Now divide for the body and sleeves as follows: Work 39-44-46-50-54-57 stitches (front piece), place the next 48-52-56-64-64-66 stitches on 1 thread for the sleeve, cast on 6-6-8-8-10-12 stitches (= in side under sleeve), work 69-76-81-90-99-106 stitches (back piece), place the next 48-52-56-64-64-66 stitches on 1 thread for the sleeve, cast on 6-6-8-8-10-12 stitches (= in side under sleeve), work the remaining 39-44-46-50-54-57 stitches (front piece). The body and sleeves are finished separately. THE PIECE IS NOW MEASURED FROM HERE! BODY: = 159-176-189-206-227-244 stitches. Continue with stocking stitch and 5 band stitches in garter stitch on each side for 21-21-22-22-22-22 cm. There is approx. 6 cm left to finished length. Knit 1 row from the right side where you increase 16-17-18-21-22-25 stitches evenly spaced = 175-193-207-227-249-269 stitches. Change to circular needle size 4 mm and work the next row from the wrong side as follows: 5 band stitches in garter stitch, * purl 1, knit 1 *, work from *-* until there are 6 stitches left, purl 1 and 5 band stitches in garter stitch. Work this rib for 6 cm. Cast off. The jacket measures approx. 52-54-56-58-60-62 cm from the shoulder down. SLEEVES: Place the 48-52-56-64-64-66 stitches from the thread on the one side of the piece on double pointed needles/short circular needle size 5 mm and knit up 1 stitch in each of the 6-6-8-8-10-12 stitches cast on under the sleeve = 54-58-64-72-74-78 stitches. Insert a marker thread in the middle of the new stitches under the sleeve. Allow the thread to follow your work onwards; it will be used when decreasing under the sleeve. Start at the marker thread and work stocking stitch in the round for 3 cm. Now decrease 2 stitches under the sleeve – read DECREASE TIP. Decrease like this every 8-5-3-2½-2-2 cm a total of 4-5-7-10-10-11 times = 46-48-50-52-54-56 stitches. Continue working until the sleeve measures 35-34-33-32-30-28 cm from the division. Knit 1 round where you increase 6-4-6-4-6-4 stitches evenly spaced = 52-52-56-56-60-60 stitches. Change to double pointed needles size 4 mm and work rib (knit 1, purl 1) for 6 cm. Cast off. The sleeve measures approx. 41-40-39-38-36-34 cm from the division. Work the other sleeve in the same way. ASSEMBLY: Sew the buttons onto the left band. |
||||||||||||||||||||||||||||
Diagram explanations |
||||||||||||||||||||||||||||
|
||||||||||||||||||||||||||||
 |
||||||||||||||||||||||||||||
 |
||||||||||||||||||||||||||||
Have you finished this pattern?Tag your pictures with #dropspattern #bluepeacockcardigan or submit them to the #dropsfan gallery. Do you need help with this pattern?You'll find 35 tutorial videos, a Comments/Questions area and more by visiting the pattern on garnstudio.com. © 1982-2026 DROPS Design A/S. We reserve all rights. This document, including all its sub-sections, has copyrights. Read more about what you can do with our patterns at the bottom of each pattern on our site. |
||||||||||||||||||||||||||||


With over 40 years in knitting and crochet design, DROPS Design offers one of the most extensive collections of free patterns on the internet - translated to 17 languages. As of today we count 324 catalogues and 12290 patterns translated into English (UK/cm). 12290
We work hard to bring you the best knitting and crochet have to offer, inspiration and advice as well as great quality yarns at incredible prices! Would you like to use our patterns for other than personal use? You can read what you are allowed to do in the Copyright text at the bottom of all our patterns. Happy crafting!
Post a comment to pattern DROPS 230-30
We would love to hear what you have to say about this pattern!
If you want to leave a question, please make sure you select the correct category in the form below, to speed up the answering process. Required fields are marked *.