
Popular categories
Looking for a yarn?


Comments / Questions (71)
![]() Karin wrote:
Karin wrote:
Hej, förstår inte sista maskan i sista varvet på A1. I vilken maska ska den fasta maskan virkas? Mvh Karin
04.06.2020 - 18:41DROPS Design answered:
Hei Karin. Siste maske i siste rad av A.1 er en T, som betyr 1 fastmaske i maske. Da skal du hekle 1 fastmaske i 4. luftmaske fra 1. rad. God Fornøyelse!
08.06.2020 - 08:13
![]() Jenny wrote:
Jenny wrote:
I still can't make sense of this pattern. I've been trying for 3 days now! I'm struggling with A2. Am I supposed to start bottom right and work right to left for the first row, then left to right for the next row, the right to left for the next row, etc? Or do I always go right to left? And A.w. and A.x. - do I do those stitches IN ADDITION to the 7 pattern repeats or INSTEAD of the first and last stitches on the row? Thank you :-)
02.06.2020 - 16:19DROPS Design answered:
Dear Jenny, work A.2 as follows: from RS work A.w and repeat the diagram a total of 7 times in width (on the first row you will have 7 groups of 3 sts), finish the row with A.x. Turn and work from WS: A.x, repeat A.2 (read from the left towards the right = row 2: *1 tr around chain-space, 1 tr in each of the 3 tr from row1*, repeat from *-* a total of 7 times, finish with A.w. Continue like this starting/ending rows with A.w/A.x. Happy crocherting!
02.06.2020 - 17:42
![]() Carmen wrote:
Carmen wrote:
I do not understand why there’s not a written pattern for the half circles, since there is a pattern for the rest of the bag. Was that just laziness? Very odd. Not everyone understands diagrams.
23.05.2020 - 22:39DROPS Design answered:
Dear Carmen, we often use diagrams to the crochet patterns - you will find here how to read diagrams. Happy crocheting!
25.05.2020 - 10:39
![]() Marianne wrote:
Marianne wrote:
Hvorfor ender jeg kun op med 21 luftmaske buer, naar jeg faerdig med A2, jeg har proevet 2 gange nu, og jeg kan ikke faa det til at passe. Med venlig hilsen Marianne Laesen Solvang Ca. USA
18.05.2020 - 23:01DROPS Design answered:
Hei Marianne. Usikker på hvorfor du ikke får riktig antall luftmaskebuer. Du skal ha 7 rapporter av A.2 etter hver rad, så prøv å telle antall rapporter etter hver rad, så vil du finne ut hvor du gjør feil/hvor det blir for få masker. God Fornøyelse!
25.05.2020 - 12:09
![]() Laurel wrote:
Laurel wrote:
I have been crocheting for over45 years and I find your patterns very confusing. Several years ago I made about 5 beautiful bags from your site, but now that you have a chart instead of actual pattern I have found they’re not worth the aggravation. Please don’t tell me to learn to read charts at this stage of the game.
13.05.2020 - 10:29DROPS Design answered:
Dear Laurel, The DROPS patterns are knitted and crocheted by thousands and thousands of people around the world. We understand however that in certain countries, with different knitting/crochet traditions than Scandinavia, our patterns might be written in a way that differs from what some are used to. But of course we want everyone to understand our patterns, so that’s why we have created an extensive library of tutorial videos as well as step by step lessons that explain how to follow the techniques we use and how to read the diagrams in our patterns. Give them a try!
13.05.2020 - 13:32
![]() Helene Plein wrote:
Helene Plein wrote:
Thank you for the lovely pattern, especially during lockdown! Instructions were easy to follow and the bag turned out beautifully - very happy. Kind regards, Helene
04.05.2020 - 15:28
![]() Elisabet wrote:
Elisabet wrote:
Salut Vanessa. Le dernier tour de A1 est faux. C'est comme ça: 1 maille en l'air. 1 maille en l'air+ 2 mailles serrée dans la maille en l'air . Répéter 6 fois. Finir avec 1 maille en l'air and 1maille coulé dans la 4ème maille en l'air du 1er tour.
19.04.2020 - 15:58DROPS Design answered:
Bonjour Elisabet, le 2ème rang de A.1 commence par 1 ml puis 2 mailles serrées autour de chaque maille en l'air, avec 1 maille en l'air entre chaque groupe de 2 mailles serrées. Terminez par 1 maille serrée dans la 4ème maille e n l'air du début du tour = vous avez 6 groupes de 2 mailles serrées et 7 mailles (A.2 commence par 3 brides dans cette maille en l'air). Bon crochet!
20.04.2020 - 11:26
![]() Suard wrote:
Suard wrote:
Bonjour J'aimerais pouvoir exécuter ce joli sac mais n'est-il pas possible d'avoir les explications autrement que par ce diagramme qui j'avoue me semble compliqué. En vous remerciant et en espérant obtenir ces explications point par point et par rang. Cordialement; Andrée Suard
17.04.2020 - 14:15DROPS Design answered:
Bonjour Mme Suard, les explications ne sont disponibles que sous cette forme - cette leçon sur les diagrammes pourra peut être vous aider à les réaliser. Bon crochet!
17.04.2020 - 14:49
![]() Vanessa wrote:
Vanessa wrote:
Je n'arrive pas a réaliser ce magnifique sac. Est ce que je pourrait avoir le décompte des mailles par rang pour le demi cercle s'il vous plait? Ou au moins pour le dernier rang? Je l"aime tellement, je souhaite vraiment le faire.
14.04.2020 - 19:28DROPS Design answered:
Bonjour Vanessa, vous crochetez 1 fois A.1 = vous aurez 7 double-brides + 4 ml (= 8 double-brides). Vous crochetez ensuite A.2 en répétant 7 fois A.2 en largeur (à la fin du 1er rang de A.2 vous devez avoir 7 fois (3 brides autour de la maille en l'air, 1 maille en l'air) et, à chaque rang, vous devez toujours avoir 7 fois le diagramme, pensez à bien vérifier votre nombre de mailles régulièrement pour éviter d'augmenter involontairement. Bon crochet!
15.04.2020 - 08:05
![]() Elisabet wrote:
Elisabet wrote:
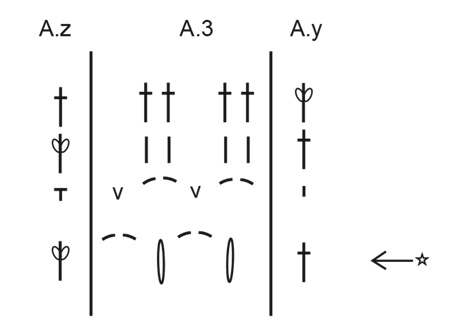
Hello Gret. I think that Ay and Az in A3 diagram correspond to the first and/or last point in each arrow just like to the Aw and Ax in A2 chart.
13.04.2020 - 22:05
|
||||||||||||||||||||||||||||||||||||||||
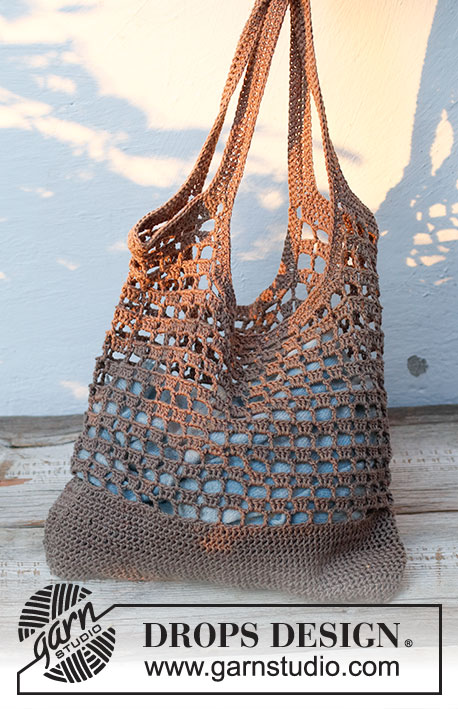
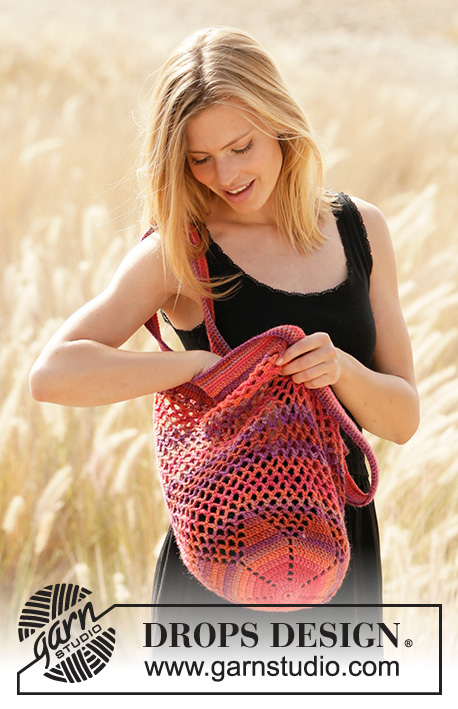
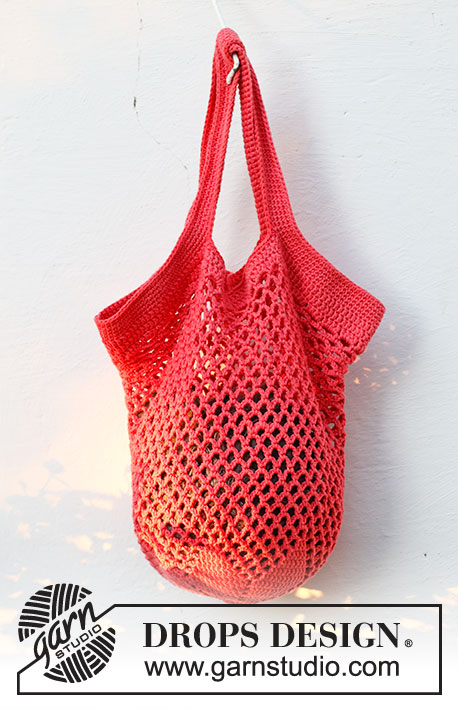
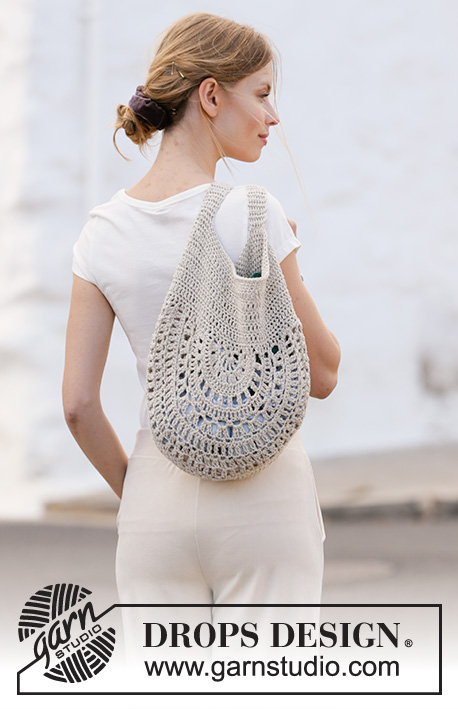
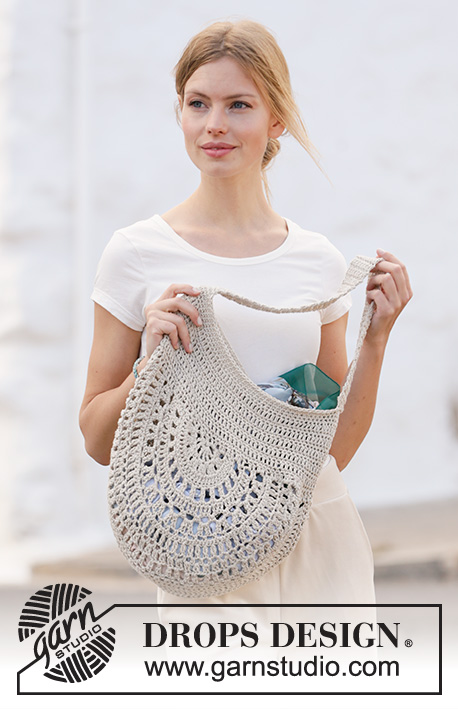
Garden Paths#gardenpathsbag |
||||||||||||||||||||||||||||||||||||||||
 |
 |
|||||||||||||||||||||||||||||||||||||||
Crocheted bag in DROPS Bomull-Lin or DROPS Paris.
DROPS 211-25 |
||||||||||||||||||||||||||||||||||||||||
|
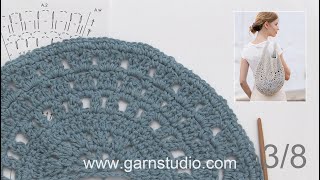
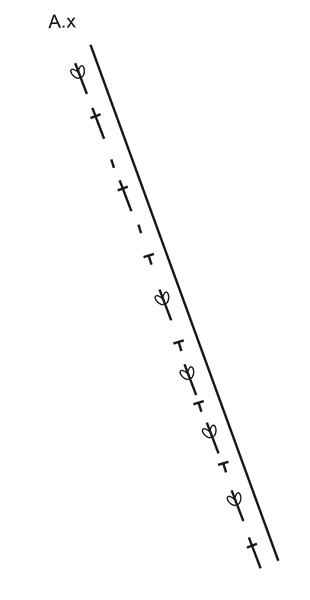
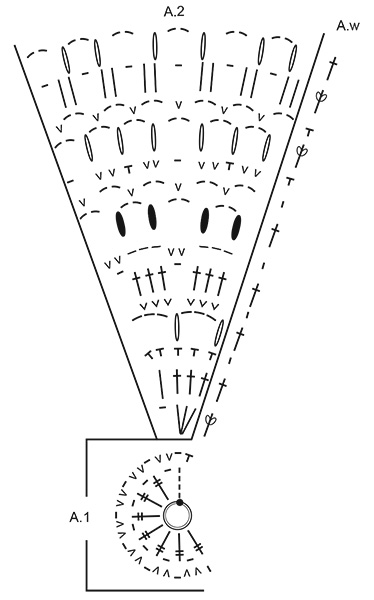
---------------------------------------------------------- EXPLANATION FOR THE PATTERN: ---------------------------------------------------------- PATTERN: See diagram A.1, A.2 and A.3 (A.w to A.z shows how rows in A.2 and A.3 begin and end). CROCHET TIP (applies to chain stitches): 1 chain stitch should equal 1 double crochet/treble crochet/double treble crochet in width. Make sure that loop made in chain stitch is pull on the crochet hook to avoid it being too tight. If the chain stitches are worked too tight, the pattern will tighten the sections with many chain stitches. CROCHET INFORMATION: At beginning of every round with double crochet work 1 chain stitch, this chain stitch replace first double crochet, i.e. skip first stitch on previous round Finish round with 1 slip stitch in 1st chain stitch at beginning of round. At beginning of every round with treble crochet work 3 chain stitches, these 3 chain stitches replace first treble crochet, i.e. skip 1 treble crochet from previous round Finish round with 1 slip stitch in 3rd chain stitch at beginning of round. DECREASE TIP (evenly): To calculate how to decrease evenly, use the total number of stitches decreases are done over (e.g. 110 stitches) , and divide by number of decreases to be done (e.g. 10 stitches) = 11. In this example decrease by working every 10th and 11th double crochet together as follows: insert hook through next stitch, get the yarn, insert hook through next stitch, get the yarn, make 1 yarn over and pull yarn through all 3 loops on hook (= 1 stitch decreased). ---------------------------------------------------------- START THE PIECE HERE: ---------------------------------------------------------- BAG - SHORT OVERVIEW OF THE PIECE: Work bag back and forth in 2 parts that look like half circles. Sew these 2 part together along the outermost arch. Then work an edge around the opening at the top of bag until finished measurements. Finally work a handle. Work handle back and forth and fasten in each side on opening. HALF CIRCLE: Begin on hook size 5 mm with Bomull-Lin or Paris, work 5 chain stitches and form a ring with 1 slip stitch in first chain stitch worked - read CROCHET TIP! Work diagram A.1 (A.1 = 1 row from right side and 1 row from wrong side). When the two rows in A.1 has been worked, work next row as follows: Work A.w over first stitch (A.w shows how row begins from right side and ends from wrong side), work diagram A.2 7 times in total in width, and finish with A.x over last stitch (A.x shows how row ends from right side and begins from wrong side). When A.2 have been worked vertically, there are 42 chain spaces on row. Insert 1 marker in the middle of the row - measure piece from this marker later. Now work what will be bottom of bag, i.e. work A.y over first stitch, work A.3 21 times in total in width and finish with A.z over last stitch. Fasten off when A.3 has been worked. Work another half circle the same way. ASSEMBLY: Sew the two half circles together along the outermost arch - sew edge to edge with neat, little stitches. EDGE AROUND OPENING: Begin at seam in one side of bag, work 1 slip stitch, work 3 chain stitches (equals 1 treble crochet), and then work 109 treble crochets around the edge at the top of bag (to get an even distribution of treble crochet, work approx. 2 treble crochets around every treble crochet and 1 treble crochet around every double crochet) = 110 treble crochets. Read CROCHET INFORMATION and work in the round as follows: ROUND 1: Work 1 double crochet in every treble crochet. ROUND 2: Work 1 treble crochet in every double crochet. Repeat round 1 and 2 until piece measures approx. 28 cm from marker. Work 1 round with double crochets and decrease at the same time 10 double crochets evenly - read DECREASE TIP and approx. 100 double crochets. Then work double crochets in the round for 2 cm, with 1 double crochet in every stitch. Cut and fasten the yarn. Bag measures approx. 30 cm from marker. STRAP: Begin in one side on bag, and work 1 double crochet in each of the middle 8 double crochets in the side. Work double crochets back and forth over these 8 double crochets until strap measures approx. 40 cm (or desired length). Fasten strap in the opposite side of bag with 1 double crochet in each of the middle 8 double crochets in the side (work through both layers). Fasten off. |
||||||||||||||||||||||||||||||||||||||||
Diagram explanations |
||||||||||||||||||||||||||||||||||||||||
|
||||||||||||||||||||||||||||||||||||||||
 |
||||||||||||||||||||||||||||||||||||||||
 |
||||||||||||||||||||||||||||||||||||||||
 |
||||||||||||||||||||||||||||||||||||||||
Have you finished this pattern?Tag your pictures with #dropspattern #gardenpathsbag or submit them to the #dropsfan gallery. Do you need help with this pattern?You'll find 21 tutorial videos, a Comments/Questions area and more by visiting the pattern on garnstudio.com. © 1982-2026 DROPS Design A/S. We reserve all rights. This document, including all its sub-sections, has copyrights. Read more about what you can do with our patterns at the bottom of each pattern on our site. |
||||||||||||||||||||||||||||||||||||||||


With over 40 years in knitting and crochet design, DROPS Design offers one of the most extensive collections of free patterns on the internet - translated to 17 languages. As of today we count 324 catalogues and 12290 patterns translated into English (UK/cm).
We work hard to bring you the best knitting and crochet have to offer, inspiration and advice as well as great quality yarns at incredible prices! Would you like to use our patterns for other than personal use? You can read what you are allowed to do in the Copyright text at the bottom of all our patterns. Happy crafting!
Post a comment to pattern DROPS 211-25
We would love to hear what you have to say about this pattern!
If you want to leave a question, please make sure you select the correct category in the form below, to speed up the answering process. Required fields are marked *.