Comments / Questions (57)
![]() Andrea Koglin wrote:
Andrea Koglin wrote:
Andrea K. 14.08.2018 - 13:44: Liebes Anleitungsteam, ich habe begonnen dieses wunderschöne Tuch zu stricken. Ich glaube aber, dass im Mosaikteil ein Fehler unterlaufen ist. Musste wieder auftrennen. In dem Abschnitt A.7A - A.8C sind in der 5.Reihe jeweils 5 Maschen in Natur angegeben. Aber ich denke laut Muster müsste aber die mittlere von den 5 Machen grau sein? Liebe Grüße Andrea Koglin
23.08.2018 - 17:42DROPS Design answered:
Liebe Andrea, Sie haben recht, das Muster sieht auf dem Foto anders aus als im Diagramm. Das Diagramm wird geprüft und korrigiert. Weiterhin gutes Gelingen!
31.08.2018 - 11:55
![]() Andrea K. wrote:
Andrea K. wrote:
Liebes Anleitungsteam, ich habe begonnen dieses wunderschöne Tuch zu stricken. Ich glaube aber, dass im Mosaikteil ein Fehler unterlaufen ist. Musste wieder auftrennen. In dem Abschnitt A.7A - A.8C sind in der 5.Reihe jeweils 5 Maschen in Natur angegeben. Aber ich denke laut Muster müsste aber die mittlere von den 5 Machen grau sein? Liebe Grüße Andrea Koglin
14.08.2018 - 13:44
![]() Demerlier Sonja wrote:
Demerlier Sonja wrote:
Heeft er al iemand de stola gebreien Als de veel steken heb voor je 10 steken moet je toch met een kleinere naald breien. Denk da het verkeerd staat in beschrijving
13.08.2018 - 07:16DROPS Design answered:
Dag Demerlier, Op een kleinere naald passen meer steken op 10 cm dan een grotere naald, vandaar dat je dan een kleinere naald moet nemen. Het is in ieder geval handig om een proeflapje te maken en de naalddikte aan te passen, zodat je de juiste stekenverhouding krijgt.
14.08.2018 - 10:21Sonia Mara wrote:
Bom dia! Porque.. bem que poderia os gráficos,ser também ser feitos em escritas, pois torna mais fácil de ler. Obrigada.
08.08.2018 - 17:06Pamela wrote:
I just printed this pattern and I now remember why I don't knit your patterns. I don't know if it's because I'm in the US or some other reason but I seriously dislike the way all the patterns are written. Love the shawl, probably won't knit it simply because of the way the pattern is written.
02.08.2018 - 15:21DROPS Design answered:
Dear Pamela, There maybe as many ways to write patterns than there are knitters – if you have questions you are welcome to ask them here, Shoul dyou need any individual assistance reading our patterns and diagrams you are welcome to contact the store where you bought your yarn (even per mail or telephone). Happy knitting!
02.08.2018 - 16:07Noomi Holm wrote:
Vil bestille garn, men I sender ikke til Færerne?
01.08.2018 - 16:15DROPS Design answered:
Hej Noomi, jo vi har flere butikker på Færøerne - se her: Forhandlere Færøerne
15.08.2018 - 08:43Lynn wrote:
Wish you would make patterns PDF with better formatting. ‘‘Tis is very hard to read
01.08.2018 - 00:41
![]() Gabi wrote:
Gabi wrote:
Toll. Das werde ich definitiv nachstricken. Ein Tuch für den Winter und kühle Tage. Auch die Farbwahl gefällt mir
11.07.2018 - 12:54
![]() Ingrid Scheungraber wrote:
Ingrid Scheungraber wrote:
Sehr schönes Modell - würde ich gerne nachstricken.
03.07.2018 - 10:47
![]() Aka wrote:
Aka wrote:
Krásný folklórní šátek, doufám, že k němu bude návod i v češtině.
01.07.2018 - 14:13
Nordic Romance#nordicromanceshawl |
|||||||||||||||||||||||||||||||||||||
 |
 |
||||||||||||||||||||||||||||||||||||
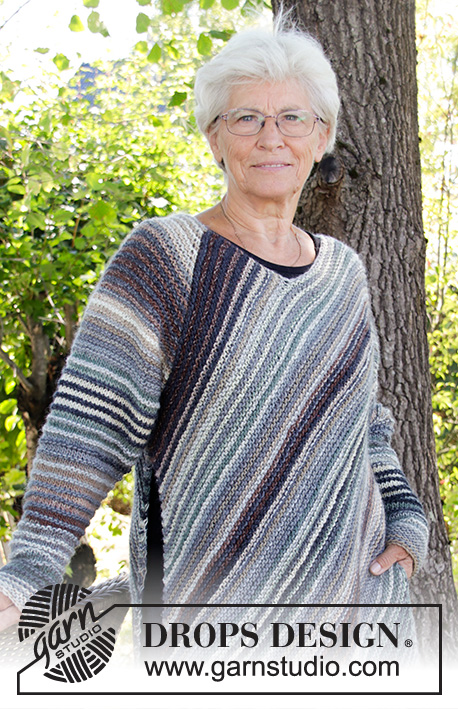
Knitted shawl in DROPS Nord. The piece is worked top down with garter stitch, mosaic pattern and wave pattern.
DROPS 195-5 |
|||||||||||||||||||||||||||||||||||||
|
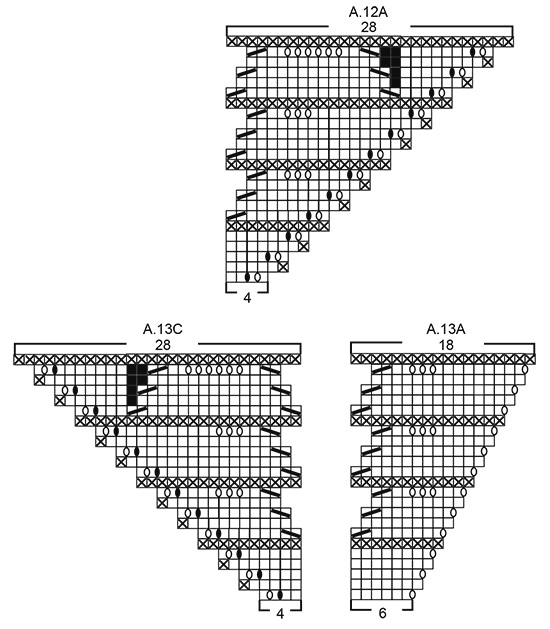
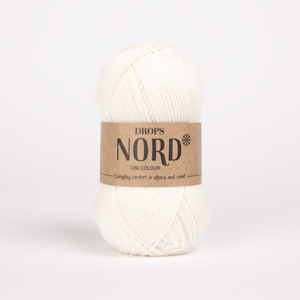
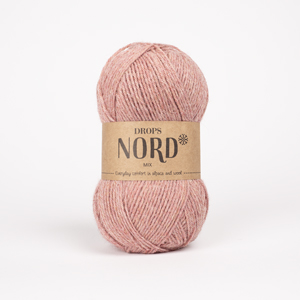
EXPLANATIONS FOR THE PATTERN: ------------------------------------------------------- RIDGE/GARTER STITCH (worked back and forth): 1 ridge = Knit 2 rows. INCREASE IN ONE-COLOURED GARTER STITCH SECTION: See diagrams A.1 and A.2. Each row in the diagrams is equivalent to one row worked. The diagrams show all the rows in the pattern seen from the right side. INCREASE TIP (evenly spaced): To work out how to increase evenly, count the total number of stitches on the needle (e.g. 261 stitches), minus the mid-stitch (= 1 stitch) and divide the remaining stitches by 2 = 130 stitches on each side of the mid-stitch. Then divide 130 stitches by the number of increases to be made before/after the mid-stitch (e.g. 3) = 43.3. In this example, increase by making 1 yarn over after approx. each 43rd stitch before the mid-stitch. Increase in the same way after the mid-stitch. On the next row knit the yarn overs twisted to avoid holes. CASTING-OFF TIP: So that the cast-off edge is not tight you can make 1 yarn over AT THE SAME TIME as casting off. Make 1 yarn over above all the yarn overs from the previous row, the yarn overs are then cast off as normal stitches. Make sure that you do not tighten the strand while casting off. If the cast-off edge is still tight, you can cast off with a size larger needle. MOSAIC PATTERN: See diagrams A.3 to A.11 and read description of the technique below. Each row in these diagrams is equivalent to 2 rows worked. I.e. from the right side the diagram is worked from right to left with increases as shown in the diagrams and from the wrong side you work the same row from left to right, but without the increases (i.e. increases are only done from the right side). On all rows from the right side, keep the strand at the back of the piece (i.e. on the wrong side) when a stitch is slipped. On all rows from the wrong side, keep the strand in front of the piece (i.e. towards you and still on the wrong side) when a stitch is slipped. Make sure the strands are not tight at the back of the piece! To keep track of the pattern, you can insert a marker between each pattern-repeat on A.4B/A.5B. A.3, A.6 and A.9 = start-stitch and end-stitch. This stitch is worked in the colour shown by the symbol, AT THE SAME TIME the symbol tells you how the pattern row is worked in A.X, A.Y and A.Z. A.X, A.Y and A.Z are sections which show the rows the mosaic pattern is worked on. On the other rows in A.4/A.5, A.7/A.8 and A.10/A.11 (i.e. the one-coloured rows) you work 1 ridge back and forth over all stitches without slipping stitches (mid-stitch always worked in stocking stitch). SECTION A.X: On each row of the pattern in A.3 which has a square with a small, black square inside (i.e. colour A), all stitches with colour A in A.4 and A.5 are knitted and all stitches with colour B are slipped. On each row of pattern in A.3 which has a square with an empty star inside (colour B), all stitches with colour B in A.4 and A.5 are knitted and all stitches with colour A are slipped. SECTION A.Y: On each row of pattern in A.6 which has a square with a small, black diamond inside (i.e. colour C), all stitches with colour C in A.7 and A.8 are knitted and all stitches with colour D are slipped. On each row of pattern in A.6 which has a square with a small, horizontal line inside (colour D), all stitches with colour D in A.7 and A.8 are knitted and all stitches with colour C are slipped. SECTION A.Z: On this row of pattern in A.9 which starts with a square with a diagonal line inside (i.e. colour E), all stitches with colour E in A.10 and A.11 are knitted and all stitches with colour A are slipped. WAVE PATTERN: See diagrams A.12 and A.13. Each row is equivalent to 1 row worked. The diagrams show all the rows in the pattern seen from the right side. ------------------------------------------------------- START THE PIECE HERE: ------------------------------------------------------- SHAWL - SHORT OVERVIEW OF THE PIECE: The piece is worked back and forth with circular needle (so that you have room for all stitches) and worked top down. Always increase 1 stitch on each side of the mid-stitch and 2 stitches in each side of each row from the right side as described in the text (= 6 stitches increased on each increase row). At the beginning of the shawl a section is worked in one-colour garter stitch. Then you work mosaic pattern. To finish an edge is worked in wave pattern. It is important to follow the diagrams carefully. The mosaic pattern itself is worked in garter stitch, but the pattern is not worked in normal garter stitch - it is made by by slipping stitches. Read description for Mosaic pattern before working it. Be aware that each row in the diagrams for the mosaic pattern (A.3 to A.11) is equivalent to 1 ridge (i.e. 2 rows). In the other diagrams (A.1, A.2, A.12 and A.13) 1 row in the diagram = 1 row worked. SHAWL: Cast on 5 stitches with circular needle size 3.5 mm and grey. The first 2 rows are worked as follows: ROW 1 (= right side): Work 1 edge stitch in GARTER STITCH – read description above, 1 yarn over, 1 stitch in stocking stitch, 1 yarn over, 1 stitch in stocking stitch, 1 yarn over, 1 stitch in stocking stitch, 1 yarn over and 1 edge stitch in garter stitch. ROW 2 (= wrong side): 2 edge stitches in garter stitch, purl until there are 2 stitches left on the row and finish with 2 edge stitches in garter stitch = 9 stitches on needle. Then work A.1 and A.2 as follows: Work A.1 over the first 4 stitches, work 1 stitch in stocking stitch (= mid-stitch – this stitch is worked in stocking stitch to finished length, irrespective of how the other stitches are worked), work A.2 over the last 4 stitches. REMEMBER THE KNITTING TENSION! Continue working and increasing as shown in A.1 and A.2 until you have worked a total of 43 ridges after the cast-on edge = 261 stitches on the needle. Work 1 more ridge with grey and increases in each side and in the middle as before, in addition increase 6 stitches evenly on row, i.e. increase 3 stitches before and 3 stitches after the mid-stitch - read INCREASE TIP. You have now worked a total of 44 ridges and there are 273 stitches on the needle. The piece measures approx. 19 cm from the middle out – measured in the knitting direction. Continue with MOSAIC PATTERN – read description above, i.e. the first row is from the right side as follows: Work A.3 (= 1 stitch), A.4A over 2 stitches, A.4B over the next 132 stitches (= 33 repeats of 4 stitches), work A.4C over 1 stitch, 1 stitch in stocking stitch (= mid-stitch – this stitch is worked in the background colour of the pattern stripe), work A.5A over 1 stitch, A.5B over the next 132 stitches (= 33 repeats of 4 stitches), work A.5C over 2 stitches and finish with A.3 (= 1 stitch). Continue this pattern, but remember that 1 row in each of these diagrams is equivalent to 1 ridge (2 rows). Make sure the strands at the back are not tight. When A.3, A.4 and A.5 have been completed in height there are 363 stitches on the needle. The next row is worked as follows from the right side: Work A.6 (= 1 stitch), A.7A over 2 stitches, A.7B over the next 174 stitches (= 29 repeats of 6 stitches), work A.7C over 4 stitches, 1 stitch in stocking stitch (= mid-stitch – this stitch is worked in the background colour of the pattern stripe), work A.8A over 4 stitches, A.8B over the next 174 stitches (= 29 repeats of 6 stitches), work A.8C over 2 stitches and finish with A.6 (= 1 stitch). When A.6, A.7 and A.8 have been completed in height there are 465 stitches on the needle. The next row is worked as follows from the right side: Work A.9 (= 1 stitch), A.10A over 2 stitches, A.10B over the next 228 stitches (= 114 repeats of 2 stitches), work A.10C over 1 stitch, 1 stitch in stocking stitch (= mid-stitch – this stitch is worked in the background colour of the pattern stripe), work A.11A over 1 stitch, A.11B over the next 228 stitches (= 114 repeats of 2 stitches), work A.11C over 2 stitches and finish with A.9 (= 1 stitch). When A.9, A.10 and A.11 have been completed in height there are 519 stitches on the needle. Continue with pearl grey and knit 2 rows where you increase 16 stitches evenly on the first row, i.e. the increases in sides and middle continue as before, in addition increase 8 stitches evenly both before and after the mid-stitch = 541 stitches on needle. Change to off white and work WAVE PATTERN – read description above, i.e. the first row is worked as follows from the right side: Work A.12A over 4 stitches, A.12B over the next 260 stitches (= 20 repeats of 13 stitches), work A.12C over 6 stitches, 1 stitch in stocking stitch (= mid-stitch), work A.13A over 6 stitches, A.12B over the next 260 stitches (= 20 repeats of 13 stitches) and finish with A.13C over the last 4 stitches. When the wave pattern is finished there are 773 stitches on the needle. Work 2 ridges back and forth over all stitches with increases in the sides and on each side of the mid-stitch as before = 785 stitches on the needle. Read CASTING-OFF TIP and cast off with knit from the right side. Cut and fasten the strands. SHAPING: Dampen the piece and carefully lay out in the right shape. Allow to dry. Repeat the process each time the shawl is washed. |
|||||||||||||||||||||||||||||||||||||
Diagram explanations |
|||||||||||||||||||||||||||||||||||||
|
|||||||||||||||||||||||||||||||||||||
 |
|||||||||||||||||||||||||||||||||||||
 |
|||||||||||||||||||||||||||||||||||||
 |
|||||||||||||||||||||||||||||||||||||
 |
|||||||||||||||||||||||||||||||||||||
Have you finished this pattern?Tag your pictures with #dropspattern #nordicromanceshawl or submit them to the #dropsfan gallery. Do you need help with this pattern?You'll find 18 tutorial videos, a Comments/Questions area and more by visiting the pattern on garnstudio.com. © 1982-2026 DROPS Design A/S. We reserve all rights. This document, including all its sub-sections, has copyrights. Read more about what you can do with our patterns at the bottom of each pattern on our site. |
|||||||||||||||||||||||||||||||||||||


Post a comment to pattern DROPS 195-5
We would love to hear what you have to say about this pattern!
If you want to leave a question, please make sure you select the correct category in the form below, to speed up the answering process. Required fields are marked *.