
Popular categories
Looking for a yarn?


Comments / Questions (96)
![]() Renu wrote:
Renu wrote:
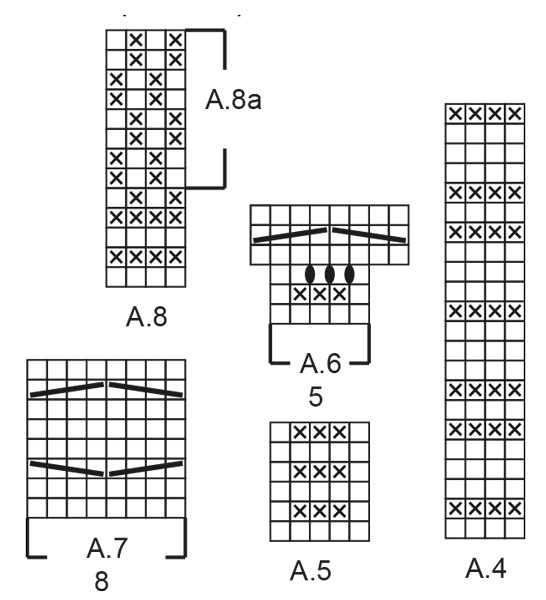
Making the xs size . In the A 8 portion the pattern is over 4 stitches plus 14 for the edges . But pattern says total stitches are 99 . One stitch seems extra . What to do with it ?
07.04.2026 - 09:26DROPS Design answered:
Dear Mrs Renu, you have 150 sts on needle and work first row A.8 as follows: 7 garter sts, knit the next 136 sts decreasing evenly 51 sts (use the tools / decrease calculator if needed) = 85 sts remain, and finish with 7 garter sts = 7+85+7=99 sts. Now work next row from WS (knit all stitches). Then you will repeat A.8 between the 7 sts as follows: 7 garter sts, repeat the 4 sts A.8 a total of 21 times, work the first stitch A.8 and finish with 7 garter sts= 99 sts. Happy knitting!
08.04.2026 - 13:41
![]() Gila wrote:
Gila wrote:
Hallo, kann es sein, dass auf dem Diagramm A6 nach der Zunahmereihe eine Hinreihe rechte Maschen und eine Rückreihe linke Maschen fehlt? Auf den Fotos scheint es so. Liebe Grüße, Gila
17.03.2026 - 16:26DROPS Design answered:
Liebe Gila, diese Reihe ist nicht "voll" linken Maschen, diese werfen bei der 2. Reihe A.6 gestrickt (1 li, 3 re, 1 li) bei der Rückreihe; dann wird man Maschen zunehmen und dann beginnen die Zöpfe wie danach in A.7. Viel Spaß beim Stricken!
18.03.2026 - 07:08
![]() Valérie wrote:
Valérie wrote:
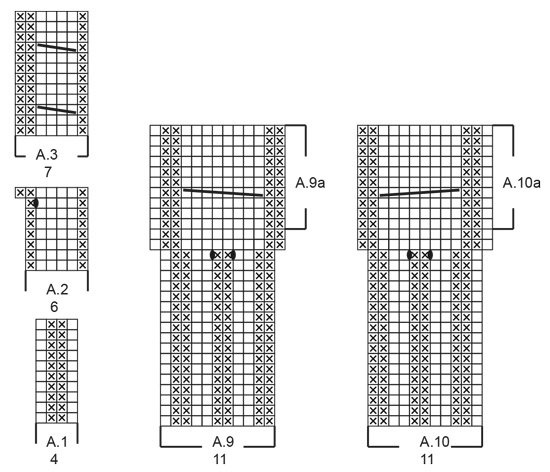
Bonsoir, je ne comprends pas comment on passe de 110 mailles (dos) à 128 après avoir tricoté A1 et A2 ? merci
03.03.2026 - 18:30DROPS Design answered:
Bonjour Valérie, à la fin de A.1 vous avez toujours 110 mailles, vous tricotez ensuite ainsi: 1 m lisière, 18 fois les 6 mailles de A.2 et 1 maille lisière. Vous augmentez ensuite 1 maille à l'avant-dernier rang de A.2 dans chaque A.2 = vous avez ainsi 7 mailles dans chaque A.2 soit 1 m lis, 18x7, 1 m lis = 128 mailles. Bon tricot!
04.03.2026 - 07:40
![]() Andrea wrote:
Andrea wrote:
When decreasing evenly, for example "1 edge stitch in garter stitch, work A.4 until 1 stitch remains and decrease at the same time 27-36-36-40-44-48 stitches evenly, 1 edge stitch in garter stitch = 87-92-92-102-112-122 stitches." are all of the decreases done in one row or are they evenly spaced out across all rows of the chart, for example 22 rows in A.4?
25.02.2026 - 13:54DROPS Design answered:
Hi Andrea, These decreases are worked on one row, across the repeats of A.4. Regards, Drops Team.
27.02.2026 - 07:08
![]() Bacquey wrote:
Bacquey wrote:
Bonsoir je suis au col châle au niveau rang 1 a faire une fois tricoter sur l endroit les 17 mailles,comment dois je serrer le fil sur les 4 dernière mailles ,si J ai bien compris je ne les tricoté pas au rang suivant,je ne comprends pas bien .merci
23.02.2026 - 17:03DROPS Design answered:
Bonjour Mme Bacquey, on serre le fil pour éviter un trou aux transition des rangs raccourcis (retrouvez cette technique ici), vous pouvez utiliser une autre technique si vous préférez, lorsque vous tournez après avoir tricoté les 17 premières mailles, les autres mailles restent sur l'aiguille gauche, sans être tricotées. Elles ne seront tricotées qu'au rang suivant du même côté. Bon tricot!
24.02.2026 - 09:42
![]() Ghislaine wrote:
Ghislaine wrote:
Modèle 237-10 passage de A1 à A2 18 mailles supplémentaires Où se font les augmentations ?
26.01.2026 - 19:31DROPS Design answered:
Bonjour Ghislaine, les augmentations se font à l'avant dernier rang de A.2, quand vous tricotez (1 m env, 4 m end, 1 jeté, 1 m env). Bon tricot!
27.01.2026 - 08:56
![]() Sylvie wrote:
Sylvie wrote:
Bonjour je n' ai pas compris votre réponse je suis au devant droit je fais 7mailles au point mousse et après je suis coincé je ne comprends pas vous me dites de faire A9 mais sur combien de mailles et après A3et le jeter je le fais a quel moment et les rangs suivants que faut il faire? Merci de me réexpliquer.
24.01.2026 - 20:46DROPS Design answered:
Bonjour Sylvie, vous tricotez le diagramme A.9 en entier, autrement dit les 11 mailles de A.9; lorsque vous aurez tricotez 1 fois A.1a en hauteur, vous tricotez A.2 au lieu de A.1; quand A.2 est terminé, vous tricotez avec l'aiguille 5,5 et tricotez 7 m point mousse, les 11 m de A.9a comme avant, puis vous répétez A.3 jusqu'à ce qu'il reste 1 m et vous tricotez cette maille au point mousse. Faites les jetés comme indiqué dans les explications écrites/ dans les diagrammes pour avoir le bon nombre de mailles indiqué. Bon tricot!
26.01.2026 - 08:32
![]() Sylvie wrote:
Sylvie wrote:
Bonsoir je suis au devant droit,je dois changer d aiguille et faire 7 mailles au point mousse puis faire A9a la première ligne ou faire desuiteA3 ?Dous je faire un jeté a chaque début de rang? Merci
20.01.2026 - 18:26DROPS Design answered:
Bonjour Sylvie, vous tricotez 7 m point mousse, puis le diagramme A.9a, faites 1 jeté, tricotez A.3 et terminez par 1 m point mousse. Vous tricotez ainsi le 1er rang des diagrammes A.9a et A.3, puis au rang suivant, le 2ème rang des diagrammes et ainsi de suite. Le jeté ne se fait qu'au tout premier rang. Bon tricot!
23.01.2026 - 08:21
![]() Capon wrote:
Capon wrote:
J ai du mal à comprendre le schéma A 4
19.01.2026 - 21:22DROPS Design answered:
Bonjour Mme Capon, dans A.4, tricotez les mailles comme indiqué dans la légende, en fonction du symbole sur l'endroit ou sur l'envers, autrement dit, on tricote ainsi: 1 rang endroit sur l'endroit, 1 rang endroit sur l'envers, 1 rang endroit sur l'endroit, 1 rang envers sur l'envers, 1 rang endroit sur l'endroit, etc.. Bon tricot!
20.01.2026 - 10:31
![]() Lisa wrote:
Lisa wrote:
Hi! For how long should I knit with both qualitys of yarns? I only see when to start use both bot not when to stop. Since Drops silk is so much lighter in weight I am guessing that it wont be sufficient for the whole west. What does the silk yarn do for the west?
15.01.2026 - 13:21DROPS Design answered:
Dear Lisa, you will work the whole piece with the 2 yarns, the amount of yarn in gram is different because both yarns have also a different meterage, just make sure you get the correct tension (also worked with 1 strand each quality). Happy knitting!
16.01.2026 - 07:51
|
||||||||||||||||||||||
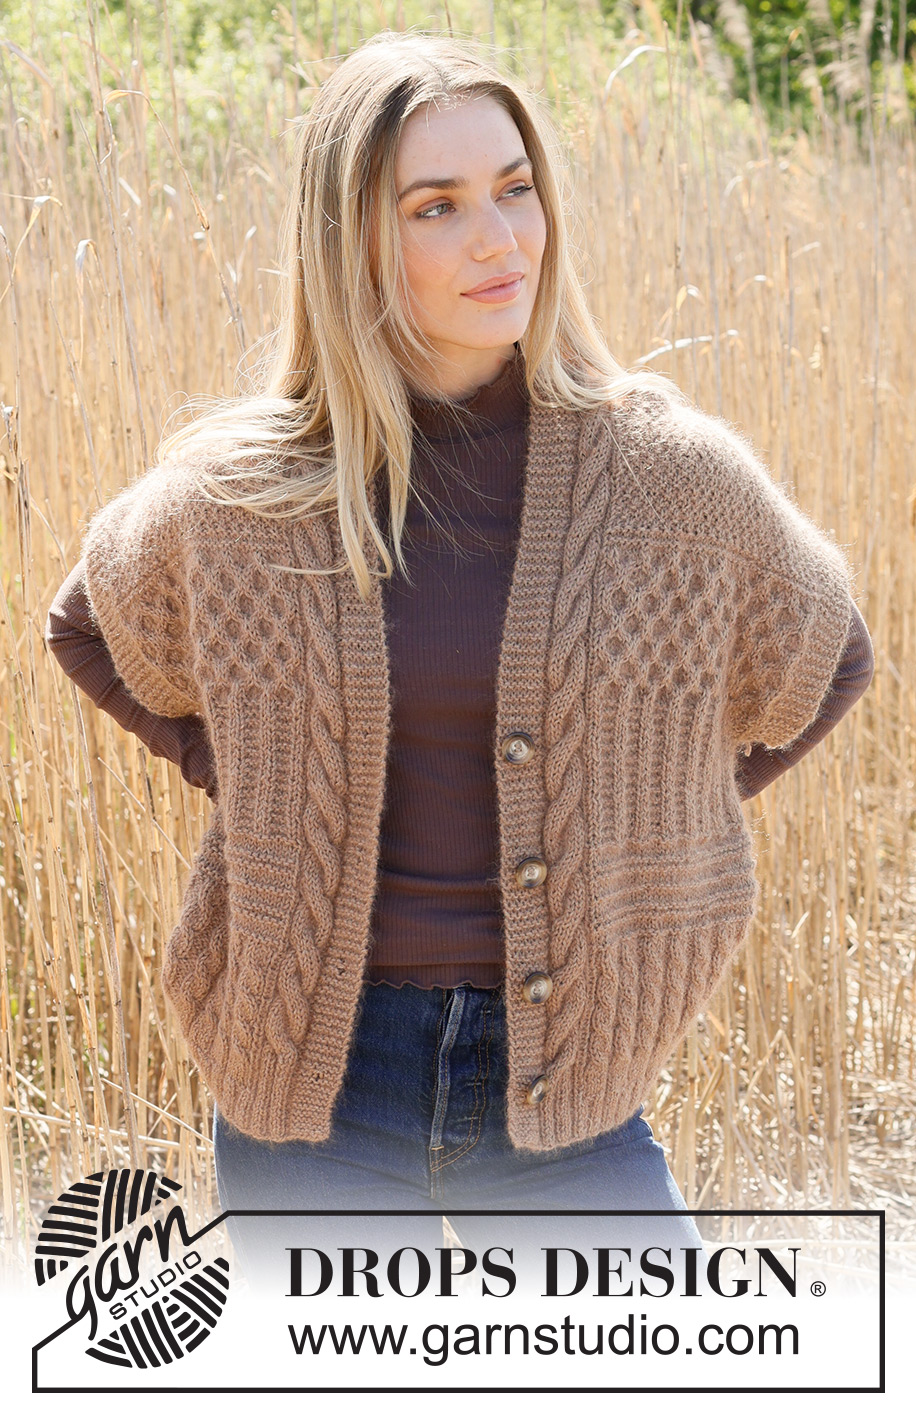
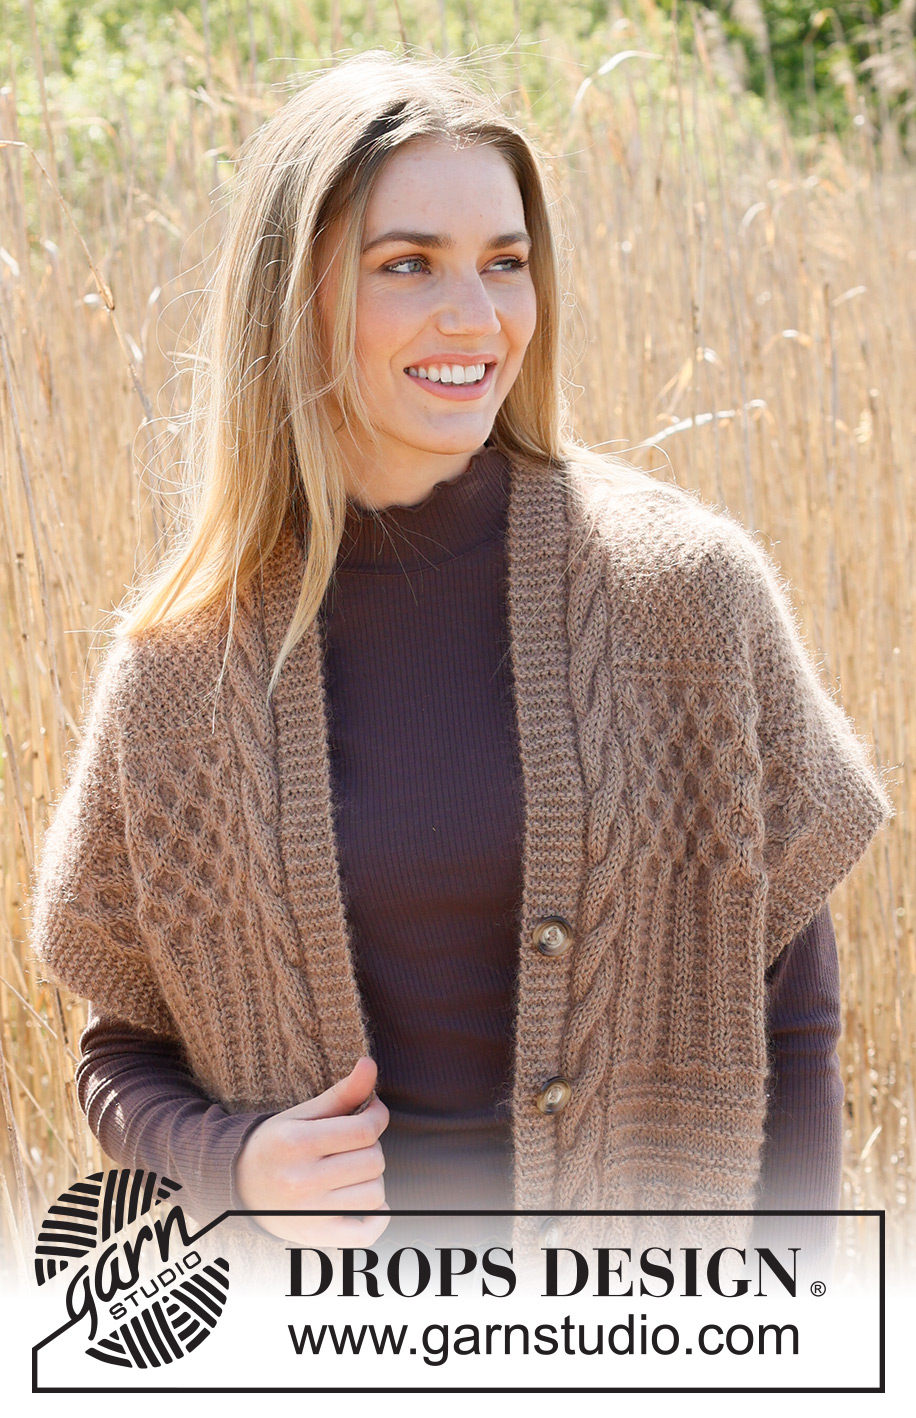
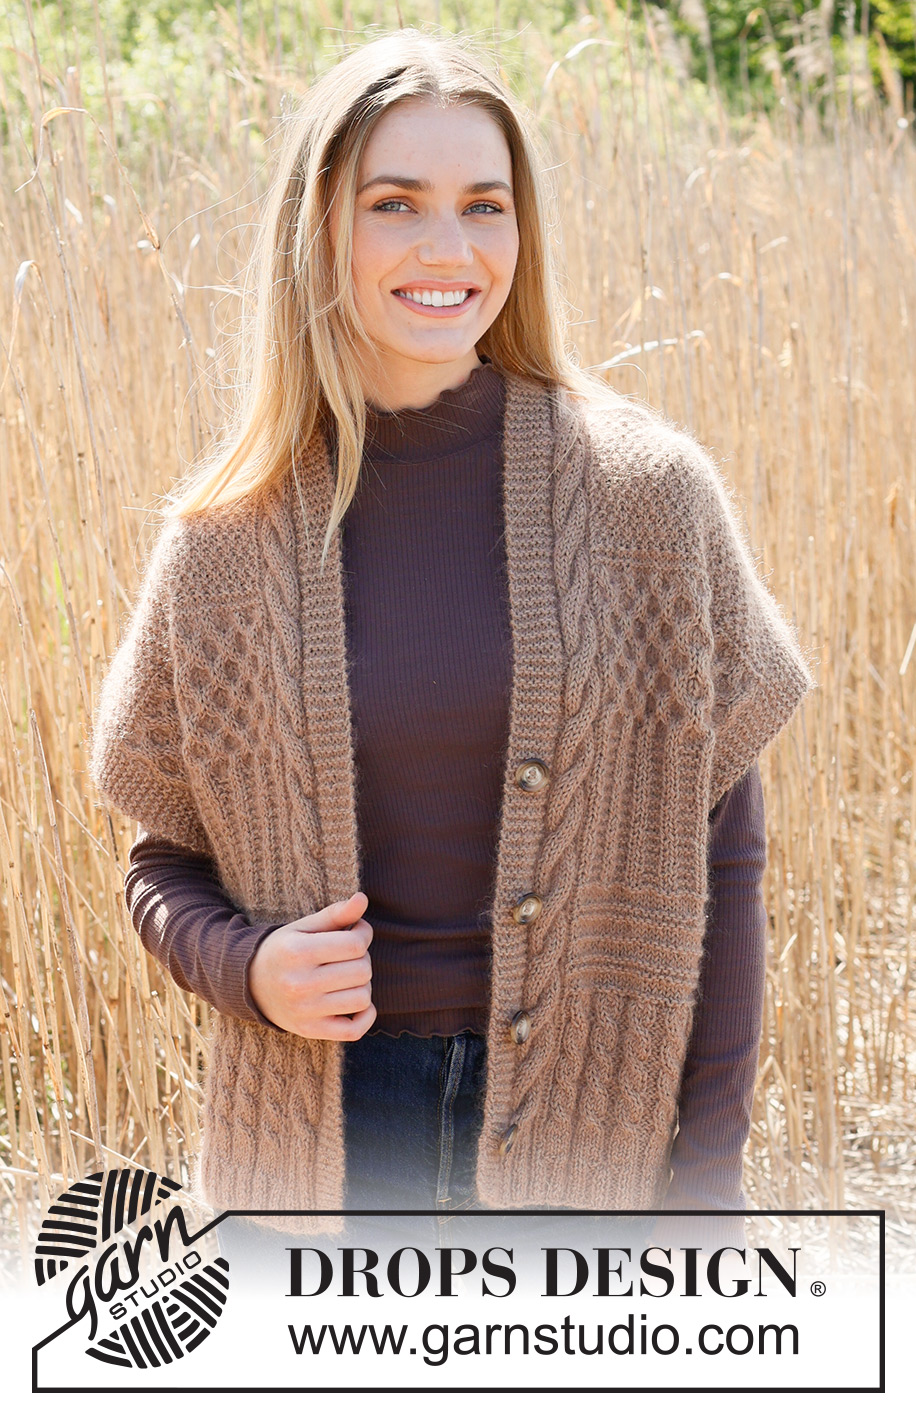
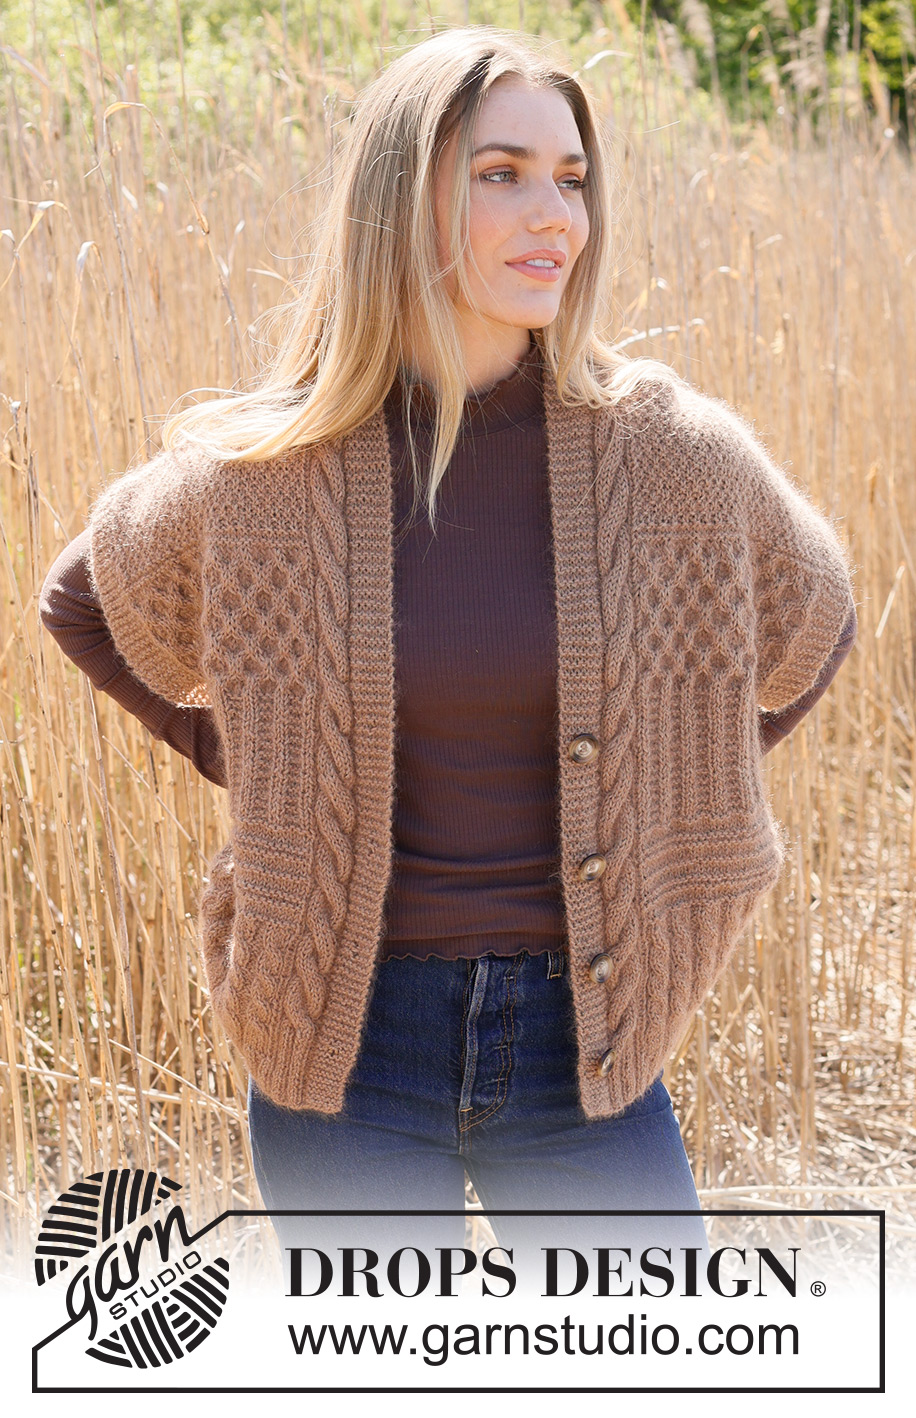
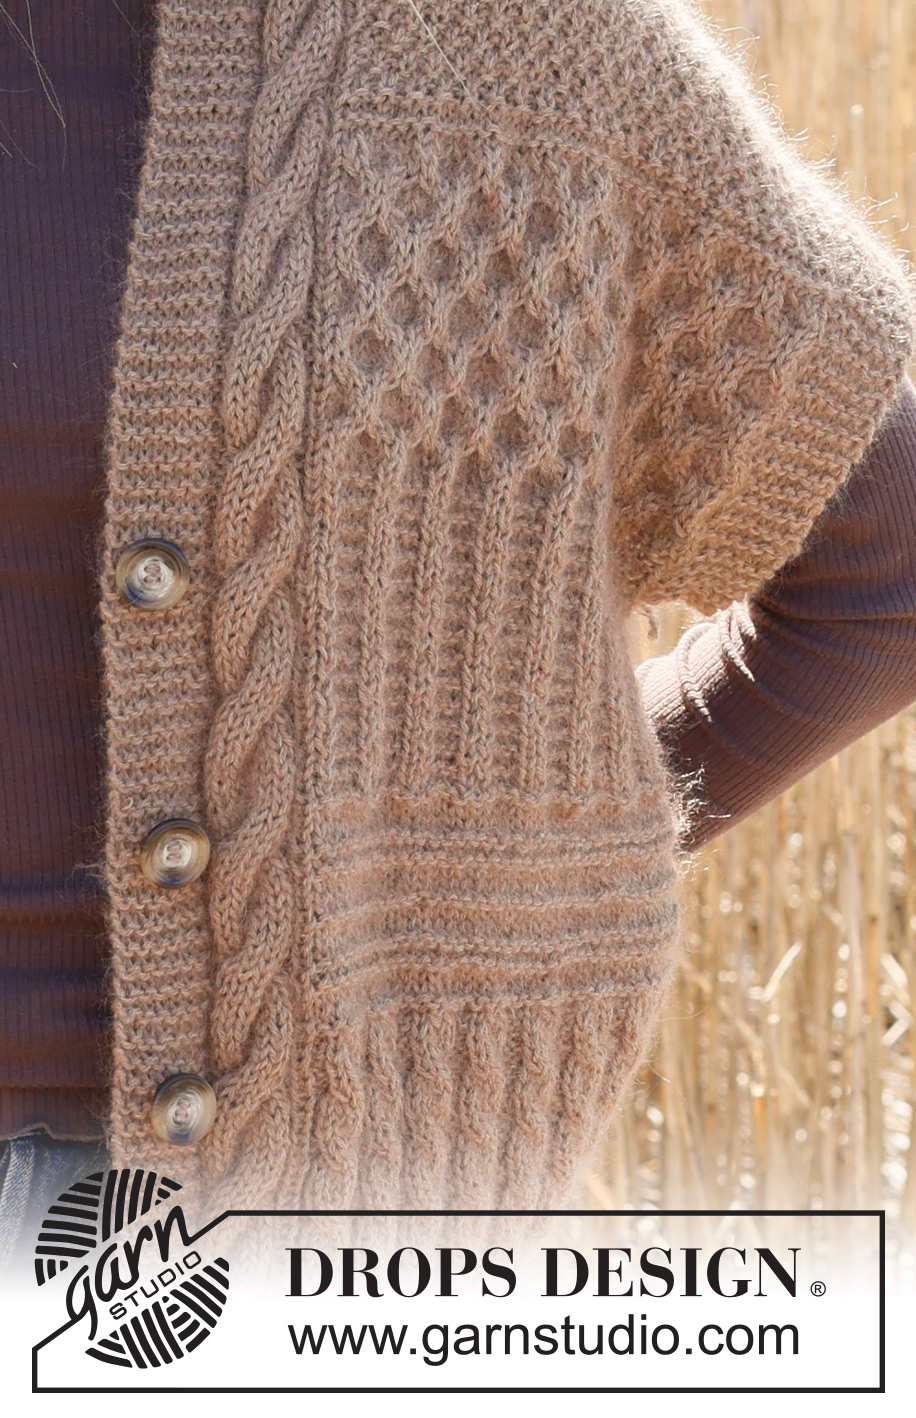
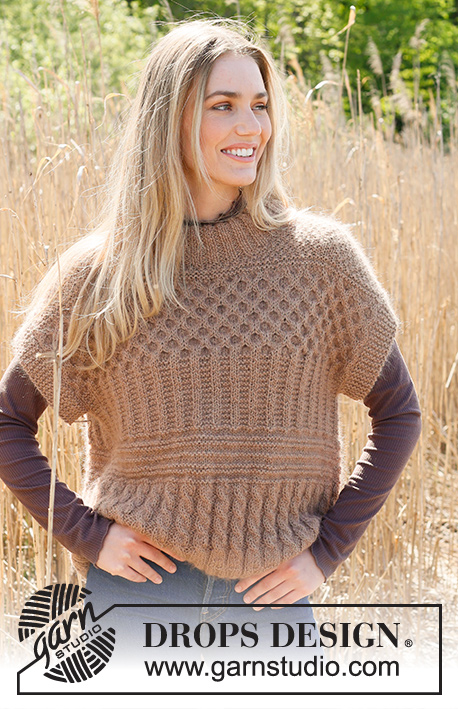
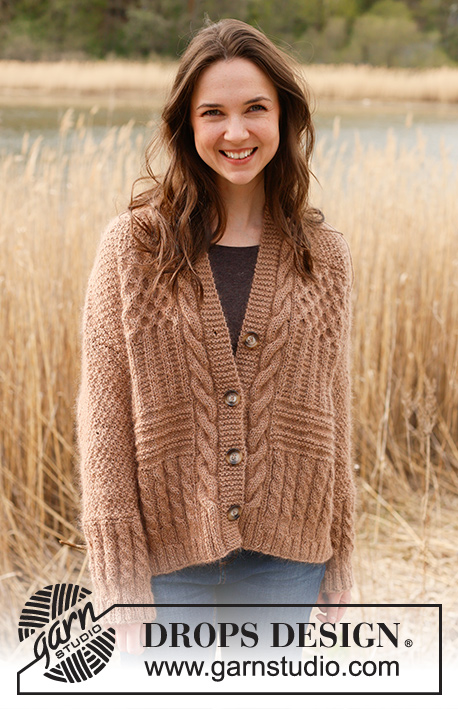
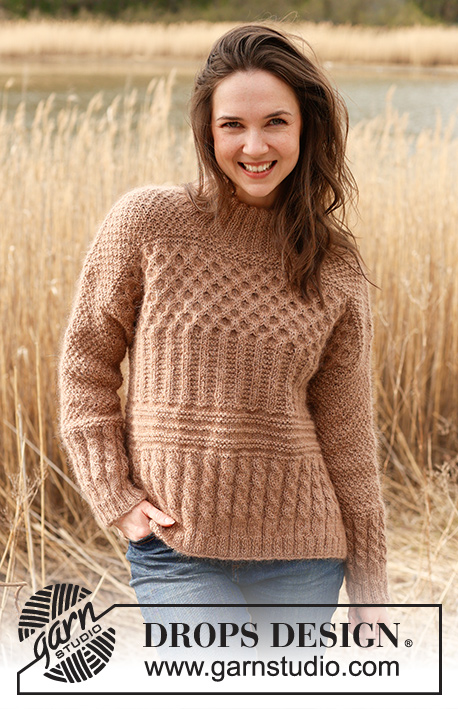
Cracked Walnuts Vest#crackedwalnutsvest |
||||||||||||||||||||||
 |
 |
|||||||||||||||||||||
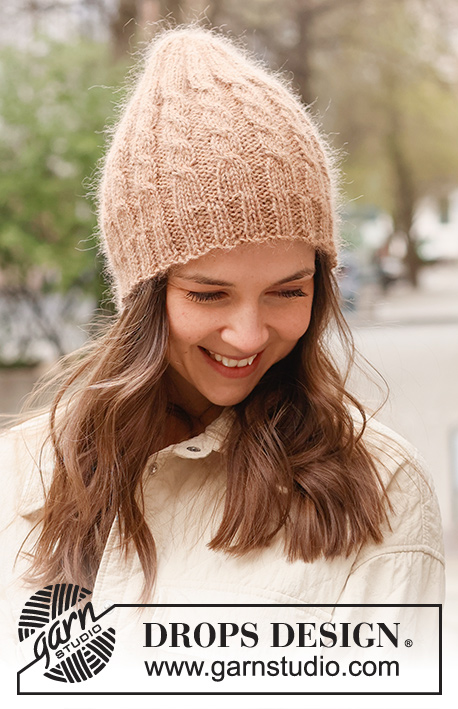
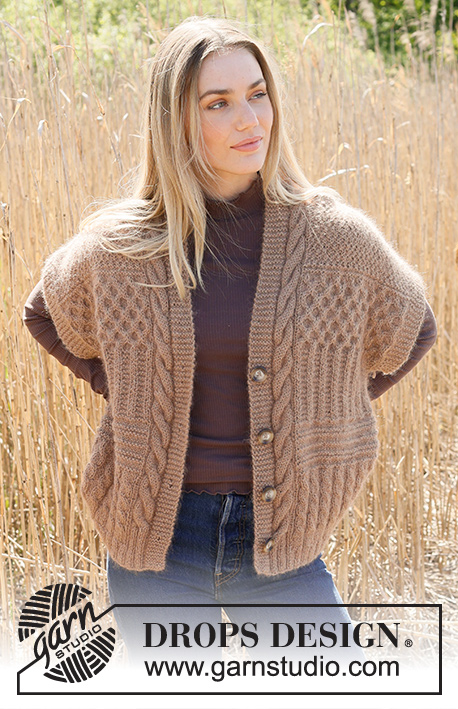
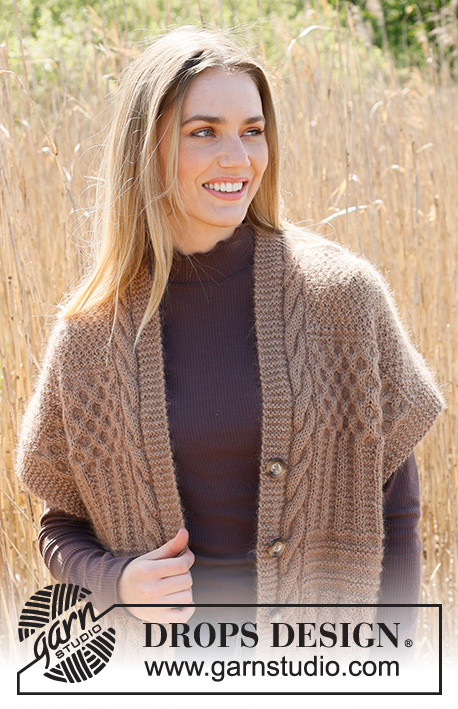
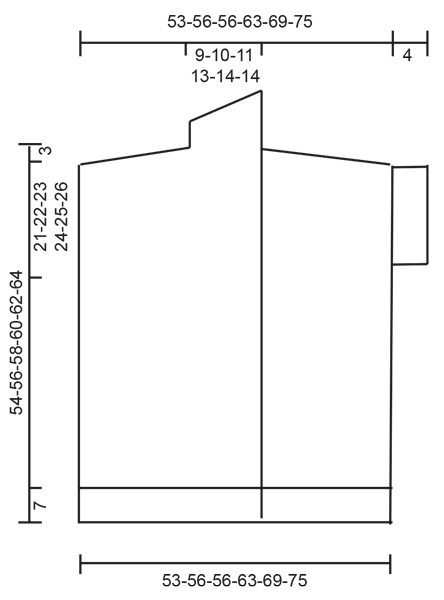
Knitted vest in DROPS Kid-Silk and DROPS Puna / DROPS Merino Extra Fine. Piece is knitted bottom up with textured pattern, ridges, cables and rib. Size XS – XXL.
DROPS 237-10 |
||||||||||||||||||||||
|
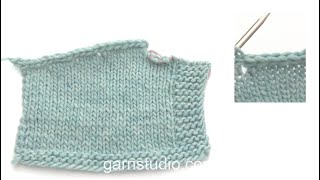
---------------------------------------------------------- EXPLANATION FOR THE PATTERN: ---------------------------------------------------------- GARTER STITCH (back and forth): Knit all rows. 1 ridge vertically = knit 2 rows. PATTERN: See diagrams A.1 to A.10. Diagrams show all rows in pattern seen from the right side. KNIT TOGETHER: FROM RIGHT SIDE: Slip 1 stitch knitwise, knit 1, pass slipped stitch over stitch worked. FROM WRONG SIDE: Purl 2 together. STOCKING STITCH: When working from wrong side, purl and when working from right side, knit. BUTTONHOLES (bottom up): Decrease for buttonholes on right band. 1 BUTTONHOLE = knit third and fourth stitch from edge together and make 1 yarn over. On next row knit yarn over to make hole. Decrease for buttonholes when piece measures: XS: 6, 14, 22 and 30 cm S: 6, 14, 22 and 30 cm M: 6, 14, 23 and 32 cm L: 7, 16, 25 and 34 cm XL: 6, 14, 22, 29 and 36 cm. XXL: 6, 14, 22, 29 and 36 cm. ---------------------------------------------------------- START THE PIECE HERE: ---------------------------------------------------------- VEST – SHORT OVERVIEW OF PIECE: Work front and back piece bottom up, back and forth in parts. BACK PIECE: Cast on 98-110-110-122-134-146 stitches on circular needle size 4 mm with 1 strand of each quality (2 strands). Purl 1 row from wrong side. Work next row as follows from right side: 1 edge stitch in GARTER STITCH – read explanation above, work A.1 until 1 stitch remain, 1 stitch in garter stitch. When A.1 has been worked 1 time vertically, work pattern as follows: 1 edge stitch in garter stitch, work A.2 until 1 stitch remains, 1 edge stitch in garter stitch. When A.2 has been worked 1 time vertically, there are 114-128-128-142-156-170 stitches on needle. Switch to circular needle size 5.5 mm. Work pattern as follows: 1 edge stitch in garter stitch, work A.3 until 1 stitch remains, 1 edge stitch in garter stitch. REMEMBER THE KNITTING TENSION! Repeat A.3 vertically until piece measures 16-17-19-19-21-22 cm. Work pattern, begin from right side as follows: 1 edge stitch in garter stitch, work A.4 until 1 stitch remains and decrease at the same time 27-36-36-40-44-48 stitches evenly, 1 edge stitch in garter stitch = 87-92-92-102-112-122 stitches. When A.4 has been worked 1 time vertically, work pattern as follows: 1 edge stitch in garter stitch, work A.5 until 1 stitch remains, 1 edge stitch in garter stitch. Repeat A.5 vertically. When piece measures 30-31-32-33-34-35 cm, cast on 6 new stitches at the end of the next 2 rows = 99-104-104-114-124-134 stitches. Work the new stitches in garter stitch until finished measurements. Continue pattern like this until piece measures 33-35-36-38-39-41 cm. Work pattern, begin from right side as follows: 7 stitches in garter stitch, work A.6 until 7 stitches remain, 7 stitches in garter stitch. When A.6 has been worked 1 time vertically, there are 150-158-158-174-190-206 stitches on needle. Work pattern as follows: 7 stitches in garter stitch, work A.7 until 7 stitches remain, 7 stitches in garter stitch. Work A.7 3 times in total vertically. Piece measures approx. 45-47-48-50-51-53 cm. Work pattern as follows: 7 stitches in garter stitch, work A.8 until 7 stitches remain and decrease at the same time 51-54-54-60-66-72 stitches evenly, 7 stitches in garter stitch = 99-104-104-114-124-134 stitches. When A.8 has been worked 1 time vertically, work A.8a vertically until finished measurements. When piece measures 49-51-53-55-57-59 cm, cast off the middle 13-14-16-18-20-20 stitches and finish each shoulder (43-45-44-48-52-57 stitches) separately. On next row from neck cast off 1 stitch at the beginning of row = 42-44-43-47-51-56 stitches. On next row from the shoulder cast off the first 7 stitches = 35-37-36-40-44-49 stitches. Then work diagonal shoulder, begin on next row from the neck as follows: * Work pattern as before until 8-9-9-10-11-12 stitches remain, turn and work back *, work from *-* 3 times in total. I.e. work 8-9-9-10-11-12 stitches less on every row from the neck. On last row towards neck, cast on 2 new stitches at the end of row = 37-39-38-42-46-51 stitches. Now work and cast off with an edge over shoulder stitches. Work stitches cast on with shoulder stitches as follows: Work * 1 stitch in STOCKING STITCH – read explanation above, work next stitch together with first/next stitch from shoulder – read KNIT TOGETHER, pass the 2 stitches back on the needle they came from with strand on wrong side of piece, make sure not to tighten yarn too much *, work from *-* until all stitches from shoulder have been worked together with the 2 new stitches that were cast on. Cast off the 2 stitches. Work the other shoulder the same way. RIGHT FRONT PIECE: Cast on 61-67-67-73-79-85 stitches on circular needle size 4 mm with 1 strand of each quality. Purl until 7 stitches remain, 7 band stitches in garter stitch. On next row from right side work pattern as follows: 7 band stitches in garter stitch, work A.9, purl 1-0-0-1-0-1, knit 1-0-0-1-0-1, work A.1 until 1 stitch remains, 1 edge stitch in garter stitch. When A.1 has been worked 1 time vertically, work pattern from right side as follows: 7 band stitches in garter stitch, A.9 as before, work A.2 until 1 stitch remains, 1 edge stitch in garter stitch. Decrease for BUTTONHOLES - read explanation above. When A.2 has been worked 1 time vertically, there are 70-77-77-84-91-98 stitches on needle. Switch to circular needle size 5.5 mm. Work pattern as follows: 7 band stitches in garter stitch, A.9a, make 1 yarn over (this is done so that the pattern is the same mid front on both front pieces), work A.3 until 1 stitch remains, 1 edge stitch in garter stitch = 71-78-78-85-92-99 stitches. Knit yarn over twisted on next row, then purl from right side and knit from wrong side. Repeat A.3 vertically until piece measures 16-17-19-19-21-22 cm. Work pattern, begin from right side as follows: 7 band stitches in garter stitch, A.9a as before, work A.4 until 1 stitch remains and decrease at the same time 15-17-17-19-21-23 stitches evenly, 1 edge stitch in garter stitch = 56-61-61-66-71-76 stitches. When A.4 has been worked 1 time vertically, work pattern as follows: 7 band stitches in garter stitch, A.9a as before, work A.5 until 1 stitch remains, 1 edge stitch in garter stitch. Repeat A.5 vertically. When piece measures 30-31-32-33-34-35 cm, cast on 6 new stitches at the end of next row from right side = 62-67-67-72-77-82 stitches. Work the new stitches in garter stitch until finished measurements. Continue pattern like this until piece measures 33-35-36-38-39-41 cm. Work pattern, begin from right side as follows: 7 band stitches in garter stitch, A.9a as before, work A.6 until 7 stitches remain, 7 stitches in garter stitch. When A.6 has been worked 1 time vertically, there are 83-91-91-99-107-115 stitches on needle. Work pattern as follows: 7 band stitches in garter stitch, A.9a as before, work A.7 until 7 stitches remain, 7 stitches in garter stitch. Work A.7 3 times in total vertically. Piece measures approx. 45-47-48-50-51-53 cm. Work pattern as follows: 7 band stitches in garter stitch, A.9a as before, work A.8 until 7 stitches remain and decrease at the same time 21-24-24-27-30-33 stitches evenly, 7 stitches in garter stitch = 62-67-67-72-77-82 stitches. When A.8 has been worked 1 time vertically, work A.8a vertically until finished measurements. When piece measures 50-52-54-56-58-60 cm, cast off the first 7 stitches on next row from wrong side = 55-60-60-65-70-75 stitches. Then work diagonal shoulder, begin on next row from the neck as follows: * Work pattern as before until 8-9-9-10-11-12 stitches remain, turn and work back *, work from *-* 3 times in total. I.e. work 8-9-9-10-11-12 stitches less on every row from the neck. On last row towards the neck work until 20-23-24-25-26-26 stitches remain, slip the last 20-23-24-25-26-26 stitches on a thread for shawl collar and cast on 2 new stitches on needle = 37-39-38-42-46-51 stitches. Now work and cast off with an edge over shoulder stitches. Work stitches cast on with shoulder stitches as follows: Work * 1 stitch in stocking stitch, work next stitch together with first/next stitch from shoulder – remember KNIT TOGETHER, pass the 2 stitches back on the needle they came from with strand on wrong side of piece, make sure not to tighten yarn too much *, work from *-* until all stitches from shoulder have been worked together with the 2 new stitches that were cast on. Cast off the 2 stitches. SHAWL COLLAR: Slip the 20-23-24-25-26-26 stitches from stitch holder on circular needle size 5.5 mm. Work as follows, begin from wrong side: Work 0-3-4-5-6-6 stitches in garter stitch, work the stitches in A.9a with purl over purl and knit over knit, and work 7 band stitches in garter stitch. On the next row from the right side, work as follows: 7 stitches in garter stitch, knit over knit and purl over purl decreasing at the same time 4 stitches evenly over the 8 knitted stitches in the middle of A.9a = 16-19-20-21-22-22 stitches. Continue with garter stitch and knit over knit and purl over purl (i.e. cables are done) and work short rows as follows: ROW 1 (= right side): Work the first 12-15-16-17-18-18 stitches, turn and tighten yarn. ROW 2 (= wrong side): Work 12-15-16-17-18-18 stitches. ROW 3 (= right side): Work over all stitches, turn and tighten yarn. ROW 4 (= wrong side): Work over all stitches. Work 1st to 4th row until shawl collar measures approx. 7-8-8-9-9-9 cm on the shortest. Work 1 ridge over all stitches. Cast off. LEFT FRONT PIECE: Cast on 61-67-67-73-79-85 stitches on circular needle size 4 mm with 1 strand of each quality. Work 7 band stitches in garter stitch, purl the rest of row. On next row from right side work pattern as follows: 1 edge stitch in garter stitch, work A.1 until 20-18-18-20-18-20 stitches remain, knit 1-0-0-1-0-1, purl 1-0-0-1-0-1, A.10, 7 band stitches in garter stitch. When A.1 has been worked 1 time vertically, work pattern from right side as follows: 1 edge stitch in garter stitch, work A.2 until 18 stitches remain, A.10 as before, 7 band stitches in garter stitch. When A.2 has been worked 1 time vertically, there are 70-77-77-84-91-98 stitches on needle. Switch to circular needle size 5.5 mm. Work pattern as follows: 1 edge stitch in garter stitch, work A.3 until 20 stitches remain, A.10a, 7 band stitches in garter stitch. Repeat A.3 vertically until piece measures 16-17-19-19-21-22 cm. Work pattern, begin from right side as follows: 1 edge stitch in garter stitch, work A.4 until 20 stitches remain and decrease at the same time 14-16-16-18-20-22 stitches evenly, A.10a as before, 7 band stitches in garter stitch = 56-61-61-66-71-76 stitches. When A.4 has been worked 1 time vertically, work pattern as follows: 1 edge stitch in garter stitch, work A.5 until 20 stitches remain, A.10a as before, 7 band stitches in garter stitch. Repeat A.5 vertically. When piece measures 30-31-32-33-34-35 cm, cast on 6 new stitches at the end of next row from wrong side = 62-67-67-72-77-82 stitches. Work the new stitches in garter stitch until finished measurements. Continue pattern like this until piece measures 33-35-36-38-39-41 cm. Work pattern, begin from right side as follows: 7 stitches in garter stitch, work A.6 until 20 stitches remain, A.10a as before, 7 band stitches in garter stitch. When A.6 has been worked 1 time vertically, there are 83-91-91-99-107-115 stitches on needle. Work pattern as follows: 7 stitches in garter stitch, work A.7 until 20 stitches remain, A.10a as before, 7 band stitches in garter stitch. Work A.7 3 times in total vertically. Piece measures approx. 45-47-48-50-51-53 cm. Work pattern as follows: 7 stitches in garter stitch, work A.8 until 20 stitches remain and decrease at the same time 21-24-24-27-30-33 stitches evenly, A.10a as before, 7 band stitches in garter stitch = 62-67-67-72-77-82 stitches. When A.8 has been worked 1 time vertically, work A.8a vertically until finished measurements. When piece measures 50-52-54-56-58-60 cm, cast off the first 7 stitches on next row from right side = 55-60-60-65-70-75 stitches. Then work diagonal shoulder, begin on next row from the neck as follows: * Work pattern as before until 8-9-9-10-11-12 stitches remain, turn and work back *, work from *-* 3 times in total. I.e. work 8-9-9-10-11-12 stitches less on every turn from the neck. On last row towards the neck work until 20-23-24-25-26-26 stitches remain, slip the last 20-23-24-25-26-26 stitches on a thread for shawl collar and cast on 2 new stitches on needle = 37-39-38-42-46-51 stitches. Now work and cast off with an edge over shoulder stitches. Work stitches cast on with shoulder stitches as follows: Work * 1 stitch in stocking stitch, work next stitch together with first/next stitch from shoulder – remember KNIT TOGETHER, pass the 2 stitches back on the needle they came from with strand on wrong side of piece, make sure not to tighten yarn too much *, work from *-* until all stitches from shoulder have been worked together with the 2 new stitches that were cast on. Cast off the 2 stitches. SHAWL COLLAR: Slip the 20-23-24-25-26-26 stitches from stitch holder on circular needle size 5.5 mm. Work as follows, begin from right side: Work 0-3-4-5-6-6 stitches in garter stitch, work the stitches in A.10a with knit over knit and purl over purl decreasing at the same time 4 stitches evenly over the 8 knitted stitches in the middle of A.10a and work 7 band stitches in garter stitch = 16-19-20-21-22-22 stitches. Continue with garter stitch, and knit over knit and purl over purl (i.e. cables are done) and work short rows as follows: ROW 1 (= wrong side): Work the first 12-15-16-17-18-18 stitches, turn and tighten yarn. ROW 2 (= right side): Work 12-15-16-17-18-18 stitches. ROW 3 (= wrong side): Work over all stitches, turn and tighten yarn. ROW 4 (= right side): Work over all stitches. Work 1st to 4th row until shawl collar measures approx. 7-8-8-9-9-9 cm on the shortest. Work 1 ridge over all stitches. Cast off. ASSEMBLY: Sew shoulder seams inside 1 stitch on i-cord edge. Sew stitches in garter stitch together. Sew shawl collar tog mid back and sew on to neck line at the back of neck. Sew side seams inside 1 edge stitch. Sew the buttons on to left front piece. |
||||||||||||||||||||||
Diagram explanations |
||||||||||||||||||||||
|
||||||||||||||||||||||
 |
||||||||||||||||||||||
 |
||||||||||||||||||||||
 |
||||||||||||||||||||||
Have you finished this pattern?Tag your pictures with #dropspattern #crackedwalnutsvest or submit them to the #dropsfan gallery. Do you need help with this pattern?You'll find 31 tutorial videos, a Comments/Questions area and more by visiting the pattern on garnstudio.com. © 1982-2026 DROPS Design A/S. We reserve all rights. This document, including all its sub-sections, has copyrights. Read more about what you can do with our patterns at the bottom of each pattern on our site. |
||||||||||||||||||||||


With over 40 years in knitting and crochet design, DROPS Design offers one of the most extensive collections of free patterns on the internet - translated to 17 languages. As of today we count 324 catalogues and 12290 patterns translated into English (UK/cm).
We work hard to bring you the best knitting and crochet have to offer, inspiration and advice as well as great quality yarns at incredible prices! Would you like to use our patterns for other than personal use? You can read what you are allowed to do in the Copyright text at the bottom of all our patterns. Happy crafting!
Post a comment to pattern DROPS 237-10
We would love to hear what you have to say about this pattern!
If you want to leave a question, please make sure you select the correct category in the form below, to speed up the answering process. Required fields are marked *.